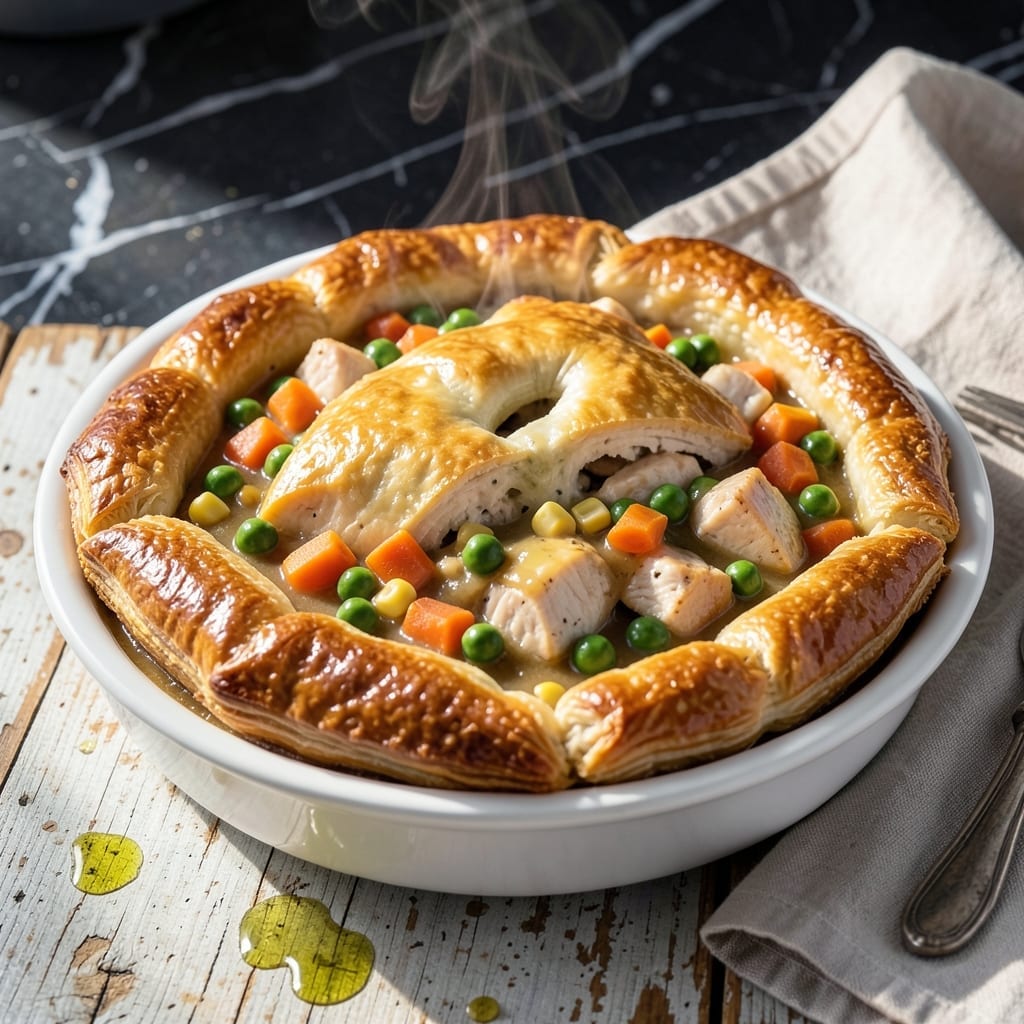
This recipe delivers a classic comfort dish with modern convenience. The Ninja Foodi creates a flaky crust and rich, savory filling without oven heat.
I developed this method after years of testing pressure cooker adaptations. The key is layering the crust properly and using the Foodi’s versatility to cook everything perfectly.
You’ll get tender chicken, creamy vegetables, and golden pastry in one pot. The filling thickens naturally while the crust bakes to perfect flakiness above.
This dish proves you don’t need an oven for traditional results. The Foodi handles it all with precise control and consistent quality.
Ingredients for Ninja Foodi Chicken Pot Pie
Flaky layers and savory filling come together for a comforting one-pot classic.
| Ingredient | Amount | Notes |
|---|---|---|
| Boneless, Skinless Chicken Breasts 🍗 | 1 ½ lb | Cut into 1-inch cubes |
| Frozen Mixed Vegetables 🥕 | 2 cups | Peas, carrots, corn, green beans |
| Unsalted Butter 🧈 | ½ cup | Cubed for crust and filling |
| All-Purpose Flour 🌾 | 2 cups | Divided for crust and roux |
| Chicken Broth 🍲 | 1 ½ cups | Low-sodium preferred |
| Whole Milk 🥛 | ½ cup | For creamy filling |
| Yellow Onion 🧅 | 1 whole | Diced finely |
| Garlic Cloves 🧄 | 3 cloves | Minced for depth of flavor |
| Fresh Thyme Leaves 🌿 | 1 tbsp | Or 1 tsp dried thyme |
| Salt 🧂 | 1 tsp | Divided for seasoning |
| Black Pepper 🌶️ | ½ tsp | Freshly ground preferred |
| Refrigerated Pie Crust 🥧 | 2 sheets | For top and bottom layers |
| Large Egg 🥚 | 1 whole | For egg wash on crust |
[recipe_ingredient_scaler]
The crust is non-negotiable here. Pillsbury refrigerated pie crust delivers consistent flakiness without the fuss of homemade. For the chicken, boneless, skinless breasts stay tender under pressure—thighs work too but dark meat has a stronger flavor. Look for low-sodium chicken broth so you can control the seasoning. Most grocery stores carry Swanson or Kitchen Basics, both reliable brands.
No fresh thyme? Dried thyme at one-third the amount works perfectly. Short on mixed vegetables? Frozen peas and carrots (the classic combo) are ideal. Whole milk can be swapped for half-and-half for extra richness or 2% for a lighter version. If using store-bought crust, check the expiration date—older dough won’t puff as well.
Assemble this just before cooking—keeping the crust cold prevents sogginess. Leftovers reheat well, though the crust softens. Stores in the fridge for 3-4 days or freezes for 2 months (thaw before reheating).
Why You’ll Love This Recipe
- One Pot Magic: The Ninja Foodi does all the work—I just dump in the chicken, frozen veggies, and broth, then let it pressure cook while I do something else.
- That Buttery Crust: The butter and flour create this rich, velvety sauce that coats every bite. Honestly, it’s the kind of comfort food I crave on chilly nights.
- Meal Prep Hero: I make a double batch on Sunday and portion it out for easy lunches all week. Between us, it reheats like a dream.
- Budget Stretcher: Chicken breasts and frozen veggies keep the cost low, and it still feels like a hearty, homemade meal. My wallet and my family both approve.
Step-by-Step Instructions for Ninja Foodi Chicken Pot Pie
This method delivers a golden, flaky crust with a rich, creamy filling every time.
Step 1: Sauté Aromatics and Cook Chicken
Select the “Sauté” function on your Ninja Foodi and set it to Normal/Medium. Add the 0.5 cup unsalted butter and let it melt. Once foaming, add the diced yellow onion and cook for 3-4 minutes until translucent and fragrant.
Add the 1.5 lb boneless, skinless chicken breasts, cut into 1-inch cubes, along with the minced 3 cloves garlic cloves and 1 tbsp fresh thyme leaves. Season with ½ tsp of the salt and all of the 0.5 tsp black pepper. Cook for 6-8 minutes until the chicken is no longer pink.
Step 2: Build the Creamy Filling
Sprinkle 1 cup of the all-purpose flour over the chicken and stir to coat evenly. This creates a roux that will thicken the filling. Pour in the 1.5 cups chicken broth and 0.5 cup whole milk, stirring constantly to prevent lumps.
Add the 2 cups frozen mixed vegetables and the remaining ½ tsp salt. Simmer for 5-7 minutes until the mixture thickens to a gravy-like consistency and the vegetables are tender but still vibrant. The filling should coat the back of a spoon thickly.
Step 3: Assemble the Pot Pie
Line the Ninja Foodi inner pot with one refrigerated pie crust, pressing it gently against the bottom and sides. Pour the chicken and vegetable filling over the crust, spreading it evenly. Top with the second refrigerated pie crust, pressing the edges to seal.
Cut a few small slits in the top crust to allow steam to escape. In a small bowl, beat the 1 whole large egg and brush it evenly over the top crust. This ensures a deep golden-brown finish and that promised flaky texture.
Step 4: Pressure Cook and Finish
Secure the lid on the Ninja Foodi and set the valve to “Seal.” Select the “Pressure” function and cook on High for 12 minutes. Once the cooking cycle completes, allow a natural pressure release for 5 minutes, then quick-release any remaining pressure.
Carefully remove the lid and check that the crust is golden brown and crisp. If needed, use the “Air Crisp” function at 350°F for 3-5 minutes to further brown the top. Let the pot pie rest for 10 minutes before slicing and serving.
Pro Tips For Making Ninja Foodi Chicken Pot Pie
- Pre-cook the chicken: Dice the chicken breasts into 1-inch pieces and pressure cook them in 1 cup of chicken broth for 8 minutes first—I learned this the hard way after ending up with rubbery chicken when I dumped everything in raw.
- Thaw the veggies: Rinse the frozen mixed vegetables under cold water for 2 minutes to remove ice crystals, or they’ll release too much liquid and make your filling watery.
- Deglaze before thickening: After browning, pour in ½ cup broth and scrape the bottom of the pot to lift those browned bits—skip this and your sauce will lack depth.
- Use cold butter: Cut the unsalted butter into small cubes and keep it chilled until mixing into the flour for the topping—this makes a real difference in getting that flaky crust.
Dietary Considerations for ninja foodi chicken pot pie
Gluten-Free Option
Swap the all-purpose flour and pie crusts for gluten-free versions. I recommend King Arthur gluten-free flour for the roux and Mi-Del gluten-free pie crusts for the layers. The texture will be slightly different but still delicious.
Dairy-Free Adaptation
Use vegan butter (like Miyoko’s) instead of regular butter and swap the whole milk for unsweetened almond milk. For the crust, dairy-free pie dough from Wholly Wholesome works perfectly. The filling will be just as creamy. 💪
Lower-Carb Version
Replace the traditional crust with a cauliflower crust or skip the top crust entirely. Use almond flour to thicken the filling instead of all-purpose flour. The filling itself is already relatively low-carb, so this keeps it keto-friendly.
Vegetarian Twist
Swap the chicken for chickpeas or diced tofu. Use vegetable broth instead of chicken broth. The preparation method remains the same, and the filling will still be hearty and flavorful.
Lactose-Free Modification
Use lactose-free milk (like Lactaid) and a lactose-free butter substitute. The crust and filling will maintain their rich textures without dairy. This is an easy switch that doesn’t compromise on taste.
Sodium Considerations
Use low-sodium chicken broth and reduce the added salt by half. You can boost flavor with extra garlic or herbs like rosemary or parsley. The dish will still be savory and satisfying. 💡
Nutrition Facts
Frequently Asked Questions
Can I use pre-cooked chicken?
Yes, but reduce pressure cooking time to 8 minutes. Pre-cooked chicken can dry out, so add ½ cup extra broth to keep the filling moist and flavorful.
Why did my crust turn out soggy?
This usually happens if the inner pot isn’t hot enough before adding the crust. Always preheat using the Sauté function, and ensure the filling is thick before assembling.
Can I make this ahead of time?
Assemble the pie but don’t cook it. Refrigerate for up to 24 hours before cooking. Add 5 minutes to the pressure time if cooking from cold.
What if my filling is too thin?
Thicken it by mixing 1 tbsp cornstarch with 2 tbsp cold water, then stir into the filling before assembling. Cook as directed.

Trained in classic French technique but raised on slow-cooked ribs and spicy rubs, she blends culinary skill with smoke and soul.
- Recipe for Boneless Pork Chops in Cast Iron Skillet: Sear and Baste to Juicy Perfection - October 3, 2026
- Recipe for Boneless Cross Rib Roast: Slow-Roasted Beef with Herb Crust - October 3, 2026
- Hamburgers in Sauce Recipe Crock Pot: Slow-Cooked Savory Delight - October 3, 2026