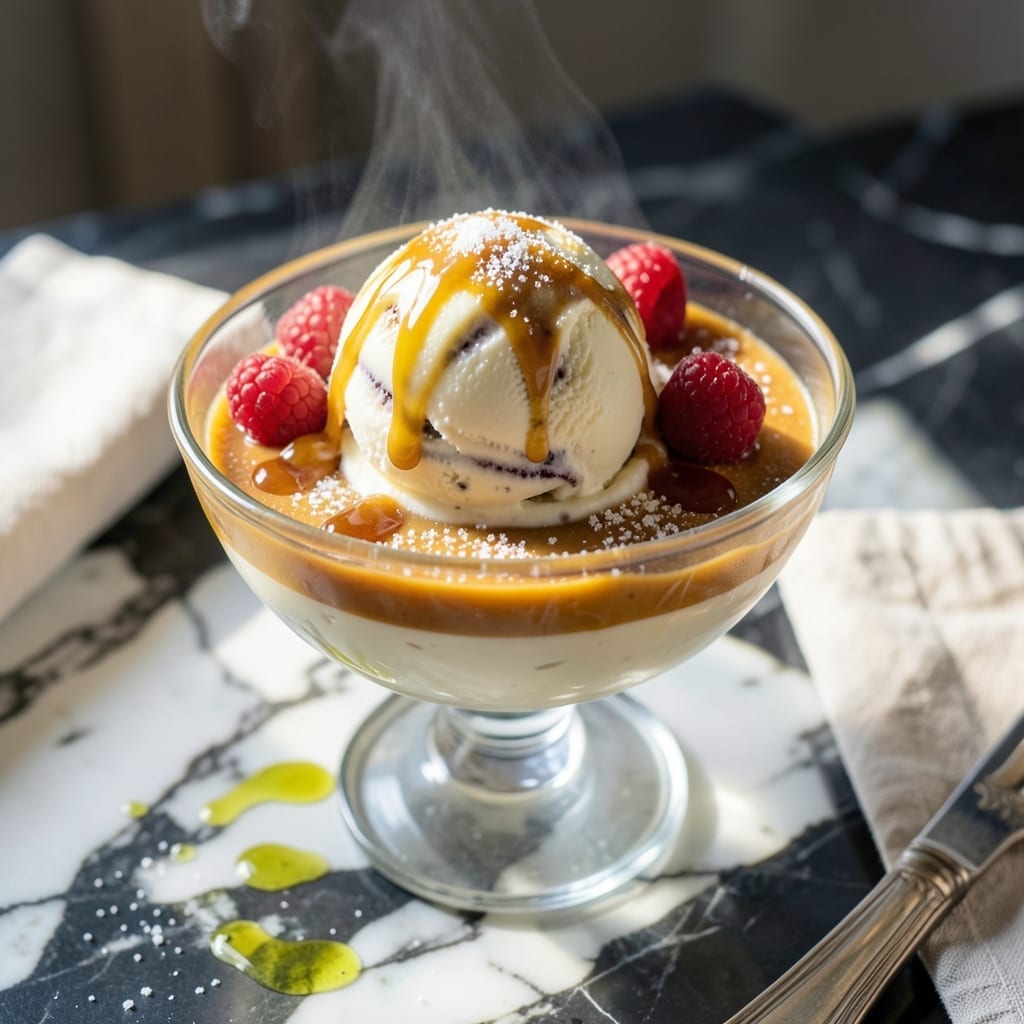
I developed this recipe after realizing pudding mix could transform homemade ice cream from good to extraordinary. The instant pudding creates that signature ultra-smooth texture without any ice crystals or graininess.
This method takes advantage of the Ninja Creami’s powerful blending capability. The pudding acts as both a stabilizer and flavor enhancer, ensuring every bite is consistently creamy and rich.
You’ll achieve professional-quality results with minimal effort. The pudding base eliminates the need for eggs or tempering, making it foolproof for beginners and experts alike.
Perfect for hot days or when you need a quick dessert. The flavor possibilities are endless with different pudding mixes.
Ingredients for Ninja Ice Cream Recipe with Pudding
Just milk, cream, pudding mix, and a few extras for that ultra-smooth texture.
| Ingredient | Amount | Notes |
|---|---|---|
| Whole Milk 🥛 | 2 cups | Cold, for smooth blending |
| Heavy Whipping Cream 🥣 | 1 cup | Full-fat for richness |
| Instant Pudding Mix 🍮 | 1 box | Any flavor, 3.4 oz size |
| Granulated Sugar 🍚 | ½ cup | Adjust to taste preference |
| Vanilla Extract 🌿 | 1 tsp | Pure for best flavor |
| Salt 🧂 | ¼ tsp | Balances sweetness |
| Ice Cubes ❄️ | 2 cups | For Ninja Creami base |
| Milk 🥛 | ½ cup | As needed for texture |
[recipe_ingredient_scaler]
The pudding mix is the magic ingredient here. Jell-O brand works perfectly—just grab any flavor you like from the baking aisle at Walmart or your grocery store. I always keep a few boxes on hand (chocolate, vanilla, butterscotch—all great). Make sure it’s instant pudding, not cook-and-serve. The heavy cream is non-negotiable for that rich, creamy base (trust me on the full-fat version).
No heavy cream? Full-fat coconut milk works in a pinch, though the flavor shifts slightly. Want it sweeter? Add extra sugar or honey. For a lighter version, swap whole milk for 2% or skim, but texture won’t be as dreamy. Vanilla extract is worth the splurge—pure vanilla beats imitation every time. The Ninja Creami handles the rest, no fancy techniques needed.
Mix and freeze immediately—don’t let it sit. Once blended, eat right away or store in an airtight container for up to 2 weeks. Leftovers freeze rock-solid, so let sit at room temp for 10-15 minutes before re-spinning.
Why You’ll Love This Recipe
- 5-Minute Mix: I dump everything in the Ninja, blend, freeze—honestly, that’s the whole process.
- Creamy Vanilla Dream: The pudding mix makes it so rich, like soft-serve from the fair but better.
- Kid-Approved Treat: My kids pick the sprinkles, and I love that it’s ready before their patience wears thin.
- Stays Scoopable: Leftovers? No icy mess here—it stays smooth for days, so I can sneak a bowl anytime.
Step-by-Step Instructions for Ninja Ice Cream With Pudding
Here’s the method that guarantees that ultra-smooth, dreamy texture you’re after.
Step 1: Blend the Creamy Base to Perfection
In your Ninja blender, combine the 2 cups Whole Milk, 1 cup Heavy Whipping Cream, 1 box Instant Pudding Mix, 0.5 cup Granulated Sugar, 1 tsp Vanilla Extract, and 0.25 tsp Salt. Secure the lid tightly—this prevents any messy explosions when you start blending.
Blend on high for 30-45 seconds until the mixture is completely smooth and the pudding mix is fully dissolved. You shouldn’t see any lumps or streaks. I like to stop and scrape down the sides once to ensure everything incorporates evenly. The base should look thick and creamy, almost like a milkshake.
Step 2: Incorporate Ice for the Right Consistency
Add the 2 cups Ice Cubes to the blender. This step is crucial for achieving that perfect frozen texture without turning your mixture into a solid block. Pulse the blender a few times first to break up the ice, then blend on high for 20-30 seconds until the ice is fully crushed and incorporated.
The mixture will be very thick—almost like soft-serve ice cream. If it’s too thick to blend, stop the machine, stir with a spatula, and blend again. Don’t add more liquid yet; the ice needs to fully break down first. You’re aiming for a smooth, slushy consistency that holds its shape when scooped.
Step 3: Adjust Texture with Extra Milk
Check the consistency of your mixture. If it’s too thick to pour into your Ninja Creami pint, add the 0.5 cup Milk, 1-2 tablespoons at a time, blending briefly after each addition. I usually start with 2 tablespoons and go from there—it’s easier to add more than to fix a runny mixture.
The final base should pour easily but still be thick enough to hold its shape slightly. Think of the texture of a very thick smoothie. If you over-thin it, your ice cream will be icy rather than creamy. Pour the mixture into your Ninja Creami pint, leaving ½ inch of headspace at the top for expansion.
Step 4: Freeze to the Perfect Temperature
Place the lid on your Ninja Creami pint and freeze for 24 hours. This is non-negotiable—rushing this step will result in icy, grainy ice cream. The mixture needs to freeze solid all the way through so the Creami can work its magic.
I like to set mine on a flat surface in the freezer to ensure even freezing. Avoid placing it near the freezer door where temperature fluctuations can occur. When it’s ready, the pint should be rock-hard, and you shouldn’t be able to make an indent with your finger when pressing on the surface.
Step 5: Process in the Ninja Creami for Ultra-Smooth Results
Remove the frozen pint from the freezer and place it into your Ninja Creami. Select the “Lite Ice Cream” setting and let it run its full cycle. The machine will stop automatically when it’s done, which usually takes 2-3 minutes.
After the cycle completes, check the texture. If it looks slightly crumbly or dry, select the “Re-spin” function and add 1-2 tablespoons of Milk before processing again. This step ensures that ultra-smooth, creamy texture that makes this recipe special. Serve immediately for the softest texture, or freeze for 1-2 hours for a firmer scoop.
Pro Tips For Making Ninja Ice Cream Recipe With Pudding
- Chill the Base: Whisk your milk, cream, and pudding mix first, then refrigerate the mixture for at least 2 hours—I learned this the hard way after my first batch turned out soupy and refused to set properly.
- Use Cold Cream: Pull your heavy whipping cream straight from the fridge; room temperature cream whips up fluffier but makes the pudding base too thin to freeze right in the Ninja.
- Skip the Overmixing: Once you add the pudding mix, stir just until combined—any longer and you’ll activate too much thickening, leaving you with icy, gummy ice cream instead of creamy.
- Add Sugar Last: Fold in the granulated sugar after the pudding has dissolved to avoid graininess, and use superfine if you have it—my grandmother swore by this, and her texture was always spot on.
Serving Suggestions for This Recipe
Classic Presentation
Serve this in chilled glass bowls for an elegant touch. The contrast of the cold glass against the creamy ice cream enhances the experience. I love using my vintage anchor hocking dishes for this. 💛
Topping Bar Setup
Set out small bowls with crushed Oreos, chopped nuts, and chocolate syrup. This lets everyone customize their own. The pudding base pairs especially well with caramel drizzle and fresh berries for a sophisticated twist.
Waffle Cone Bowls
For a fun presentation, serve in homemade waffle cones. Make them ahead using a waffle cone maker and store in an airtight container. The crispy texture contrasts beautifully with the smooth ice cream.
Sundae Style
Layer scoops with whipped cream, sprinkles, and a cherry on top for a nostalgic touch. I drizzle hot fudge between layers to create a decadent sundae effect.
Mini Portions
Use espresso cups for individual servings at dinner parties. This creates a refined dessert experience. Top each with a mint leaf for a restaurant-worthy finish. ✨
Frozen Treat Pops
Pour any leftover mixture into popsicle molds before freezing. These make perfect handheld treats for kids. Add chocolate chips or fruit chunks before freezing for extra texture.
Nutrition Facts
Frequently Asked Questions
Can I use sugar-free pudding mix?
Yes, sugar-free instant pudding works perfectly. The texture will be just as smooth, though the flavor might be slightly less sweet. Adjust with extra sugar or sweetener to taste before freezing.
What if my mixture is too runny after blending?
Add 1-2 tablespoons of pudding mix and blend again. If still thin, freeze for 1 hour before checking consistency. Don’t overfill the pint—leave ½ inch headspace.
Can I make this without a Ninja Creami?
You can, but the texture won’t be as smooth. Freeze in a shallow dish, then blend in a food processor with 2-3 tablespoons milk until creamy. It may require more effort.
How long does it keep in the freezer?
Store in an airtight container for up to 2 weeks. For best texture, let it sit at room temperature for 10-15 minutes before re-spinning.

Trained in classic French technique but raised on slow-cooked ribs and spicy rubs, she blends culinary skill with smoke and soul.
- Recipe for Boneless Pork Chops in Cast Iron Skillet: Sear and Baste to Juicy Perfection - October 3, 2026
- Recipe for Boneless Cross Rib Roast: Slow-Roasted Beef with Herb Crust - October 3, 2026
- Hamburgers in Sauce Recipe Crock Pot: Slow-Cooked Savory Delight - October 3, 2026