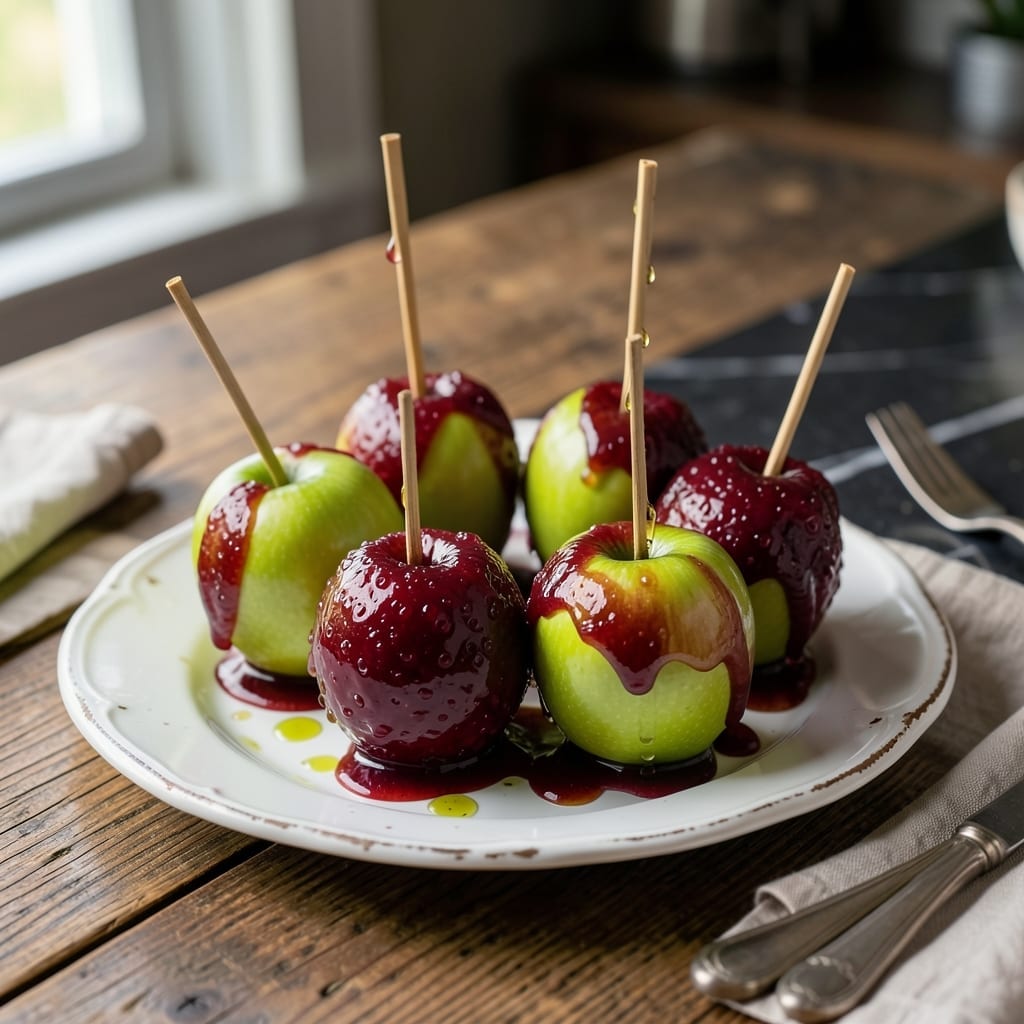
There’s something timeless about the crisp snap of a green apple coated in that signature shiny red glaze. This classic treat brings nostalgia with every bite.
I’ve refined this method over years to ensure the perfect balance of tart apple and sweet, glass-like candy shell. The secret is patience with the syrup temperature.
Ingredients for Old Fashioned Candy Apple Recipe with Green Apples
Classic ingredients for that nostalgic crisp apple with glossy red candy coating.
| Ingredient | Amount | Notes |
|---|---|---|
| Granny Smith Apples 🍏 | 4 whole | Medium-sized, washed and dried |
| Granulated Sugar 🍚 | 2 cups | White sugar for clear syrup |
| Light Corn Syrup 💧 | 1 cup | Prevents sugar crystallization |
| Water 💧 | ¾ cup | For syrup consistency |
| Red Food Coloring 🎨 | 1 tbsp | Gel type preferred for vivid color |
| White Vinegar 💧 | 1 tsp | Balances sweetness |
| Vanilla Extract 🌿 | 1 tsp | Pure extract for best flavor |
| Unsalted Butter 🧈 | 1 tbsp | Optional for glossier finish |
| Wooden Skewers 🪵 | 4 pieces | Or popsicle sticks for handling |
| Parchment Paper 📜 | 1 sheet | For drying apples |
[recipe_ingredient_scaler]
The apples are everything here. Granny Smith delivers that essential tart crunch to balance the sweet shell—avoid varieties that turn mealy when cooked. Look for firm, unblemished fruit (about 3 inches in diameter). Most grocery stores stock them year-round, but farmers markets in fall have the freshest crop. The food coloring needs to be gel-based for that vibrant shiny red glaze without thinning the syrup.
No light corn syrup? Honey or agave at a 1:1 ratio works, though the texture may differ slightly. For a deeper flavor, swap up to half the sugar for brown sugar. Skip the vinegar if you prefer pure sweetness, but it does cut the cloying effect beautifully. The butter is optional but adds a professional sheen—vegan butter works equally well for dietary needs.
Store finished apples at room temperature for 2-3 days on parchment paper (they’ll weep in containers). Best eaten fresh but can be refrigerated in a single layer for up to 5 days. Avoid humid environments—sugar shell absorbs moisture.
Why You’ll Love This Recipe
- No-Fuss Boil: It’s just sugar, corn syrup, water, and a splash of color simmered together—no fancy steps, no stress.
- Tart Meets Sweet: Granny Smiths hold their crisp bite under that glossy, crackly red shell. Honestly, the contrast is what I crave.
- Crowd-Pleasing Treat: I bring these to fall festivals, Halloween parties, even school bake sales and they disappear first.
- Pantry Staples Only: I always have these ingredients on hand, so I can make a batch on a whim without a special grocery run.
Step-by-Step Instructions for Old Fashioned Candy Apples
Master the technique for achieving that signature glossy coating and satisfying crunch.
Step 1: Prepare the Apples and Workspace
Begin by thoroughly washing and drying the 4 whole Granny Smith Apples to remove any wax or residue. I find that polishing them with a clean kitchen towel ensures the candy coating adheres properly. Insert the 4 pieces Wooden Skewers firmly into the stem end of each apple, pushing them about halfway through.
Line a baking sheet with the 1 sheet Parchment Paper and set it near your workspace. This preparation prevents sticking when you place the finished apples to set. The skewers serve as convenient handles and prevent fingerprints from marring the glossy finish.
Step 2: Cook the Sugar Syrup to Hard Crack Stage
In a heavy saucepan, combine the 2 cups Granulated Sugar, 1 cup Light Corn Syrup, and 0.75 cup Water. Place over medium-high heat and bring to a boil without stirring. I use a candy thermometer clipped to the side of the pan for accuracy.
Once boiling, add the 1 tbsp Red Food Coloring and 1 tsp White Vinegar. Continue cooking until the mixture reaches 300°F (hard crack stage). At this temperature, the syrup will form brittle threads when dropped into cold water. Avoid stirring during cooking as this can cause sugar crystallization.
Step 3: Finish the Glaze and Coat the Apples
Remove the syrup from heat and stir in the 1 tsp Vanilla Extract and 1 tbsp Unsalted Butter. The butter creates a glossier finish, while the vanilla adds depth to the flavor. Be cautious as the mixture will bubble vigorously.
Working quickly before the syrup sets, dip each apple into the hot mixture, tilting the pan to fully submerge it. Lift the apple and let excess syrup drip off for 10-15 seconds. Hold the apple at an angle to allow any pools of syrup to settle evenly.
Step 4: Set and Cool the Candy Apples
Place each coated apple on the parchment-lined baking sheet. I space them at least 2 inches apart to prevent sticking. The candy coating will begin to harden almost immediately, creating that characteristic glossy shell.
Allow the apples to cool completely at room temperature for 20-30 minutes. The coating should be firm and make a light cracking sound when gently tapped. Serve immediately or store in a cool, dry place for up to 3 days in an airtight container.
Pro Tips For Making Old Fashioned Candy Apple Recipe With Green Apples
- Test the Syrup: Drop a spoonful of syrup into ice water—if it hardens instantly, it’s ready. I learned this the hard way after pulling apples out of syrup that never set.
- Dry the Apples: Wipe the Granny Smiths completely dry after washing, or the candy coating will slide right off. Sounds tedious, but it actually changes the outcome.
- Skip the Cold Dip: Don’t refrigerate apples before dipping—they’ll sweat and ruin the candy shell. Room temp works best, even if you’re impatient like me.
- Use a Heavy Pot: A thick-bottomed pot prevents hot spots that burn sugar. After scorching two batches in thin pans, I finally switched to my Dutch oven and never looked back.
Make-Ahead Tips for This Dish
Prep Apples Early
Wash and dry your Granny Smith Apples up to 2 hours before starting. This gives them time to air-dry completely, ensuring the candy coating sticks properly. I polish mine with a clean towel for extra shine.
Syrup Prep Ahead
You can measure all syrup ingredients (2 cups Granulated Sugar, 1 cup Light Corn Syrup, 0.75 cup Water) the night before. Store them in separate containers to avoid clumping. This saves 10 minutes on cooking day.
Room Temperature Storage
Finished apples keep beautifully at room temperature for 2-3 days on parchment paper. Avoid plastic containers—they trap moisture and soften the coating. I arrange mine on a wire rack for air circulation. ✨
Refrigerator Option
For longer storage, place apples in a single layer in the fridge for up to 5 days. Let them sit at room temperature for 30 minutes before serving to restore the glossy texture. The cold can make the coating slightly sticky.
Avoid Humidity
These treats hate moisture. Store in the coolest, driest spot in your kitchen—never near the stove or sink. I keep a small silica packet in my storage container as extra protection. 💡
Re-Crisp Trick
If the coating softens, place apples on parchment in a 200°F oven for 5-7 minutes. This restores the hard crack texture without melting the sugar. Watch closely to prevent burning.
Nutrition Facts
Frequently Asked Questions
Why use Granny Smith apples specifically?
Granny Smiths provide the perfect tart contrast to the sweet coating. Their firm texture holds up to the hot syrup better than softer varieties. Other green apples may turn mushy or lose their crispness.
Can I make these without corn syrup?
Yes, substitute honey or agave at a 1:1 ratio. The texture may differ slightly, but the flavor will still be delicious. Avoid skipping the syrup entirely as it prevents sugar crystallization.
How do I fix syrup that crystallized?
Remove from heat immediately and add 1-2 tablespoons of hot water. Stir gently until dissolved, then bring back to 300°F. Avoid stirring during cooking to prevent this issue.
What’s the best way to remove wax from apples?
Wash under warm running water while scrubbing with a produce brush. Dry thoroughly with a clean towel. This ensures the candy coating adheres properly to the apple surface.

Trained in classic French technique but raised on slow-cooked ribs and spicy rubs, she blends culinary skill with smoke and soul.
- Recipe for Boneless Pork Chops in Cast Iron Skillet: Sear and Baste to Juicy Perfection - October 3, 2026
- Recipe for Boneless Cross Rib Roast: Slow-Roasted Beef with Herb Crust - October 3, 2026
- Hamburgers in Sauce Recipe Crock Pot: Slow-Cooked Savory Delight - October 3, 2026