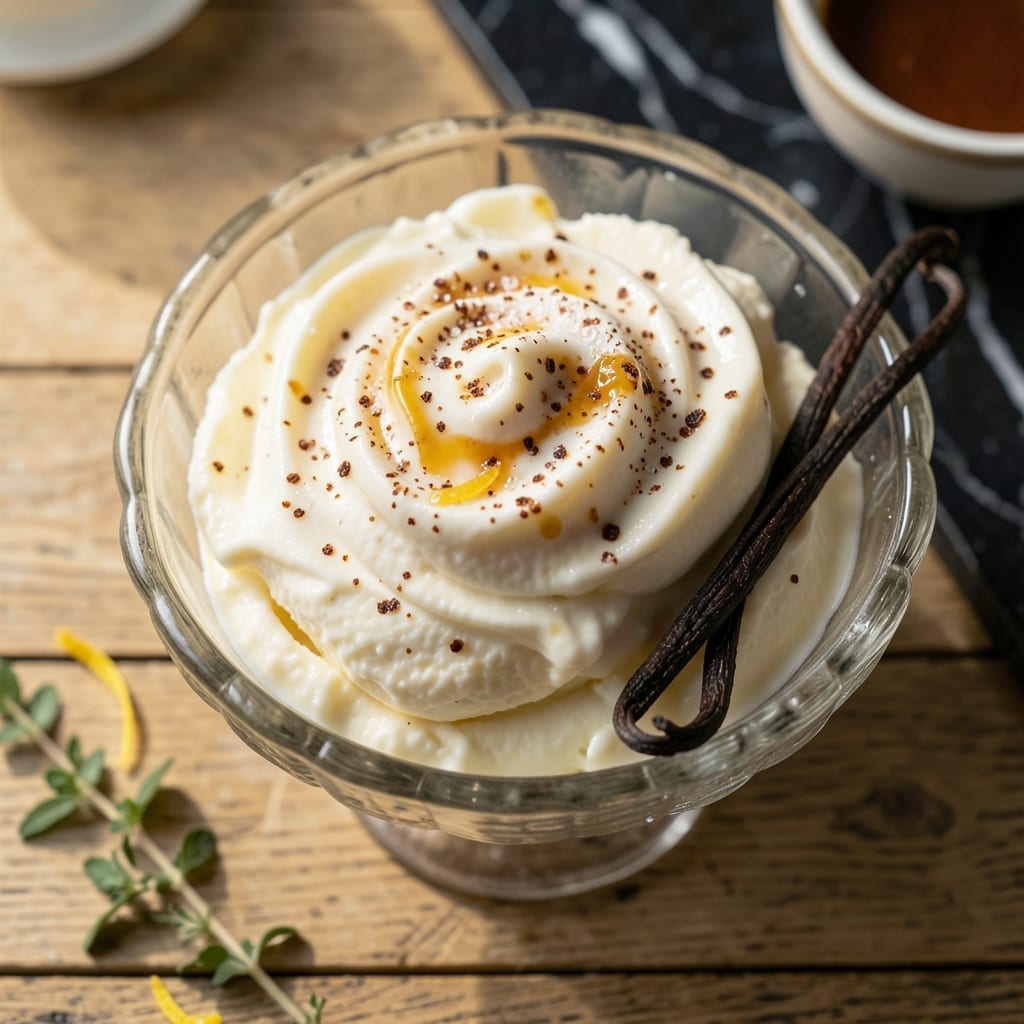
There’s nothing quite like the creamy richness of old fashioned ice cream made the traditional way. I developed this method to capture that nostalgic texture without modern shortcuts.
This recipe relies on a simple custard base using raw eggs, sugar, and cream. The key is temperature control—heating the mixture just enough to dissolve sugar without cooking the eggs.
What you get is homemade ice cream with a velvety texture that freezes beautifully. The raw egg base creates a smoother consistency than many churned versions.
Perfect for summer afternoons or special occasions. The process takes patience but delivers authentic results every time.
Ingredients for Old Fashioned Homemade Ice Cream Recipe with Raw Eggs
Creamy custard base ingredients for authentic old fashioned texture without modern shortcuts.
| Ingredient | Amount | Notes |
|---|---|---|
| Heavy Cream 🥛 | 2 cups | Full-fat for richness |
| Whole Milk 🥛 | 1 cup | Whole fat preferred |
| Granulated Sugar 🍚 | ¾ cup | Fine white sugar |
| Large Egg Yolks 🥚 | 6 whole | Fresh, pasteurized optional |
| Vanilla Extract 🌿 | 2 tsp | Pure extract recommended |
| Salt 🧂 | ¼ tsp | Fine sea salt |
| Heavy Whipping Cream 🥛 | 1 cup | For lighter texture |
| Vanilla Bean 🌿 | 1 whole | Split and scraped |
| Light Corn Syrup 🧈 | 2 tbsp | Prevents iciness |
| Whole Eggs 🥚 | 2 whole | Pasteurized if preferred |
[recipe_ingredient_scaler]
The dairy quality is paramount here. Heavy cream from Organic Valley or a trusted local dairy ensures the richest base. Egg yolks provide the emulsion—pasteurized eggs (available at Whole Foods) eliminate salmonella risk while maintaining texture. Vanilla bean adds depth, but pure extract works if beans are unavailable. Avoid ultra-pasteurized cream as it won’t whip properly.
No raw eggs? Pasteurized liquid eggs work identically. Swap corn syrup for light agave or honey at the same ratio. For a lighter version, half-and-half can replace some cream (texture will be less dense). The sugar can be reduced slightly, but don’t go below 1/2 cup or freezing will be affected. Freshly scraped vanilla seeds make a visible difference in the final product.
The custard base keeps in the fridge for 2 days before churning. Once frozen, ice cream stays fresh for 1 week in an airtight container, though it’s best consumed within 3 days for optimal texture. Freezer burn can be prevented by pressing plastic wrap directly onto the surface before sealing.
Why You’ll Love This Recipe
- No Fuss Mixing: I just whisk the yolks, sugar, and dairy together—no cooking required, just pure simplicity.
- Rich Custard Taste: Those egg yolks and heavy cream give it that ultra-creamy, old-school richness I can’t get from store-bought.
- Crowd Pleaser: Between us, this is my go-to for summer BBQs and birthday parties—everyone always asks for seconds.
- Freezer Friendly: I make a double batch and stash it away; it keeps beautifully for up to two weeks.
Step-by-Step Instructions for Old Fashioned Homemade Ice Cream
This traditional method delivers a velvety custard base with authentic texture and flavor.
Step 1: Infuse the Dairy with Vanilla
In a heavy saucepan, combine the 2 cups Heavy Cream, 1 cup Whole Milk, and the seeds from the 1 whole Vanilla Bean (plus the scraped pod). Heat over medium-low heat until the mixture just begins to simmer around the edges—you’ll see tiny bubbles forming, but it should not boil.
Remove from heat, cover, and let steep for 15 minutes to allow the vanilla to fully infuse into the dairy. This step develops the deep, aromatic vanilla flavor that defines old-fashioned ice cream. Strain out the vanilla pod before proceeding.
Step 2: Temper the Eggs and Create the Custard Base
In a separate bowl, whisk together the 0.75 cup Granulated Sugar, 6 whole Large Egg Yolks, 2 whole Whole Eggs, and 0.25 tsp Salt until the mixture is pale, thick, and ribbons form when the whisk is lifted.
Slowly pour the warm dairy mixture into the egg mixture while whisking constantly to temper the eggs—this prevents them from scrambling. Return the combined mixture to the saucepan and cook over low heat, stirring constantly with a wooden spoon, until the custard thickens enough to coat the back of the spoon (5-7 minutes).
Step 3: Chill and Add Final Flavorings
Pour the custard through a fine-mesh strainer into a clean bowl to remove any cooked egg bits. Stir in the 2 tsp Vanilla Extract, 1 cup Heavy Whipping Cream, and 2 tbsp Light Corn Syrup. The corn syrup enhances smoothness and prevents iciness in the final product.
Cover the bowl and refrigerate the custard for at least 4 hours, or preferably overnight. Chilling is critical—it ensures a smooth texture and allows the flavors to meld completely. The mixture should be very cold before freezing.
Step 4: Freeze to Perfection
Pour the chilled custard into your ice cream maker and churn according to the manufacturer’s instructions, typically 20-25 minutes. The ice cream is ready when it reaches a soft-serve consistency and holds its shape when scooped.
For a firmer texture, transfer the ice cream to a lidded container and freeze for an additional 4 hours or until solid. The result is a rich, scoopable ice cream with a luxurious mouthfeel that only a traditional custard base can provide.
Pro Tips For Making Old Fashioned Homemade Ice Cream Recipe With Raw Eggs
- Chill the Base: Always refrigerate the custard for at least 4 hours—overnight if you can—before churning. I learned this the hard way when my first batch turned out soupy because the mixture was still warm.
- Temper the Yolks: Slowly drizzle about a cup of the hot cream mixture into the egg yolks while whisking constantly, then return it all to the pot. After a scrambled egg disaster, I finally figured out that this prevents curdling.
- Use Fresh Eggs: Sounds obvious, but with raw eggs in the mix, fresher yolks taste cleaner and whip up fluffier. My grandmother swore by this, and she was right.
- Add Vanilla Last: Stir in the vanilla extract only after the custard has cooled. High heat can mute its flavor, and I was skeptical until I tried it—now I notice the difference every time.
Wine and Beer Pairings for This Dish
Dessert Wine Pairings
Rich custard ice cream demands equally rich companions. A late-harvest Riesling from Germany offers honeyed sweetness that mirrors the vanilla notes. I love Dr. Loosen for its vibrant acidity that cuts through the creaminess beautifully. 🍷
Port and Cream
Tawny Port with its caramel and nutty undertones creates a sophisticated pairing. Try Graham’s 10-Year Tawny—its complexity stands up to the eggy richness. Serve slightly chilled for the best experience.
Beer Alternatives
For beer lovers, a Belgian quadrupel like Westvleteren 12 delivers dark fruit and spice notes. The carbonation cleanses your palate between bites. Avoid hoppy beers—they’ll clash with the sweetness. 🍺
Coffee Pairings
A strong espresso or cold brew with a splash of cream makes an excellent non-alcoholic option. The bitterness balances the sweetness perfectly. I prefer Stumptown for its bold, chocolatey notes.
Sparkling Options
A demi-sec Champagne offers effervescence that refreshes between spoonfuls. Veuve Clicquot makes an accessible version. The bubbles also help reset your palate for the next bite. ✨
Nutrition Facts
Frequently Asked Questions
Is it safe to use raw eggs in homemade ice cream?
Using fresh, high-quality eggs reduces risk, but pasteurized eggs are safer. Heat the custard to 160°F to kill bacteria while maintaining texture. Always use clean utensils to prevent contamination.
Can I make this without an ice cream maker?
Yes, but it requires extra effort. Freeze the custard in a shallow dish, stirring vigorously with a fork every 30 minutes for 3-4 hours to break up ice crystals and achieve a smooth texture.
Why does my ice cream turn icy?
Icy texture usually means the custard wasn’t cold enough before freezing or the sugar content was too low. Ensure it chills for at least 4 hours and use the full 0.75 cup sugar to prevent ice formation.
How long will this keep in the freezer?
For best quality, enjoy within 1 week. Store in an airtight container with plastic wrap pressed directly on the surface to prevent freezer burn. Flavor peaks within 3 days.

Trained in classic French technique but raised on slow-cooked ribs and spicy rubs, she blends culinary skill with smoke and soul.
- Recipe for Boneless Pork Chops in Cast Iron Skillet: Sear and Baste to Juicy Perfection - October 3, 2026
- Recipe for Boneless Cross Rib Roast: Slow-Roasted Beef with Herb Crust - October 3, 2026
- Hamburgers in Sauce Recipe Crock Pot: Slow-Cooked Savory Delight - October 3, 2026