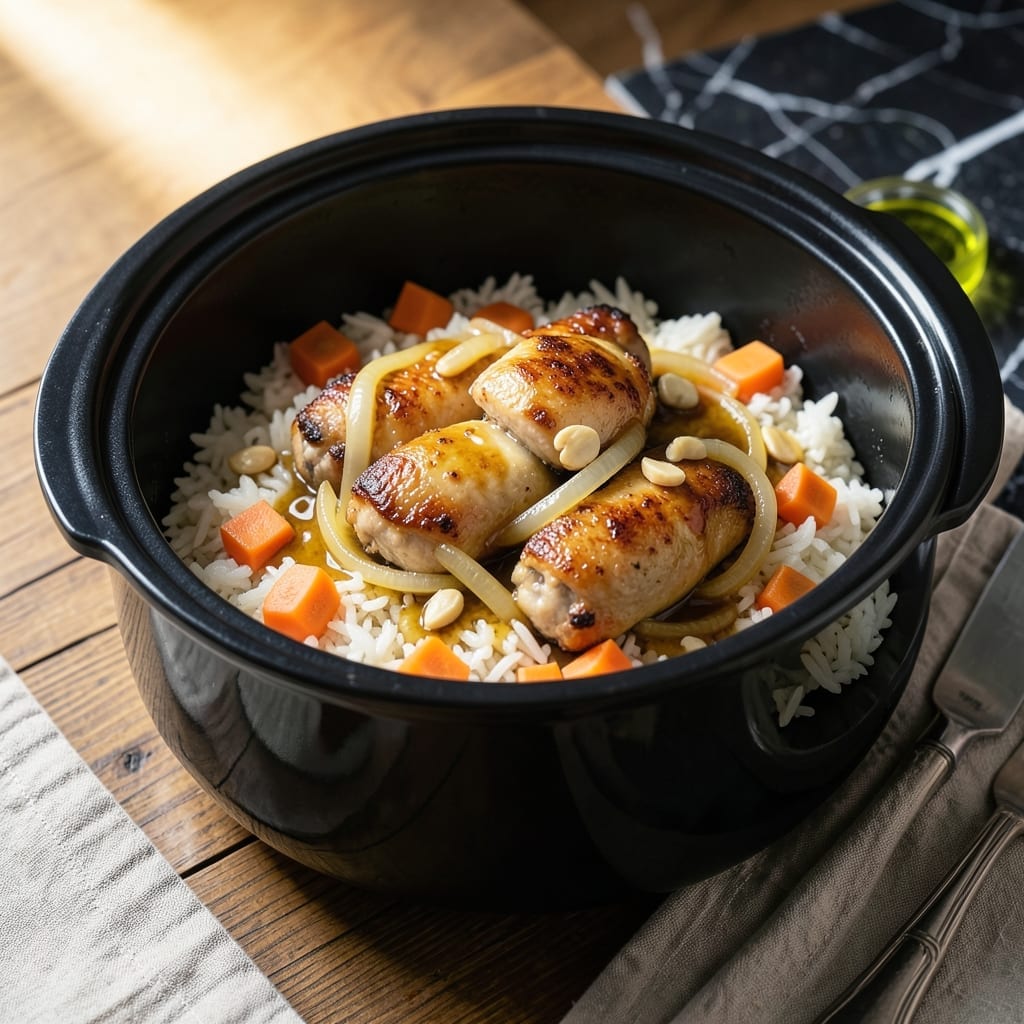
This rice cooker method delivers a complete, hands-off meal with minimal effort and maximum flavor. The appliance does all the work while you focus on other tasks.
One pot means easy cleanup and perfectly cooked ingredients every time. The rice cooker’s precise heat control ensures even cooking without burning or undercooking.
You’ll enjoy tender proteins, fluffy rice, and well-blended flavors in a single vessel. The technique is simple yet produces consistently excellent results.
Ideal for busy weeknights when you need a fuss-free dinner solution. The process requires no special skills or constant monitoring.
Ingredients for One Pot Recipe Rice Cooker
Everything goes in the rice cooker for this hands-off, flavor-packed meal.
| Ingredient | Amount | Notes |
|---|---|---|
| Long-Grain White Rice 🍚 | 2 cups | Rinsed until water runs clear |
| Chicken Thighs 🍗 | 1 ½ lb | Boneless, skinless, trimmed |
| Chicken Broth 🥣 | 2 ½ cups | Low-sodium preferred |
| Carrots 🥕 | 2 whole | Peeled and diced |
| Yellow Onion 🧅 | 1 whole | Finely chopped |
| Garlic Cloves 🧄 | 4 cloves | Minced for depth |
| Soy Sauce 🫒 | 2 tbsp | Low-sodium or tamari |
| Sesame Oil 🫒 | 1 tbsp | Toasted for aroma |
| Frozen Peas 🌱 | 1 cup | No need to thaw |
| Green Onions 🧅 | 3 whole | Thinly sliced for garnish |
| Fresh Ginger 🌿 | 1 tbsp | Grated or minced |
| Diamond Crystal Kosher Salt 🧂 | 1 tsp | Adjust to taste |
| Ground Black Pepper 🌶️ | ½ tsp | Freshly cracked preferred |
[recipe_ingredient_scaler]
The chicken thighs are key here—boneless, skinless from Costco or Whole Foods stay juicy and don’t dry out. Rinsing the rice removes excess starch so it cooks up fluffy, not gummy. I always grab low-sodium chicken broth (Swanson or Better Than Bouillon) to control the salt level. Fresh ginger and garlic? Non-negotiable. They infuse the whole dish with that warm, aromatic base.
No rice cooker? Instant Pot on rice mode works the same. Swap chicken for tofu or shrimp—just adjust cook time. Tamari instead of soy sauce for gluten-free. Frozen peas can be edamame or corn (no thawing needed either). The sesame oil? Don’t skip it—it adds that nutty depth. If you’re out, a splash of toasted peanut oil gets you close.
Leftovers keep 4-5 days in the fridge, reheat in the microwave with a splash of water. Freezes beautifully for 3 months—portion it out for easy lunches. The rice soaks up flavors even more overnight (worth the wait).
Why You’ll Love This Recipe
- Set It & Forget: I toss everything in the rice cooker and walk away—no stirring, no watching, just perfectly cooked rice and tender chicken.
- Rich Chicken Flavor: The broth soaks into the rice while the thighs stay juicy, and the carrots and onions sweeten it just right.
- Meal Prep Hero: I make a big batch on Sunday and it reheats beautifully for lunches all week.
- Budget Friendly: One pot, one protein, and pantry staples. Honestly, it’s my cheapest meal that still feels like a treat.
Step-by-Step Instructions for One Pot Rice Cooker Meal
Here’s the method. Straightforward, tested, works every time.
Step 1: Prep the Rice and Aromatics
Rinse the 2 cups Long-Grain White Rice under cold water until the water runs clear. This removes excess starch so your grains stay separate. Meanwhile, peel and dice the 2 whole Carrots into small, even pieces.
Finely chop the 1 whole Yellow Onion, mince the 4 cloves Garlic Cloves, and grate the 1 tbsp Fresh Ginger. I like to keep all these prep steps together so I can add them to the rice cooker in one go. Thinly slice the 3 whole Green Onions and set aside for garnish.
Step 2: Sear the Chicken Thighs
Pat the 1.5 lb Chicken Thighs dry with paper towels and season with 1 tsp Diamond Crystal Kosher Salt and 0.5 tsp Ground Black Pepper. If your rice cooker has a sauté function, use it to brown the chicken on both sides. If not, a quick sear in a skillet works too.
You want a light golden crust on each piece—this adds depth of flavor. Don’t cook the chicken through at this stage; just get it started. Transfer the seared chicken to a plate and set aside.
Step 3: Layer Everything in the Rice Cooker
Add the rinsed rice to the rice cooker pot. Pour in the 2.5 cups Chicken Broth, 2 tbsp Soy Sauce, and 1 tbsp Sesame Oil. Stir to combine, then add the diced carrots, onion, garlic, and ginger. Spread everything out evenly.
Place the seared chicken thighs on top of the rice mixture. Add the 1 cup Frozen Peas—no need to thaw them first. The steam from the cooking rice will take care of it. Close the lid and set the rice cooker to its standard setting.
Step 4: Cook and Rest
Let the rice cooker do its thing. Most models will switch to “keep warm” once the cooking is done, which usually takes about 25-30 minutes. Resist the urge to open the lid during cooking—steam is key for even doneness.
Once finished, let it sit for 10 minutes with the lid closed. This allows the chicken to finish cooking and the flavors to meld together. The rice should be tender, the chicken fully cooked, and the peas bright green and heated through.
Step 5: Fluff, Garnish, and Serve
Gently fluff the rice with a fork, breaking up any clumps. The chicken should be fall-apart tender—if it’s not, nestle it back into the rice and let it steam for another 5 minutes. Slice the chicken if desired, or leave the thighs whole.
Sprinkle the sliced green onions over the top for a fresh finish. Serve directly from the rice cooker pot for an effortless, hands-off meal that’s ready when you are.
Pro Tips For Making One Pot Recipe Rice Cooker
- Rinse the Rice: I learned this the hard way—skipping the rinse leaves your one-pot dish with a starchy, gummy texture. Two quick washes under cold water until the water runs clear keeps the grains separate.
- Brown the Thighs: After burning three batches, I finally figured out that searing the chicken thighs for 3-4 minutes per side in the rice cooker’s pot (if it has a sauté function) adds depth you can’t get otherwise.
- Chop Evenly: Sounds weird, but it works: cut the carrots and onion into uniform, small pieces—about ½-inch dice—so they cook through at the same rate as the rice.
- Use Room-Temp Broth: My grandmother swore by this, and she was right: adding cold broth straight from the fridge slows down the cooking. Let it sit out for 10 minutes before mixing it in.
Wine and Beer Pairings for This Dish
Crisp White Wines
A dry Riesling from Washington State offers bright acidity that cuts through the soy and sesame notes. I love Chateau Ste. Michelle for its consistent quality and affordable price point. Serve chilled at 45-50°F for best results. 🍷
Light Bodied Reds
If you prefer red wine, try a Pinot Noir from Oregon—its earthy notes complement the ginger and garlic beautifully. Eyrie Vineyards produces excellent options that won’t overpower the dish. Lightly chill for 15 minutes before serving.
Asian Beer Pairings
For beer lovers, a crisp Japanese lager like Asahi or Sapporo provides a clean, refreshing contrast to the rich flavors. The carbonation helps cleanse your palate between bites. Serve ice cold in frosted glasses. 🍺
Local Craft Options
American craft beers work too—try a pilsner from your local brewery. The light malt profile won’t compete with the dish’s savory notes. I often grab Firestone Walker Pivo for its balanced hop character.
Non-Alcoholic Choices
For a non-alcoholic option, ginger beer (like Bundaberg) offers a spicy kick that pairs well with the dish’s flavors. The effervescence mimics beer’s palate-cleansing effect. Serve over ice with a lime wedge. ✨
Nutrition Facts
Frequently Asked Questions
Do I need to brown the chicken first?
Searing the chicken adds flavor but isn’t mandatory. If skipping, add 5 minutes to the cook time. The rice cooker will still cook it through completely.
Can I use brown rice instead?
Yes, but increase liquid to 3 cups and extend cook time to 45-50 minutes. Brown rice needs more water and time to soften.
What if my rice cooker doesn’t have a sauté function?
Use a skillet to sear the chicken separately, then transfer everything to the rice cooker. This ensures proper browning without special equipment.
How do I prevent the rice from sticking?
Rinse the rice thoroughly and add 1 tablespoon of oil to the broth. Avoid stirring during cooking to keep grains separate.

Trained in classic French technique but raised on slow-cooked ribs and spicy rubs, she blends culinary skill with smoke and soul.
- Best Smoked Oxtail Recipe: Deep-Rich Flavor After Low-and-Slow Cooking - October 14, 2026
- Pit Boss Smoked Prime Rib Roast Recipe: Bark-to-Bone Crispness in 4 Hours - October 14, 2026
- Smoked Tuna Steak Recipe: Seared Crust Meets Silky Centers - October 14, 2026