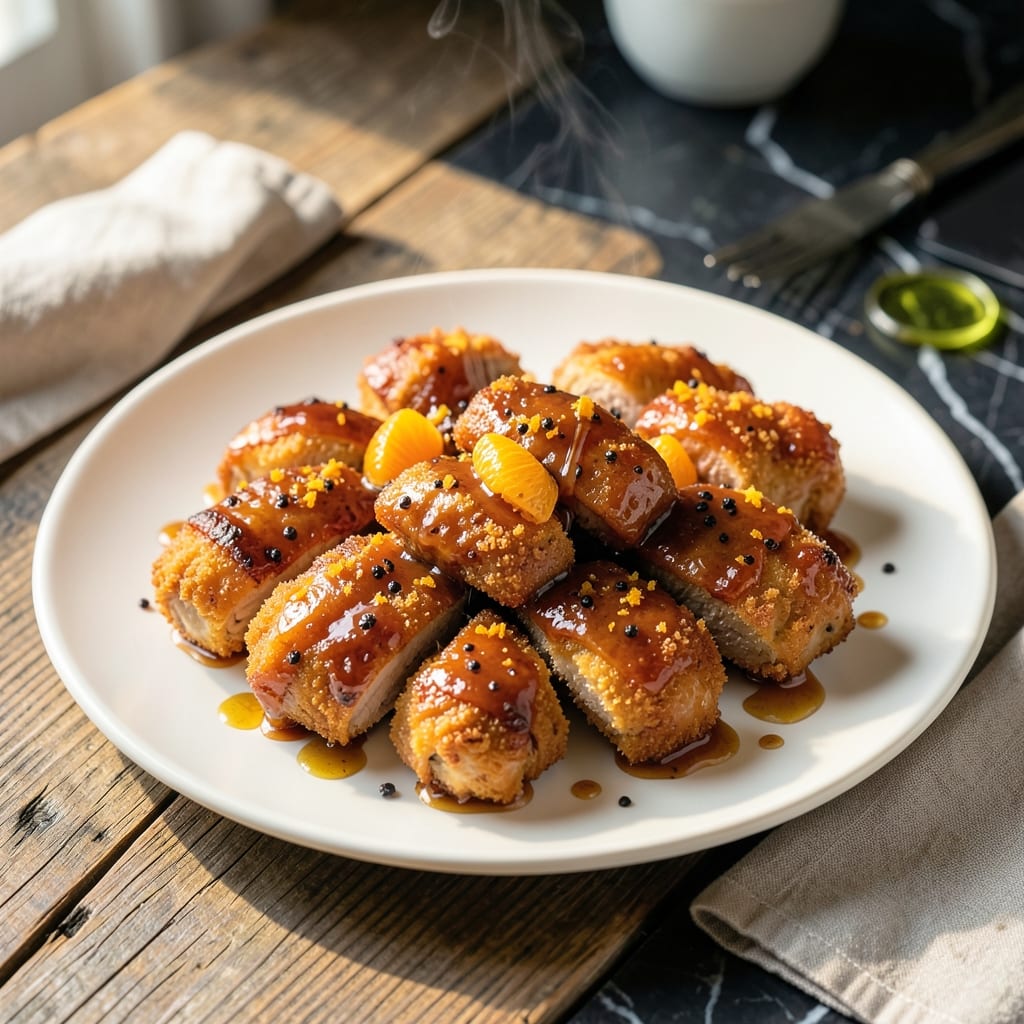
This baked orange chicken delivers all the sweet, sticky flavor you love without the deep fryer. The secret is a high-heat oven that creates caramelized edges while keeping the meat juicy.
I developed this method after realizing most recipes rely on frying for texture. By coating the chicken in cornstarch and baking at 425°F, you get that signature crispiness with far less oil.
The sauce comes together in 5 minutes on the stovetop, using fresh orange juice, soy sauce, and a touch of honey for balance. It clings perfectly to each piece.
What emerges is restaurant-quality orange chicken with a glossy glaze and tender interior. The oven does most of the work, making this dish as practical as it is delicious.
Ingredients for Orange Chicken Recipe Not Fried
Pantry staples and a few fresh items create this crispy, saucy crowd-pleaser.
| Ingredient | Amount | Notes |
|---|---|---|
| Boneless Skinless Chicken Thighs 🍗 | 1 ½ lb | Cut into 1-inch pieces |
| Cornstarch 🌾 | ½ cup | For crispy coating |
| Fresh Orange Juice 🍊 | ¾ cup | Newly squeezed preferred |
| Orange Zest 🍊 | 1 tbsp | From 1 large orange |
| Soy Sauce 🥢 | ⅓ cup | Low-sodium recommended |
| Honey 🍯 | ¼ cup | For sticky glaze |
| Rice Vinegar 🍶 | 2 tbsp | Balances sweetness |
| Minced Garlic 🧄 | 3 cloves | Freshly minced |
| Fresh Ginger 🌿 | 1 tbsp | Peeled and grated |
| Vegetable Oil 🫒 | 2 tbsp | High smoke point preferred |
| Brown Sugar 🏝️ | 2 tbsp | Light or dark |
| Red Pepper Flakes 🌶️ | ¼ tsp | Optional for heat |
| Sesame Seeds 🌰 | 1 tbsp | For garnish |
| Green Onions 🧅 | 3 whole | Thinly sliced for topping |
[recipe_ingredient_scaler]
The chicken thighs are key here—bone-in works too but takes longer to cook. I grab mine from Whole Foods or Trader Joe’s for consistent quality. Fresh orange juice makes a huge difference, so avoid bottled if you can (the flavor is just brighter). For the cornstarch, any brand works—it’s all about the crispy texture it gives the chicken.
No honey? Maple syrup or agave at the same amount works fine. Short on fresh ginger? Ground ginger at one-third the amount in a pinch. Soy sauce substitutes: tamari for gluten-free or coconut aminos for a milder taste. The rice vinegar can be swapped for apple cider vinegar (same tang, slightly fruitier). Skip the red pepper flakes if you’re serving kids.
Leftovers keep for 3-4 days in the fridge, though the coating softens a bit. Reheat in the oven at 375°F for 10 minutes to crisp it back up. Freezes for 2 months—perfect for meal prep.
Why You’ll Love This Recipe
- One Pan Wonder: I just toss the chicken in cornstarch, sear it, then let the orange juice and zest do their magic in the same pan.
- Zesty Kick: The fresh orange zest and juice give it that bright, tangy punch that beats any takeout I’ve tried.
- Meal Prep Hero: It reheats like a dream—still tender, still flavorful, even after three days in the fridge.
- Budget Friendly: Boneless thighs stay juicy and cost half what breast meat would, and a little soy sauce stretches the flavor far.
Step-by-Step Instructions for Orange Chicken Not Fried
Here’s how I achieve that irresistible sticky glaze and crispy coating without frying.
Step 1: Coat the Chicken in Cornstarch
Start by preheating your oven to 400°F and lining a baking sheet with parchment paper. I cut the 1.5 lb Boneless Skinless Chicken Thighs into 1-inch pieces for even cooking. Pat them dry with a paper towel—this is crucial for a crispy coating.
Place the chicken pieces in a bowl and toss them with the 0.5 cup Cornstarch until each piece is fully coated. The cornstarch creates that signature crispy texture without the need for deep frying. Arrange the coated pieces on the prepared baking sheet, leaving space between each piece.
Step 2: Bake Until Crispy
Drizzle the 2 tbsp Vegetable Oil evenly over the chicken. This helps it crisp up in the oven. Bake for 20 minutes, then flip each piece and bake for another 15-20 minutes until the coating is golden brown and crispy.
I keep an eye on the chicken during the last 10 minutes to ensure it doesn’t over-brown. The pieces should be firm to the touch and slightly puffed. This baking method gives you that perfect crunch without the grease of frying.
Step 3: Prepare the Orange Sauce
While the chicken bakes, I make the sauce. In a medium saucepan over medium heat, combine the 0.75 cup Fresh Orange Juice, 1 tbsp Orange Zest, 0.33 cup Soy Sauce, 0.25 cup Honey, 2 tbsp Rice Vinegar, 3 cloves Minced Garlic, 1 tbsp Fresh Ginger, and 2 tbsp Brown Sugar.
Bring the mixture to a gentle simmer, stirring frequently. Add the 0.25 tsp Red Pepper Flakes if you like a bit of heat. Let it cook for 5-7 minutes until the sauce thickens slightly and becomes glossy. It should coat the back of a spoon but still be pourable.
Step 4: Toss and Garnish
Once the chicken is crispy, transfer it to a large bowl. Pour the warm orange sauce over the chicken and toss gently until every piece is evenly coated. The sauce will cling beautifully to the crispy cornstarch coating, creating that sticky, sweet, and tangy finish.
Transfer the orange chicken to a serving platter and garnish with the 1 tbsp Sesame Seeds and thinly sliced 3 whole Green Onions. Serve immediately over rice to soak up every bit of that delicious sauce. The contrast of the crispy chicken and the silky glaze is pure perfection.
Pro Tips For Making Orange Chicken Recipe Not Fried
- Coat Chicken Twice: Toss the chicken in cornstarch, let it rest 5 minutes, then repeat—the double coat makes it crispier without frying. I learned this the hard way after my first batch turned out gummy.
- Zest First, Juice Later: Grate the orange zest before cutting it open for juice—it’s impossible to do afterward, and fresh zest packs way more flavor than dried.
- Skip Overcrowding: Cook the chicken in batches if needed; crowding the pan steams the coating instead of browning it. After burning three batches, I finally figured out spacing matters most.
- Simmer the Sauce: Let the orange juice, zest, and soy sauce reduce for 3-4 minutes until slightly thickened—raw, thin sauce just doesn’t cling to the chicken. My grandmother swore by this, and she was right.
Serving Suggestions for This Recipe
Over Steamed Rice
Serve this dish over steamed jasmine rice—the fluffy texture soaks up the sticky sauce perfectly. I use a 1:1.5 rice-to-water ratio in my rice cooker. The contrast between the crispy chicken and soft rice makes every bite satisfying.
With Stir-Fried Veggies
A side of quick stir-fried broccoli or snap peas adds freshness and crunch. Toss 2 cups veggies in 1 tbsp oil over high heat for 3-4 minutes. The bright color and texture balance the richness.
Garnish Creatively
Beyond green onions and sesame seeds, try thin orange slices or crushed peanuts for extra flair. A sprinkle of extra red pepper flakes adds heat. These small touches elevate the presentation beautifully. ✨
For Meal Prep
Pack leftovers with rice in separate containers to maintain crispiness. When reheating, spread on a baking sheet at 375°F for 8-10 minutes. Microwaving works in a pinch but may soften the coating.
Family-Style Serving
Place the chicken on a large platter with rice in a bowl and sauce on the side. Let everyone build their own plate. This interactive approach makes it fun for gatherings. I love seeing guests customize their servings.
With a Cold Drink
A crisp Asian lager or jasmine iced tea cuts through the sweetness. For non-alcoholic options, sparkling water with lime refreshes the palate between bites. The right drink completes the meal. 💛
Nutrition Facts
Frequently Asked Questions
Can I use chicken breast instead of thighs?
Yes, but thighs stay juicier. If using breast, reduce baking time to 15-18 minutes per side to prevent dryness. The cornstarch coating still gets crispy.
How do I make the sauce thicker?
Simmer it longer after adding a cornstarch slurry (1 tbsp cornstarch + 2 tbsp water). Stir constantly until it reaches your desired consistency.
Can I air-fry instead of baking?
Cook at 375°F for 12-15 minutes, shaking the basket halfway. The air fryer gives extra crispiness with even less oil.

Trained in classic French technique but raised on slow-cooked ribs and spicy rubs, she blends culinary skill with smoke and soul.
- Best Smoked Oxtail Recipe: Deep-Rich Flavor After Low-and-Slow Cooking - October 14, 2026
- Pit Boss Smoked Prime Rib Roast Recipe: Bark-to-Bone Crispness in 4 Hours - October 14, 2026
- Smoked Tuna Steak Recipe: Seared Crust Meets Silky Centers - October 14, 2026