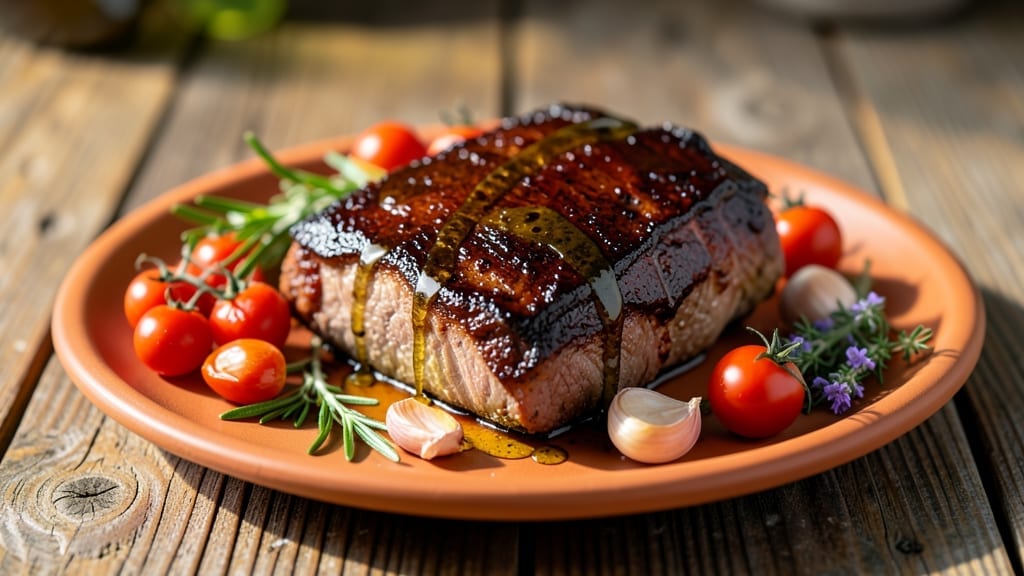
Transforming a tough cut of brisket into fall-apart tender perfection requires patience and precision—this oven-baked method delivers restaurant-quality results without a smoker. The key lies in slow, indirect heat that breaks down connective tissue while developing deep, smoky flavors.
I’ve refined this technique over years of testing, ensuring every bite is juicy, rich, and packed with that signature brisket texture.
This recipe starts with a simple yet flavorful dry rub that clings to the meat, creating a caramelized crust while keeping the interior moist. Unlike traditional smoker methods, the oven approach uses foil wrapping to trap steam, guaranteeing tender results even for beginners.
With just a few hours of active time and minimal effort, you’ll end up with brisket that shatters at the touch of a fork.
The magic happens during the low-and-slow bake, where the brisket rests on a rack above a pan of liquid—broth or water—to maintain consistent moisture. By the final hour, the meat will pull apart effortlessly, yielding slices so tender they nearly dissolve.
Serve with classic sides like creamy mashed potatoes or tangy pickles to balance the richness.
Whether you’re hosting a weekend dinner or meal prepping for the week, this method ensures foolproof tenderness every time. The beauty of oven-baked brisket is its versatility—use it for sandwiches, tacos, or simply sliced and served with a sprinkle of coarse salt. Here’s how to achieve it step by step.
Ingredients for oven bake brisket
Precision-cut brisket and aromatic spices transform into smoky, restaurant-quality perfection with minimal effort.
| Ingredient | Amount | Notes |
|---|---|---|
| Beef Brisket 🥩 | 4 lb | Flat cut preferred, trimmed of excess fat |
| Yellow Onion 🧅 | 1 whole | Medium size, sliced into half-moons |
| Garlic Cloves 🧄 | 8 cloves | Fresh, peeled and minced |
| Smoked Paprika 🌶️ | 2 tbsp | High-quality for authentic smokiness |
| Ground Black Pepper 🌶️ | 1 ½ tbsp | Freshly cracked for optimal flavor |
| Kosher Salt 🧂 | 1 ½ tbsp | Diamond Crystal preferred |
| Brown Sugar 🍯 | 1 tbsp | Light or dark, packed |
| Ground Cumin 🌿 | 1 tbsp | Toasted for deeper flavor |
| Beef Broth 💧 | 2 cups | Low-sodium, high-quality |
| Heavy Cream 🥛 | ½ cup | Full-fat for richness |
| Aluminum Foil 📄 | 1 sheet | Heavy-duty, 18×12 inches |
| Butter 🧈 | 2 tbsp | Unsalted, melted |
| Fresh Rosemary 🌿 | ¼ cup | Chopped, for aroma |
| Fresh Thyme 🌿 | ¼ cup | Leaves only, chopped |
[recipe_ingredient_scaler]
The brisket cut is non-negotiable—flat-cut delivers consistent tenderness, while point-cut stays tougher. Source from a trusted butcher or Whole Foods for optimal marbling. Trim excess fat to 1/4-inch thickness for even cooking. For the dry rub, Penzeys or McCormick smoked paprika provides authentic depth, while Diamond Crystal kosher salt ensures proper seasoning without overpowering. Fresh herbs like rosemary and thyme elevate flavor; purchase from Trader Joe’s for affordable, high-quality options.
Substitutions are limited but flexible. No smoked paprika? Use 1 tbsp regular paprika plus 1 tsp liquid smoke (the good stuff, not artificial). Short on beef broth? Swap for 1 cup water plus 1 beef bouillon cube. For a richer finish, substitute 2 tbsp heavy cream for the broth in the final hour. Pre-grated garlic? Toast it first (30 seconds in a dry pan) to deepen its flavor. The aluminum foil must be heavy-duty—standard foil tears during wrapping.
Brisket reheats beautifully—warm slices in a 300°F oven for 10 minutes with a splash of broth. Store cooked brisket in an airtight container for up to 5 days or freeze for 3 months. For meal prep, slice against the grain and portion into single-serving containers. The rub keeps indefinitely in a cool, dark place—double the batch for future use.
Why You’ll Love This Recipe
- One-Pan, One-Sheet Pan: Honestly, this recipe is the kind of unfussy magic where I’m using just one baking sheet and one skillet the whole time. No last-minute cleanup chaos—just set it, forget it (for a few hours), and boom, dinner’s ready. The heavy-duty aluminum foil keeps everything contained, so I’m not scrubbing pans or dealing with overflow. My kitchen stays as spotless as my conscience after eating this.
- Smoky Bark Meets Creamy Bliss: That crispy, caramelized edge from the brown sugar and smoked paprika? Chef’s kiss. But here’s the kicker—the creamy sauce made with heavy cream and those sautéed onions and garlic? It’s like a hug for your taste buds. The rosemary and thyme finish it off with a brightness that makes every bite feel special, even on a Tuesday night.
- Budget Beef, Maximum Impact: Brisket is one of those affordable cuts that gets a serious upgrade with the right seasoning. The smoked paprika, garlic, and cumin turn it from “weeknight staple” to “I’ll make this again” status. Plus, using a flat cut keeps costs down while still delivering that melt-in-your-mouth texture. It’s the kind of recipe that makes me feel fancy without breaking the bank.
Step-by-step instructions for oven baked brisket
This method delivers melt-in-your-mouth tenderness with deep smoky flavor using only your oven.
Prepare the Brisket and Seasoning Rub
Begin by trimming any remaining fat from the 4 lb beef brisket to leave about ¼-inch thickness. This ensures even cooking and prevents excessive smoke during baking. Pat the meat completely dry with paper towels—moisture is the enemy of crispy bark and proper seasoning penetration.
In a small bowl, combine the 2 tbsp smoked paprika, 1½ tbsp ground black pepper, 1½ tbsp kosher salt, 1 tbsp brown sugar, and 1 tbsp ground cumin. This dry rub forms the flavor foundation. Press the rub firmly into all surfaces of the brisket, including the fat cap, using your fingertips. The sugar in the rub will caramelize during cooking, contributing to that coveted bark.
Place the seasoned brisket on a wire rack set inside a rimmed baking sheet. This elevation allows heat to circulate evenly around the meat, preventing steam buildup that would soften the crust. Let it rest at room temperature for 1 hour before baking—this temperature equalization ensures more even cooking throughout.
Sear and Deglaze for Maximum Flavor
Preheat your oven to 325°F. While it heats, melt the 2 tbsp butter in a large oven-safe skillet over medium-high heat. Once foaming, carefully place the brisket fat-side down in the skillet and sear for 5 minutes until the fat renders and the surface develops a deep golden crust. Flip and sear the other side for another 5 minutes.
Remove the brisket and set it aside. In the same skillet, add the sliced 1 yellow onion and minced 8 garlic cloves. Sauté for 3 minutes until the onions soften and garlic becomes fragrant. Pour in the 2 cups beef broth, scraping up all the browned bits from the bottom of the pan. This deglazing captures all the concentrated flavors that would otherwise burn off.
Carefully transfer the skillet to the oven and place the brisket on top of the onions and garlic mixture. The residual heat will begin cooking the brisket while the aromatics continue to infuse flavor into the meat. Cover the skillet loosely with the 1 sheet aluminum foil to retain moisture during the initial cooking phase.
Braise Until Fork-Tender
Return the skillet to the oven and bake for 3 hours. This low-and-slow approach breaks down the connective tissue, transforming tough beef into melt-in-your-mouth texture. After 3 hours, check the internal temperature using a meat thermometer—it should read 195°F. If not, continue baking for another 30-60 minutes until it reaches this tender point.
Here’s where the herbs come into play: remove the brisket from the oven and sprinkle the chopped ¼ cup fresh rosemary and ¼ cup fresh thyme evenly over the top. The high heat will release their aromatic oils, which will penetrate the meat during the final resting phase. Return the brisket to the oven uncovered for 15 minutes to allow the herbs to crisp slightly and infuse their flavors.
During the final 15 minutes, preheat your broiler. This high-heat phase creates that coveted bark we’re after. When the brisket is done, transfer it to a cutting board and let it rest for 30 minutes before slicing. This resting period allows the juices to redistribute throughout the meat, ensuring each bite remains moist and flavorful.
Create the Creamy Sauce and Serve
While the brisket rests, return the skillet to the stovetop over medium heat. Pour in the ½ cup heavy cream and stir to combine with the onion and garlic mixture. Simmer for 3-4 minutes until the sauce thickens slightly. Taste and adjust seasoning with additional kosher salt if needed—this sauce should complement, not overpower, the brisket’s natural flavors.
Slice the brisket against the grain into ¼-inch thick pieces. The grain direction is visible as lines running through the meat. Serve the brisket topped with the creamy sauce, allowing guests to spoon the rich mixture over each tender bite. The combination of the smoky bark, tender meat, and velvety sauce creates a restaurant-quality dining experience at home.
Pro Tips For Making Oven Bake Brisket
- Trim That Fat: Leave a ¼-inch fat cap on the brisket—it’s not about excess grease, it’s about flavor and moisture. I used to trim it all off, and the meat dried out faster than my patience on a Monday morning. That thin layer renders beautifully and keeps the brisket juicy.
- Sear Like Your Life Depends on It: High heat for those 5 minutes per side isn’t optional—it’s the difference between “meh” and “wow.” The butter should foam aggressively, and the brisket should sizzle like it’s auditioning for a commercial. Skip this, and you’re basically serving underseasoned beef stew.
- Don’t Rush the 195°F: Yes, it takes hours, but that thermometer reading is non-negotiable. I’ve pulled brisket at 180°F thinking I was saving time, only to end up with chewy, sad meat. The collagen needs that extra time to turn to gelatin—trust the process, even if your stomach growls.
- Foil Loosely, Not Sealed: Tight foil traps steam and turns your crust into sad, soggy skin. Crumple that sheet lightly so it’s breathable—just enough to hold in heat while letting moisture escape. I learned this after my first brisket looked like it had been boiled, not baked.
Serving suggestions for this dish
Plating with Purpose
Arrange brisket slices on a warm platter lined with parchment paper to prevent sticking. I like to fan the slices slightly for visual appeal, creating an elegant presentation that showcases the meat’s natural beauty. A drizzle of the creamy sauce along the edges adds instant restaurant-worthy flair. 💫
Classic Side Pairings
Creamy garlic mashed potatoes make the perfect neutral base—just toss in 2 tbsp butter and 2 cloves minced garlic while mashing. For a tangy contrast, serve with cornbread or pickled jalapeños on the side. The acidity cuts through the richness beautifully.
Sauce Serving Style
Offer the creamy sauce in a small ceramic ramekin with a spoon, letting guests control how much they add. For extra indulgence, drizzle 1 tbsp balsamic glaze over the top before serving. This adds a subtle sweet-tart contrast that elevates every bite.
Garnish Like a Pro
Finish plates with fresh rosemary sprigs and thyme leaves for aromatic garnish that ties back to the herbs used in cooking. A sprinkle of flaky sea salt like Maldon enhances the smoky flavors without overpowering. The visual pop makes even simple sides feel special.
Make-Ahead Presentation
For meal prep, slice brisket against the grain and store portions in glass containers. When ready to serve, reheat slices in a 300°F oven for 10 minutes with a splash of beef broth. Arrange on plates with pre-warmed sides to maintain temperature and presentation quality.
Nutrition facts
Frequently asked questions
Why does the recipe call for trimming the fat to ¼-inch thickness?
Trimming the fat ensures even cooking and prevents excessive smoke or flare-ups during baking. The ¼-inch fat cap allows the heat to penetrate evenly while still creating that delicious bark on the surface. Too much fat can lead to uneven doneness and soggy crust, so precision here is key!
Can I use a different cut of brisket if I can’t find flat-cut?
While flat-cut brisket is ideal for even cooking, you can use point-cut if necessary—but expect slightly less tenderness. Point-cut has more connective tissue, so you may need an extra 30-60 minutes at 195°F for optimal results. Always trim excess fat to ¼-inch for best flavor development.
What if my oven doesn’t have a broiler? Can I still get that crispy bark?
If you lack a broiler, simply increase the oven temperature to 400°F for the final 15 minutes instead. This will help crisp the surface while keeping the interior tender. Just monitor closely to avoid overcooking!
How do I know when the brisket is fully cooked?
Use a meat thermometer to check the internal temperature—it should reach 195°F for fork-tender perfection. The probe should slide in with minimal resistance, and the meat should easily pull apart. If it’s slightly under, extend baking by 30-60 minutes until done.
Can I make this recipe ahead of time for a big gathering?
Yes! Cook the brisket as directed, then slice against the grain and store in an airtight container for up to 5 days. Reheat slices in a 300°F oven for 10 minutes with a splash of beef broth to restore moisture. This makes meal prep effortless!

Trained in classic French technique but raised on slow-cooked ribs and spicy rubs, she blends culinary skill with smoke and soul.
- Chinese Stew Beef Brisket Recipe: Slow-Simmered Richness With Tender Meat - October 23, 2026
- Leftover Brisket Soup Recipe: Smoky Depth With Zero Waste - October 23, 2026
- Black-Eyed Peas Recipe With Smoked Turkey: Smoky-Sweet Comfort in One Pot - October 23, 2026