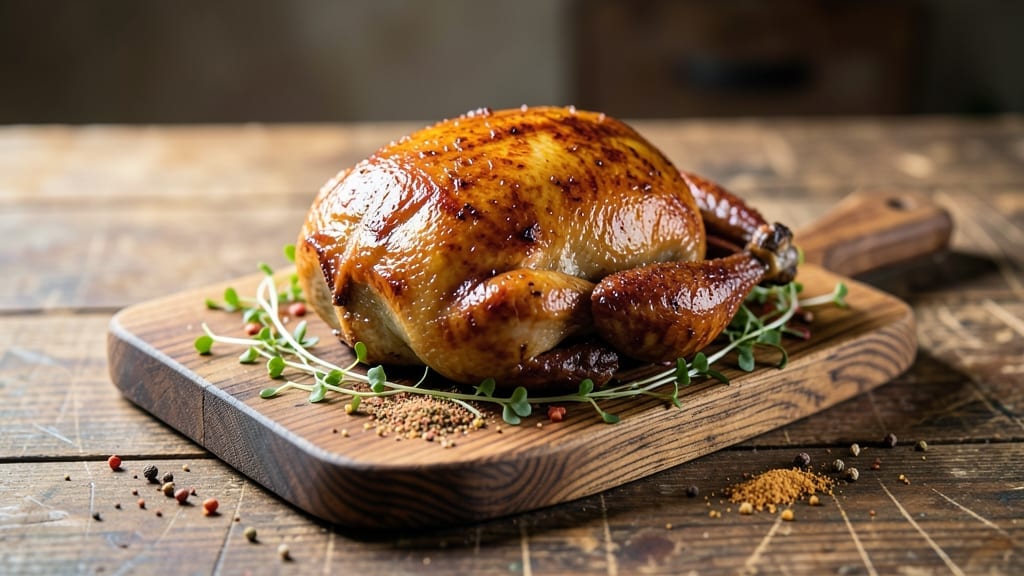
A brined and smoked turkey recipe transforms holiday dinners from ordinary to extraordinary—juicy, smoky, and packed with flavor that keeps everyone asking for seconds. The key lies in a precise brining process that ensures moisture retention and a smoking technique that infuses that unmistakable wood-fired aroma.
I developed this method after years of perfecting smoked meats, drawing on both my French technique training and the smoky traditions I grew up with at family cookouts.
This recipe delivers restaurant-quality results without requiring a professional smoker. With a simple brine of salt, sugar, and aromatic herbs, your turkey stays impossibly moist while absorbing deep, smoky flavors.
The smoking process is straightforward—just maintain a steady temperature and let the wood chips do their work. It takes time, but the payoff is worth every minute.
By the time you pull that turkey from the smoker, you’ll have a bird with crispy skin, tender meat that falls apart easily, and a rich, smoky crust that’s impossible to resist.
The resting period ensures juices redistribute, guaranteeing every slice is as perfect as the first. This is the kind of turkey that makes holiday feasts unforgettable.
Pair it with classic sides like mashed potatoes, cranberry sauce, or a fresh green salad to complete the meal. The smoky flavor even enhances store-bought gravy, turning an ordinary side into something extraordinary. Let’s get started on your showstopper centerpiece!
Ingredients for brined and smoked turkey
Juicy, restaurant-quality turkey starts with these essential ingredients—simple but powerful for smoky perfection.
| Ingredient | Amount | Notes |
|---|---|---|
| Fresh Whole Turkey 🦃 | 12 lb | 12-14 lb, bone-in, skin-on |
| Kosher Salt 🧂 | 3 cups | Non-iodized, coarse grain |
| Granulated Sugar 🍚 | 1 cup | White or brown sugar |
| Fresh Garlic Cloves 🧄 | 12 cloves | Peeled, smashed slightly |
| Fresh Rosemary Sprigs 🌿 | 4 whole | Fresh, not dried |
| Fresh Thyme Bundles 🌿 | 4 whole | Stems intact |
| Fresh Orange Peel 🍊 | 1 whole | From 1 large orange, dried |
| Apple Cider Vinegar 🍎 | 1 cup | For brine acidity |
| Wood Chips (Hickory or Apple) 🌳 | 4 cups | Unsoaked, food-grade |
| Butter 🧈 | 1 cup | Unsalted, softened |
| Olive Oil 🫒 | ½ cup | For skin crispiness |
| Black Peppercorns 🌶️ | 1 tbsp | Freshly cracked |
| Fresh Sage Leaves 🌿 | 1 cup | Fresh, not dried |
[recipe_ingredient_scaler]
The turkey size matters—12-14 lbs is ideal for 8 servings. Look for a bird with good marbling and a vibrant color. Costco or local butchers often have the best quality, especially if you ask for a fresh cut that day. The herbs should be fresh (not dried)—Trader Joe’s usually has great bundles for this. For the wood chips, Traeger or Cookshack brands are reliable, but any food-grade hickory or apple works. The orange peel adds a subtle citrus note that balances the smokiness—don’t skip it.
No fresh herbs? Dried rosemary and thyme at half the amount will work, but fresh is worth the effort. Running low on apple cider vinegar? White vinegar or lemon juice in a pinch. For the wood chips, cherry or pecan also pair beautifully with turkey. The butter and olive oil combo is key for crispy skin—don’t substitute margarine. If you can’t find kosher salt, sea salt works too, but adjust to taste since it’s finer. The garlic and peppercorns should be freshly cracked or ground for maximum flavor.
This turkey keeps beautifully—3-4 days in the fridge after smoking. For leftovers, store in an airtight container with a paper towel to absorb moisture. Reheat gently in the oven or microwave for best texture. The brine can be made 2 days ahead and stored in the fridge. If you’re prepping early, freeze the turkey in the brine for up to 3 months—just thaw it in the fridge before smoking. The wood chips? Store them in a sealed container in a cool, dry place for up to 6 months.
Why You’ll Love This Recipe
- No-Fuss Feast: Honestly, this recipe is my secret weapon for holidays—because after the brine, it’s basically hands-off. Just pop it on the smoker for 12-14 hours while you nap, and wake up to a turkey that’s already done. The hard part? Deciding whether to carve it immediately or wait for the crowd to arrive.
- Smoky Magic: That combo of granulated sugar and kosher salt in the brine? It’s like a flavor bomb. Then the fresh garlic, rosemary, and thyme tied inside the cavity? Chef’s kiss. The smoke from the hickory or apple wood chips doesn’t overpower—it just adds that perfect, woodsy depth. Every bite is creamy inside with that crispy edge? Dangerously addictive.
- Leftovers That Shine: I always say, “Leftovers are just dinner’s second act.” This turkey? It keeps beautifully for 3-4 days in the fridge, and honestly, the flavors get even better the next day. Slice it thin, toss it on a sandwich with some mustard, or reheat with a drizzle of the pan juices. Trust me, no sad turkey leftovers here.
- Budget-Friendly Crowd-Pleaser: A 12-pound turkey feeds a small army without breaking the bank—especially when you’re using pantry staples like kosher salt, sugar, and apple cider vinegar for the brine. The fresh herbs (rosemary, sage, thyme) are affordable if you buy in bulk, and the butter-oil basting keeps costs low while making the skin crispy perfection. Perfect for Thanksgiving, but also? My go-to for a lazy Sunday dinner.
Step-by-step instructions for brined and smoked turkey
Here’s how to transform your holiday turkey into juicy, smoky perfection.
Prepare the Brine for Maximum Juiciness
In a large stockpot, combine 3 cups kosher salt, 1 cup granulated sugar, 1 cup apple cider vinegar, and 12 smashed garlic cloves. Add 8 quarts cold water and stir until everything dissolves completely. This brine should be fully saturated—you’ll know it’s ready when no more salt dissolves and the mixture tastes strongly salty.
Place the 12 lb fresh whole turkey in a large brining bag or clean stockpot, ensuring it’s completely submerged. Pour the brine over the turkey, making sure it’s fully covered. Refrigerate uncovered for 12-24 hours, turning the turkey once halfway through. The cold brine will penetrate deeply, ensuring every bite stays moist and flavorful. Don’t skip this step—it’s what guarantees that holiday juiciness you crave.
Create the Smoking Rub and Prepare the Turkey
Remove the turkey from the brine and pat it very dry with paper towels, both inside and out. This drying step is crucial for developing that perfect crispy skin later. In a small bowl, mix together 1 cup fresh sage leaves, 4 fresh rosemary sprigs, 4 fresh thyme bundles, 1 tbsp cracked black peppercorns, and 1 fresh orange peel (finely chopped). Rub this mixture all over the turkey, including inside the cavity.
Stuff the cavity with additional herbs and the remaining orange peel. Tie the legs together with kitchen twine and tuck the wing tips under the body. This shaping helps the turkey cook more evenly. Let the turkey sit uncovered in the refrigerator for 1 hour before smoking—this final drying step is key for that crispy skin we’re after.
Set Up and Smoke the Turkey Low and Slow
Preheat your smoker to 225°F using 4 cups wood chips. This low temperature is what gives us that tender, fall-apart meat without drying it out. Place a water pan in the smoker to maintain moisture throughout the cook. When the smoker reaches temperature and you see clean, blue smoke (not thick white), it’s ready for your turkey.
Place the turkey on the smoker grate, breast-side up. Smoke for 3 hours before raising the temperature to 250°F. This gradual increase helps prevent the skin from burning while the turkey comes up to temperature. Smoke for a total of 12-14 hours or until the internal temperature reaches 165°F in the thickest part of the thigh. The skin should be golden brown and crispy, and the juices should run clear when you pierce the thigh with a meat thermometer.
Baste and Finish for Extra Flavor
About 2 hours before the turkey is finished smoking, prepare a basting mixture by melting 1 cup butter and ½ cup olive oil together in a small saucepan. Once melted, remove from heat and stir in 1 tbsp cracked black peppercorns and 1 cup finely chopped fresh sage leaves. Every 30 minutes during the last 2 hours of smoking, brush this mixture generously over the turkey skin. This basting creates a rich, flavorful crust that seals in all those smoky flavors.
The basting also helps develop that beautiful mahogany color and crispy texture we want. Keep the smoker door closed as much as possible during this time—every time you open it, you lose heat and potentially dry out the skin. When the turkey reaches 165°F internally, it’s time to remove it from the smoker.
Rest and Serve for Perfect Results
Transfer the turkey to a cutting board and tent loosely with foil. Let it rest for at least 30 minutes before carving. This resting period is absolutely critical—it allows the juices to redistribute throughout the meat instead of running out onto your cutting board. The turkey will actually rise in temperature a few degrees during this time (carryover cooking), so don’t worry if it’s not quite at 165°F when you start carving.
When you’re ready to serve, carve the turkey against the grain for maximum tenderness. The meat should be juicy, tender, and infused with that beautiful smoky flavor from the wood chips. Save any leftover pan juices to make a quick gravy—just whisk them with a bit of the turkey drippings and some warm broth. This brined and smoked turkey is the centerpiece your holiday feast deserves.
Pro Tips For Making Brined And Smoked Turkey
- Prep the Garlic Right: Don’t just chop those 12 cloves—slightly smash them with the flat side of your knife first. This releases more flavor into the brine without turning it into a garlicky slurry. I learned this the hard way after my first batch tasted like a hospital cafeteria.
- Don’t Rush the Final Dry: That 1-hour uncovered fridge rest before smoking isn’t optional—it’s where the magic happens for crispy skin. Skimp on it, and you’ll end up with a turkey that’s tender but sad. Trust me, even if you’re impatient like me.
- Watch the Smoke Color: Thick white smoke means your wood chips aren’t burning cleanly—wait until you see steady blue smoke before loading the turkey. I once ignored this and ended up with a turkey that tasted like a campfire instead of a feast.
- Baste Like You Mean It: Don’t just drizzle that butter and olive oil mixture—slather it on like you’re painting. The skin needs that fat to render properly and develop that golden crust. I used to half-ass it, and the skin never got that perfect snap.
Essential equipment for perfect results
Your Smoker’s Soul
You don’t need a fancy setup to smoke a turkey—just a reliable smoker that can maintain 225-250°F consistently. I’ve used everything from a Traeger Pro Series 34 pellet smoker to a DIY offset smoker built from a repurposed grill, and the key is temperature control.
If you’re on a budget, a Weber Smokey Mountain Cooker is a fantastic entry point—just invest in a quality meat thermometer like Thermoworks Smoke to monitor internal temps accurately. 🔥
The Water Pan Game-Changer
A water pan is non-negotiable for smoking turkey. It maintains humidity and prevents the skin from drying out during the long cook. I use a 10-inch cast iron skillet with a lid, filled halfway with water, placed directly on the smoker grate.
The steam keeps the turkey moist while the smoke does its magic. Pro tip: Add a splash of apple cider vinegar to the water for extra flavor infusion.
Wood Chips: Hickory vs. Apple
Hickory is the classic choice for turkey—bold and traditional—but apple wood adds a sweeter, fruitier note that pairs beautifully with the herbs in this recipe. I prefer Traeger hickory chips for reliability, but any food-grade wood works.
Soak them for 30 minutes in warm water before using to ensure steady smoke without flare-ups. If you’re experimenting, pecan wood adds a subtle sweetness that surprises guests.
Thermometer Upgrade
Never guess the turkey’s doneness again. A dual-probe thermometer like the Meater Plus lets you track both the smoker temp and the turkey’s internal temp simultaneously.
The turkey is done when it reaches 165°F in the thickest part of the thigh, but the probes also alert you if the smoker temperature drops—critical for that perfect finish. I keep one probe in the breast and another in the thigh to catch any inconsistencies early.
Basting Station Essentials
For that crispy, golden skin, you’ll need a heatproof brush (like the OXO Good Grips silicone brush) to apply the butter-oil basting mixture. A small saucepan for melting the butter and olive oil, plus a whisk to blend the freshly cracked peppercorns and sage into the mixture.
I also keep a spray bottle with water nearby to quickly extinguish any accidental flare-ups from the wood chips.
Resting Station Setup
After smoking, transfer the turkey to a cutting board and tent it loosely with foil. I use a large stainless steel tray to catch any juices that might drip during resting. This tray also doubles as a gravy base later—just whisk in some turkey drippings and warm broth.
For extra presentation, line the tray with parchment paper to make carving and serving a breeze. The resting tray should be on a stable surface, like a cutting board on a trivet, to protect your countertop from drips. 💫
Nutrition facts
Frequently asked questions
Why does brining make such a difference in smoked turkey?
The brine penetrates deep into the turkey, ensuring juiciness throughout every bite. Without it, even smoked turkey can dry out during the long cook. The salt and sugar in the brine break down muscle fibers, allowing the turkey to absorb more moisture and flavor. This step is especially important for holiday feasts where you want tender, fall-apart meat.
Can I use dried herbs instead of fresh in the smoking rub?
Yes, but adjust the quantities—use about half the amount of dried herbs compared to fresh. For example, swap 1 cup fresh sage leaves for ½ cup dried sage. Dried herbs still add flavor, but they won’t contribute as much moisture or aromatic depth. Fresh herbs are ideal for that bright, vibrant taste.
What if my smoker temperature keeps dropping?
Consistent temperature is key! If your smoker fluctuates, add more wood chips or adjust the air vents to maintain 225°F. A dual-probe thermometer helps track both the smoker and turkey temps. If the issue persists, consider preheating your smoker for an extra 10-15 minutes before adding the turkey. Patience and precision keep the turkey cooking evenly.
How do I handle leftovers from this brined and smoked turkey?
Store leftovers in an airtight container with a paper towel to absorb excess moisture. Reheat gently in the oven or microwave—never overcook, as the turkey will already be fully done. This turkey keeps beautifully for 3-4 days in the fridge, making it perfect for meal prep. Save any pan juices to make a quick, flavorful gravy!

Trained in classic French technique but raised on slow-cooked ribs and spicy rubs, she blends culinary skill with smoke and soul.
- Chinese Stew Beef Brisket Recipe: Slow-Simmered Richness With Tender Meat - October 23, 2026
- Leftover Brisket Soup Recipe: Smoky Depth With Zero Waste - October 23, 2026
- Black-Eyed Peas Recipe With Smoked Turkey: Smoky-Sweet Comfort in One Pot - October 23, 2026