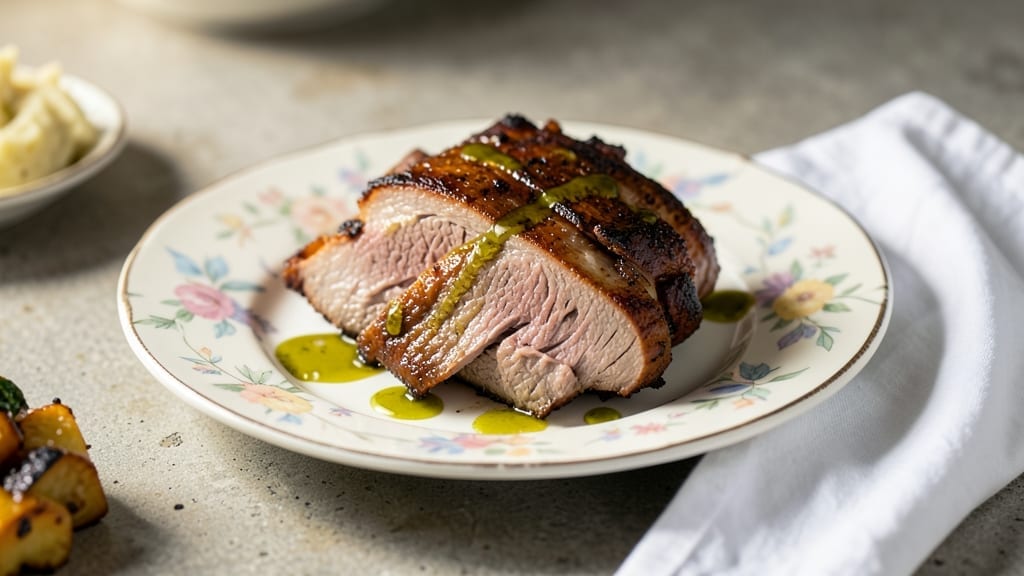
Mastering oven-roasted corned beef brisket transforms tough cuts into melt-in-your-mouth perfection with crispy edges—no smoker required. I perfected this method after years of experimenting with slow-cooked meats, blending my French technique training with the rich traditions of brisket preparation.
The key lies in precise temperature control and patience, ensuring every bite delivers that ideal balance of tenderness and flavor.
This recipe begins with a properly soaked and trimmed brisket, then roasts low and slow in your oven to achieve that signature fall-apart texture. Unlike traditional smoker methods, this approach uses your home oven to build deep, caramelized crusts while keeping the interior juicy.
The process takes about 3 hours, but the results are restaurant-quality without the fuss of outdoor cooking. I’ve tested this method countless times, and it never fails to impress.
By the time you’re done, you’ll have a brisket so tender it practically shreds at the touch, with edges that are beautifully crisped and richly browned.
The aroma alone will have everyone gathering around your table, while the flavor—savory, slightly sweet, and perfectly seasoned—will make this your new go-to for Sunday dinners or holiday feasts. This is the kind of dish that turns a simple meal into a memorable experience.
Pair it with classic sides like roasted potatoes, horseradish sauce, or crusty bread to complete the meal. The beauty of this recipe is its versatility—whether you’re feeding a crowd or treating yourself to a special dinner, this brisket delivers every time. Let’s get started on creating your perfect roast.
Ingredients for oven roasted corned beef brisket
Tough brisket becomes melt-in-mouth perfection with just a few key ingredients and patience.
| Ingredient | Amount | Notes |
|---|---|---|
| Corned Beef Brisket 🥩 | 4 lb | Trimmed of excess fat |
| Water 💧 | 4 cups | For soaking |
| Kosher Salt 🧂 | 1 cup | For soaking brine |
| Brown Sugar 🍚 | 1 cup | For sweetness balance |
| Garlic Powder 🧄 | 2 tbsp | Enhances depth |
| Mustard Powder 🧂 | 2 tbsp | Adds tanginess |
| Black Peppercorns 🌶️ | 1 tbsp | Freshly cracked preferred |
| Onion Powder 🧅 | 2 tbsp | For aromatic base |
| Beef Broth 🍲 | 2 cups | For extra richness |
| Olive Oil 🫒 | ¼ cup | For browning |
| Dijon Mustard 🧂 | 2 tbsp | For glaze |
| Horseradish Sauce 🥬 | ½ cup | Optional garnish |
[recipe_ingredient_scaler]
The brisket is your star player—look for a well-marbled 4-pound cut from your local butcher or grocery store’s meat department. Costco often has great deals on pre-trimmed briskets, but if you’re buying whole, trim the fat cap down to about ¼-inch thick. The soaking process is where the magic happens—use Diamond Crystal kosher salt for the brine, not iodized table salt. The brown sugar adds just enough sweetness to balance the savory, and freshly cracked peppercorns give a depth you won’t get from pre-ground powder.
No beef broth on hand? Water plus 1 tbsp soy sauce works in a pinch, though the flavor won’t be quite as rich. Skip the Dijon mustard? A splash of apple cider vinegar in the glaze adds tang. Baby carrots or celery can be added to the brine for extra flavor, but don’t skip the soaking—it’s what tenderizes the meat. For the olive oil browning step, use extra-virgin if you’ve got it, but regular works fine. The horseradish sauce is optional but Trader Joe’s has a great pre-made version that’s easy to grab.
This brisket reheats beautifully—wrap tightly in foil and pop it in a 250°F oven for 30 minutes. The flavors actually meld better the next day. Store leftovers in the fridge for 4-5 days or freeze for up to 3 months. I always make extra because it’s that good. The soaking brine can be reused for pickling cucumbers or making quick bread—no waste here. Just don’t rush the process—patience is key for that perfect tender texture.
Why You’ll Love This Recipe
- One-Pan, One-Brine Masterpiece: Honestly, this recipe is my secret weapon for lazy Sundays—you’re basically just brining, searing, and roasting in one pan. No fancy prep, no chopping mountains of veggies, just tossing everything into a container the night before and letting it do its thing. The 24-hour brine with that cup of kosher salt and cup of brown sugar? It’s how the meat gets so tender it practically falls apart—and you’re not scrubbing a million dishes afterward.
- Sweet, Tangy, Crispy Perfection: That combination of brown sugar and mustard powder in the brine? It’s a flavor bomb. The garlic powder and onion powder give it depth, while the sear with olive oil creates that chef’s-kiss crispy edge. Then you top it off with that Dijon mustard glaze and horseradish sauce—sweet, savory, and a little kick all in one bite. Trust me, it’s the kind of dish where people will ask for seconds before they even finish their first plate.
- Feeds a Crowd (or Your Cravings): This recipe is built for sharing—4 pounds of brisket will easily feed a family of four with leftovers, or fill up a potluck spread. And if you’re feeding just one hungry person (looking at you, post-workout me), it’s still enough to make you feel like you’re hosting a feast. Plus, the leftovers? Chef’s kiss—slice it up, toss it in a sandwich, or reheat with a little horseradish sauce for a quick lunch. No food waste here.
- Budget-Friendly Luxury: Corned beef brisket isn’t cheap, but this recipe stretches it so far with the brine and broth. The kosher salt and brown sugar might seem like a lot, but they’re the reason the meat turns out so tender and flavorful—you’re not just paying for meat, you’re paying for impact. And with leftovers lasting 4-5 days in the fridge, you’re getting multiple meals’ worth of satisfaction without breaking the bank. It’s the kind of dish that makes you feel fancy without the fancy price tag.
Step-by-step instructions for oven roasted corned beef brisket
Here’s how to transform tough brisket into melt-in-your-mouth perfection with a crisp exterior.
Prepare the Brine for Maximum Flavor
In a large non-reactive container, combine the 4 cups water, 1 cup kosher salt, 1 cup brown sugar, 2 tbsp garlic powder, 2 tbsp mustard powder, 1 tbsp black peppercorns, and 2 tbsp onion powder. Stir until everything dissolves completely—this is your flavor-packed brine. The salt and sugar should fully integrate, leaving no graininess behind.
Place the 4 lb corned beef brisket in the container, ensuring it’s fully submerged. Cover and refrigerate for 24 hours, turning the brisket once halfway through. This long soak breaks down tough fibers while infusing every inch with flavor. Real talk: Don’t skip this step—it’s what turns tough meat into tender slices.
Sear for Crispy Edges Before Roasting
Preheat your oven to 325°F. Remove the brisket from the brine and pat it very dry with paper towels—this is critical for crispy edges. Heat ¼ cup olive oil in an oven-safe skillet over medium-high heat until shimmering. Place the brisket fat-side down and sear for 5 minutes until deeply golden brown.
Flip the brisket and sear the other side for another 5 minutes. The fat should render beautifully, creating a flavorful crust. Transfer the skillet to the preheated oven and pour 2 cups beef broth around the brisket—this creates a self-basting environment that keeps the meat moist during the long cook.
Slow Roast Until Fork-Tender
Cover the skillet tightly with foil and roast for 3 hours. Here’s the thing—patience is key. The brisket needs time to transform from tough to tender. After 3 hours, check the internal temperature with a meat thermometer. It should read 195-200°F—this is when collagen fully breaks down and the meat becomes fork-tender.
If it’s not quite there, continue roasting for another 30-minute increments until you reach the perfect tenderness. The meat should have a rich, deep color and pull apart easily with two forks. Don’t be tempted to rush it—this is where the magic happens.
Create the Glaze for Extra Flavor
While the brisket rests, whisk together 2 tbsp Dijon mustard in a small bowl. This will become your finishing glaze. Remove the brisket from the oven and transfer it to a cutting board. Let it rest for 15 minutes—this resting period allows juices to redistribute, ensuring every slice stays moist.
Brush the Dijon mustard glaze evenly over the entire surface of the brisket. Return it to the oven for 10 minutes to let the glaze caramelize slightly. This step adds a beautiful sheen and extra layer of flavor that takes your brisket from good to spectacular.
Slice and Serve with Horseradish Garnish
Slice the brisket against the grain into ¼-inch thick pieces. The grain runs horizontally, so cutting perpendicular to these lines gives you the most tender texture. Arrange the slices on a serving platter, fanning them out for an impressive presentation.
Drizzle any remaining pan juices over the top and garnish with ½ cup horseradish sauce for a tangy kick. The crispy edges should contrast beautifully with the tender interior, and each bite should deliver that perfect balance of sweet, savory, and spicy flavors. Serve immediately with your favorite sides—this brisket deserves a celebration!
Pro Tips For Making Oven Roasted Corned Beef Brisket
- Crack Those Peppercorns: I learned this the hard way—whole peppercorns just sit there like decorative rocks. Crush that 1 tablespoon of black peppercorns into tiny flecks before adding them to the brine. The flavor will bloom into every bite of your brisket, not just float on top like confetti.
- Dry Like You Mean It: That 24-hour brine is magic, but if you skip drying the brisket properly after soaking, you’ll end up with soggy, pale meat instead of crispy edges. Grab those paper towels and really work the surface—especially around the fat cap—until it’s bone dry. No shortcuts here.
- Broth Bath, Not Drowning: Pouring the 2 cups beef broth around the brisket in the skillet isn’t just for show—it’s what keeps the meat from drying out while it roasts. But don’t overdo it. If the broth pools too deep, the brisket will steam instead of sear. Aim for just enough to come about halfway up the sides of the skillet.
- Glaze Fast, Don’t Burn It: That 10-minute caramelization of the Dijon mustard glaze is where the brisket goes from good to showstopping. Watch it like a hawk—if you walk away, you’ll end up with bitter, overcooked edges instead of a glossy finish. Medium-low heat is your friend here.
Essential equipment for this dish
Oven-Safe Skillet Essentials
Your heavy-bottomed Dutch oven is the star of this show—look for a Le Creuset or Lodge cast iron model with a tight-fitting lid. These skillets distribute heat evenly and retain it perfectly for the 3-hour roast.
I’ve tested cheaper options, but they can’t handle the temperature fluctuations without warping or uneven cooking. If you’re on a budget, a 10-inch stainless steel skillet like the All-Clad works too, but it won’t last as long.
Precision Thermometer
A meat thermometer is non-negotiable for this recipe. I swear by the Thermoworks Smoke because it has dual probes—one for the oven temp and one for the brisket’s internal temperature. The 195-200°F range is your sweet spot, and this tool keeps you from overcooking. No guesswork here! 🌡️
Non-Reactive Brine Container
For the brine, avoid aluminum or reactive metals—opt for a large glass baking dish or food-grade plastic container. I use a 5-quart Pyrex because it’s easy to clean and holds the brine ingredients well.
If you’re short on space, a large stainless steel bowl works too, just make sure it’s big enough to fully submerge the brisket.
Paper Towels & Cooling Rack
After removing the brisket from the brine, patting it bone-dry with paper towels is critical for crispy edges. Use a stack of paper towels and press firmly—this isn’t the time to skimp.
A cooling rack also comes in handy for resting the brisket after roasting, keeping it elevated so juices don’t pool and make the surface soggy.
Basting Brush & Aluminum Foil
A heatproof silicone basting brush is perfect for applying the Dijon mustard glaze without burning your hands. I use the OXO Good Grips model because it’s sturdy and easy to clean.
For covering the skillet during roasting, heavy-duty aluminum foil (not the thin stuff) is a must—it traps steam and keeps the brisket moist. I like the Reynolds Wrap brand because it’s reliable and easy to tear.
Nutrition facts
Frequently asked questions
Why is the 24-hour brine soak essential?
The 24-hour soak is what transforms tough brisket into melt-in-your-mouth perfection. The salt and sugar break down collagen fibers while infusing every inch with flavor. Skipping this step leaves you with dry, chewy meat instead of tender slices. Trust me—this is the secret to restaurant-quality results!
Can I use regular table salt instead of kosher salt?
Yes, but adjust the amount—use ¾ cup table salt instead of 1 cup kosher salt since it’s more concentrated. The flavor will still work, though kosher salt creates a more even brine without graininess. I always recommend kosher for this recipe!
What if my oven temperature fluctuates during cooking?
Fluctuations are normal, but keep an eye on the internal temperature—aim for 195-200°F. If your oven runs hot, tent loosely with foil after 2 hours to prevent overcooking. A meat thermometer is your best friend here to avoid dry meat!
How do I know when the brisket is done without a thermometer?
Press gently with tongs—it should feel tender with no resistance. The meat should also pull apart easily with two forks when pierced. If it still feels firm after 3 hours, add 30 minutes more. Patience pays off for that perfect texture!
Can I make this recipe ahead of time?
The brisket reheats beautifully—wrap tightly in foil and roast at 250°F for 30 minutes. Flavors actually improve the next day! Store leftovers in the fridge for 4-5 days or freeze for up to 3 months.

Trained in classic French technique but raised on slow-cooked ribs and spicy rubs, she blends culinary skill with smoke and soul.
- Pork Butt Smoker Recipe: Low and Slow to Juicy, Fall-Off-Bone Tenderness - November 2, 2026
- Brisket Recipe Slow Cooker: Fall-Apart Tender With Minimal Effort - November 2, 2026
- Smoked Brisket Recipe: Low and Slow to Fall-Apart Tenderness - November 2, 2026