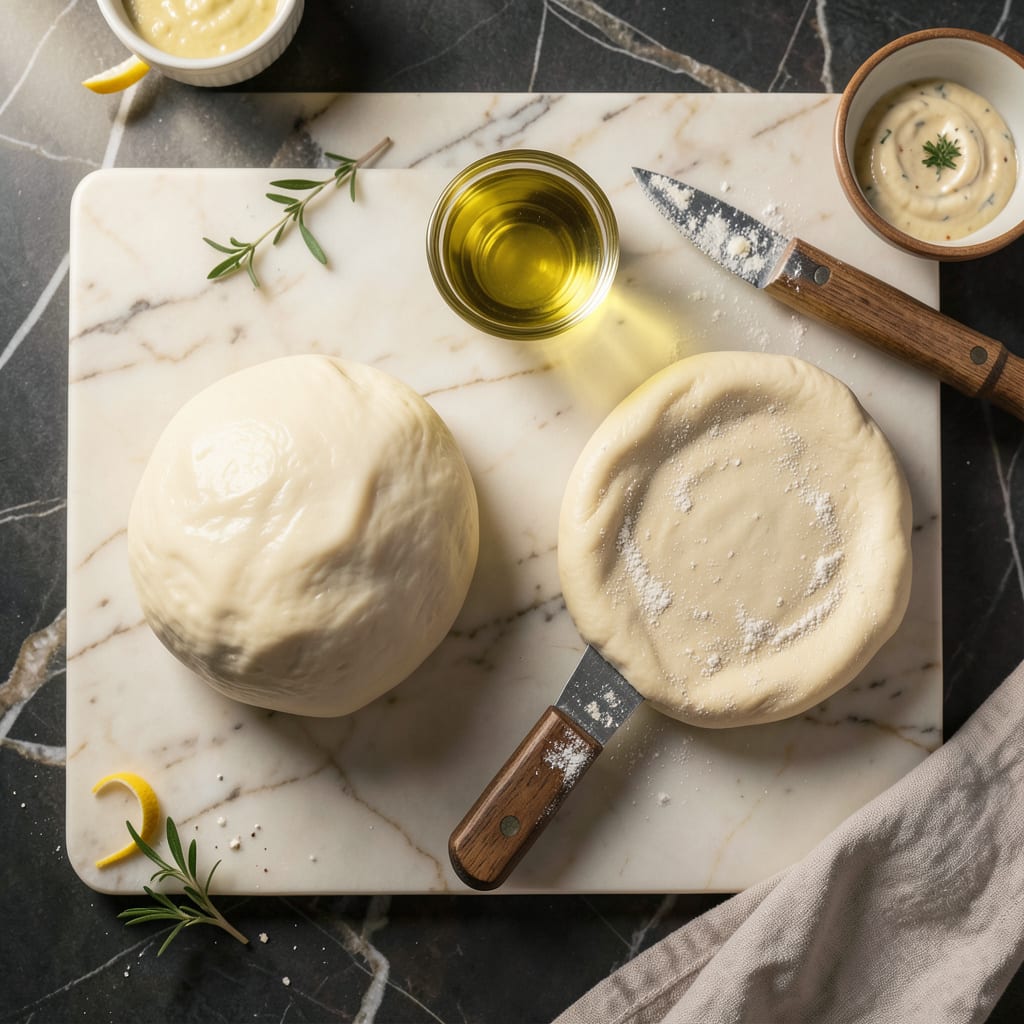
Nothing ruins pizza night faster than dough that fights back—springing into place when you try to stretch it, refusing to hold its shape. I’ve been there, wrestling with elastic dough that behaves more like a rubber band than the supple, stretchy base you want. The good news? This isn’t a lost cause, and the fix is simpler than you think.
Most elastic dough problems come down to two things: overdeveloped gluten or improper resting. When you knead too much or let dough rise too long, those gluten strands get tighter and tighter. The dough becomes tough instead of pliable. I learned this the hard way during my first attempt at Neapolitan-style pizza—what should have been a crispy crust turned into chewy disappointment.
Here’s what works: first, stop kneading the moment the dough comes together. Second, give it the right amount of rest time—not too little, not too much. The perfect window is when the dough feels relaxed but still has some spring when poked. That’s your sweet spot for stretchable, workable dough that won’t snap back.
By the time you finish these adjustments, you’ll have dough that stretches easily, holds its shape, and bakes into that perfect, crispy crust we’re all after. No more wrestling matches with your pizza base—just smooth sailing to cheesy, crispy perfection. Let’s get that dough under control.
📚 In This Guide
- What You’ll Need
- Instructions
- Tips and Common Mistakes
What Youll Need
- ● All-purpose or bread flour – 3½ cups (440g) (high-protein flour for better structure)
- ● Instant yeast – 1 packet (2¼ tsp or 7g) (or active dry yeast, proofed first)
- ● Warm water – 1¼ cups (300ml) (105–110°F / 40–43°C for yeast activation)
- ● Salt – 1½ tsp (9g) (enhances flavor and controls yeast)
- ○ Olive oil – 2 tbsp (30ml) (optional, for softer dough)
- ○ Sugar or honey – 1 tsp (5g) (optional, helps yeast activation)
- ● Stand mixer with dough hook (or a large bowl + wooden spoon for hand-mixing)
- ● Kitchen scale (for precise measurements)
- ● Plastic wrap or damp towel (to cover dough while resting)
- ○ Rolling pin (optional, for shaping if stretching is difficult)
- ● Pizza stone or baking sheet (preheated for best results)
- ○ Bench scraper (optional, for dividing dough)
- ● Patience! ⏳ (dough needs 1–2 hours to rise at room temp)
Instructions for Fixing Elastic Pizza Dough
You’re about to transform that stubborn, springy dough into the perfect pizza base—let’s make it happen!
Diagnose the Dough’s Condition
First, let’s assess exactly what we’re working with. Take your dough out of the bowl and place it on a lightly floured surface. If it immediately springs back when you try to stretch it, or if it feels tight and dense, we’ve confirmed the elasticity issue.
Check the temperature of your dough—it should feel slightly cool to the touch, not cold from the fridge. Cold dough is naturally more elastic. Also notice if the surface looks very smooth and taut; this indicates over-developed gluten which is causing the springiness we need to fix.
Relax the Gluten Through Strategic Resting
The secret to fixing elastic dough is giving the gluten strands time to relax. Divide your dough into 4 equal portions (for personal pizzas) and shape each into a smooth ball. Place them on a floured surface, cover with a clean kitchen towel, and let rest at room temperature.
Here’s the game-changer: most recipes say to rest for 30 minutes, but I’ve found that 1 full hour makes a dramatic difference with overly elastic dough. The gluten will gradually relax, making the dough much more cooperative. You’ll actually see the balls spread slightly as the gluten unwinds—this visual cue tells you it’s working!
For even better results, create a warm environment by placing the covered dough near your preheating oven (but not too close). The gentle warmth accelerates the relaxation process without over-proofing the dough.
Use the Two-Stage Stretching Technique
After resting, it’s time to shape your pizza. Start by gently pressing one dough ball with your fingertips, working from the center outward while leaving a 1-inch border for the crust. Don’t use a rolling pin—this compresses the dough and makes it tough.
Here’s my professional trick: stretch the dough to about 80% of your final size, then let it rest for 5 minutes before final shaping. This two-stage approach gives the gluten one last chance to relax before you create the final pizza base. You’ll feel the difference immediately—the dough will stretch much more easily without fighting back.
As you stretch, if the dough starts resisting again, don’t force it. Let it rest for another 3-5 minutes and try again. The key is patience—rushing this step is what causes tears and uneven crusts.
Pre-Bake for Guaranteed Crispiness
To ensure your pizza doesn’t turn out chewy despite the previously elastic dough, we’ll use a pre-baking technique. Place your stretched dough on a piece of parchment paper (this makes transferring easier) and dock it all over with a fork to prevent large air bubbles from forming.
Preheat your oven to its highest setting—typically 500-550°F—with a pizza stone or inverted baking sheet inside. Slide your dough (still on the parchment) onto the hot stone and bake for 3-4 minutes until it just starts to puff slightly and turn opaque. This head start creates a crispy foundation before you add toppings.
Watch for the edges to just begin turning light golden brown—this is your visual cue that the base is set. The parchment will char slightly at the edges, which is normal and actually adds great flavor. Now you’re ready to add your sauce and toppings with confidence!
Final Bake with Toppings
After pre-baking, add your sauce and toppings quickly but carefully. Return the pizza to the oven and bake for 8-12 minutes until the crust is deep golden brown and the cheese is bubbly with some light browning in spots.
The pre-baked base will now crisp up beautifully without becoming tough. You’ll get that perfect combination of crispy bottom, airy crust, and properly cooked toppings. The cheese should be fully melted with some browned spots, and when you tap the bottom of the crust with a spatula, it should sound hollow—this auditory check confirms perfect doneness.
Let your pizza rest for 2 minutes before slicing—this allows the cheese to set slightly so it doesn’t all slide off when you cut into it. The crust should be crisp enough to hold its shape when sliced, yet still have that wonderful chewy interior that makes great pizza so satisfying.
Tips and Common Mistakes for Perfect Pizza Dough Stretch
Transforming elastic dough into pizza perfection is all about technique—I’ve learned these game-changing tricks through years of trial and error.
The Resting Secret: That 1-hour rest in Step 2 isn’t just downtime—it’s when the magic happens! I’ve found that placing the covered dough near (but not too close to) your preheating oven creates the ideal warm environment. The gentle heat helps relax the gluten faster than room temperature alone. Watch for the dough balls to spread slightly—this visual confirmation means the gluten is properly relaxing and you’re ready for stretching.
Stretching Technique: In Step 3, when you stretch to 80% of final size, use your knuckles rather than fingertips for more even pressure. This prevents creating thin spots that could tear when adding toppings. The 5-minute rest between stretches is non-negotiable—I learned this after ruining too many pizzas by rushing! You’ll feel the difference when the dough finally cooperates without springing back.
Pre-Bake Perfection: During the 3-4 minute pre-bake in Step 4, don’t walk away! Watch for the edges to turn just barely opaque—this is your window to pull it out. The parchment will char slightly at the edges, which might look concerning but actually adds amazing flavor. I like to rotate the pizza 180 degrees halfway through this short bake to ensure even cooking on my home oven’s uneven heat.
Final Bake Visuals: For the 8-12 minute final bake in Step 5, look for the cheese to develop small browned spots and the crust edges to turn deep golden brown. The hollow sound when tapping the bottom is your auditory confirmation of perfect doneness. I always set my timer for 8 minutes, then check every minute after—that final stretch of baking happens fast!
Pro Tips for Pizza Dough Too Elastic
- Transforming elastic dough into pizza perfection is all about technique—I’ve learned these game-changing tricks throu…
- The Resting Secret: That 1-hour rest in Step 2 isn’t just downtime—it’s when the magic happens! I’ve found that placi…
- Stretching Technique: In Step 3, when you stretch to 80% of final size, use your knuckles rather than fingertips for …
Frequently Asked Questions
Why is my pizza dough too elastic and hard to stretch?
Overdeveloped gluten is the usual culprit! Kneading too long, using high-protein flour (like bread flour), or letting the dough rest insufficiently can make it bounce back. Try a shorter knead (5-8 mins), use 00 flour for a tender crumb, or let it rest 1-2 hours at room temp to relax the gluten.
Can I fix elastic dough without starting over?
Yes! Let the dough rest covered at room temp for 30-60 minutes—gluten relaxes over time. If still stubborn, lightly oil your hands and gently press (don’t pull) it into shape. For extreme cases, roll it thin with a pin, then stretch by hand.
How long should I knead pizza dough to avoid elasticity?
For hand-kneading: 8-10 minutes max (until smooth but still soft). Stand mixer? 5-6 minutes on low. Over-kneading = tough dough. Test by poking it—if it springs back slowly, you’re golden!
What’s the best flour for stretchy (but not elastic) pizza dough?
00 flour (Italian-style) is ideal—low protein (11-12%) for tender, easy-to-stretch dough. All-purpose flour works too (12-13% protein). Avoid bread flour (>14% protein) unless you love a chewy crust. Mix in 10% semolina for extra crispiness!
Does cold fermentation help reduce dough elasticity?
Cold-proofing (24-72 hours in the fridge) relaxes gluten and boosts flavor. Divide dough into balls, refrigerate in airtight containers, then bring to room temp 1-2 hours before shaping. Patience pays off with a silky, cooperative dough!
If your pizza dough is too elastic, don’t stress—it’s fixable! 🎯 The key is balancing hydration, kneading time, and rest. With a few tweaks (like adjusting flour, using the right technique, or letting it proof longer), you’ll be on your way to a perfectly stretchy, crispy crust in no time.
Ready to put these tips to the test? Grab your dough, try one of the fixes above, and get baking—your best homemade pizza is just a roll away! 🍕

Trained in classic French technique but raised on slow-cooked ribs and spicy rubs, she blends culinary skill with smoke and soul.
- Recipe for Boneless Pork Chops in Cast Iron Skillet: Sear and Baste to Juicy Perfection - October 3, 2026
- Recipe for Boneless Cross Rib Roast: Slow-Roasted Beef with Herb Crust - October 3, 2026
- Hamburgers in Sauce Recipe Crock Pot: Slow-Cooked Savory Delight - October 3, 2026