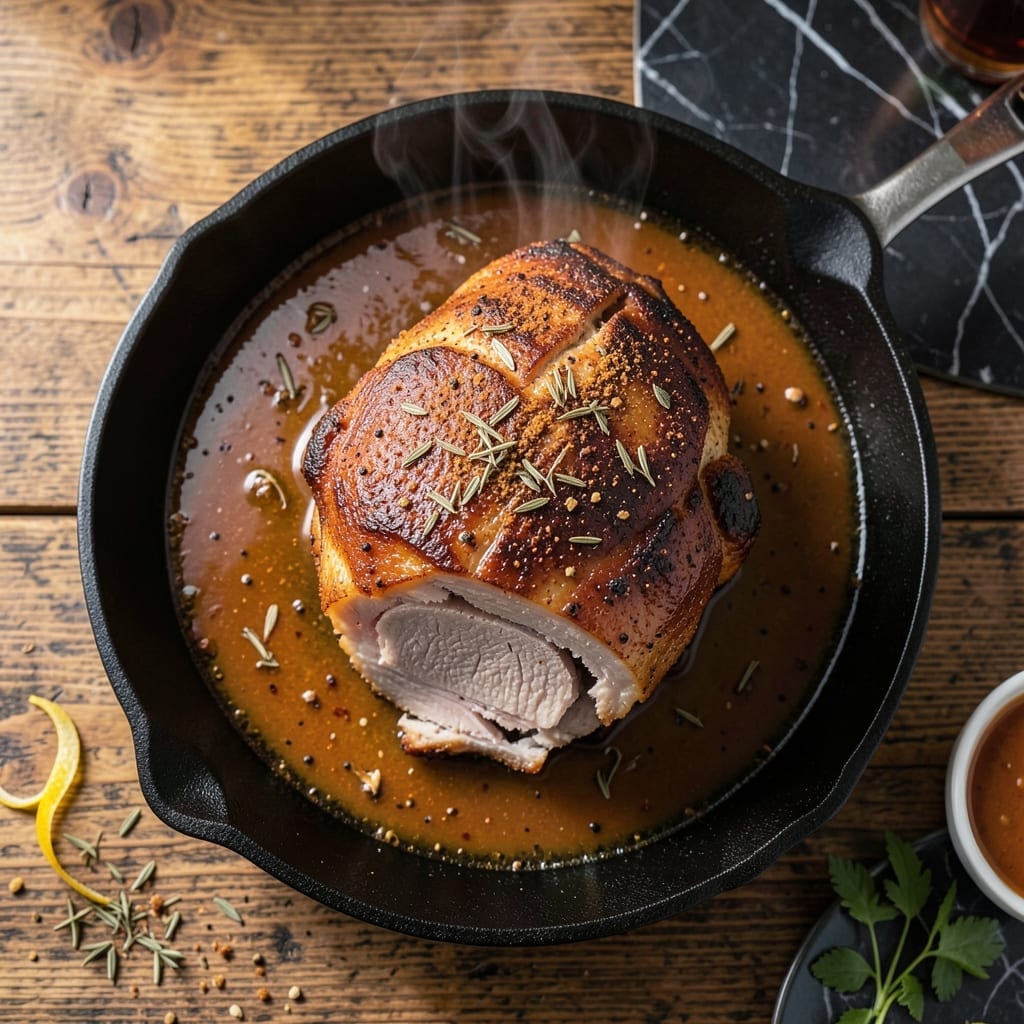
This oven-roasted pork shoulder butt transforms tough cuts into fall-apart tender perfection with minimal effort. The slow cooking process breaks down connective tissue, creating meat that shreds at the touch of a fork.
I’ve refined this method to ensure consistent results every time. A simple dry rub and low oven temperature work together to develop deep, savory flavors while maintaining moisture.
The result is juicy, flavorful pork with a caramelized exterior and tender interior. It’s ideal for sandwiches, tacos, or serving as a hearty main course.
This technique guarantees restaurant-quality results at home with just a few basic ingredients and 4-5 hours of hands-off cooking.
Ingredients for Pork Shoulder Butt Roast Recipe in Oven
Transform tough pork into fall-apart tender perfection with these essential ingredients for oven roasting.
| Ingredient | Amount | Notes |
|---|---|---|
| Pork Shoulder Butt 🐖 | 4 lb | Bone-in preferred for flavor |
| Kosher Salt 🧂 | 2 tbsp | Diamond Crystal preferred |
| Black Pepper 🌶️ | 1 tbsp | Freshly ground for best results |
| Garlic Powder 🧄 | 1 tbsp | Not garlic salt |
| Onion Powder 🧅 | 1 tbsp | Fine ground preferred |
| Smoked Paprika 🌶️ | 2 tsp | Sweet or hot variety |
| Dried Oregano 🌿 | 2 tsp | Mediterranean oregano preferred |
| Brown Sugar 🧈 | ¼ cup | Light or dark variety |
| Olive Oil 🫒 | 2 tbsp | Extra-virgin for richness |
| Apple Cider Vinegar 🍏 | 2 tbsp | Balances rub sweetness |
| Chicken Stock 🍲 | 1 cup | Low-sodium preferred |
| Yellow Onion 🧅 | 1 whole | Large, roughly chopped |
| Garlic Cloves 🧄 | 6 cloves | Peeled and smashed |
[recipe_ingredient_scaler]
The pork shoulder butt is non-negotiable here. Bone-in yields superior flavor and moisture, though boneless works in a pinch. Source from Costco or Whole Foods for consistent marbling. For the dry rub, Diamond Crystal kosher salt is the professional standard—its flaky texture adheres better to the meat’s surface. The smoked paprika adds depth, while brown sugar creates that coveted caramelized crust.
Out of smoked paprika? Regular paprika plus a pinch of liquid smoke gets you close. No apple cider vinegar? White vinegar or lemon juice at the same quantity works. For the stock, vegetable broth substitutes fine. The onion and garlic can be omitted if you’re short on time, but they add aromatic depth. For extra richness, swap olive oil for avocado oil (higher smoke point).
The raw pork keeps in the fridge for 3-4 days or freezes for 6-12 months. Once cooked, shredded pork stays fresh for 4-5 days refrigerated or 3 months frozen. Store in airtight containers with some cooking liquid to maintain moisture.
Why You’ll Love This Recipe
- Set It and Forget: I rub the shoulder with salt, pepper, and those powders, pop it in the oven, and let the oven do the heavy lifting for hours.
- Garlic-Onion Crush: The combo of garlic and onion powder gives every bite that deep, savory punch I crave without any fancy marinades.
- Feeds the Gang: One roast makes enough for Sunday supper plus sandwiches all week—my family actually fights over the leftovers.
- Budget Hero: Pork shoulder is cheap, but with just salt and spices it turns into a meal that feels like a splurge. Honestly, it’s my secret to eating well without breaking the bank.
Step-by-Step Instructions for Pork Shoulder Butt Roast in Oven
This method guarantees fall-apart tenderness with a caramelized crust every time.
Step 1: Prepare the Pork Shoulder Butt
Pat the 4 lb Pork Shoulder Butt dry with paper towels to ensure optimal browning. In a small bowl, combine the 2 tbsp Kosher Salt, 1 tbsp Black Pepper, 1 tbsp Garlic Powder, 1 tbsp Onion Powder, 2 tsp Smoked Paprika, 2 tsp Dried Oregano, and 0.25 cup Brown Sugar.
Rub this mixture evenly over all surfaces of the pork, pressing gently to adhere. This dry rub creates a flavorful bark while enhancing the natural richness of the meat.
Step 2: Sear and Deglaze for Depth of Flavor
Heat the 2 tbsp Olive Oil in a large Dutch oven over medium-high heat. Once shimmering, sear the pork on all sides for 3-4 minutes per side until deeply browned. This step develops complex flavor compounds that will infuse the dish.
Remove the pork and reduce heat to medium. Add the roughly chopped 1 whole Yellow Onion and 6 cloves Garlic Cloves to the pot, cooking for 2 minutes. Pour in the 2 tbsp Apple Cider Vinegar to deglaze, scraping up all browned bits from the bottom.
Step 3: Slow-Roast to Perfection
Return the pork to the Dutch oven and pour in the 1 cup Chicken Stock. The liquid should come about halfway up the pork. Cover tightly and transfer to a preheated 325°F oven.
Roast for 3-4 hours, turning the pork halfway through, until the internal temperature reaches 195-200°F and the meat pulls apart easily with a fork. The low and slow method breaks down collagen into gelatin, creating that signature melt-in-your-mouth texture.
Step 4: Rest and Shred
Carefully transfer the pork to a cutting board and tent loosely with foil. Let it rest for 15-20 minutes—this allows the juices to redistribute throughout the meat. The pork should be incredibly tender at this point, with the bone (if using bone-in) slipping out cleanly.
Shred the pork using two forks, pulling it apart along the natural grain. The meat should separate effortlessly, with each piece coated in the rich cooking liquid. Serve the shredded pork with some of the pan juices spooned over the top for maximum flavor and moisture.
Pro Tips For Making Pork Shoulder Butt Roast Recipe In Oven
- Start Low and Slow: Set your oven to 275°F—any higher and the fat won’t render properly, leaving you with a tough roast. I learned this the hard way after pulling a dry, chewy shoulder out at 325°F.
- Pat It Dry First: Blot the pork shoulder with paper towels before seasoning, or the rub won’t stick and you’ll end up with a steamed exterior instead of a crust. Sounds tedious, but it actually changes the outcome.
- Skip the Rush: Resist the urge to crank the heat to speed things up; pork shoulder needs 6-8 hours to break down properly. After burning three batches trying to hurry, I finally figured out patience is the thing that matters most.
- Rest Before Slicing: Give it a solid 20-30 minutes under foil after pulling it from the oven, or all the juices will spill onto the cutting board. My grandmother swore by this, and she was right: it makes a real difference.
Dietary Considerations for This Recipe
Keto-Friendly Adaptation
This dish can easily fit a keto diet by omitting the brown sugar from the dry rub. Replace it with 1 tbsp erythritol or monk fruit sweetener for similar caramelization without the carbs.
Gluten-Free Status
All ingredients in this recipe are naturally gluten-free. Just verify your chicken stock is certified gluten-free, as some brands use wheat-based thickeners. I always check the label on Swanson or Pacific Foods brands.
Dairy-Free and Nut-Free
This creation contains no dairy or nuts, making it safe for those with allergies. The olive oil and all spices are naturally free from these common allergens. 💪
Low-Sodium Option
To reduce sodium, cut the kosher salt to 1 tbsp and use low-sodium chicken stock. You can boost flavor with extra garlic powder and onion powder.
Slow Cooker Method
For hands-off cooking, use a slow cooker on low for 8-10 hours. Follow the same prep steps but skip the searing. The result will be just as tender, though it won’t develop the same caramelized crust.
Reheating Leftovers
Store in airtight containers with some cooking liquid for up to 4 days. Reheat gently in a 300°F oven with a splash of stock to prevent drying out. 🔥
Nutrition Facts
Frequently Asked Questions
What’s the ideal internal temperature for pull-apart tenderness?
Aim for 195-200°F on a meat thermometer. At this range, collagen fully breaks down into gelatin, creating that signature melt-in-your-mouth texture.
Can I use a boneless cut instead?
Yes, but bone-in yields better flavor and moisture. If using boneless, reduce cooking time by about 30 minutes since it cooks faster without the bone.
How do I prevent the meat from drying out?
Keep it covered tightly and don’t skip the 15-20 minute resting time. Also, store leftovers with some cooking liquid in an airtight container.
What if I don’t have a Dutch oven?
Use a heavy oven-safe pot with a tight lid or cover a roasting pan with foil. The key is maintaining moisture during the 3-4 hour cooking time.

Trained in classic French technique but raised on slow-cooked ribs and spicy rubs, she blends culinary skill with smoke and soul.
- Recipe for Boneless Pork Chops in Cast Iron Skillet: Sear and Baste to Juicy Perfection - October 3, 2026
- Recipe for Boneless Cross Rib Roast: Slow-Roasted Beef with Herb Crust - October 3, 2026
- Hamburgers in Sauce Recipe Crock Pot: Slow-Cooked Savory Delight - October 3, 2026