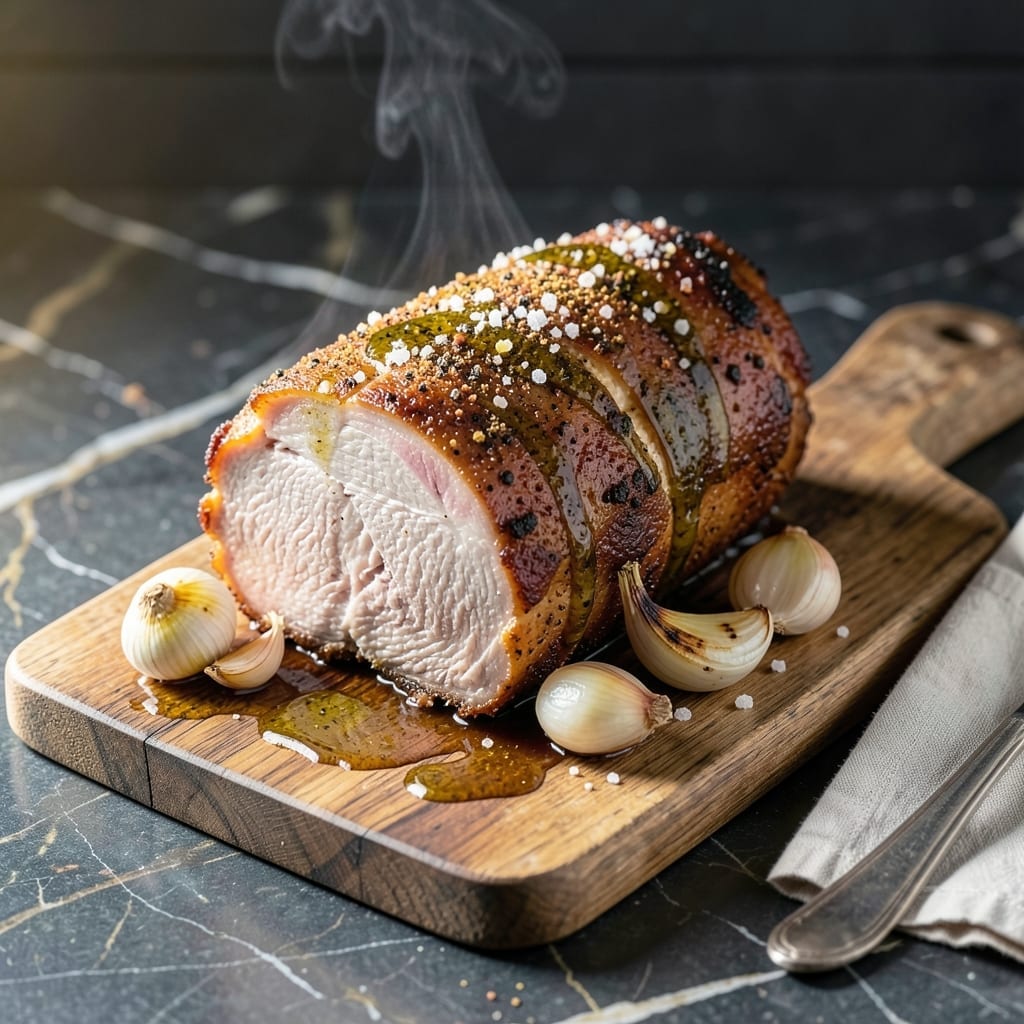
I developed this oven method after years of experimenting with pork shoulder, and it delivers pull-apart tenderness every time without fail.
The secret is low and slow roasting at a precise temperature, allowing the connective tissue to break down gradually. A simple dry rub enhances the natural flavor without overpowering the meat.
What emerges from your oven is succulent pork with a caramelized exterior and juices that pool on the cutting board. The meat shreds effortlessly with just a fork.
Perfect for sandwiches, tacos, or serving alongside your favorite sides. The results speak for themselves.
Ingredients for Pork Shoulder Picnic Roast Recipe Oven
A handful of spices and a pork shoulder is all it takes for that fall-apart magic.
| Ingredient | Amount | Notes |
|---|---|---|
| Pork Shoulder Picnic Roast 🥩 | 4 lb | Bone-in, skin-on preferred |
| Kosher Salt 🧂 | 2 tbsp | Diamond Crystal preferred |
| Black Pepper 🌶️ | 1 tbsp | Freshly ground coarse |
| Garlic Powder 🧄 | 1 tbsp | Not garlic salt |
| Onion Powder 🧅 | 1 tbsp | Fresh ground preferred |
| Smoked Paprika 🌶️ | 2 tsp | For depth of flavor |
| Dried Oregano 🌿 | 1 tbsp | Mediterranean variety preferred |
| Brown Sugar 🍚 | 2 tbsp | Light or dark works |
| Olive Oil 🫒 | 2 tbsp | For searing and moisture |
| Apple Cider Vinegar 🍏 | ¼ cup | For tenderizing acidity |
| Chicken Stock 🥣 | ½ cup | Low-sodium preferred |
| Yellow Onion 🧅 | 1 whole | Quartered for roasting |
| Carrots 🥕 | 3 whole | Peeled, cut into chunks |
| Celery Stalks 🌿 | 3 pieces | Cut into large pieces |
[recipe_ingredient_scaler]
The pork is the star here. Bone-in, skin-on picnic roast gives the best texture and flavor—look for good marbling at Costco or your local butcher. The dry rub components are pantry staples, but if your spices are ancient (you know who you are), Penzeys has fantastic fresh options. Don’t skip the brown sugar—it caramelizes beautifully with the spices (worth the extra minute).
No smoked paprika? Regular paprika plus a pinch of chipotle powder works. Out of apple cider vinegar? White vinegar or lemon juice at the same amount. The chicken stock can be swapped for vegetable stock if that’s what you’ve got. Short on time? Cut the roast into smaller chunks—reduces cooking time significantly.
Leftovers keep beautifully—shred and store in its juices for up to 5 days in the fridge or 3 months frozen. The fat solidifies when cold, so reheat gently. Perfect for meal prep (I always make extra).
Why You’ll Love This Recipe
- Set It and Forget It: I rub the shoulder with salt, pepper, garlic and onion powder, pop it in the oven, and let the dry heat do all the heavy lifting.
- That Crispy Bark: Honestly, the way the spices caramelize into a dark, crackling crust while the inside stays juicy—it’s the reason I make this every other Sunday.
- Feeds My Crew Twice: One 4-pound picnic roast gives us dinner plus enough pulled pork for tacos the next day.
- Budget Hero: Between us, picnic shoulder costs half what a loin does and still delivers rich, porky flavor that tastes anything but cheap.
Step-by-Step Instructions for Pork Shoulder Picnic Roast Oven
Here’s my method for fall-apart tender pork shoulder with minimal hands-on time.
Step 1: Season the Pork Shoulder Generously
Pat the 4 lb Pork Shoulder Picnic Roast dry with paper towels. This removes excess moisture so the seasoning adheres properly and the surface browns better. I can’t stress this enough—dry meat sears better.
In a small bowl, combine the 2 tbsp Kosher Salt, 1 tbsp Black Pepper, 1 tbsp Garlic Powder, 1 tbsp Onion Powder, 2 tsp Smoked Paprika, 1 tbsp Dried Oregano, and 2 tbsp Brown Sugar. Rub this mixture all over the pork, pressing firmly to create a thick crust. Let it sit at room temperature for 30 minutes while you preheat the oven.
Step 2: Sear for Deep Flavor Development
Heat the 2 tbsp Olive Oil in a large Dutch oven over medium-high heat. When the oil shimmers, add the seasoned pork shoulder. Sear undisturbed for 3-4 minutes per side until deeply browned. You’re building a flavor foundation here—don’t rush.
The pork is ready to flip when it releases easily from the pot. This means the crust has formed properly. After searing all sides, transfer the pork to a plate temporarily. The fond (browned bits) left in the pot will dissolve into your braising liquid, adding incredible depth.
Step 3: Add Aromatics and Braising Liquid
To the same Dutch oven, add the 1 whole Yellow Onion (quartered), 3 whole Carrots (peeled and cut into chunks), and 3 pieces Celery Stalks (cut into large pieces). Cook for 2-3 minutes until the vegetables begin to soften slightly.
Pour in the 0.25 cup Apple Cider Vinegar and 0.5 cup Chicken Stock, scraping up all the browned bits from the bottom. The vinegar adds brightness that cuts through the richness of the pork. Return the pork to the pot, along with any accumulated juices from the plate.
Step 4: Slow Roast to Tender Perfection
Cover the Dutch oven with a tight-fitting lid and transfer to a preheated 325°F oven. Cook for 3-4 hours, or until the pork is fork-tender and pulls apart easily. I start checking at 3 hours—every oven runs differently.
You’ll know it’s done when an instant-read thermometer inserted into the thickest part reads 195-203°F. But the real test is the fork test: if it slides in with no resistance and you can pull the meat apart with gentle pressure, it’s ready. The collagen has broken down into gelatin, giving you that signature tenderness.
Step 5: Rest and Shred for Serving
Carefully transfer the pork to a cutting board and tent loosely with foil. Let it rest for 15-20 minutes. This allows the juices to redistribute throughout the meat. If you skip this step, you’ll lose all those precious juices to the cutting board.
Shred the pork using two forks, discarding any large pieces of fat or bone. Skim excess fat from the cooking liquid and pour some of the braising liquid over the shredded pork to keep it moist. Serve immediately while hot and juicy.
Pro Tips For Making Pork Shoulder Picnic Roast Recipe Oven
- Start High, Finish Low: Sear the picnic roast at 450°F for 20 minutes to crisp the fat cap, then drop to 300°F for the rest of the cook—this gives you crackling skin without drying out the meat.
- Score the Fat: Cut 1/4-inch deep crosshatches into the fat cap before seasoning so the salt and spices penetrate better and the fat renders down evenly.
- Skip the Rush: I learned this the hard way—pull it at 195°F internal temp, not when it “looks done,” or the collagen won’t break down and you’ll chew on tough meat.
- Double the Rub: Sounds like overkill, but use twice as much garlic and onion powder as you think—picnic roast is dense and can handle bold seasoning without tasting overpowering.
Common Mistakes When Making pork shoulder picnic roast recipe oven
Skipping the Dry Step
I can’t count how many times I’ve seen people rush straight to seasoning without drying the pork. Pat the 4 lb Pork Shoulder Picnic Roast thoroughly with paper towels first. Wet meat steams instead of searing, preventing that crucial crust from forming. 💡
Rushing the Sear
Don’t crowd the Dutch oven or move the pork too soon. It needs 3-4 minutes per side over medium-high heat to develop deep browning. The pork will release naturally when ready—if it sticks, it’s not ready to flip.
Using the Wrong Temperature
Low and slow is key. 325°F is the sweet spot for breaking down collagen without drying out the meat. Higher temps will cook the exterior too quickly, leaving the interior tough. I learned this the hard way with my first few attempts.
Skipping the Rest
After 3-4 hours in the oven, resist the urge to dig in immediately. Let the pork rest 15-20 minutes tented with foil. This allows juices to redistribute—cutting too soon sends them all to the cutting board.
Overlooking the Braising Liquid
Don’t discard the cooking liquid after removing the pork. Skim the fat and drizzle some over the shredded meat to maintain moisture. The apple cider vinegar and chicken stock add layers of flavor that elevate the final dish. 🔥
Checking Too Frequently
Every time you open the oven, you lose 25-50°F of heat. Trust the process and check only after the 3-hour mark. The fork test is more reliable than constantly opening the oven door.
Nutrition Facts
Frequently Asked Questions
Should I remove the skin before cooking?
Leave the skin on for extra flavor and crispiness. It helps seal in juices during the long roast and creates a delicious crackling texture.
Can I cook this at a higher temperature to save time?
Not recommended. Higher temps can dry out the meat before the collagen breaks down properly. Stick to 325°F for that perfect pull-apart texture.
What if my pork isn’t tender after 4 hours?
Check the internal temperature—it should reach 195-203°F. If it’s still tough, continue cooking in 30-minute increments until fork-tender.
How do I store leftovers?
Shred and store in its juices in an airtight container in the fridge for up to 5 days or freeze for 3 months. Reheat gently to preserve moisture.

Trained in classic French technique but raised on slow-cooked ribs and spicy rubs, she blends culinary skill with smoke and soul.
- Recipe for Boneless Pork Chops in Cast Iron Skillet: Sear and Baste to Juicy Perfection - October 3, 2026
- Recipe for Boneless Cross Rib Roast: Slow-Roasted Beef with Herb Crust - October 3, 2026
- Hamburgers in Sauce Recipe Crock Pot: Slow-Cooked Savory Delight - October 3, 2026