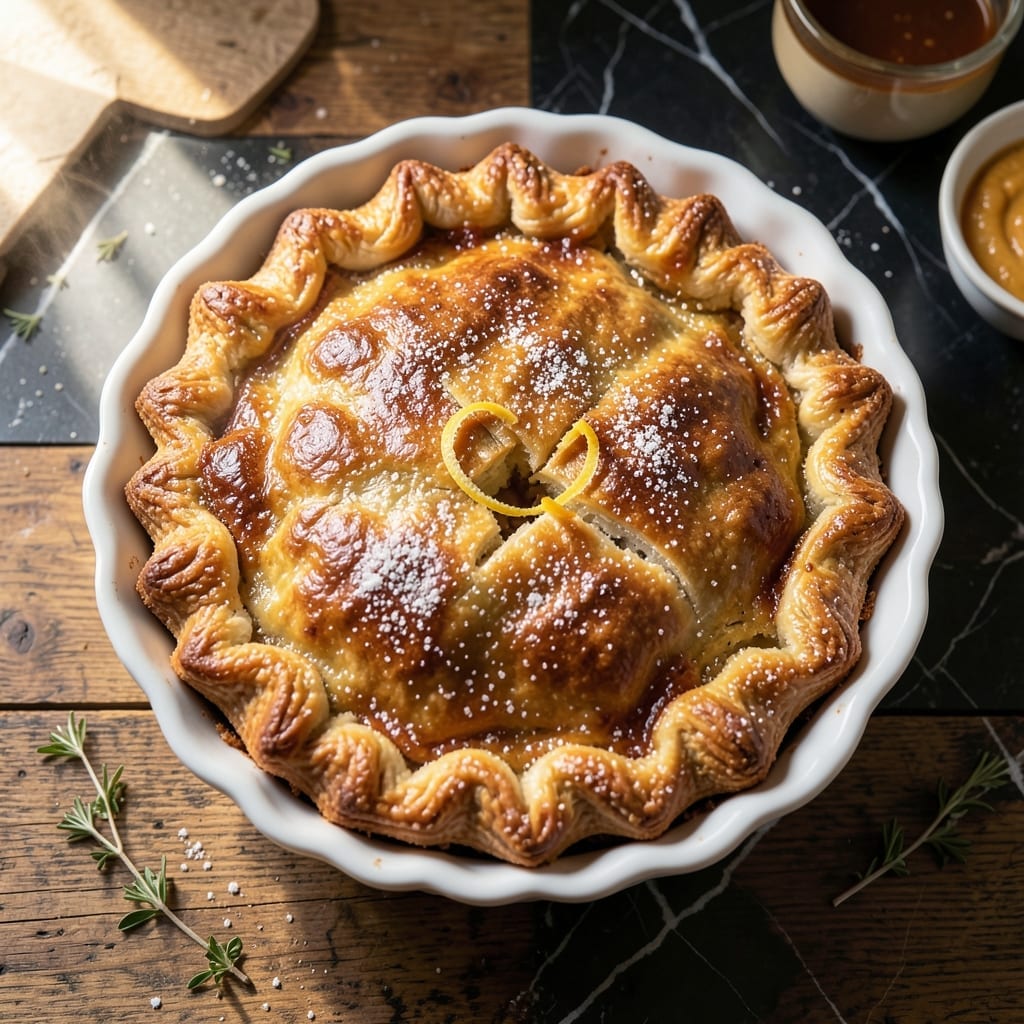
I still remember that 2019 pot pie disaster in my Boston apartment—tears, pizza delivery, and a vow to master crust. This recipe delivers the buttery flakes that shatter with every bite, a redemption years in the making.
Cold ingredients and minimal handling are key to achieving layers that separate into perfect flakes during baking. The technique is simple but precise, ensuring a tender yet sturdy crust that holds up to hearty fillings.
What emerges from the oven is a golden, crisp crust with visible layers, ready to encase your favorite pot pie filling. The buttery aroma alone signals this is no ordinary pastry.
This method works in any kitchen, even those smaller than most closets. Here’s how to create pastry that rivals any bakery.
Ingredients for Pot Pie Crust Recipe from Scratch
Cold butter and flour create the flaky layers that define this pastry.
| Ingredient | Amount | Notes |
|---|---|---|
| All-Purpose Flour 🌾 | 2 ½ cups | Spoon and level, don't scoop |
| Unsalted Butter 🧈 | 1 cup | Ice cold, cubed |
| Ice Water 💧 | ½ cup | Plus 1 tbsp as needed |
| Salt 🧂 | 1 tsp | Fine sea salt preferred |
| Granulated Sugar 🍚 | 1 tsp | Optional, for color |
| Egg 🥚 | 1 whole | For egg wash |
| Vinegar 🍯 | 1 tbsp | White or apple cider |
[recipe_ingredient_scaler]
The butter must be ice cold—Land O’Lakes or Plugrá work well. Use King Arthur or Gold Medal for the flour; both have consistent protein content. Cut the butter into small cubes and chill again before mixing. The vinegar tenderizes the gluten (worth the extra minute). If your kitchen is warm, chill your mixing bowl and pastry cutter too.
No vinegar? Lemon juice works at the same amount. Short on butter? Freeze the dough for 15 minutes between steps to keep it cold. For a richer flavor, substitute 1 tablespoon of butter with cream cheese. The sugar is optional but gives a lovely golden color to the crust.
The dough keeps in the fridge for 2 days or freezes for 1 month. Wrap it tightly in plastic—don’t let it dry out. Let it warm slightly before rolling to prevent cracking. Baked crusts stay crisp for 1 day at room temperature.
Why You’ll Love This Recipe
- 5-Minute Mix: I just pulse the flour, cold butter, and a pinch of sugar in the food processor—ice water brings it together faster than my morning coffee.
- Buttery Layers: That flaky crust? It’s all the cold butter creating pockets of golden perfection with every bite.
- Freezer Friendly: I roll out extra dough, freeze it flat, and pull it out for spontaneous pot pies or even quick tarts.
- Pantry Staples: Honestly, it’s just flour, butter, salt, sugar, and water—no special trips to the store.
Step-by-Step Instructions for Pot Pie Crust From Scratch
This method delivers flaky, golden layers that will elevate your next pot pie to perfection.
Step 1: Combine Dry Ingredients
In a large bowl, whisk together the 2.5 cups All-Purpose Flour, 1 tsp Salt, and 1 tsp Granulated Sugar until evenly distributed. The sugar is optional but adds a subtle golden color to the finished crust.
I always spoon and level the flour to avoid compacting it, which would make the dough tough. The fine sea salt ensures even distribution throughout the crust for consistent seasoning in every bite.
Step 2: Cut in the Cold Butter
Add the 1 cup Unsalted Butter, which should be ice cold and cut into ½-inch cubes. Use a pastry cutter or your fingers to work the butter into the flour mixture until the largest pieces are about the size of peas.
You’ll see the mixture start to resemble coarse crumbs with visible butter pieces—this is exactly what you want. The key is keeping the butter cold; if it melts, it will create a dense crust instead of flaky layers. Work quickly and handle the dough as little as possible.
If the butter starts to soften, pop the bowl into the freezer for 5 minutes to chill before continuing.
Step 3: Add Liquid and Form the Dough
Create a well in the center of the mixture and add the 0.5 cup Ice Water and 1 tbsp Vinegar. The vinegar tenderizes the gluten slightly, making the crust more forgiving to work with.
Use a fork to gently mix the liquid into the flour mixture until it just starts to come together. The dough will look shaggy and slightly dry—that’s perfect. Don’t overmix; you want just enough liquid to hold the dough together.
Turn the dough out onto a lightly floured surface and gently knead it 2-3 times just until it forms a cohesive ball. If the dough feels too dry, add up to 1 tbsp of additional ice water, but no more.
Step 4: Chill and Roll Out the Dough
Divide the dough into two equal portions, flatten each into a 1-inch-thick disc, and wrap them tightly in plastic wrap. Refrigerate for at least 1 hour (or up to 2 days). Chilling relaxes the gluten and re-solidifies the butter, making the dough easier to roll out.
On a lightly floured surface, roll out one disc to a ⅛-inch thickness, about 12 inches in diameter for a standard pie dish. The edges should be slightly larger than your pan to account for shrinkage during baking.
For a golden finish, brush the top crust with a beaten egg before baking. This creates a beautiful sheen and helps the crust brown evenly.
Step 5: Blind Bake or Fill and Bake
For a pre-baked crust (blind baking), line the dough with parchment paper, fill with pie weights or dried beans, and bake at 375°F for 15 minutes. Remove the weights and bake for an additional 10-12 minutes until the crust is light golden brown.
For a filled pot pie, add your filling to the bottom crust, top with the second rolled-out dough, and crimp the edges to seal. Cut a few slits in the top crust to allow steam to escape, then bake according to your pot pie recipe until the crust is deep golden brown and the filling is bubbly.
Let the crust cool slightly before slicing to allow it to set. The layers should separate easily, revealing the flaky texture you worked so hard to create.
Pro Tips For Making Pot Pie Crust Recipe From Scratch
- Chill the Butter: Cut your unsalted butter into small cubes and refrigerate for 15 minutes before mixing—I learned this the hard way after ending up with a tough, greasy crust.
- Use Ice Water: Fill a glass with water and ice cubes, then measure from that for the coldest possible liquid; it keeps the butter from melting prematurely in the dough.
- Don’t Overwork Dough: Mix just until the flour is barely incorporated and you see pea-sized butter pieces—after burning three batches, I finally figured out that less handling means flakier layers.
- Rest Before Rolling: Let the dough rest in the fridge for at least 30 minutes before rolling; my grandmother swore by this, and she was right: it relaxes the gluten for a tender crust.
Pro Cooking Tips for This Dish
Butter Temperature Control
Keep your 1 cup Unsalted Butter ice cold—cut into ½-inch cubes and return to the fridge between steps. If the butter softens, the layers won’t form properly, and you’ll end up with a dense crust. I learned this the hard way during that 2019 disaster. 💡
Minimal Handling Technique
Use a pastry cutter or your fingertips to work the butter into the flour until pea-sized pieces remain. Overworking the dough develops gluten, making the crust tough. Stop mixing once the dough just comes together—it should look shaggy, not smooth.
Chill Between Steps
If your kitchen is warm, chill the dough for 5 minutes between mixing and rolling. This prevents the butter from melting and ensures clean, distinct layers. I always freeze my bowl and cutter in summer to be extra safe.
Roll Evenly
Roll the dough to a consistent ⅛-inch thickness on a floured surface. Rotate the dough 90 degrees every few rolls to prevent sticking. Use a ruler if you’re unsure—precision matters for even baking.
Egg Wash for Shine
Brush the top crust with a beaten egg before baking for a golden finish. For extra crispness, sprinkle with coarse salt or flaky sea salt. This simple step makes your pie look bakery-perfect.
Prevent Soggy Bottoms
For pot pies, blind bake the bottom crust at 375°F for 10 minutes before adding the filling. This creates a barrier against moisture. Cut steam vents in the top crust to prevent a soggy, collapsed center. 🔥
Nutrition Facts
Frequently Asked Questions
Why does the butter need to stay cold?
Cold butter creates steam during baking, which separates the dough into flaky layers. If it melts prematurely, the crust will be dense instead of light and crisp.
Can I use a food processor instead of cutting by hand?
Yes, pulse the 1 cup Unsalted Butter with flour until pea-sized. Be careful not to overmix—just until the butter is evenly distributed. This saves time while keeping the texture perfect.
How do I prevent the edges from burning?
Cover the edges with foil or a pie shield during the last 10-15 minutes of baking. This protects them while allowing the center to brown fully.
Can I make this dough ahead of time?
The dough keeps in the fridge for up to 2 days or freezes for 1 month. Wrap it tightly in plastic to avoid drying out. Let it warm slightly before rolling.

Trained in classic French technique but raised on slow-cooked ribs and spicy rubs, she blends culinary skill with smoke and soul.
- Recipe for Boneless Pork Chops in Cast Iron Skillet: Sear and Baste to Juicy Perfection - October 3, 2026
- Recipe for Boneless Cross Rib Roast: Slow-Roasted Beef with Herb Crust - October 3, 2026
- Hamburgers in Sauce Recipe Crock Pot: Slow-Cooked Savory Delight - October 3, 2026