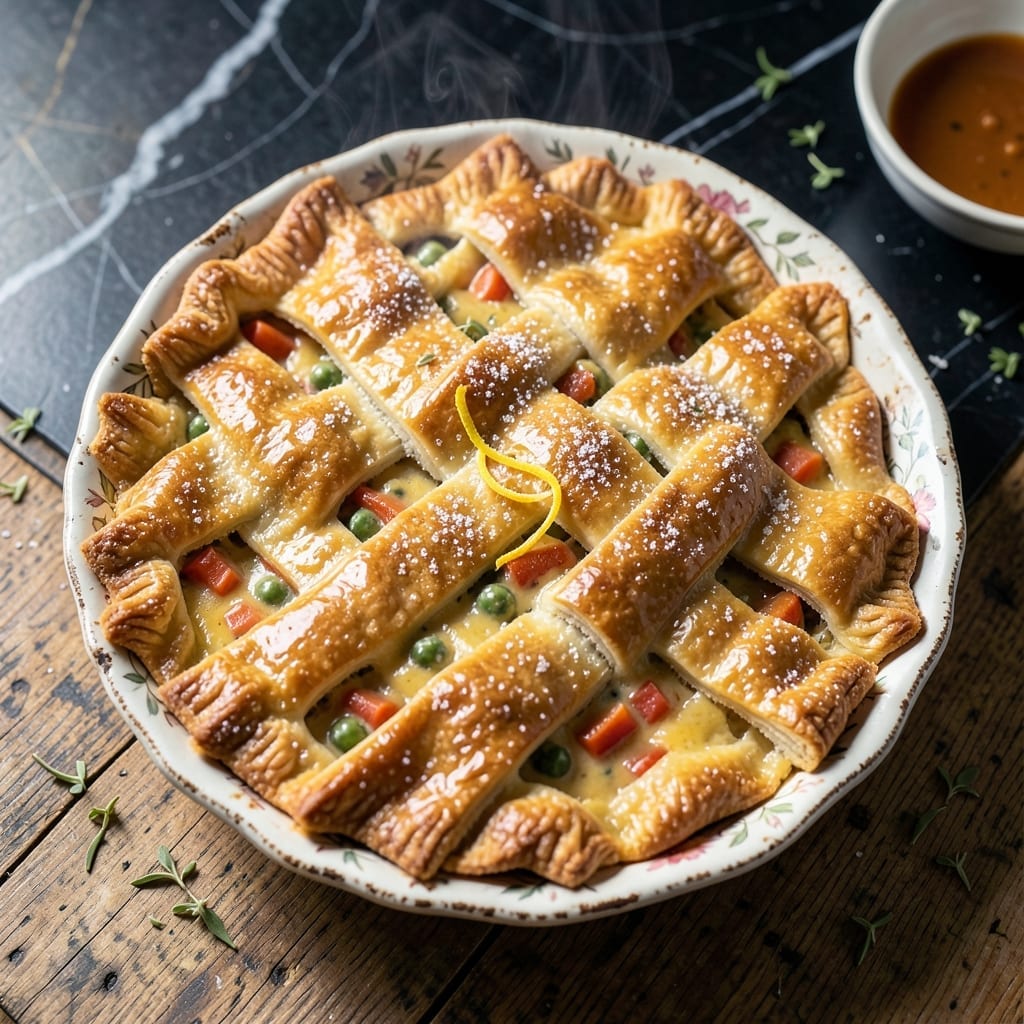
I developed this crust after my infamous 2019 pot pie disaster taught me butter isn’t the only path to flaky layers. This version proves plant-based fats can deliver that coveted golden, layered texture we all crave.
The secret lies in using cold vegetable shortening combined with a touch of oil. This creates pockets of fat that melt during baking, producing those flaky layers that shatter at the touch of a fork.
What emerges from the oven is a crust so tender and layered, you won’t believe it’s dairy-free. The edges turn golden brown while the bottom stays crisp, holding up perfectly to any creamy filling.
This method works in any kitchen, Boston triple-decker or otherwise. The dough comes together quickly and rests while you prepare the filling.
Ingredients for Pot Pie Crust Recipe No Butter
Cold shortening and oil create those flaky layers without any dairy at all.
| Ingredient | Amount | Notes |
|---|---|---|
| All-Purpose Flour 🌾 | 2 ½ cups | Plus extra for dusting |
| Vegetable Shortening 🧈 | ¾ cup | Very cold, cut into cubes |
| Neutral-Flavored Oil 🫒 | 2 tbsp | Like avocado or canola |
| Ice Water 💧 | ⅓ cup | Plus 1 tbsp as needed |
| Salt 🧂 | 1 tsp | Fine sea salt preferred |
| Granulated Sugar 🍚 | 1 tsp | Optional, for color |
| Apple Cider Vinegar 🍎 | 1 tsp | Helps tenderize dough |
[recipe_ingredient_scaler]
The shortening is non-negotiable here—Crisco is the gold standard, but any vegetable-based brand works. Look for the all-vegetable variety, not the butter-flavored kind. Store it in the fridge until you’re ready to use it. The oil should be neutral (skip the olive oil here). I grab mine from Trader Joe’s or any regular grocery store—they all work fine.
No shortening? Coconut oil in solid form can work but adds a slight flavor. Swap the oil for melted vegan butter if you’re okay with a hint of buttery taste. The vinegar might seem odd, but it’s doing important work—don’t skip it. If you’re out, lemon juice works in a pinch. The sugar is optional, but it helps with browning.
Dough keeps in the fridge for 2 days or freezes for 3 months (wrap it tight). Let it sit at room temp for 10 minutes before rolling. Leftover baked crust? Toast it up for croutons—zero waste.
Why You’ll Love This Recipe
- No-Fuss Mixing: I just stir the flour, shortening, oil, and ice water together—no butter to soften, no waiting around.
- Crisp & Flaky: Honestly, the shortening gives it that perfect tender crunch without any dairy aftertaste.
- Freezer Friendly: I’ll make a double batch and freeze one for next month’s pot pie emergency.
- Pocketbook Proof: Vegetable shortening and basic oil keep the cost way down, yet it still feels special.
Step-by-Step Instructions for Pot Pie Crust No Butter
Here’s the method that guarantees flaky, golden layers every time without dairy.
Step 1: Combine Dry Ingredients
In a large bowl, whisk together the 2.5 cups All-Purpose Flour, 1 tsp Salt, and 1 tsp Granulated Sugar. The sugar helps with browning, giving your crust that beautiful golden color. Make sure to break up any lumps in the flour so your dry ingredients are evenly distributed.
I like to use fine sea salt here because it dissolves more evenly in the dough. This step only takes 30 seconds but makes a big difference in the final texture of your crust.
Step 2: Cut in the Shortening
Add the 0.75 cup Vegetable Shortening (very cold and cut into cubes) to the flour mixture. Using a pastry cutter or two forks, work the shortening into the flour until the mixture resembles coarse crumbs with pea-sized pieces of shortening visible. This should take about 2-3 minutes of steady cutting.
The key to flaky layers is leaving some visible pieces of shortening – don’t overwork it. These little pockets of fat will create steam during baking, which makes those beautiful flaky layers we’re after. The mixture should look like wet sand with some larger pieces mixed in.
Step 3: Add Liquid Ingredients
Make a well in the center of your flour-shortening mixture. Add the 2 tbsp Neutral-Flavored Oil, 0.33 cup Ice Water, and 1 tsp Apple Cider Vinegar. The vinegar helps tenderize the dough, while the oil adds extra flakiness.
Using a fork, gently stir the mixture just until it starts to come together. You’ll notice the dough will look shaggy and slightly dry at first – that’s perfect. The goal is to use as little liquid as possible while still getting the dough to hold together.
Step 4: Form and Chill the Dough
Turn the dough out onto a lightly floured surface. Gently press it together into a rough ball, then divide into two equal portions. Flatten each portion into a disk about 1 inch thick. This shape makes rolling out much easier later.
Wrap each disk tightly in plastic wrap and refrigerate for at least 30 minutes (or up to 2 days). Chilling allows the shortening to firm up again and the gluten to relax, which prevents the crust from shrinking during baking. You’ll know it’s ready when the dough feels firm to the touch.
Step 5: Roll and Use the Crust
On a lightly floured surface, roll out one disk of dough to about ⅛ inch thickness. Start from the center and work your way out in all directions, turning the dough occasionally to prevent sticking. If the dough cracks, don’t worry – just press it back together.
Use the rolled crust immediately for your pot pie, or wrap and refrigerate for up to 2 days. For best results, don’t let the dough sit at room temperature too long before using. The crust should hold together well but still feel slightly cool to the touch when ready to use.
Pro Tips For Making Pot Pie Crust Recipe No Butter
- Chill the Shortening: Cut the vegetable shortening into small cubes and freeze for 15 minutes before mixing—this keeps it from melting into the flour and guarantees flaky layers.
- Use Ice-Cold Water: I learned this the hard way: if your water isn’t ice-cold, the oil and shortening will start to soften, making the crust tough instead of tender.
- Don’t Overwork It: Mix just until the dough comes together, even if it looks a little shaggy. Overmixing develops gluten, and that means a chewy crust instead of a light one.
- Add Vinegar: Sounds weird, but it works: replace 1 tablespoon of the ice water with white vinegar—it tenderizes the crust and makes it easier to roll out.
Flavor Customization for pot pie crust recipe no butter
Herb-Infused Crust
Add 1 tbsp chopped fresh rosemary or 1 tsp dried thyme to your dry ingredients. The herbs release aromatic oils during baking, creating a savory depth that pairs beautifully with chicken or vegetable fillings. I tested this in my tiny Boston kitchen—it’s a game-changer. 🌿
Cheesy Vegan Option
Mix in ½ cup nutritional yeast or ½ cup vegan Parmesan with the flour for a cheesy flavor without dairy. This adds a subtle umami note that works especially well with creamy mushroom or lentil fillings.
Spiced Sweet Version
For dessert pot pies, add 1 tsp cinnamon and ¼ tsp nutmeg to the dry ingredients. The warm spices complement apple or berry fillings beautifully. I learned this trick from Nonna’s apple pie recipe.
Extra Flaky Layers
Replace 2 tbsp ice water with 2 tbsp chilled vodka. The alcohol evaporates during baking, creating even more steam for ultra-flaky layers. It’s my secret for competition-worthy crusts.
Citrus Zest Twist
Add 1 tsp lemon or orange zest to brighten the flavor. This pairs wonderfully with seafood or spring vegetable fillings. Just a little zest makes the crust taste fresher and more complex. 💛
Whole Wheat Boost
Swap 1 cup all-purpose flour for 1 cup whole wheat flour. The nutty flavor works well with hearty fillings like beef or turkey. Add 1 extra tbsp ice water if the dough feels too dry.
Nutrition Facts
Frequently Asked Questions
Why use shortening instead of butter?
Shortening has a higher melting point than butter, creating more stable layers. It also contains no water, which means less steam and more control over flakiness. The result is a crust that stays crisp longer.
Can I use coconut oil instead of shortening?
Yes, but use solid coconut oil and chill it well first. Be aware it may add a slight coconut flavor to your crust. For neutral taste, stick with vegetable shortening.
How do I prevent a soggy bottom crust?
Pre-bake the bottom crust for 8-10 minutes before adding filling. Also, brush the crust with a thin layer of egg wash or oil before adding wet fillings. This creates a barrier against moisture.
Can I make this dough ahead of time?
The dough keeps well in the fridge for up to 2 days or in the freezer for 3 months. Just wrap it tightly in plastic wrap. Let it sit at room temperature for 10 minutes before rolling.

Trained in classic French technique but raised on slow-cooked ribs and spicy rubs, she blends culinary skill with smoke and soul.
- Recipe for Boneless Pork Chops in Cast Iron Skillet: Sear and Baste to Juicy Perfection - October 3, 2026
- Recipe for Boneless Cross Rib Roast: Slow-Roasted Beef with Herb Crust - October 3, 2026
- Hamburgers in Sauce Recipe Crock Pot: Slow-Cooked Savory Delight - October 3, 2026