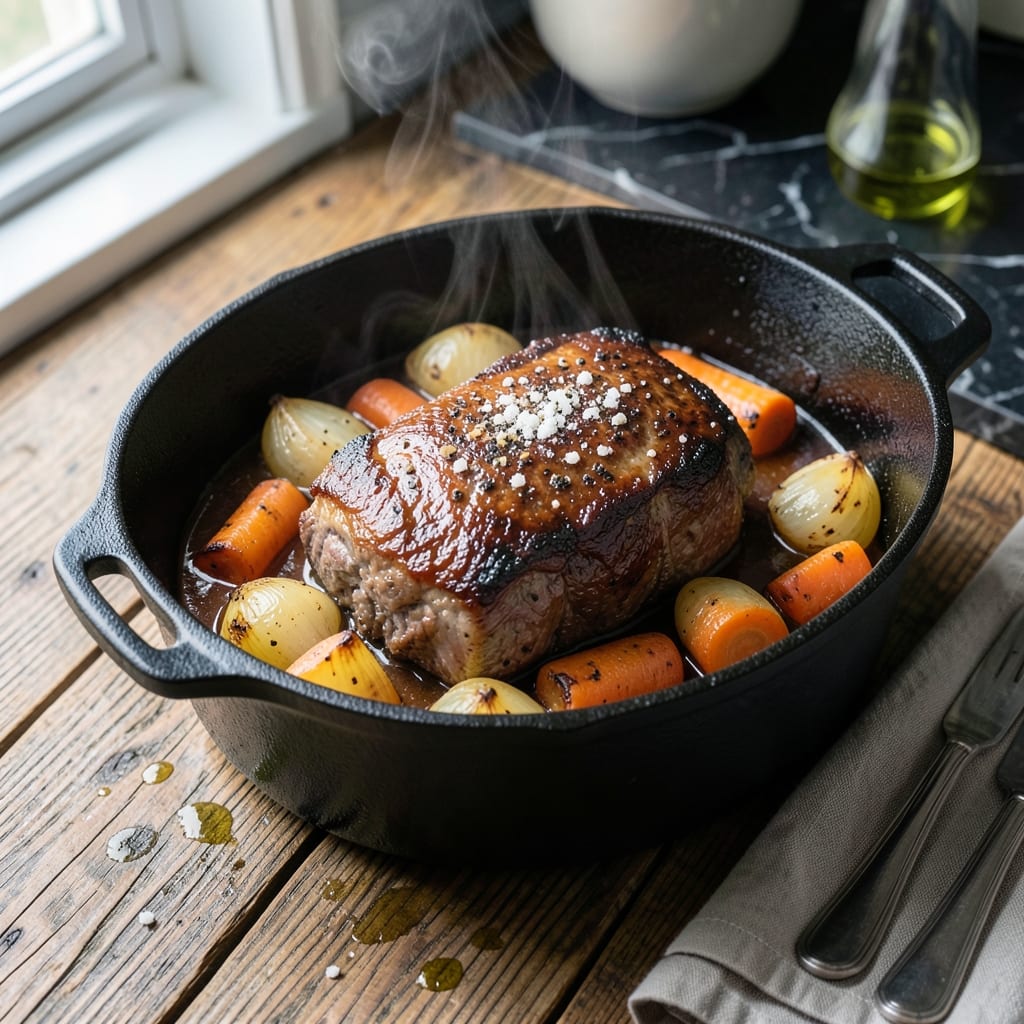
There’s nothing like a stovetop pot roast simmering in my Dutch oven, filling the kitchen with that rich, meaty aroma. My Nonna’s version was always the star of Sunday dinners, and I’ve spent years perfecting it to work on a stovetop without sacrificing flavor.
This method turns tough cuts of beef into melt-in-your-mouth tenderness through slow braising. The Dutch oven locks in moisture while the stovetop gives you complete control over the heat. I’ve tested this in my tiny Boston kitchen more times than I can count.
You’ll sear the beef first for a deep, caramelized crust, then let it braise in a flavorful liquid until it’s fall-apart tender. Vegetables soak up all that savory goodness, making every bite packed with comfort.
It’s the kind of dish that turns a regular weeknight into something special. Here’s how to make it just like Nonna did.
Ingredients for Pot Roast Recipe Dutch Oven Stovetop
Here’s what you need for that rich, meaty aroma filling your kitchen like Nonna’s Sunday suppers.
| Ingredient | Amount | Notes |
|---|---|---|
| Chuck Roast 🥩 | 3 lb | Well-marbled, trimmed of excess fat |
| Kosher Salt 🧂 | 2 tsp | Divided for seasoning beef and liquid |
| Black Pepper 🌶️ | 1 ½ tsp | Freshly ground, divided |
| Olive Oil 🫒 | 2 tbsp | For searing beef |
| Yellow Onions 🧅 | 2 whole | Large, quartered |
| Carrots 🥕 | 4 whole | Large, cut into chunks |
| Celery Stalks 🥬 | 3 whole | Cut into 2-inch pieces |
| Garlic Cloves 🧄 | 5 cloves | Smashed, peeled |
| Dry Red Wine 🍷 | 1 ½ cups | Bold, full-bodied preferred |
| Beef Broth 🥣 | 2 cups | Low-sodium for control |
| Tomato Paste 🍅 | 2 tbsp | For depth of flavor |
| Fresh Thyme Sprigs 🌿 | 4 whole | Plus extra for garnish |
| Bay Leaves 🍃 | 2 whole | Dried, for aroma |
| All-Purpose Flour 🌾 | 2 tbsp | For thickening gravy |
[recipe_ingredient_scaler]
The beef is everything here. Chuck roast gives you that melt-in-your-mouth texture—brisket or round won’t be as tender. Look for good marbling (those white fat streaks) and buy from a butcher if you can. Whole Foods or Costco have great options. The Dutch oven is key too—Le Creuset or Lodge work perfectly (and yes, they last forever).
No red wine? Beef broth plus a splash of balsamic vinegar gets you 80% there. Fresh out of thyme? Dried thyme at one-third the amount works fine. The carrots can be baby carrots if that’s what you’ve got (no shame). If you’re out of tomato paste, Trader Joe’s has those handy squeeze tubes—no waste, keeps forever.
Leftovers taste even better the next day. Keeps 4-5 days in the fridge, freezes for 3 months (portion it first). That gravy thickens as it cools—reheat with a splash of broth to loosen it up. (worth the extra minute)
Why You’ll Love This Recipe
- One Pot Wonder: I love that everything cooks together in the Dutch oven—just sear the chuck roast, toss in the onions, and let the stovetop do the work.
- Sunday Dinner, Anytime: This feels fancy enough for company but is unfussy enough for a quiet Tuesday night with leftovers.
- Budget Stretch: A single chuck roast feeds my family for days, and honestly, the leftovers taste even better the next day.
Step-by-Step Instructions for Dutch Oven Pot Roast
Here’s how to turn that chuck roast into fork-tender, flavorful perfection on the stovetop.
Step 1: Sear the Beef to Lock in Flavor
Pat the 3 lb chuck roast dry with paper towels—this is crucial for a good sear. Season generously with 1 tsp kosher salt and ½ tsp black pepper on all sides. Heat the 2 tbsp olive oil in your Dutch oven over medium-high heat until it shimmers.
Add the beef and sear undisturbed for 4-5 minutes per side until deep brown and crusty. Resist the urge to move it—you want that rich, caramelized crust. Once browned all over, transfer the roast to a plate and set aside.
Step 2: Build the Aromatic Base
In the same pot, add the 2 whole quartered yellow onions, 4 whole chunked carrots, and 3 whole celery stalks. Cook for 5-6 minutes, stirring occasionally, until the vegetables start to soften and brown slightly.
Stir in the 5 cloves smashed garlic and 2 tbsp tomato paste, cooking for 1-2 minutes until the paste darkens slightly and becomes fragrant. This step deepens the flavor base and ensures every bite is packed with savory richness.
Step 3: Deglaze and Simmer
Pour in the 1.5 cups dry red wine, scraping up all the browned bits from the bottom of the pot with a wooden spoon. Let it simmer for 3-4 minutes until the liquid reduces by about half. These browned bits are pure flavor—don’t skip this step.
Return the beef to the pot, then add the 2 cups beef broth, 4 whole fresh thyme sprigs, and 2 whole bay leaves. The liquid should come about halfway up the roast. Bring to a gentle simmer, then reduce the heat to low.
Step 4: Braise Until Fork-Tender
Cover the Dutch oven and let it braise for 2.5 to 3 hours, turning the roast every 45 minutes for even cooking. You’ll know it’s ready when the beef pulls apart easily with a fork and the internal temperature reaches 195-200°F.
If the liquid reduces too much during cooking, add a splash of water or broth to keep the roast partially submerged. The long, slow cook transforms the tough chuck roast into something melt-in-your-mouth tender.
Step 5: Thicken the Gravy and Serve
Remove the roast and vegetables to a serving platter. Skim any excess fat from the surface of the cooking liquid, then bring it to a gentle simmer. Whisk in the 2 tbsp all-purpose flour and cook for 2-3 minutes until the gravy thickens slightly.
Season the gravy with the remaining 1 tsp kosher salt and 1 tsp black pepper, then pour it over the roast and vegetables. Serve immediately while hot, garnished with extra thyme if desired.
Pro Tips For Making Pot Roast Recipe Dutch Oven Stovetop
- Sear Hard, Don’t Rush: Crank the heat to medium-high and let the chuck roast develop a deep crust—about 3-4 minutes per side. I learned this the hard way after pulling it too early and ending up with a pale, flavorless roast.
- Salt the Meat Overnight: Pat the chuck roast dry, then salt it generously (about 1 teaspoon per pound) and let it sit uncovered in the fridge for at least 12 hours. Sounds like overkill, but it actually changes the outcome—way more tender and seasoned through.
- Deglaze with Purpose: After searing, pour in about ½ cup of liquid (water, broth, or wine) to scrape up those browned bits. Skip this and you’re leaving half the flavor in the pan—I was skeptical until I tried it.
- Low and Slow Wins: Once the lid’s on, drop the heat to low and let it simmer for 2.5-3 hours. Resist the urge to peek—every time you lift the lid, you’re adding 10-15 minutes to the cook time. My grandmother swore by this, and she was right.
Perfect Pairings for This Dish
Classic Comfort Sides
There’s nothing like serving this over creamy mashed potatoes—the gravy soaks in beautifully. I use Yukon Golds with a splash of whole milk and 4 tbsp butter for the perfect texture. Honestly, it’s my go-to for Sunday dinners.
Fresh Bread Pairings
A crusty Italian loaf or sourdough is perfect for soaking up every last bit of gravy. Warm it in the oven for 5-10 minutes at 350°F before serving. My Nonna always had a fresh loaf from the neighborhood bakery ready. 🥖
Vegetable Additions
For a lighter option, serve with roasted Brussels sprouts or sautéed green beans. Toss the Brussels with 1 tbsp olive oil and ½ tsp garlic powder, then roast at 400°F for 20-25 minutes. The crispiness contrasts the tenderness perfectly.
Wine Recommendations
A bold Cabernet Sauvignon or Malbec pairs wonderfully with the rich beef flavors. I love a California Cab—its dark fruit notes complement the dish beautifully. For white lovers, a full-bodied Chardonnay works too. 🍷
Simple Salad
Balance the meal with a crisp arugula salad dressed in lemon vinaigrette. Toss 4 cups arugula with 2 tbsp olive oil, 1 tbsp lemon juice, and a pinch of salt and pepper. The peppery bite cuts through the richness.
Nutrition Facts
Frequently Asked Questions
Can I use a different cut of beef?
Stick with chuck roast for best results, but brisket or short ribs work too. Avoid lean cuts like sirloin—they’ll dry out during the long braise. The fat in chuck keeps it moist and tender.
How do I know when it’s done?
It’s ready when the beef pulls apart easily with a fork. Aim for an internal temp of 195-200°F. If it shreds without resistance, you’ve nailed it.
What if my gravy is too thin?
Simmer uncovered for 5-10 minutes to reduce, or mix 1 tbsp cornstarch with 1 tbsp water and stir in. Cook for 2-3 minutes until thickened.
Can I make this ahead?
It tastes even better the next day. Store in the fridge for up to 4-5 days or freeze for 3 months. Reheat gently on the stovetop.

Trained in classic French technique but raised on slow-cooked ribs and spicy rubs, she blends culinary skill with smoke and soul.
- Recipe for Boneless Leg of Lamb Roast in the Oven: Herb-Crusted and Rosy Pink Inside - October 3, 2026
- Meat Loaf Recipe With Beef And Pork: Homestyle Blend With Rich Gravy - October 3, 2026
- Hamburger Patty Recipe No Egg: Juicy Bind With Breadcrumbs and Milk - October 3, 2026