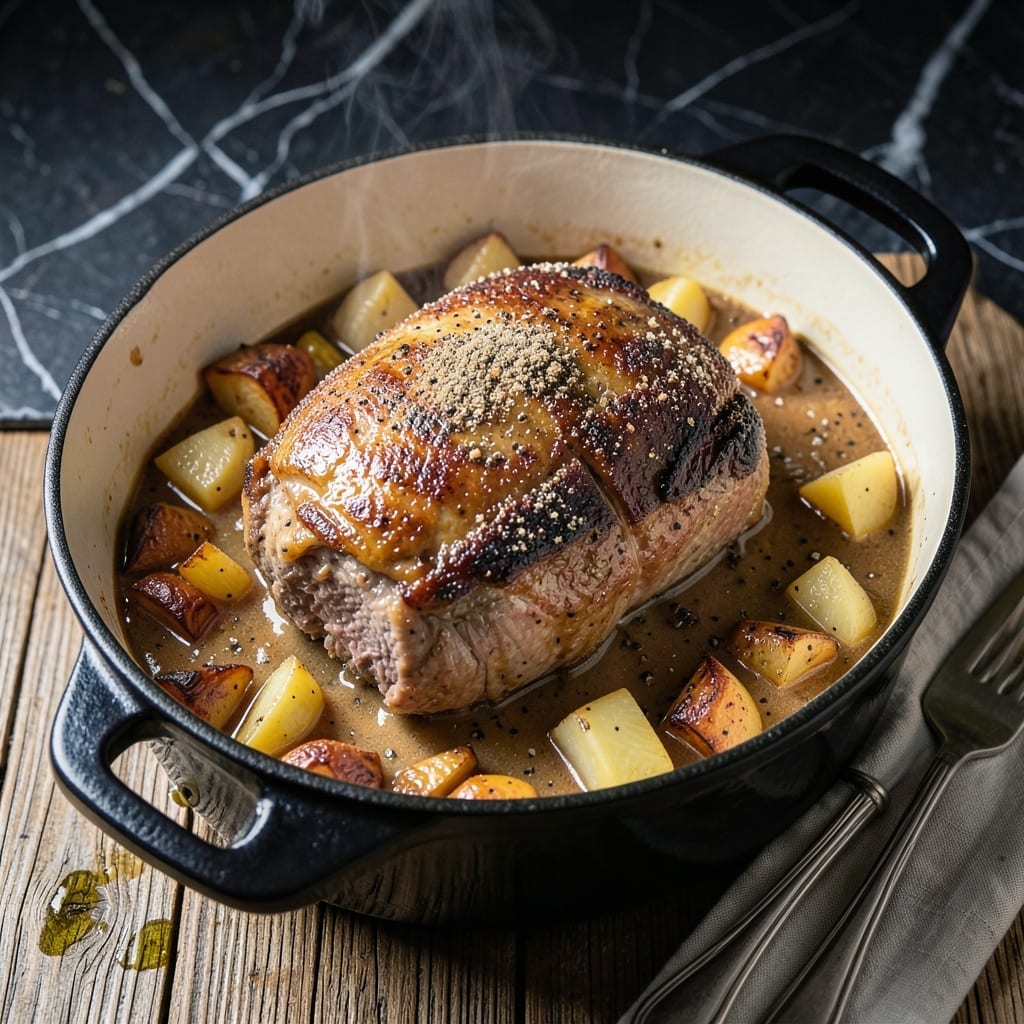
There’s nothing quite like the tender results of a slow-braised pot roast cooked in a Dutch oven. This method transforms tough cuts into melt-in-your-mouth perfection through careful heat and time management.
I’ve perfected this technique over years of Sunday dinners, ensuring every bite delivers rich, deep flavor. The Dutch oven’s even heat distribution makes all the difference for consistent, tender results.
Ingredients for Pot Roast Recipe Dutch Oven
Transform tough beef into melt-in-your-mouth perfection with these carefully selected ingredients for Dutch oven success.
| Ingredient | Amount | Notes |
|---|---|---|
| Beef Chuck Roast 🥩 | 3 lb | Well-marbled, boneless preferred |
| Kosher Salt 🧂 | 1 ½ tsp | Diamond Crystal preferred for even seasoning |
| Freshly Ground Black Pepper 🌶️ | 1 tsp | Coarse grind for texture |
| All-Purpose Flour 🌾 | ¼ cup | For dusting meat before searing |
| Olive Oil 🫒 | 2 tbsp | High smoke point for searing |
| Yellow Onion 🧅 | 1 whole | Large, diced into chunks |
| Carrots 🥕 | 3 whole | Cut into 2-inch pieces |
| Celery Stalks 🌿 | 3 whole | Cut into 2-inch pieces |
| Garlic Cloves 🧄 | 5 cloves | Smashed for robust flavor |
| Dry Red Wine 🍷 | 1 cup | Bold variety like Cabernet Sauvignon |
| Beef Broth 🥣 | 2 cups | Low-sodium preferred for control |
| Tomato Paste 🍅 | 2 tbsp | Concentrated for depth of flavor |
| Fresh Thyme Sprigs 🌿 | 3 whole | Plus extra for garnish |
| Bay Leaf 🍃 | 1 whole | Dried, for aromatic base |
[recipe_ingredient_scaler]
The beef chuck roast is non-negotiable for this preparation. USDA Choice or Prime grade ensures sufficient marbling to render down during the long braise, resulting in that signature tenderness. Source from a reputable butcher or high-turnover supermarket meat counter. Look for a well-marbled piece with a bright red hue—avoid anything with a grayish tint or strong odor. The weight matters; 3 pounds serves four generously with leftovers.
Substitutions must maintain the dish’s integrity. No red wine? Use additional beef broth with 1 tbsp balsamic vinegar for acidity. Fresh thyme can be replaced with 1 tsp dried thyme. For the tomato paste, those squeeze tubes from specialty markets offer convenience without waste. The vegetables provide the aromatic base, so maintain the 3-3-1 ratio of carrots, celery, and onion for balanced flavor development.
Store the beef chuck roast in its original packaging on a tray in the coldest part of your refrigerator for up to 3 days before cooking. The vegetables keep 1 week in crisper drawers. Leftovers improve overnight and freeze beautifully for up to 3 months, making this ideal for meal prep or Sunday dinner tradition.
Why You’ll Love This Recipe
- One Pot Magic: The Dutch oven does all the work—just sear the beef chuck, deglaze, and let it braise while I do something else.
- Fall-Apart Tender: That chuck roast turns buttery soft, with the flour crust locking in juices for a rich, savory bite every time.
- Feeds the Whole Week: I make it Sunday and we’re set for leftovers—sandwiches, tacos, or just reheated with mashed potatoes.
- Budget Hero: A cheap chuck roast becomes a showstopper with pantry staples like salt, pepper, and flour. Honestly, it’s my wallet’s favorite meal.
Step-by-Step Instructions for Pot Roast Dutch Oven
This method delivers fall-apart beef with rich, concentrated braising liquid every time.
Step 1: Sear and Develop Flavor Foundation
Pat the 3 lb Beef Chuck Roast completely dry with paper towels. Season aggressively on all sides with the 1.5 tsp Kosher Salt and 1 tsp Freshly Ground Black Pepper, pressing the seasoning into the meat so it adheres well during searing.
Dust the roast lightly with the 0.25 cup All-Purpose Flour, shaking off any excess. The flour creates a golden crust and helps thicken the braising liquid later. Heat the 2 tbsp Olive Oil in a Dutch oven over medium-high heat until shimmering.
Sear the beef for 4-5 minutes per side until deeply browned and a thick crust forms. Don’t move the roast during searing—this ensures proper crust development. Transfer to a plate and set aside.
Step 2: Build the Aromatic Base
In the same Dutch oven, add the diced 1 whole Yellow Onion, the 3 whole Carrots cut into 2-inch pieces, and the 3 whole Celery Stalks cut similarly. Cook for 5-6 minutes over medium heat, stirring occasionally, until the vegetables begin to soften and develop light caramelization.
Add the 5 cloves Garlic Cloves (smashed) and cook for 1 minute until fragrant. Stir in the 2 tbsp Tomato Paste and cook for another 2 minutes, which deepens its flavor and prevents a raw taste in the finished dish.
Step 3: Deglaze and Begin Braising
Pour in the 1 cup Dry Red Wine and scrape up all the browned bits from the bottom of the pot with a wooden spoon. These fond bits are pure flavor. Bring to a simmer and cook for 3-4 minutes until the liquid reduces by about half.
Return the seared beef to the Dutch oven along with any accumulated juices. Add the 2 cups Beef Broth, 3 whole Fresh Thyme Sprigs, and 1 whole Bay Leaf. The liquid should come about halfway up the roast. This ensures even cooking without submerging the meat completely.
Step 4: Slow Braise to Tenderness
Cover the Dutch oven and transfer to a preheated 325°F oven. Braise for 2.5 to 3 hours, turning the roast every 45 minutes to ensure even cooking. You’ll know it’s done when a fork inserted into the thickest part twists easily and the meat pulls apart with minimal resistance.
The braising liquid should be rich and flavorful, with the vegetables nearly melted into the sauce. If the liquid level gets too low during cooking, add ½ cup of hot water to maintain the proper level for even cooking.
Step 5: Rest and Serve
Carefully transfer the beef to a cutting board. Skim any excess fat from the surface of the braising liquid if desired. The vegetables will have broken down into a rich, flavorful sauce that pairs perfectly with the tender beef.
Let the roast rest for 15 minutes before slicing or pulling apart. This allows the juices to redistribute throughout the meat. Serve the beef with the braising liquid spooned over the top, ensuring each portion gets plenty of the delicious sauce.
Pro Tips For Making Pot Roast Recipe Dutch Oven
- Sear It Hard: Crank the heat to medium-high and sear the chuck roast until deeply browned—this builds the flavor base that makes pot roast unforgettable. I learned this the hard way after years of lukewarm oil and pale meat.
- Pat It Dry: Blot the roast with paper towels before searing, or the flour won’t stick and the oil will sputter like a firecracker. Sounds tedious, but it actually changes the outcome.
- Don’t Rush the Braise: After adding liquid, cover and keep the heat low—simmer, don’t boil, or the meat turns tough. My grandmother swore by this, and she was right.
- Deglaze Properly: After searing, pour in a splash of broth or wine and scrape up those browned bits on the bottom—they’re pure flavor waiting to be rescued. I skip this when I’m lazy, but the dish is noticeably better when I don’t.
Dietary Considerations for This pot roast recipe dutch oven
Gluten-Free Option
Swap the 0.25 cup All-Purpose Flour for cornstarch or gluten-free flour blend. I use Bob’s Red Mill 1:1 with great results. The sear won’t be quite as dark, but the flavor remains excellent. 💪
Low-Carb Adaptation
Omit the flour entirely and increase searing time to 6-7 minutes per side for a deeper crust. The braising liquid will be thinner but still packed with flavor from the vegetables and wine.
Dairy-Free Notes
This recipe is naturally dairy-free as written. Just ensure your beef broth is free from dairy derivatives. I always check labels on store-bought broths to be certain.
Low-Sodium Version
Use low-sodium beef broth and reduce the Kosher Salt to 1 tsp. You can always adjust seasoning at the end. The wine and vegetables provide plenty of natural flavor.
Red Wine Substitute
Replace the 1 cup Dry Red Wine with 1 cup beef broth plus 1 tbsp balsamic vinegar. The vinegar adds the necessary acidity to balance the richness of the dish. 🍷
Vegetable Swaps
For variety, try using parsnips instead of carrots or fennel in place of celery. These maintain the aromatic base while offering different flavor profiles.
Nutrition Facts
Frequently Asked Questions
Why use a Dutch oven for this method?
A Dutch oven’s heavy base and tight lid create the perfect environment for slow, even cooking. It maintains steady 325°F heat and locks in moisture, ensuring fall-apart tenderness.
Can I use a different cut of beef?
Chuck roast is ideal for its marbling, but brisket or short ribs work well too. Avoid lean cuts like sirloin—they’ll dry out during the long 2.5-3 hour braise.
How do I know when it’s done?
The meat should pull apart easily with a fork. If it resists, give it another 30 minutes. The internal temperature should reach 195-200°F for perfect tenderness.
Can I make this on the stovetop?
Yes! After searing and adding liquid, simmer covered on low heat for 3-4 hours. Check occasionally to ensure the liquid doesn’t evaporate.

Trained in classic French technique but raised on slow-cooked ribs and spicy rubs, she blends culinary skill with smoke and soul.
- Recipe for Curried Tofu: Aromatic Spices With Crispy Edges - October 3, 2026
- Recipe for Dumplings in Crock Pot: Fluffy Pillows with Minimal Effort - October 3, 2026
- Recipe For Diced Pork In Slow Cooker: Melt-In-Your-Mouth Tenderness All Day - October 3, 2026