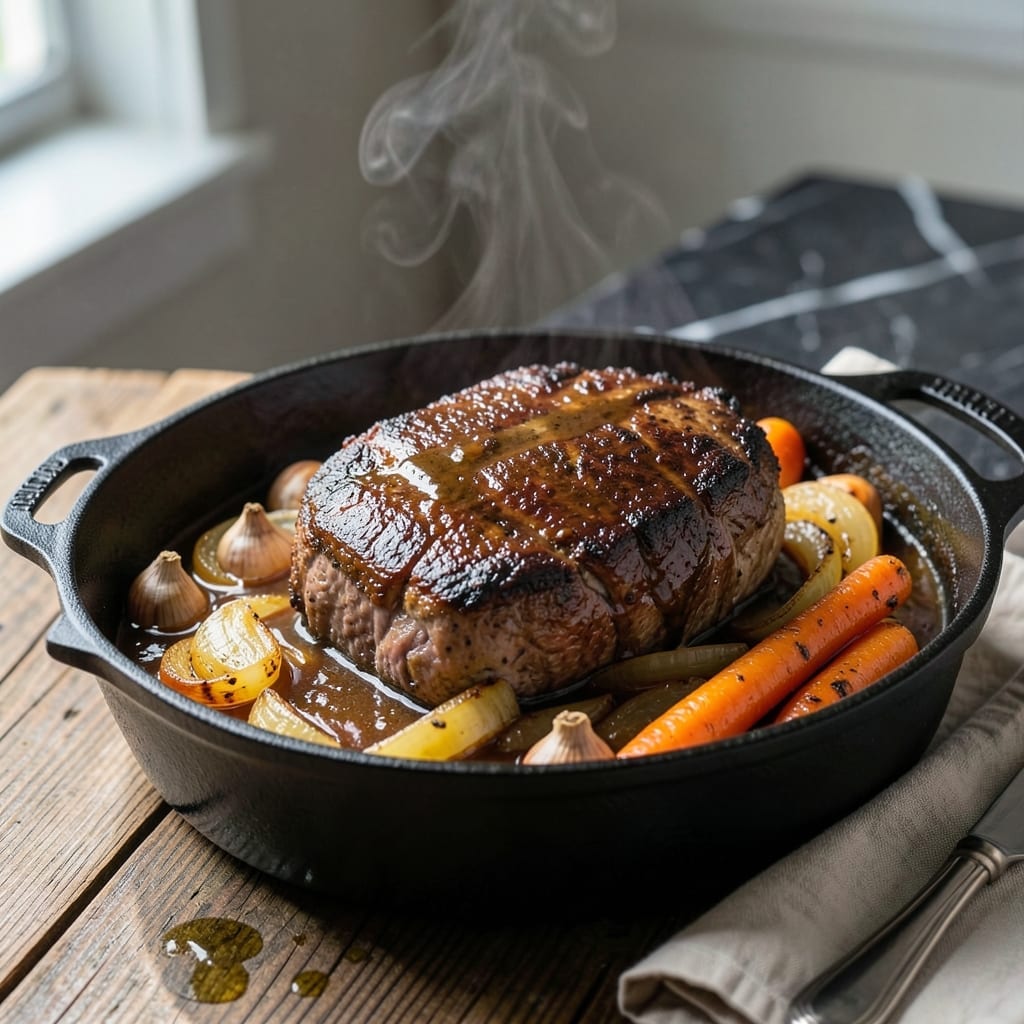
I’ve tested pot roast recipes in every kind of oven, and the right temperature makes all the difference for achieving that fork-tender result. This method transforms tough cuts into melt-in-your-mouth perfection through slow, steady heat.
The key is maintaining a consistent 325°F oven temperature, which allows the connective tissue to break down gradually without drying out the meat. I developed this approach after too many dry, overcooked roasts taught me the value of patience.
By the time it finishes, you’ll have a pot roast with a rich, caramelized crust and meat that falls apart at the slightest touch. The vegetables soak up the flavorful juices, creating a complete meal that tastes like home.
This technique works in any standard oven and requires minimal hands-on time. The results speak for themselves.
Ingredients for Pot Roast Recipe Oven Temperature
A few quality ingredients and patience transform tough beef into something spectacular.
| Ingredient | Amount | Notes |
|---|---|---|
| Chuck Roast 🥩 | 3 lb | Well-marbled, boneless preferred |
| Kosher Salt 🧂 | 2 tsp | Diamond Crystal preferred |
| Black Pepper 🌶️ | 1 tsp | Freshly ground for best flavor |
| Garlic Cloves 🧄 | 6 cloves | Peeled, smashed for robust flavor |
| Yellow Onions 🧅 | 2 whole | Medium-sized, quartered |
| Carrots 🥕 | 4 whole | Large, cut into 3-inch chunks |
| Celery Stalks 🌿 | 3 whole | Cut into 2-inch pieces |
| Russet Potatoes 🥔 | 1 ½ lb | Peeled, halved if small |
| Beef Broth 🥣 | 3 cups | Low-sodium preferred for control |
| Red Wine 🍷 | 1 cup | Dry variety like Cabernet Sauvignon |
| Tomato Paste 🍅 | 2 tbsp | For depth of flavor |
| Fresh Thyme Sprigs 🌿 | 3 whole | Tied with kitchen twine |
| Fresh Rosemary Sprigs 🌿 | 2 whole | Tied with kitchen twine |
| Bay Leaves 🍃 | 2 whole | Dried, for aromatic base |
| Olive Oil 🫒 | 2 tbsp | For searing roast |
[recipe_ingredient_scaler]
The chuck roast is non-negotiable here—look for good marbling (those white fat streaks) at Costco or your butcher. It’s a tough cut, but that fat and connective tissue melt into gelatin during the long braise, creating that fork-tender texture. Avoid lean cuts like sirloin; they’ll dry out. If you’re buying pre-cut, ask for chunks at least 2 inches thick so they hold up to the cooking time.
No red wine? Substitute additional beef broth with 1 tbsp balsamic vinegar for acidity. Fresh herbs can be swapped for dried at one-third the amount. The tomato paste adds depth, but in a pinch, 1 tbsp ketchup works (though it’s sweeter). For the broth, Better Than Bouillon makes a rich base if you’re not using homemade. Carrots can be swapped for parsnips for a slightly sweeter note.
This tastes even better the next day—store in the fridge for up to 4 days or freeze for 3 months. Reheat gently on the stove with a splash of water to loosen the juices. The potatoes will soften more over time, but that’s part of the charm (they soak up all the flavor).
Why You’ll Love This Recipe
- Set It & Forget: Honestly, I just season the chuck roast, toss in the onions and garlic, and let the oven do the work at 325°F for hours.
- Fallback Flavor: That slow heat turns the salt, pepper, and garlic into this rich, savory crust that soaks into every bite.
- Sunday or Thursday: I serve it for Sunday dinner with mashed potatoes, then shred the leftovers for tacos on Tuesday.
- Feeds & Freezes: One 4-pound roast gives us dinner for four plus two more meals in the freezer.
Step-by-Step Instructions for Pot Roast Oven Braising
Here’s the method I’ve perfected for melt-in-your-mouth results every time.
Step 1: Sear and Season the Chuck Roast
Heat the 2 tbsp olive oil in a Dutch oven over medium-high heat until it shimmers. Pat the 3 lb chuck roast completely dry with paper towels, then season aggressively on all sides with the 2 tsp kosher salt and 1 tsp black pepper.
Sear the roast for 4-5 minutes per side until you achieve a deep brown crust on all surfaces. I press the meat down gently with tongs during searing to ensure full contact with the pan. This creates the flavor foundation for your entire dish, so don’t rush it.
Step 2: Build the Aromatic Base
Remove the seared roast and set it aside. In the same Dutch oven, add the 2 whole yellow onions, 4 whole carrots, and 3 whole celery stalks. Cook for 5-6 minutes until the vegetables begin to soften and develop some color.
Add the 6 cloves garlic cloves and 2 tbsp tomato paste, stirring constantly for 1-2 minutes until the tomato paste deepens in color and sticks slightly to the bottom of the pot. Here’s where the magic happens—these browned bits will dissolve into your braising liquid for incredible depth of flavor.
Step 3: Deglaze and Begin Braising
Pour in the 1 cup red wine and scrape up all the browned bits from the bottom of the pot with a wooden spoon. Let it simmer for 2-3 minutes until reduced by about half. This deglazing step captures all that concentrated flavor from the searing process.
Return the roast to the pot and add the 3 cups beef broth, 1.5 lb russet potatoes, 3 whole fresh thyme sprigs, 2 whole fresh rosemary sprigs, and 2 whole bay leaves. The liquid should come about halfway up the meat—add a splash of water if needed.
Step 4: Slow Braise to Fork-Tender Perfection
Bring the liquid to a simmer, then cover the Dutch oven and transfer it to a preheated 325°F oven. Braise for 2.5 to 3 hours, turning the roast halfway through cooking. You’ll know it’s ready when the meat pulls apart easily with a fork and the internal temperature reaches 195-200°F.
Real talk: The potatoes should be tender enough to pierce easily with a knife, and the braising liquid should have reduced slightly, concentrating all those beautiful flavors. If the liquid level gets too low during cooking, add a splash of water or additional beef broth.
Step 5: Rest and Serve
Carefully remove the roast and vegetables to a serving platter. Skim any excess fat from the surface of the braising liquid, then simmer it on the stovetop for 5-7 minutes until it thickens slightly into a rich, velvety sauce.
Let the roast rest for 10-15 minutes before slicing or pulling apart. This resting period allows the juices to redistribute throughout the meat, ensuring every bite is as tender as the last. Serve the pot roast and vegetables with plenty of that incredible sauce spooned over the top.
Pro Tips For Making Pot Roast Recipe Oven Temperature
- Start Hot, Finish Low: Sear the chuck roast in a screaming hot Dutch oven first, then drop the oven temp to 300°F for slow cooking—I learned this the hard way after my first pot roast came out tough as boots.
- Salt Overnight: Rub the chuck roast with kosher salt at least 12 hours before cooking. Sounds weird, but it works: the meat stays juicier and seasons all the way through.
- Don’t Crowd the Pan: If you’re browning the onions and garlic with the meat, do it in batches—steer clear of overloading or they’ll steam instead of caramelize, and your gravy will taste flat.
- Use a Probe Thermometer: Pull the pot roast when it hits 195-200°F internally, not just when the time’s up. My grandmother swore by this, and she was right: it’s the only way to guarantee fall-apart tenderness.
Storing and Reheating This Recipe
Refrigerator Storage
Let your pot roast cool at room temperature for no more than 2 hours, then transfer it with all the vegetables and braising liquid to an airtight container. I use my trusty Pyrex glass set for this. It will keep beautifully in the fridge at 40°F or below for up to 4 days. ❄️
Freezer Storage
For longer storage, portion the roast and vegetables into freezer-safe containers or heavy-duty zip-top bags. Leave 1 inch of headspace for expansion, and it will maintain quality for up to 3 months. I learned the hard way that forgetting this step leads to freezer-burned disappointment.
Stovetop Reheating
This is my preferred method for maintaining texture. Transfer the roast and sauce to a Dutch oven, add ¼ cup water or beef broth, and heat over medium-low heat for 15-20 minutes. Stir occasionally to prevent sticking. 🔥
Microwave Reheating
For quick meals, place individual portions in a microwave-safe dish, cover with a damp paper towel, and heat on 50% power for 2-3 minutes. Stir, then continue heating in 30-second intervals until reaching 165°F.
Sauce Revival Tip
If the sauce has thickened too much during storage, whisk in 2-3 tbsp water or broth while reheating. This brings it back to that perfect velvety consistency. I always keep a splash of Better Than Bouillon on hand for this exact purpose.
Nutrition Facts
Frequently Asked Questions
What cut of beef works best?
Chuck roast is ideal for its marbling and connective tissue that breaks down beautifully during 3 hours of braising. Avoid lean cuts like sirloin—they’ll dry out.
Can I cook it at a higher temperature?
Not recommended. Higher heat toughens the meat before it becomes tender. Stick to 325°F for that perfect fall-apart texture.
How do I know when it’s done?
It’s ready when the internal temperature hits 195-200°F and the meat pulls apart easily with a fork. This usually takes 2.5 to 3 hours.
What if my sauce is too thin?
Simmer the liquid on the stovetop for 5-7 minutes after cooking. For extra richness, mix in 1 tbsp cornstarch with water.

Trained in classic French technique but raised on slow-cooked ribs and spicy rubs, she blends culinary skill with smoke and soul.
- Recipe for Pan Fried: Golden Crust with Savory Depth - October 3, 2026
- Recipe For Fried Chicken In A Pressure Cooker: Crispy Golden Bites in Half the Time - October 3, 2026
- Recipe For Leftover Fried Fish: Crunchy Leftovers Transformed - October 3, 2026