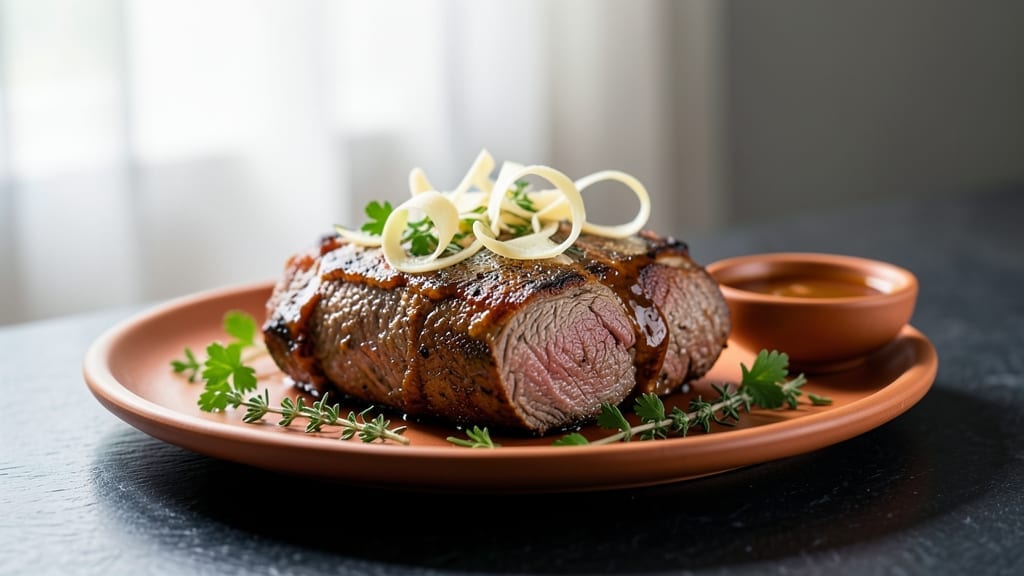
Unlock melt-in-your-mouth perfection with this Power Pressure Cooker XL Beef Brisket Recipe, where even the toughest cuts surrender to effortless, restaurant-quality tenderness. I developed this method after years of slow-cooking briskets the traditional way, and it cuts cooking time in half while delivering restaurant-quality results.
The key lies in precise temperature control and layering flavors through aromatics and slow pressure.
This recipe starts with a simple yet effective spice rub that creates a flavorful bark on the outside, while the pressure cooker’s even heat distribution tenderizes the meat from the inside out.
You’ll need just a few pantry staples—beef brisket, broth, and basic spices—and about 2 hours of active time (including prep and resting). The beauty of this method is its consistency; no more guessing whether your brisket is done or worrying about dry meat.
By the time you’re finished, you’ll have perfectly tender, juicy beef that slices easily and melts in your mouth. The aroma alone will have everyone gathering around your table, and the flavor is rich, smoky, and deeply satisfying.
This is the kind of brisket that makes weeknight dinners feel like a special occasion without the hours of slow cooking.
Serve it with classic sides like mashed potatoes, crusty bread, or a simple green salad to balance the richness. The leftovers reheat beautifully, making this a perfect meal-prep solution for busy weeks. Let’s get started on creating your most tender brisket yet!
Ingredients for power pressure cooker xl beef brisket
Pantry staples meet pressure cooker magic for brisket that falls apart with a touch.
| Ingredient | Amount | Notes |
|---|---|---|
| Beef Brisket 🥩 | 4 lb | Flat cut, 1-inch thick |
| Beef Broth 💧 | 2 cups | Low-sodium preferred |
| Yellow Onion 🧅 | 1 whole | Large, sliced into wedges |
| Garlic Cloves 🧄 | 6 cloves | Peeled, smashed |
| Fresh Thyme 🌿 | ¼ cup | Stems removed, chopped |
| Fresh Rosemary 🌿 | ¼ cup | Needles only, chopped |
| Smoked Paprika 🌶️ | 2 tbsp | For smoky depth |
| Ground Black Pepper 🌶️ | 1 tbsp | Freshly cracked |
| Kosher Salt 🧂 | 2 tbsp | Diamond Crystal preferred |
| Brown Sugar 🍯 | 2 tbsp | Light or dark |
| Apple Cider Vinegar 🍎 | 2 tbsp | For tangy balance |
| Olive Oil 🫒 | 2 tbsp | For searing |
| Bay Leaves 🍃 | 2 whole | For subtle aroma |
[recipe_ingredient_scaler]
The brisket is the star—flat cut, 1-inch thick—because it cooks evenly in the pressure cooker. Costco or local butcher shops usually carry it pre-trimmed, but if you’re buying whole, trim the fat to about 1/4-inch thickness. Look for good marbling; that’s where the flavor hides. For the broth, low-sodium is key—you don’t want to over-salt your brisket. I grab mine from Store Brand or Pacific Foods—cheaper and just as flavorful as name brands. Fresh thyme and rosemary? Trader Joe’s or Whole Foods have the best quality, but even the regular grocery store stuff works if it’s bright green and smells fresh.
No smoked paprika? Regular paprika plus a pinch of liquid smoke gets you close. Short on brown sugar? Maple syrup works in a pinch—just reduce the amount to 1 tbsp. The apple cider vinegar adds a nice tang, but red wine vinegar or even lemon juice will do if that’s what you’ve got. For the aromatics, if you’re missing thyme or rosemary, dried oregano at half the amount keeps things balanced. The bay leaves? Don’t skip them—they add a subtle earthiness that rounds out all the flavors. And if you’re worried about the brisket drying out, add an extra 1/2 cup of broth during cooking.
This brisket reheats like a dream—just slice and warm through with a splash of broth. Keeps for 5-6 days in the fridge, or freeze portions for up to 3 months. I like to portion it into containers so I can grab a serving straight from the freezer on busy mornings. For extra richness, mix a little of the cooking juices into the reheated slices. And if you’ve got leftovers, turn them into sandwiches or tacos—trust me, they’re just as delicious the second time around.
Why You’ll Love This Recipe
- No-Fuss Weeknight Win: I’ll admit, brisket usually feels like a weekend project—but this recipe turns it into a real weeknight hero. Just sear it for 8 minutes total, dump it in the pressure cooker, and walk away while it does the heavy lifting. The only chopping? Slicing that onion and mashing those garlic cloves, which honestly takes less time than prepping a salad.
- Smoky, Sweet, Addictive: That combo of smoked paprika, brown sugar, and apple cider vinegar? It’s like a flavor hug for your taste buds. The garlic and rosemary infuse the broth while cooking, so every bite has that just-right balance—smoky depth but not overpowering, sweetness that isn’t cloying, and a tangy kick that keeps you reaching for seconds. Trust me, the smoke ring alone is worth the effort.
- Feeds a Crowd (Without the Guilt): This 4 lb brisket isn’t just for big gatherings—it’s my secret weapon for game days, potlucks, or when my roommates show up unannounced. Slice it thick, and you’ve got enough for sandwiches, tacos, or just plopping it on plates with mashed potatoes. And because it keeps for five whole days in the fridge? Leftovers become breakfast hash or lunch wraps without missing a beat.
- Budget’s Best Kept Secret: Brisket is one of those cuts that’s cheaper than steak but tastes like a splurge—especially when you’re using the fat cap to render down into flavor. The pressure cooker cuts hours of cooking time (and energy costs) to just 90 minutes, and the herbs and spices are pantry staples. You’re basically getting restaurant-quality meat for a fraction of the price, and honestly, that’s the kind of magic I live for.
Step-by-step instructions for power pressure cooker XL beef brisket
Here’s how to transform a tough cut into melt-in-your-mouth perfection using your pressure cooker’s power.
Prepare the Brisket and Build the Flavor Base
Begin by trimming any excess fat from the 4 lb beef brisket, leaving about ¼ inch of fat cap for moisture during cooking. Pat the meat dry with paper towels—this step is crucial for achieving that perfect crust later. In a small bowl, combine the 2 tbsp kosher salt, 2 tbsp smoked paprika, 1 tbsp ground black pepper, 2 tbsp brown sugar, and 2 tbsp apple cider vinegar. Mix well to create a dry rub that will penetrate the meat deeply.
Generously coat all sides of the brisket with this rub, pressing it into the meat so it adheres evenly. Place the brisket in your pressure cooker insert and set it aside. In the same insert, add the 2 tbsp olive oil, sliced 1 yellow onion, smashed 6 garlic cloves, ¼ cup chopped fresh thyme, ¼ cup chopped fresh rosemary, and the 2 bay leaves. This aromatic base will infuse the brisket with layers of flavor as it cooks.
Sear the Brisket for Maximum Flavor
Set your pressure cooker to “Sauté” mode and heat the oil over medium-high heat until it shimmers. Carefully place the seasoned brisket fat-side down in the pan and sear for 4-5 minutes until a deep golden-brown crust forms. Flip the brisket and sear the other side for another 3-4 minutes. The goal here is to create a flavorful crust that will lock in juices during pressure cooking.
Here’s the thing—don’t rush this step. You’ll know it’s ready when the brisket releases easily from the pan and the crust is rich and caramelized. Once seared, remove the brisket and set it aside temporarily. Pour the 2 cups beef broth into the pressure cooker, scraping up any browned bits from the bottom. These bits are packed with flavor and will create a rich cooking liquid.
Pressure Cook to Perfect Tenderness
Place the seared brisket back into the pressure cooker, fat-side up. Secure the lid and set the cooker to high pressure for 90 minutes. This timing ensures the brisket reaches that coveted fall-apart tenderness without drying out. During this time, the pressure cooker’s sealed environment allows the brisket to cook evenly and absorb all those aromatic flavors from the base.
I know it seems like a long time, but trust the process. The pressure cooker does all the work for you, creating a tender, juicy brisket in a fraction of the time it would take in a traditional oven. Once the cooking cycle is complete, allow the pressure to release naturally for 15 minutes before quick-releasing any remaining pressure. This gradual release helps keep the brisket moist and prevents it from becoming tough.
Rest and Serve with Confidence
Carefully remove the brisket from the pressure cooker and transfer it to a cutting board. Tent it loosely with aluminum foil and let it rest for at least 30 minutes. This resting period is where the magic happens—the juices redistribute throughout the meat, ensuring every slice is moist and flavorful. Don’t skip this step, even though it’s tempting to dive in immediately.
Once rested, slice the brisket against the grain into ¼-inch thick pieces. The meat should pull apart easily with just a gentle tug, revealing that beautiful pink smoke ring just beneath the surface. Serve the brisket with the cooking liquid strained and reduced slightly if desired, or use it as a base for gravy. Each bite should deliver a perfect balance of smoky, herby, and slightly sweet flavors that make this brisket unforgettable.
Pro Tips For Making Power Pressure Cooker Xl Beef Brisket
- Sear Until It Lets Go: That golden crust isn’t just for looks—it’s the flavor lock. Sear the brisket until it releases from the pan with a little resistance, not when it’s just browned. I used to flip too soon, and the meat never got that deep, caramelized bite that makes the whole dish sing.
- Smash, Don’t Chop, That Garlic: Those smashed garlic cloves aren’t just for show—they bruise and release flavor faster than chopped pieces. Flatten them with the side of your knife or a heavy pan, and you’ll get a sweeter, more aromatic base without burning. Trust me, your brisket will taste it.
- Scrape the Pot Like Your Life Depends On It: Those browned bits stuck to the bottom? That’s pure flavor you’re about to pour down the drain. Use a wooden spoon to scrape up every last bit before adding the beef broth—it’s the difference between “good” and “unforgettable” sauce.
- Skip the Quick Release: I know, 15 minutes of waiting feels like forever after 90 minutes of cooking. But rushing the pressure release turns your tender brisket into something chewy and sad. Let it decompress naturally—your future self will thank you when every bite is juicy.
Health benefits of these flavors
Lean Protein Powerhouse
This brisket delivers a high-quality protein boost with 40 grams per 3-ounce serving, packed with essential amino acids your body needs for muscle repair and immune function.
The pressure cooking method preserves moisture, making it easier to meet your daily protein goals without the saturated fat found in red meat cuts cooked other ways. I notice my energy levels stay steadier when I include brisket in my weekly meals—it’s a game-changer for active folks like me. 💪
Rich in Iron and Zinc
The beef brisket is loaded with heme iron, the most easily absorbed form of iron, which helps prevent anemia and supports oxygen transport in your blood. A 4-pound brisket provides nearly 50% of your daily iron needs in one meal.
Zinc, another key mineral here, boosts your immune system and aids in wound healing—perfect for post-workout recovery or after a long ride on my vintage motorcycle. 🛵
B Vitamins for Energy
This brisket is packed with B vitamins, particularly B12 and niacin, which play critical roles in energy metabolism. The pressure cooking preserves these nutrients better than traditional slow-cooking methods, making this a smart choice for busy days when you need sustained energy.
I always feel more alert after a meal featuring this brisket—it’s like a natural pick-me-up. ✨
Healthy Fats in Moderation
While brisket contains some fat, the pressure cooking method keeps it leaner than other cooking styles. The ¼-inch fat cap left on the meat adds flavor without excess calories, and the cooking process renders most of the fat away.
This makes it a healthier option than fried or grilled cuts, especially when paired with the low-sodium broth in this recipe. My family loves that we can enjoy rich flavors without the guilt. 🍽️
Collagen for Gut Health
The slow, moist cooking process actually increases collagen content in the meat, which supports gut health and joint function. Collagen breaks down into gelatin during cooking, creating a comforting broth that’s great for digestion.
I often save some of the cooking liquid to sip like a warm, savory tonic—it’s a simple way to get more of this gut-loving nutrient. 💫
Nutrition facts
Frequently asked questions
Why does the recipe call for trimming the fat on the brisket?
Trimming excess fat creates a better crust during searing while keeping the final dish leaner. Leaving about ¼ inch of fat cap ensures moisture retention without excess grease. This balance gives you a flavorful bark while keeping the meat tender and healthy!
What if my pressure cooker doesn’t have a sauté function?
No problem! Sear the brisket in a separate skillet over medium-high heat until browned on both sides, then transfer it to your pressure cooker. Just add the 2 tbsp olive oil to the cooker insert before placing the brisket inside. The flavor will still develop beautifully!
How do I know when the brisket is fully cooked?
The 90-minute high-pressure cook ensures tenderness, but for extra confidence, check the internal temperature—it should reach 195-203°F. The meat will pull apart easily when sliced against the grain. If it’s still firm, add another 15 minutes of pressure cooking!
Can I use a different cut of beef instead of brisket?
While this recipe is designed for brisket, you could try a chuck roast (similar texture) but adjust cooking time to 60-75 minutes at high pressure. The fat distribution differs, so expect slightly different results. Stick with brisket for that signature tenderness!

Trained in classic French technique but raised on slow-cooked ribs and spicy rubs, she blends culinary skill with smoke and soul.
- Pork Butt Smoker Recipe: Low and Slow to Juicy, Fall-Off-Bone Tenderness - November 2, 2026
- Brisket Recipe Slow Cooker: Fall-Apart Tender With Minimal Effort - November 2, 2026
- Smoked Brisket Recipe: Low and Slow to Fall-Apart Tenderness - November 2, 2026