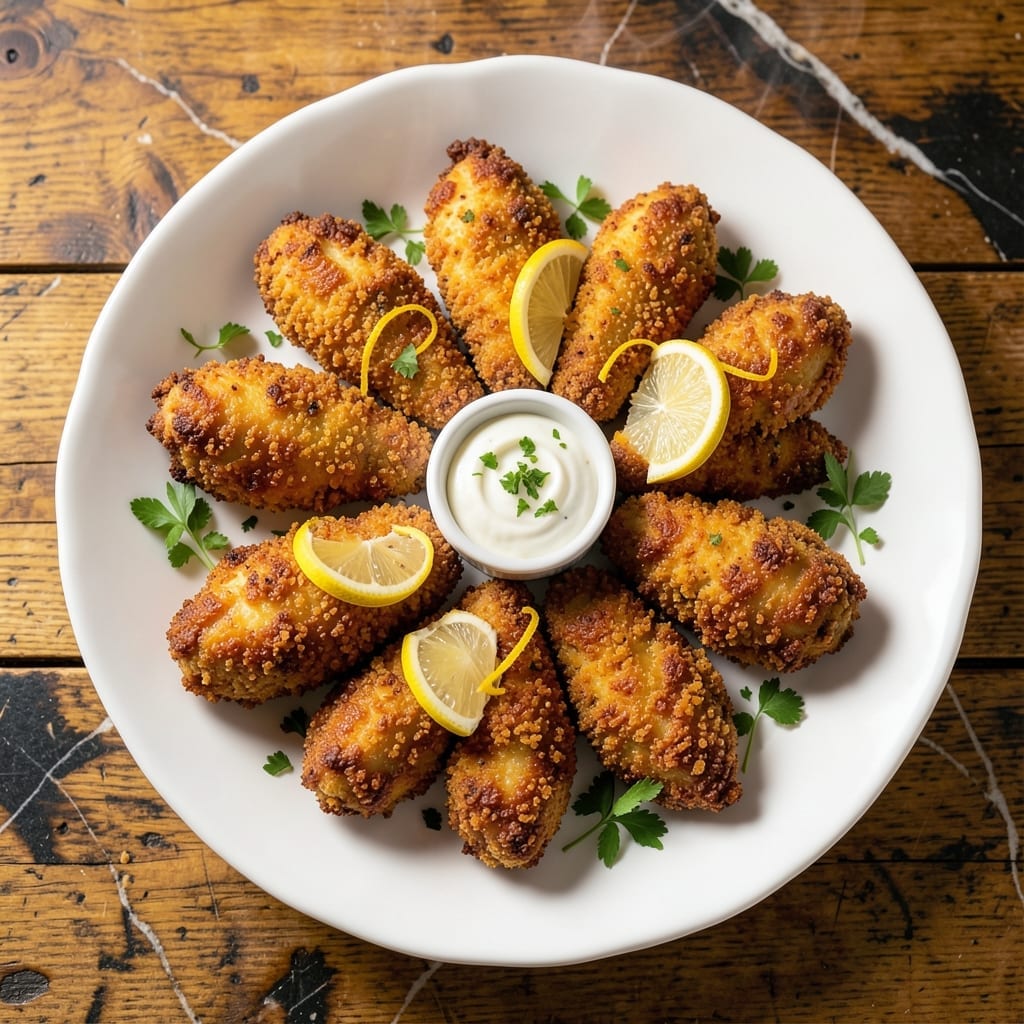
Crispy, golden chicken tenders with a panko crust deliver restaurant-quality texture without the fryer. This method guarantees tender meat inside with a shatteringly crispy exterior every time.
I developed this technique after years of testing breading methods, and panko proved the only crumb that stays crunchy. A simple egg wash and seasoned flour create the perfect adhesion for maximum crunch.
The oven does the work while you prepare sides, and the result is juicy tenders with a coating that doesn’t soften. The key is high heat and a wire rack for even air circulation.
Serve immediately for peak crispness, or hold in a warm oven for up to 20 minutes without sacrificing texture.
Ingredients for Recipe for Baked Chicken Tenders with Panko Crumbs
Pantry staples plus chicken create this crispy, golden dish with ease.
| Ingredient | Amount | Notes |
|---|---|---|
| Chicken Tenders 🍗 | 1 ½ lb | Boneless, skinless, about 12 pieces |
| Panko Breadcrumbs 🍞 | 2 cups | Japanese-style for extra crunch |
| All-Purpose Flour 🌾 | ¾ cup | For initial dredging |
| Large Eggs 🥚 | 2 whole | Beaten for egg wash |
| Garlic Powder 🧄 | 1 tsp | Adds savory depth |
| Onion Powder 🧅 | 1 tsp | Complements garlic flavor |
| Paprika 🌶️ | 1 tsp | Sweet or smoked variety |
| Salt 🧂 | 1 tsp | Kosher or sea salt |
| Black Pepper 🌶️ | ½ tsp | Freshly ground preferred |
| Olive Oil 🫒 | 2 tbsp | For drizzling before baking |
| Cooking Spray 🧴 | 1 can | For greasing wire rack |
[recipe_ingredient_scaler]
The panko is non-negotiable here—only Japanese-style breadcrumbs deliver that signature crunch. Find them in the Asian aisle at Kroger or Walmart, or grab the Kikkoman brand if available. For the chicken, look for tenders already cut from the breast (often labeled as chicken tenderloins). If buying whole breasts, slice them into 1-inch strips yourself. The egg wash should be from fresh eggs for best adhesion.
No panko on hand? Crush plain breadcrumbs with a rolling pin—they won’t be as crispy but work in a pinch. Swap garlic and onion powder for 1 tbsp of Italian seasoning if that’s what’s in your cabinet. For extra flavor, add 1 tsp of dried thyme or rosemary. The olive oil can be any neutral oil like vegetable or canola if preferred.
Store raw chicken in the fridge for up to 2 days before cooking. Once baked, tenders keep well for 3-4 days in an airtight container. Reheat in the oven at 375°F for 10-12 minutes to maintain crispiness. Avoid microwaving—it’ll turn the coating soggy.
Why You’ll Love This Recipe
- One Pan Meal: I just toss everything on a sheet pan—no fancy equipment, and cleanup is a breeze.
- Crispy Perfection: The panko gives it that impossible-to-resist crunch, while the garlic powder adds just the right kick.
- Weeknight Hero: I serve these for quick dinners, pack them for lunches, or even set them out as party snacks.
- Budget Stretch: Chicken tenders are affordable, and this recipe makes them taste like a million bucks. Honestly, it’s my go-to for feeding a crowd without breaking the bank.
Step-by-Step Instructions for Baked Chicken Tenders With Panko Crumbs
This method delivers a golden, crispy coating with tender, juicy chicken every time.
Step 1: Season and Dredge the Chicken Tenders
Pat the 1.5 lb Chicken Tenders dry with paper towels to remove excess moisture. This step is crucial for achieving crispiness. Season both sides evenly with 1 tsp Salt, 1 tsp Garlic Powder, 1 tsp Onion Powder, 1 tsp Paprika, and 0.5 tsp Black Pepper.
Place the 0.75 cup All-Purpose Flour in a shallow dish. Dredge each piece of seasoned chicken through the flour, shaking off any excess. The flour creates a base layer that helps the egg wash and breadcrumbs adhere properly.
Step 2: Apply Egg Wash and Panko Coating
In a separate bowl, beat the 2 whole Large Eggs until well combined. Dip each floured chicken tender into the egg wash, ensuring it is fully coated on all sides. Let any excess egg drip off.
Place the 2 cups Panko Breadcrumbs in another shallow dish. Press each egg-coated tender firmly into the panko, turning to coat completely. The pressure ensures the breadcrumbs stick well and create an even, crispy layer.
Step 3: Arrange and Prepare for Baking
Position a wire rack on a baking sheet and lightly coat it with Cooking Spray. Arrange the breaded chicken tenders on the rack in a single layer, ensuring they do not touch each other. This allows hot air to circulate evenly around each piece for uniform crisping.
Lightly drizzle the tenders with 2 tbsp Olive Oil. This adds extra richness and promotes browning as they bake. The oil should glisten on the surface without soaking into the breadcrumbs.
Step 4: Bake Until Golden and Crispy
Preheat your oven to 400°F. Bake the chicken tenders for 15-18 minutes, flipping halfway through the cooking time. This ensures both sides crisp evenly without over-browning.
Watch for the breadcrumbs to turn a deep golden brown and the internal temperature of the chicken to reach 165°F. The tenders should feel firm to the touch and the coating should be crisp when tested with a fork.
Pro Tips For Making Recipe For Baked Chicken Tenders With Panko Crumbs
- Preheat the Pan: I learned this the hard way—tossing the tenders onto a cold tray just gives you soggy panko. Crank the oven to 425°F and let the baking sheet heat up for 5 minutes first. —
- Pat Dry the Chicken: After burning three batches, I finally figured out that wet tenders steam instead of crisp. Blot them with paper towels until they look dull, not shiny. —
- Double Dip the Coating: Sounds weird, but it works: dip in flour, egg, panko, then back in egg and panko again. That extra layer keeps the crumbs from falling off when you flip them. —
- Skip the Overcrowding: I used to cram the sheet pan to save time, but the tenders just steamed each other. Leave at least an inch between pieces so the hot air can actually crisp the panko.
Common Mistakes When Making This Dish
Skipping the Drying Step
I can’t stress this enough—always pat your chicken tenders completely dry before dredging. Wet meat prevents the flour from adhering properly, leading to a sad, patchy coating. Use paper towels and press firmly to remove every bit of moisture. 💪
Overcrowding the Pan
Place tenders on the wire rack with at least 1 inch between each piece. Crowding causes steam to build up, which softens the panko and ruins that shatteringly crisp texture. I use two racks if baking a double batch.
Skipping the Flip
Even with a wire rack, you must flip each tender halfway through baking. The top side gets direct heat first, so flipping ensures both sides turn that perfect golden brown. Set a timer for 8 minutes so you don’t forget.
Using Cold Chicken
Let your tenders sit at room temperature for 15-20 minutes before starting. Cold chicken takes longer to cook, which can dry out the meat before the coating crisps. This simple step makes a noticeable difference.
Under-seasoning the Flour
Don’t just season the chicken—mix ½ tsp salt and ¼ tsp pepper directly into your flour. This adds flavor to every bite of the coating. I learned this trick from my dad’s pancake days. 🌟
Rushing the Baking Time
Resist the urge to pull them early. Panko needs that full 15-18 minutes at 400°F to develop its signature crunch. Check that the internal temp hits 165°F before serving.
Nutrition Facts
Frequently Asked Questions
Can I use regular breadcrumbs instead of panko?
You can, but panko creates the signature extra-crispy texture. For best results, pulse regular breadcrumbs in a food processor to make them coarser before using.
How do I keep the coating from falling off?
Press firmly when coating and let the egg wash drip off before adding panko. Also, pat the chicken completely dry first—moisture prevents adhesion.
What’s the best way to reheat leftovers?
Use the oven at 375°F for 10-12 minutes to maintain crispiness. Microwaving will make the coating soggy.
Can I make these ahead of time?
Bread the tenders up to 4 hours ahead and refrigerate uncovered. Bake just before serving for maximum crispness.

Trained in classic French technique but raised on slow-cooked ribs and spicy rubs, she blends culinary skill with smoke and soul.
- Best Smoked Oxtail Recipe: Deep-Rich Flavor After Low-and-Slow Cooking - October 14, 2026
- Pit Boss Smoked Prime Rib Roast Recipe: Bark-to-Bone Crispness in 4 Hours - October 14, 2026
- Smoked Tuna Steak Recipe: Seared Crust Meets Silky Centers - October 14, 2026