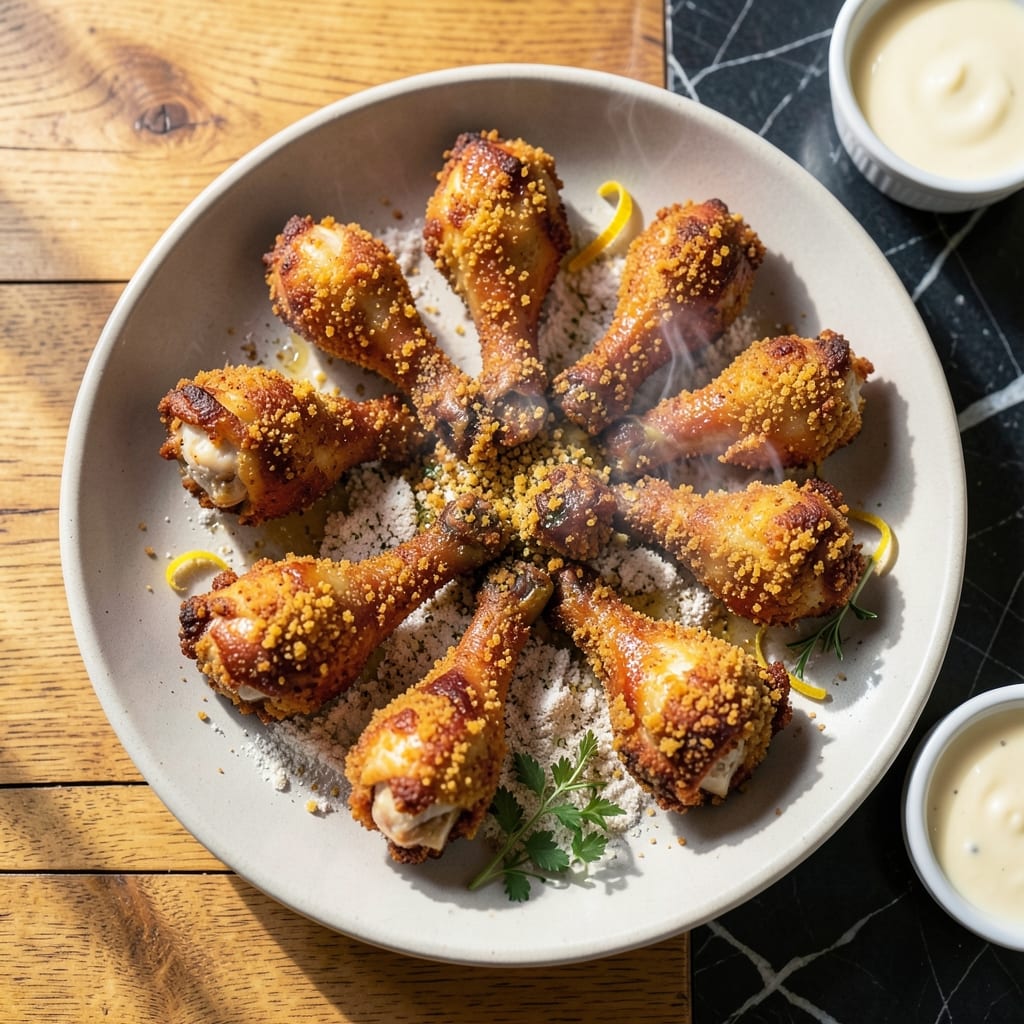
Achieving juicy chicken with a perfectly crispy coating is simpler than you think. This method delivers restaurant-quality results at home with basic ingredients and straightforward techniques.
The secret lies in a two-step breading process that creates a durable, flavorful crust. Proper seasoning at each layer ensures every bite is packed with flavor, while the cooking method guarantees the meat stays tender and moist.
You’ll end up with golden brown chicken legs that stay juicy inside and satisfyingly crunchy outside. The coating adheres perfectly, even when baked or fried, creating a texture that’s impossible to resist.
Serve these as a main course with your favorite sides or as the star of a hearty family meal. The technique works consistently, making it a reliable addition to your cooking repertoire.
Ingredients for Recipe for Breaded Chicken Legs
Pantry staples plus chicken legs. That is all you need for this.
| Ingredient | Amount | Notes |
|---|---|---|
| Chicken Legs 🍗 | 8 pieces | Bone-in, skin-on preferred |
| All-Purpose Flour 🌾 | 1 ½ cups | For initial dredging layer |
| Large Eggs 🥚 | 2 whole | Beaten for egg wash |
| Buttermilk 🥛 | ½ cup | For tenderizing and moisture |
| Panko Breadcrumbs 🍞 | 2 cups | For extra crispy coating |
| Garlic Powder 🧄 | 1 tbsp | For seasoning breading |
| Onion Powder 🧅 | 1 tbsp | Adds depth to coating |
| Paprika 🌶️ | 1 tsp | Sweet or smoked variety |
| Salt 🧂 | 1 tsp | Divided for seasoning layers |
| Black Pepper 🌶️ | ½ tsp | Freshly ground preferred |
| Cayenne Pepper 🔥 | ¼ tsp | Optional for heat |
| Vegetable Oil 🫒 | 2 cups | For frying chicken legs |
| Dried Parsley 🌿 | 1 tsp | For garnish and color |
[recipe_ingredient_scaler]
The chicken legs are the star here—bone-in, skin-on gives you that juicy meat with crispy skin. Most grocery stores carry them in family packs (look for Perdue or Tyson at Walmart or Kroger). If you can only find split drums and thighs, that works too (just adjust cooking time). The buttermilk is key for tenderness—full-fat for best results (or sub regular milk with a tbsp of vinegar).
No buttermilk? Milk plus lemon juice or vinegar works in a pinch. Panko not available? Crushed cornflakes or regular breadcrumbs get you 80% there. The paprika can be swapped for Cajun seasoning if you want extra kick. Want more crunch? Add crushed pork rinds to the breading. The cayenne is optional, but I always add it (just a pinch won’t hurt).
Raw chicken keeps in the fridge for 1-2 days max. Breaded legs are best fried fresh, but you can prep the breading station 4 hours ahead. Leftovers? Reheat in a 400°F oven for 10-15 minutes to crisp them back up. Never microwave—soggy disaster.
Why You’ll Love This Recipe
- One Pan Wonder: I love that I only need a bowl and a baking sheet—no fancy equipment, just mix, coat, and bake.
- Crispy Perfection: The buttermilk and panko combo gives that golden crunch with juicy meat inside. Honestly, it’s the only way I’ll eat chicken legs now.
- Feeds the Crew: Whether it’s a lazy Sunday or a last-minute dinner, this works for picky kids and hungry adults alike.
- Budget Friendly: Chicken legs are cheap, and a little panko goes a long way. I stretch this meal across two nights without anyone complaining.
Step-by-Step Instructions for Breaded Chicken Legs
Here’s my foolproof method for achieving that perfect crunch with tender meat inside.
Step 1: Season and Dredge the Chicken Legs
Pat the 8 pieces Chicken Legs dry with paper towels—this ensures the coating sticks properly. Season them lightly with ½ tsp Salt and ¼ tsp Black Pepper (you’ll add more to the breading later).
In a shallow dish, combine the 1.5 cups All-Purpose Flour with ½ tsp Salt, ¼ tsp Black Pepper, and ½ tsp Cayenne Pepper. Dredge each piece in the flour mixture, shaking off any excess. The flour creates a base layer that helps the egg wash adhere better.
Step 2: Dip in Egg Wash and Coat with Panko Mixture
In a bowl, whisk together the 2 whole Large Eggs and 0.5 cup Buttermilk until smooth. This mixture tenderizes the meat and adds moisture to the coating. Dip each floured chicken leg into the egg wash, letting any excess drip off.
In another shallow dish, mix the 2 cups Panko Breadcrumbs with 1 tbsp Garlic Powder, 1 tbsp Onion Powder, and 1 tsp Paprika. Press each chicken leg firmly into the panko mixture, ensuring it’s fully coated. The panko creates that signature extra-crispy texture.
Step 3: Fry to Golden Perfection
Heat the 2 cups Vegetable Oil in a deep skillet over medium-high heat to 350°F. Use a thermometer for accuracy—oil that’s too cool will make the coating greasy, while oil that’s too hot can burn the outside before the inside cooks.
Carefully place the breaded chicken legs in the hot oil, working in batches if needed to avoid crowding. Fry for 12-15 minutes, turning occasionally, until the coating is deep golden brown and the internal temperature reaches 165°F. The panko will create an audible sizzle when it hits the oil—music to your ears.
Step 4: Drain and Finish
Transfer the fried chicken legs to a wire rack set over a paper towel-lined baking sheet. This setup allows air to circulate around the pieces, preventing them from becoming soggy. Let them drain for 5 minutes—this is just enough time to let the oil drip off without cooling the chicken too much.
Sprinkle the hot chicken legs with the 1 tsp Dried Parsley for a pop of color and a subtle herbal note. The parsley sticks better when the chicken is still hot and slightly oily. Serve immediately while the coating is at its crispiest and the meat is juiciest.
Pro Tips For Making Recipe For Breaded Chicken Legs
- Dry the Skin First: Pat the chicken legs thoroughly with paper towels before dredging—I learned this the hard way after my first few batches turned out soggy instead of crispy.
- Chill the Coating: After breading, let the legs rest in the fridge for 15-20 minutes. This keeps the Panko from falling off during frying.
- Skip the Crowding: Fry in batches with at least an inch between each leg, or the oil temp drops and you’ll end up with greasy, undercooked spots.
- Use Cold Buttermilk: Straight-from-the-fridge buttermilk makes the egg wash thicker, so the breadcrumbs stick better and stay put while cooking.
Creative Variations of recipe for breaded chicken legs
Spicy Southern Style
Add 1 tbsp Cajun seasoning to your panko mixture for a Southern kick. I also mix in ½ tsp cayenne pepper to the flour dredge for extra heat. The result has a beautiful reddish hue and a warmth that builds with each bite. 🌶️
Honey Mustard Glaze
After frying, brush the legs with a mix of 2 tbsp honey and 2 tbsp Dijon mustard. Return to a 400°F oven for 5 minutes to set the glaze. This sweet-tangy coating caramelizes beautifully, adding another layer of texture.
Parmesan Herb Crust
Stir ½ cup grated Parmesan and 1 tbsp dried Italian herbs into your panko mixture. The Parmesan adds a salty depth while the herbs give it a fresh aromatic quality. I love this variation with a side of marinara for dipping.
Air Fryer Method
Spray breaded legs with olive oil and air fry at 400°F for 20-22 minutes, flipping halfway. You’ll get nearly the same crispiness as frying with far less oil. The coating browns beautifully and the meat stays incredibly juicy. 🔥
Asian-Inspired Twist
Swap the panko for crushed rice crackers and add 1 tbsp sesame seeds to the mixture. Include 1 tsp ginger powder in your flour dredge. Serve with sweet chili sauce for an Asian fusion experience.
Double-Crunch Coating
For extra crunch, repeat the egg wash and panko coating process. Press the second layer on firmly and let it rest for 10 minutes before frying. This creates a thicker, more substantial crust that stays crispy longer.
Nutrition Facts
Frequently Asked Questions
Can I use boneless chicken instead?
Yes, but bone-in yields juicier results. Boneless cooks faster—reduce frying time to 8-10 minutes. The coating may not adhere as well without skin.
Why did my coating fall off during frying?
Likely because the chicken wasn’t dry before dredging or the oil wasn’t hot enough. Pat pieces thoroughly and maintain 350°F oil temperature.
Can I bake instead of fry?
Bake at 400°F for 25-30 minutes, flipping halfway. Spray with oil first for extra crispiness. The texture will differ slightly.
How do I keep them crispy for later?
Reheat on a wire rack in a 400°F oven for 10-15 minutes. Microwaving makes them soggy. Store leftovers in a single layer to prevent steam buildup.

Trained in classic French technique but raised on slow-cooked ribs and spicy rubs, she blends culinary skill with smoke and soul.
- Best Smoked Oxtail Recipe: Deep-Rich Flavor After Low-and-Slow Cooking - October 14, 2026
- Pit Boss Smoked Prime Rib Roast Recipe: Bark-to-Bone Crispness in 4 Hours - October 14, 2026
- Smoked Tuna Steak Recipe: Seared Crust Meets Silky Centers - October 14, 2026