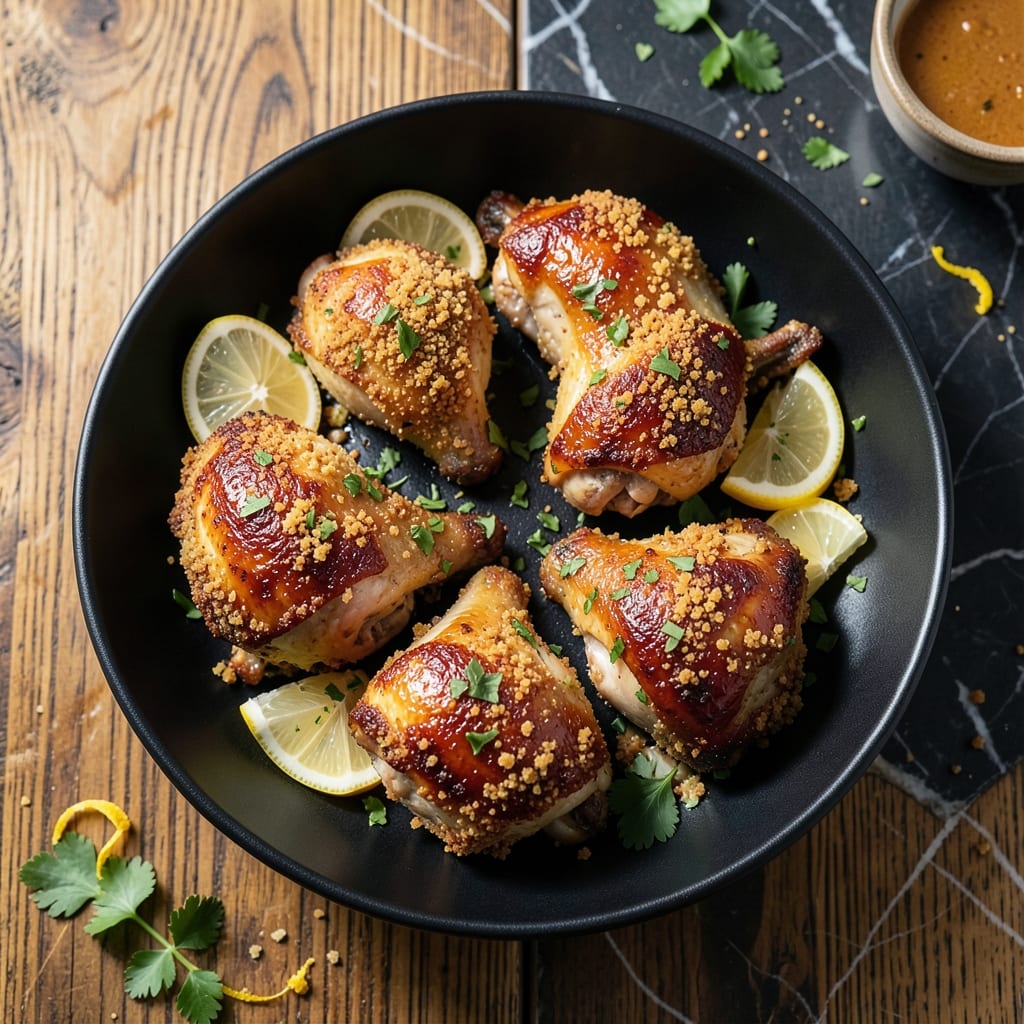
I’ve perfected the art of achieving crispy, golden panko-crusted chicken thighs that stay juicy inside. This method transforms simple ingredients into a dish with restaurant-quality texture and flavor.
The secret lies in pressing the panko coating firmly onto the chicken before baking at 400°F. This creates a shatteringly crunchy topping while keeping the meat tender and moist beneath.
What emerges from the oven is chicken with a perfectly browned crust and succulent interior. The panko breadcrumbs add a satisfying crunch that contrasts beautifully with the juicy meat.
Serve these as a main course with your favorite sides or over a fresh salad for added texture. Here’s how to make them perfectly every time.
Ingredients for Recipe for Baked Chicken Thighs with Panko Bread Crumbs
Bone-in thighs, panko, and a few pantry staples create that restaurant-quality crunch and juiciness.
| Ingredient | Amount | Notes |
|---|---|---|
| Bone-in, Skin-on Chicken Thighs 🍗 | 2 lb | Pat dry before coating |
| Panko Breadcrumbs 🍞 | 2 cups | Japanese-style for maximum crunch |
| All-Purpose Flour 🌾 | ½ cup | For initial dredging |
| Large Eggs 🥚 | 2 whole | Beaten for binding |
| Dijon Mustard 🟡 | 2 tbsp | Adds tang to coating |
| Garlic Powder 🧄 | 1 tsp | For seasoning breadcrumbs |
| Onion Powder 🧅 | 1 tsp | Balances the garlic |
| Paprika 🌶️ | 1 tsp | Sweet or smoked variety |
| Dried Thyme 🌿 | ½ tsp | Earthy complement to chicken |
| Kosher Salt 🧂 | 1 ½ tsp | Divided for seasoning |
| Black Pepper 🌶️ | ½ tsp | Freshly ground preferred |
| Olive Oil 🫒 | 2 tbsp | For drizzling before baking |
| Unsalted Butter 🧈 | 2 tbsp | Melted for richness |
| Fresh Parsley 🌿 | ¼ cup | Chopped, for garnish |
[recipe_ingredient_scaler]
The chicken thighs are non-negotiable here—bone-in, skin-on gives you that juicy interior. Grab them from Whole Foods or your butcher for the best quality, but supermarket brands work too. The panko is what sets this apart from regular breadcrumbs. Look for Kikkoman brand at most grocery stores—it’s the gold standard for that shatteringly crisp texture.
No panko? Crush plain melba toast in a food processor—it’s the closest substitute. Fresh out of Dijon? Regular mustard plus a pinch of sugar gets you 80% there. The herbs can be swapped for whatever you’ve got (rosemary or oregano both work great). If you’re avoiding butter, olive oil works fine—just don’t skip the fat entirely.
The breaded thighs bake best fresh, but leftovers keep 3-4 days in the fridge. Reheat in a toaster oven to revive the crunch. Panko absorbs moisture, so store unused breadcrumbs in an airtight container—they’ll last 6-12 months that way.
Why You’ll Love This Recipe
- No-Fuss Coating: Honestly, it’s just dip in flour, egg, and panko—no fancy steps, and the Dijon in the egg wash adds a little kick without extra work.
- Crispy Outside, Juicy Inside: That panko crust gets golden and crunchy while the skin-on thighs stay absurdly tender. The contrast? Ridiculously good.
- Weeknight Hero: I throw these in the oven while finishing other sides—dinner’s done in 40 minutes flat, and they’re fancy enough for company.
- Budget-Friendly Feast: Bone-in thighs are cheap, and panko stretches further than you’d think. Leftovers? Still crispy reheated in the toaster oven.
Step-by-Step Instructions for Baked Chicken Thighs With Panko Bread Crumbs
Here’s how to get that perfect crunch every time without drying out the meat.
Step 1: Prep and Season the Chicken Thighs
Pat the 2 lb Bone-in, Skin-on Chicken Thighs completely dry with paper towels—this is non-negotiable for crispy skin. I press hard to remove every bit of moisture, especially under the skin where water tends to pool.
Season both sides generously with 1 tsp Kosher Salt and 0.5 tsp Black Pepper (reserve the remaining 0.5 tsp Kosher Salt for later). I like to get my fingers right under the skin to season the meat directly—this ensures flavor in every bite. Let the seasoned thighs sit while you prep the coating.
Step 2: Create the Panko Breading Station
Set up three shallow bowls. In the first, whisk together the 0.5 cup All-Purpose Flour, remaining 0.5 tsp Kosher Salt, 1 tsp Paprika, 1 tsp Garlic Powder, 1 tsp Onion Powder, and 0.5 tsp Dried Thyme until evenly combined. This flour mixture adds both flavor and structure to the coating.
In the second bowl, beat the 2 whole Large Eggs with the 2 tbsp Dijon Mustard until fully blended and slightly frothy. The mustard adds a subtle tang that cuts through the richness. In the third bowl, pour the 2 cups Panko Breadcrumbs—no seasoning needed here as the flour mixture already carries the flavor.
Step 3: Bread and Rest the Chicken
Dredge each thigh in the flour mixture, pressing firmly to adhere, then shake off any excess. Next, dip into the egg mixture, letting any excess drip off for 5 seconds. Finally, press into the panko breadcrumbs, coating all sides completely with an even layer. I use one hand for wet ingredients and one for dry to keep things clean.
Place the breaded thighs on a wire rack set over a baking sheet. This setup allows air to circulate underneath, preventing the coating from getting soggy. Let them rest for 10-15 minutes—this helps the coating set and adhere better during baking.
Step 4: Bake to Golden Perfection
Preheat your oven to 400°F. While it heats, drizzle the 2 tbsp Olive Oil evenly over the breaded thighs—this adds extra crispiness. Then melt the 2 tbsp Unsalted Butter and drizzle that over too, making sure to cover all the breaded surfaces.
Bake for 35-40 minutes until the coating is deep golden brown and the internal temperature reaches 165°F. You’ll know it’s ready when the panko topping is crispy and the juices run clear when pierced. Rotate the pan halfway through for even browning if your oven has hot spots.
Step 5: Rest and Garnish
Transfer the baked thighs to a serving platter and let them rest for 5 minutes. This brief rest allows the juices to redistribute, ensuring the meat stays moist when you cut into it. The coating will stay crispy if you don’t cover them.
Just before serving, sprinkle with the 0.25 cup Fresh Parsley for a pop of color and freshness. The parsley should be finely chopped so it distributes evenly over the thighs. Serve immediately while the coating is still at its crispiest.
Pro Tips For Making Recipe For Baked Chicken Thighs With Panko Bread Crumbs
- Preheat the Pan: Start with a screaming hot oven—425°F minimum—so the panko gets crispy before the chicken overcooks. I learned this the hard way after pulling out sad, soggy thighs from a lukewarm oven.
- Dry the Skin: Pat the chicken thighs bone dry with paper towels before dredging. Sounds tedious, but it’s the only way the flour-egg-panko crust actually sticks instead of sliding off.
- Press Hard on Panko: After coating, press the panko into the thighs with your palms—firmly, like you mean it. This keeps the crumbs from floating away in the oven and gives you that thick, crunchy layer.
- Use Dijon in Egg Wash: Whisk a tablespoon of Dijon into the beaten eggs before dredging. It adds a subtle tang and helps the coating cling better than plain egg ever could.
Common Mistakes When Making Perfect Results
Skipping the Drying Step
Never skip patting the 2 lb Bone-in, Skin-on Chicken Thighs completely dry first. Moisture is the enemy of crispiness—even a little water under the skin will steam the breading instead of frying it. I use 3-4 paper towels per thigh to ensure they’re bone-dry before seasoning. 💡
Overcrowding the Pan
Give each thigh space on the rack—crowding causes the panko to steam rather than crisp. I use a large baking sheet with a wire rack and never put more than 4 thighs on it at once. This ensures hot air circulates evenly around each piece.
Skipping the Rest
Letting the breaded thighs rest for 10-15 minutes before baking is crucial. This helps the coating set and adhere properly. Without this step, the panko might slide off during baking, leaving you with bare spots and a messy oven.
Wrong Oven Temperature
400°F is the sweet spot for this recipe. Any lower and the panko won’t crisp properly; any higher and the breadcrumbs might burn before the chicken cooks through. I always preheat my oven for 15 minutes to ensure even heat.
Not Pressing the Panko
Simply dipping the thighs in panko isn’t enough—you need to press firmly to create a thick, even layer. I use my palm to really pack the breadcrumbs onto the chicken, especially on the skin side. This creates that shatteringly crisp texture we’re after.
Without this pressure, the coating will be thin and may not stick properly during baking.
Nutrition Facts
Frequently Asked Questions
Can I use boneless thighs instead?
Yes, but bone-in helps keep the meat juicy during baking. If using boneless, reduce baking time to 25-30 minutes at 400°F to prevent drying out.
Why did my coating fall off?
Press the panko firmly onto each thigh and let them rest 10-15 minutes before baking. This helps the egg wash set, creating a better bond.
How do I keep the panko crispy?
Use a wire rack on your baking sheet for air circulation. Avoid covering after baking—this traps steam and makes the coating soggy.
Can I make this ahead?
Bread the thighs up to 4 hours ahead and refrigerate. Bake just before serving for maximum crispiness.

Trained in classic French technique but raised on slow-cooked ribs and spicy rubs, she blends culinary skill with smoke and soul.
- Recipe for Boneless Pork Chops in Cast Iron Skillet: Sear and Baste to Juicy Perfection - October 3, 2026
- Recipe for Boneless Cross Rib Roast: Slow-Roasted Beef with Herb Crust - October 3, 2026
- Hamburgers in Sauce Recipe Crock Pot: Slow-Cooked Savory Delight - October 3, 2026