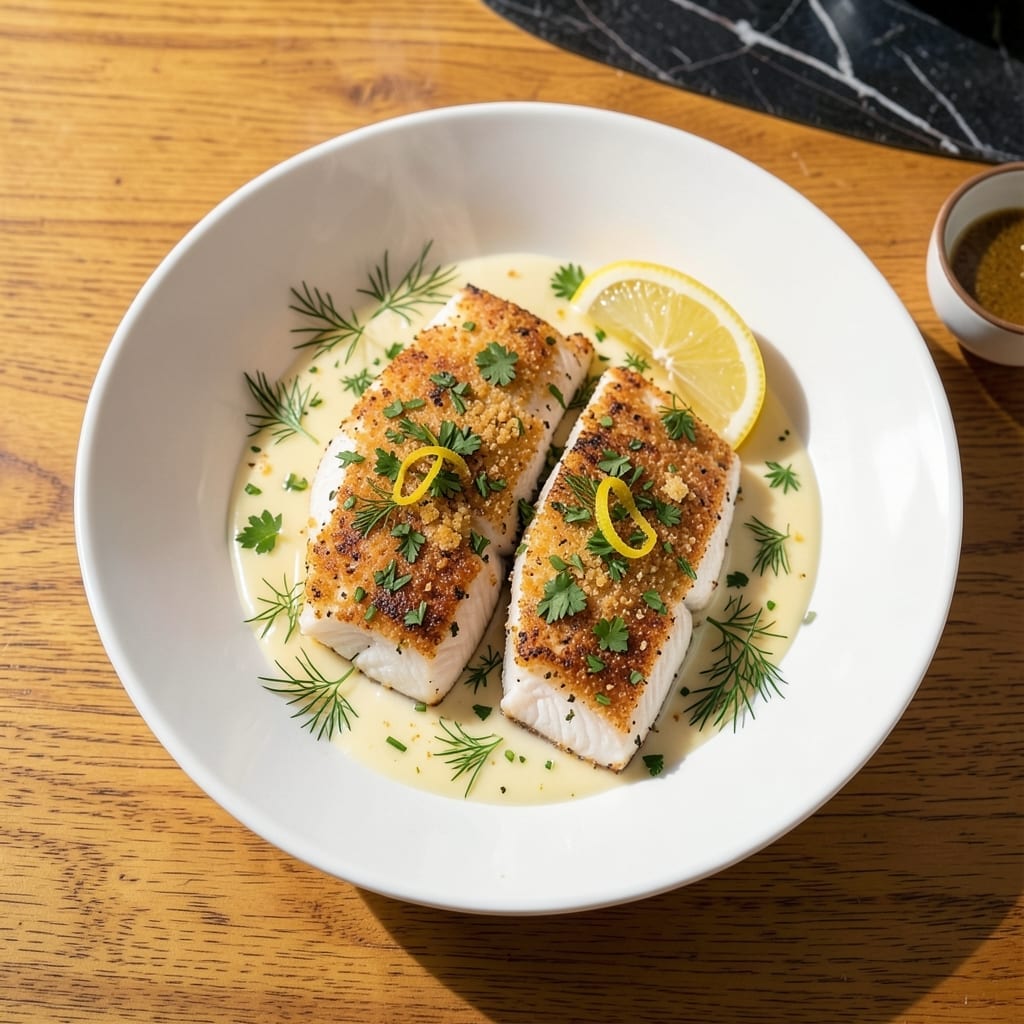
This baked red snapper delivers flaky, tender fish with minimal effort and maximum flavor. A simple lemon-herb crust enhances the natural sweetness of the snapper without overpowering it.
Perfect for an elegant weeknight dinner, this method ensures moist, perfectly cooked fish every time with just a few ingredients and 20 minutes in the oven.
Ingredients for Recipe for Baked Red Snapper
Minimal ingredients, maximum flavor with this elegant baked fish dish.
| Ingredient | Amount | Notes |
|---|---|---|
| Red Snapper Fillets 🐟 | 1 ½ lb | Skin-on, bone-out, about 1-inch thick |
| Unsalted Butter 🧈 | 4 tbsp | Melted for crust |
| Panko Breadcrumbs 🍞 | ½ cup | For crispy topping texture |
| Fresh Lemon 🍋 | 1 whole | Zested and juiced |
| Fresh Parsley 🌿 | ¼ cup | Finely chopped, flat-leaf variety |
| Fresh Dill 🌿 | 2 tbsp | Chopped, or substitute dried |
| Garlic Cloves 🧄 | 3 cloves | Minced for aromatic base |
| Dijon Mustard 🟡 | 1 tbsp | For tangy binding agent |
| Extra-Virgin Olive Oil 🫒 | 1 tbsp | For greasing baking dish |
| Kosher Salt 🧂 | 1 tsp | Diamond Crystal preferred for seasoning |
| Freshly Ground Black Pepper 🌶️ | ½ tsp | Coarse grind for best texture |
| Dry White Wine 🍷 | ¼ cup | For deglazing and moisture |
| Shallot 🧅 | 1 whole | Finely minced for subtle flavor |
[recipe_ingredient_scaler]
The snapper is the star—look for wild-caught red snapper fillets at Whole Foods or a trusted seafood counter. Thickness matters: aim for 1-inch fillets to ensure even cooking without drying out. The skin should be bright and slightly iridescent, a sign of freshness. If buying frozen, thaw overnight in the fridge (never at room temperature) to maintain texture integrity.
No Panko? Regular breadcrumbs at half the amount work, but the texture won’t be as crisp. Fresh herbs are ideal, but dried at one-third the quantity can substitute—just rehydrate in a bit of lemon juice. The white wine adds depth; dry vermouth is a perfect one-to-one swap. For a non-alcoholic option, chicken stock with a splash of lemon juice mimics the acidity well.
Best served immediately, but leftovers reheat gently—10-15 minutes at 300°F to avoid overcooking. Store cooked fish in an airtight container for up to 2 days. The herb crust loses crispness, but the flavor remains excellent for quick meals.
Why You’ll Love This Recipe
- I’ll be real: this is my go-to when I need a fancy-feeling dinner with zero stress.
- One Pan Wonder: I just pop the fillets on a sheet, top with buttery panko and lemon, and let the oven do the work.
- Buttery Crunch: That panko-parsley topping gets golden and crisp while the snapper stays tender—honestly, it’s the best part.
- Weeknight Hero: I’ll be real: this is my go-to when I need a fancy-feeling dinner with zero stress.
Step-by-Step Instructions for Baked Red Snapper
This refined method ensures perfectly flaky fish with a golden, herbaceous crust.
Step 1: Prepare the Lemon-Herb Crust Mixture
In a medium bowl, combine the 0.5 cup Panko breadcrumbs, 0.25 cup Fresh Parsley, 2 tbsp Fresh Dill, 3 cloves Garlic Cloves (minced), 1 tbsp Dijon Mustard, and the zest of the 1 whole Fresh Lemon. The mustard acts as a binding agent while the citrus zest brightens the herb profile.
Add 4 tbsp Unsalted Butter (melted) to the bowl and stir until the mixture resembles wet sand and holds together when pressed. This texture ensures the crust will adhere to the fillets and crisp properly during baking. Season with 1 tsp Kosher Salt and 0.5 tsp Freshly Ground Black Pepper.
Step 2: Sear the Shallot and Deglaze
Preheat your oven to 400°F. While it heats, warm the 1 tbsp Extra-Virgin Olive Oil in a small oven-safe skillet over medium heat. Add the 1 whole Shallot (finely minced) and sauté for 2-3 minutes until translucent and just beginning to caramelize at the edges.
Pour in the 0.25 cup Dry White Wine to deglaze the pan, scraping up any browned bits with a wooden spoon. Simmer for 1-2 minutes until the liquid reduces by half. This creates a flavorful base that will infuse the fish as it bakes.
Step 3: Top Fillets and Bake to Flaky Perfection
Pat the 1.5 lb Red Snapper Fillets dry with paper towels—this is critical for achieving a golden crust. Place them skin-side down in the skillet with the shallot-wine mixture. Press the Panko mixture evenly over the top of each fillet, creating a ¼-inch thick layer. The crust should fully cover the surface to lock in moisture.
Transfer the skillet to the preheated oven and bake for 12-15 minutes until the crust is golden brown and the fish flakes easily with a fork. Avoid overbaking; the fish continues cooking slightly after removal from the oven. The internal temperature should reach 130-135°F for optimal doneness.
Step 4: Finish and Serve
Remove the skillet from the oven and let the fish rest for 2-3 minutes. Drizzle the juices from the pan over the crust to add moisture and shine. The crust should be crisp to the touch while the fish beneath remains tender and flaky.
Garnish with fresh dill sprigs and lemon wedges from the 1 whole Fresh Lemon. Serve immediately while the crust is at its peak texture. The contrast between the crisp topping and the delicate, buttery fish is what defines this dish.
Pro Tips For Making Recipe For Baked Red Snapper
- Dry the Fillets: Pat the red snapper fillets completely dry with paper towels before seasoning—I learned this the hard way after my first batch steamed instead of crisping under the panko.
- Toast the Panko: Toss the panko in a dry pan for 2-3 minutes until golden before mixing with butter. Sounds weird, but it works: it guarantees a crunchy topping that doesn’t turn soggy in the oven.
- Watch the Oven Temp: Bake at 400°F for 12-15 minutes—any lower and the breadcrumbs won’t brown, any higher and the fish dries out. My grandmother swore by this, and she was right.
- Zest Before Juicing: Grate the lemon zest directly into your butter mixture before squeezing the juice—it packs way more flavor than juice alone and actually changes the outcome.
Essential Equipment for Perfect Results
Oven-Safe Skillet
An oven-safe skillet is non-negotiable for this dish—I use my 12-inch Lodge cast iron because it retains heat beautifully. A stainless steel skillet works equally well if you prefer lighter cookware. Ensure it can handle 400°F for 15 minutes without warping. 🔥
Mixing Bowls
You’ll need a medium mixing bowl for the crust mixture. I prefer Pyrex glass because it’s durable, non-reactive, and easy to clean. The bowl should hold at least 2 cups to comfortably mix the breadcrumbs, herbs, and butter without spilling.
Wooden Spoon
A wooden spoon is ideal for stirring the crust mixture and deglazing the pan. It won’t scratch your skillet like metal utensils and handles the high heat of the stovetop and oven seamlessly. Plus, it’s gentle on your cookware investment.
Citrus Zester
For the lemon zest, a Microplane is my go-to tool—it removes the flavorful outer layer without the bitter pith. If you don’t have one, the fine side of a box grater works, but it’s less efficient. Fresh zest makes a noticeable difference in the crust’s brightness.
Instant-Read Thermometer
To ensure perfect doneness, an instant-read thermometer is key. I use the ThermoWorks ThermoPop for its accuracy and speed. Aim for an internal temperature of 130-135°F in the thickest part of the fillet. This prevents overcooking while ensuring safety. 💡
Paper Towels
Pat the fillets dry thoroughly with paper towels before adding the crust. This step removes excess moisture, which is critical for achieving a crisp, golden topping. Moisture is the enemy of a perfect crust, so don’t skip this.
Nutrition Facts
Frequently Asked Questions
What thickness should the fillets be?
Aim for 1-inch thick fillets for even cooking. Thinner pieces may overcook, while thicker ones might not finish in 12-15 minutes.
Can I use frozen fillets?
Yes, but thaw overnight in the fridge first. Never cook from frozen, as this leads to uneven doneness and a soggy crust.
How do I know when it’s done?
The fish is ready when it reaches 130-135°F internally and flakes easily with a fork. The crust should be golden brown.
Can I make the crust ahead?
Prepare the mixture up to 1 day in advance and refrigerate. Press onto fillets just before baking to maintain crispness.

Trained in classic French technique but raised on slow-cooked ribs and spicy rubs, she blends culinary skill with smoke and soul.
- Recipe for Boneless Pork Chops in Cast Iron Skillet: Sear and Baste to Juicy Perfection - October 3, 2026
- Recipe for Boneless Cross Rib Roast: Slow-Roasted Beef with Herb Crust - October 3, 2026
- Hamburgers in Sauce Recipe Crock Pot: Slow-Cooked Savory Delight - October 3, 2026