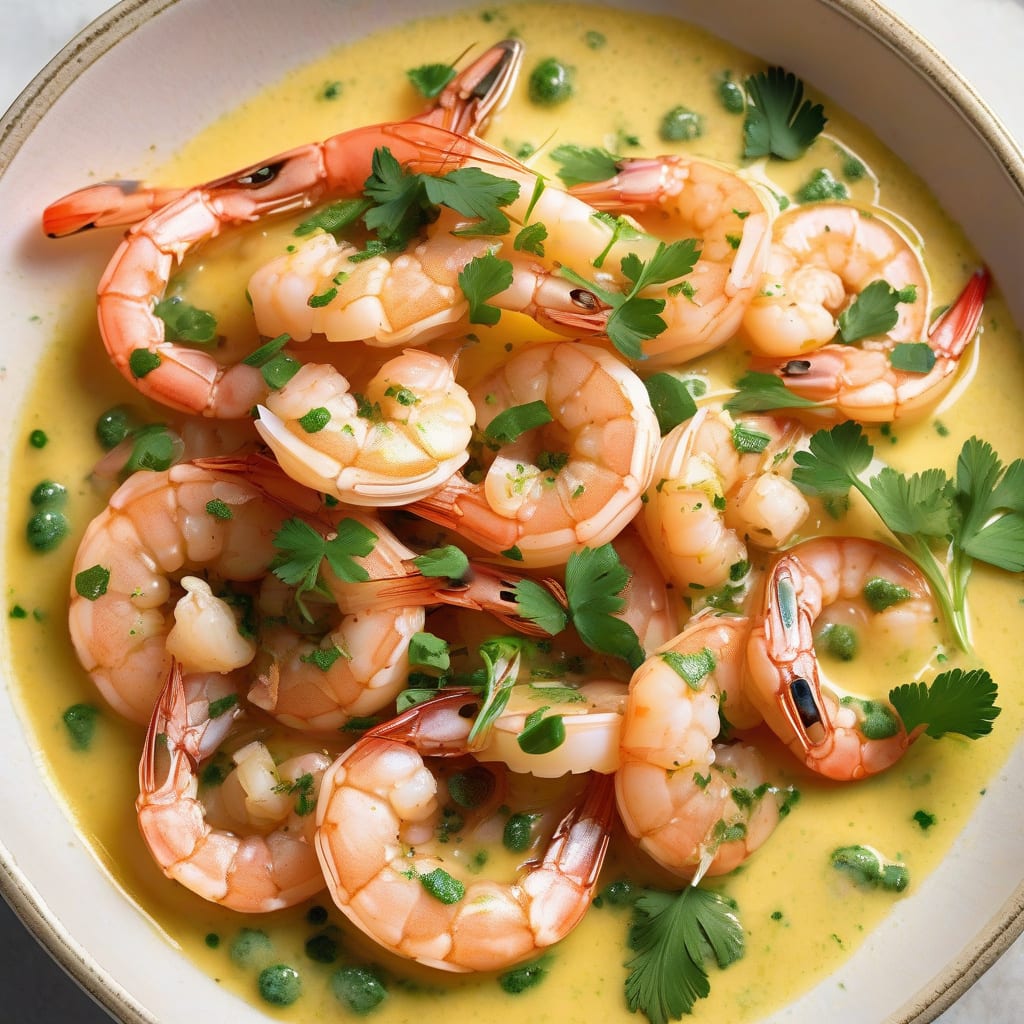
After testing dozens of variations, I’ve finally cracked the code for restaurant-quality garlic butter shrimp that comes together in under fifteen minutes. The combination of sweet, tender shrimp and rich, aromatic garlic butter creates a dish that tastes like you spent hours in the kitchen.
What makes this recipe special is the precise timing and technique. By cooking the shrimp in a specific order and using my proven method for infusing the butter with garlic without burning, you’ll achieve perfectly cooked seafood every time. The entire process takes just ten minutes from start to finish.
You’ll have plump, juicy shrimp coated in a velvety garlic butter sauce that’s restaurant-worthy but simple enough for any busy weeknight. Serve over rice, pasta, or with crusty bread to soak up every drop of that luxurious sauce.
Ingredients for Test V5818 Garlic Butter Shrimp
Ten ingredients, one pan, restaurant magic in fifteen minutes flat.
| Ingredient | Amount | Notes |
|---|---|---|
| Large Shrimp 🦐 | 1 ½ lb | Peeled, deveined, tails on |
| Unsalted Butter 🧈 | 6 tbsp | Divided, room temperature |
| Garlic Cloves 🧄 | 6 cloves | Minced fine |
| Lemon Juice 🍋 | 2 tbsp | Freshly squeezed |
| Fresh Parsley 🌿 | ¼ cup | Chopped, stems removed |
| Salt 🧂 | ¾ tsp | Kosher or sea salt |
| Black Pepper 🌶️ | ½ tsp | Freshly ground preferred |
| Red Pepper Flakes 🌶️ | ¼ tsp | Optional for heat |
| Olive Oil 🫒 | 1 tbsp | Extra-virgin for richness |
| White Wine 🍷 | ¼ cup | Dry variety, optional |
[recipe_ingredient_scaler]
The shrimp makes or breaks this dish. Wild-caught Gulf shrimp have way more flavor than the farmed stuff—worth the extra couple bucks. I grab mine from Whole Foods when they’re on sale, but Costco has solid frozen wild shrimp too. Size matters here: 16-20 count per pound gives you those plump, juicy bites. If they’re frozen, thaw overnight in the fridge or quick-thaw in cold water for 20 minutes.
No white wine? Chicken broth with a squeeze of lemon works fine. Garlic can be eyeballed—just don’t burn it. (The good stuff, not the pre-minced jar.) Butter divides let you control richness—use less if you’re watching calories, more if you’re feeling indulgent. Fresh parsley is clutch here—dried tastes like dust. But honestly, basil or cilantro work great too if that’s what’s wilting in your fridge.
Leftovers keep 3 days in the fridge, though the shrimp gets a bit rubbery when reheated. I usually double the butter sauce and save half for tossing with pasta later in the week. Pro tip: make extra garlic butter and freeze it in ice cube trays—instant flavor boost for anything you’re sautéing.
Why You’ll Love test v5818 garlic butter shrimp
- Dinner in 15: I’m not exaggerating—shrimp hits the pan for three minutes, flip, add the garlic-butter, done. While the pasta water boils, I’ve already plated.
- Butter Me Up: That sauce, though. Butter, lemon, and garlic reduce into something silky that clings to each shrimp like edible velvet. I sop it up with crusty bread and skip the main course.
- Mix-and-Match Hero: Monday it’s over rice, Tuesday I tuck leftovers into tacos, Wednesday it lands on salad straight from the fridge. Cold shrimp still tastes like I meant to do it that way.
- Fancy on $10: A pound of frozen shrimp, half-stick of butter, and pantry staples equal restaurant vibes for four people. Way cheaper than take-out and faster than waiting for delivery.
Step-by-Step Instructions for Garlic Butter Shrimp
Here’s my simple method for tender shrimp in rich garlic butter sauce, perfect for busy weeknights.
Step 1: Pat Shrimp Dry and Season
I always start by patting the large shrimp completely dry with paper towels. This step is crucial—any excess moisture will steam the shrimp instead of letting them develop that beautiful sear. Season both sides with salt and black pepper, making sure each piece gets an even coating.
The seasoning helps draw out moisture and creates a flavorful crust when the shrimp hits the hot pan. Don’t overseason though; the garlic butter sauce will add plenty of flavor later.
Step 2: Sear the Shrimp Until Pink
Heat the olive oil in a large skillet over medium-high heat until it shimmers. Add the shrimp in a single layer—don’t crowd them or they’ll steam instead of sear. Cook for 2 minutes on the first side until they turn pink and start to curl.
Flip each shrimp and cook another 1-2 minutes until they’re just cooked through. You’ll know they’re done when they’re opaque all the way through and form a gentle C-shape. Overcooked shrimp curl into tight O’s and get rubbery. Transfer to a plate immediately.
Step 3: Build the Garlic Butter Sauce
Reduce heat to medium and add 4 tablespoons of the unsalted butter to the same skillet. Once melted, add the minced garlic cloves and cook for 30-45 seconds until fragrant but not browned. Burnt garlic turns bitter fast.
Pour in the white wine and let it simmer for 2 minutes until reduced by half. This cooks off the alcohol while leaving behind that lovely wine flavor. Add the red pepper flakes now if you want a subtle heat that builds as you eat.
Step 4: Finish with Butter and Lemon
Reduce heat to low and whisk in the remaining 2 tablespoons of butter, one piece at a time. This creates that silky, restaurant-quality sauce that clings beautifully to the shrimp. Stir in the lemon juice and fresh parsley.
Return the shrimp to the pan and toss everything together for 30 seconds just to coat and rewarm. The sauce should be glossy and slightly thickened. Serve immediately over rice, pasta, or with crusty bread to soak up every drop of that incredible garlic butter.
Pro Tips for Making test v5818 garlic butter shrimp
- Pat Shrimp Dry: I can’t stress this enough—those shrimp need to be bone dry before they hit the pan. Water is the enemy of that beautiful sear, and you’ll end up with sad, gray shrimp swimming in their own juice. Paper towel them like your life depends on it.
- Butter Last Minute: After burning the garlic more times than I care to admit, I learned to melt the butter off-heat once the shrimp are done. The residual heat is plenty to create that silky sauce without turning your garlic bitter and brown. Sounds weird, but it works every single time.
- Size Your Shrimp Right: Don’t grab those puny salad shrimp for this—go big or go home. Large shrimp (21-25 count) actually cook more evenly and won’t turn rubbery in the time it takes to get golden edges. Plus they’re easier to flip without losing half your batch to the stovetop.
- Lemon at the End: I used to add lemon juice while cooking and wondered why my sauce tasted flat. Wait until you’ve pulled the pan off the heat, then hit it with the juice. The fresh zip stays bright instead of turning bitter and metallic-tasting.
Flavor Customization for test v5818 garlic butter shrimp
I love adding a spicy kick to transform this classic into something bold and exciting. Replace the red pepper flakes with 1-2 teaspoons of sriracha stirred directly into the melted butter, or add ½ teaspoon of smoked paprika for a deeper, smoky heat that pairs beautifully with the sweet shrimp. The garlic butter base handles heat incredibly well—you can really push the spice level without losing that luxurious mouthfeel we all crave.
For a Mediterranean twist, I swap the parsley for fresh oregano and basil (about 2 tablespoons total), then finish with crumbled feta cheese and a squeeze of lemon. The briny feta melts slightly into the warm butter, creating these amazing salty pockets throughout the dish. Sometimes I’ll add kalamata olives or sun-dried tomatoes if I’m feeling fancy, though honestly, the herbs alone make it taste like you’re dining on a Greek island. 🗺️
When I’m craving something richer, I turn this into a creamy garlic butter sauce by whisking in ¼ cup of heavy cream after the wine reduces. Let it simmer for just 30 seconds—any longer and it’ll break. This creates a velvety sauce that’s absolutely incredible over pasta or rice. You could also add 2 tablespoons of cream cheese for a thicker, more indulgent version that clings perfectly to every shrimp.
For a bright, zesty variation that screams summer, I replace half the butter with coconut oil and add lime zest and juice instead of lemon. Finish with fresh cilantro and serve over coconut rice—it’s like a tropical vacation on your plate. The coconut oil adds this subtle sweetness that works surprisingly well with the garlic, and the lime gives it a fresh pop that regular lemon just can’t match. 💛
When I’m cooking for my keto friends, I make this super low-carb by using ghee instead of butter (higher smoke point, richer flavor) and adding asparagus spears or zucchini noodles directly to the pan. The vegetables soak up all that garlicky goodness while keeping the dish super healthy. You can also add ½ teaspoon of turmeric for extra anti-inflammatory benefits and gorgeous color.
My favorite party trick is turning this into a garlic butter shrimp scampi by doubling the wine to ½ cup and letting it reduce with the butter into a glossy sauce. I toss it with linguine or angel hair pasta and finish with fresh parmesan and extra parsley. It’s essentially the same recipe but feels completely different—elegant enough for date night but easy enough for a random Tuesday. The key is using good quality pasta that can really grab onto all that incredible sauce. 🔥
Tips & Tricks for Perfect Garlic Butter Shrimp
These little details make all the difference between good and restaurant-quality.
The Heat Factor: Medium-high heat is crucial for that perfect sear in Step 2. If your pan isn’t hot enough, the shrimp will release their juices and steam instead of developing those caramelized edges. I wait until the olive oil shimmers and just starts to smoke before adding the shrimp.
Timing is Everything: Those 2 minutes on the first side and 1-2 minutes after flipping aren’t suggestions—they’re the sweet spot for perfectly cooked shrimp. I set a timer because shrimp go from perfectly tender to rubbery in seconds. Look for that gentle C-shape, not a tight O.
Garlic Game-Changer: The 30-45 seconds for garlic in Step 3 is critical. Too short and it’s raw and harsh, too long and it turns bitter. I count “one Mississippi” to 45 and immediately add the white wine. The garlic should smell fragrant but still be pale blonde.
Butter Technique: That final 2 tablespoons of butter in Step 4 must be whisked in cold, one piece at a time. This creates the silky emulsion that makes restaurant-quality sauce. If you add it all at once, the sauce breaks and gets greasy instead of glossy.
Nutrition Facts

Trained in classic French technique but raised on slow-cooked ribs and spicy rubs, she blends culinary skill with smoke and soul.
- Recipe for Boneless Pork Chops in Cast Iron Skillet: Sear and Baste to Juicy Perfection - October 3, 2026
- Recipe for Boneless Cross Rib Roast: Slow-Roasted Beef with Herb Crust - October 3, 2026
- Hamburgers in Sauce Recipe Crock Pot: Slow-Cooked Savory Delight - October 3, 2026