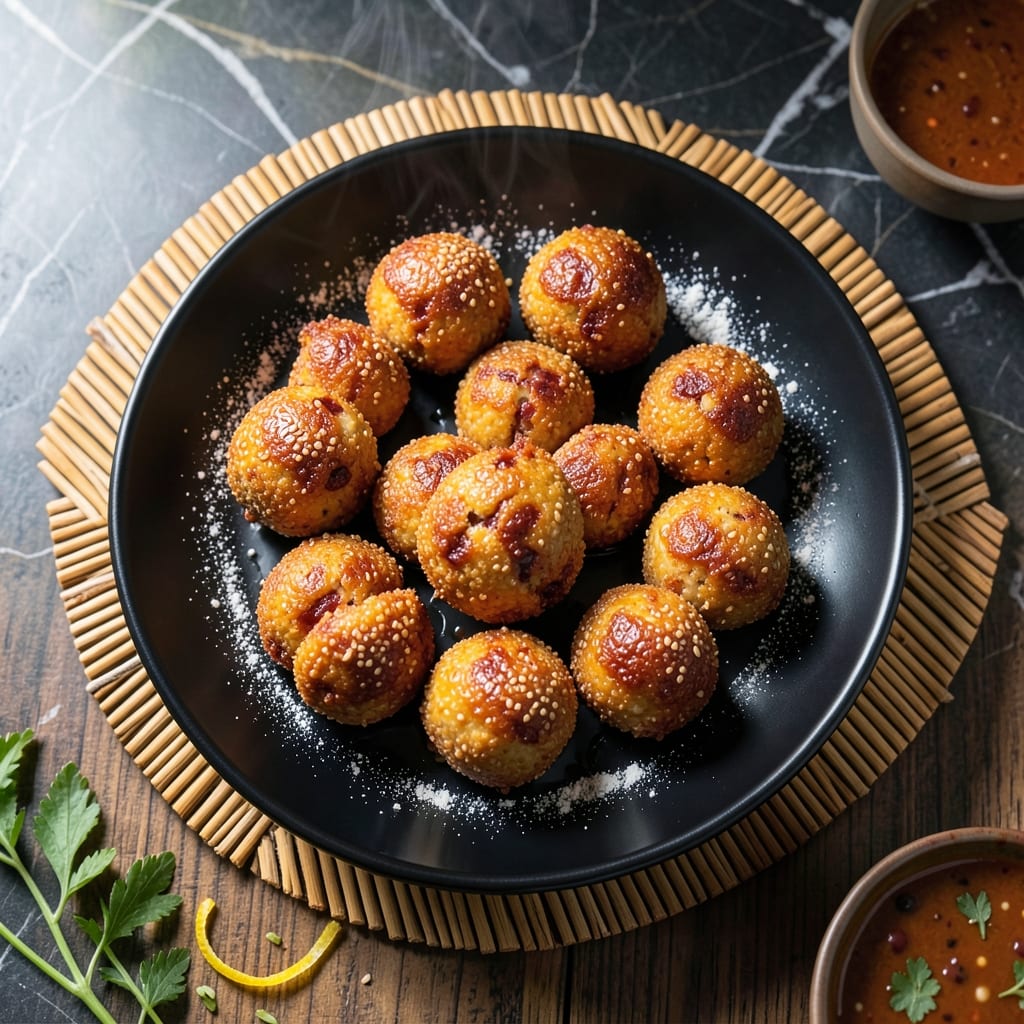
This Filipino treat combines chewy mochi with sweet red bean paste, creating a beloved snack that’s both nostalgic and satisfying. The key lies in achieving the perfect crispy exterior while keeping the inside soft and gooey.
I’ve refined this method to ensure consistent results, using simple ingredients and precise techniques. The filling is a sweet, earthy contrast to the delicate mochi shell, making every bite a delightful surprise.
The frying process is crucial—too hot, and the outside burns before the inside cooks; too cool, and you lose that signature crispy texture. Patience and attention to detail make all the difference.
Serve these warm for the best experience, with the filling just starting to ooze out. This dish is a celebration of texture and flavor, perfect for sharing or enjoying as a sweet indulgence.
Ingredients for Recipe for Buchi Filipino Food
Simple pantry staples transform into these crispy, gooey Filipino mochi balls with sweet bean centers.
| Ingredient | Amount | Notes |
|---|---|---|
| Glutinous Rice Flour 🌾 | 2 cups | Also called sweet rice flour |
| Granulated Sugar 🍚 | ¾ cup | Divided for dough and filling |
| Water 💧 | 1 cup | Warm for dough activation |
| Red Bean Paste 🟥 | 1 ½ cups | Canned or homemade sweetened |
| Vegetable Oil 🫒 | 4 cups | For deep frying |
| Cornstarch 🌽 | ¼ cup | For dusting and thickening |
| Salt 🧂 | ¼ tsp | Balances sweetness |
| Vanilla Extract 🌿 | 1 tsp | Pure extract for best flavor |
| Sesame Seeds 🌰 | 2 tbsp | Toasted, for coating |
| All-Purpose Flour 🥣 | ½ cup | For dusting work surface |
[recipe_ingredient_scaler]
The glutinous rice flour is non-negotiable here—look for it in Asian markets or the international aisle at Whole Foods. Regular rice flour won’t give you that chewy mochi texture. I like Koda Farms brand for consistency. The red bean paste should be sweet and smooth—Trader Joe’s carries a great canned version if you don’t want to make your own. Freshness matters with the oil, so check the expiration date.
No red bean paste? Lotus seed paste works beautifully with a slightly floral note. For a quicker version, sweetened mashed sweet potatoes make a great substitute. The sesame seeds are optional but add that classic crunch (toast them first for extra flavor). If you’re gluten-free, swap the all-purpose flour for more cornstarch—just dust your surface generously to prevent sticking.
Store uncooked dough wrapped tightly in plastic for up to 2 days in the fridge. Fried buchi keep 3-4 days at room temp in an airtight container, but they’re best eaten fresh. Freeze cooked buchi for up to 1 month—reheat in the oven to revive the crispiness.
Why You’ll Love This Recipe
- 5-Ingredient Magic: Honestly, it’s just glutinous rice flour, sugar, water, red bean paste, and oil—no fancy shopping or prep.
- Sweet-Salty Pocket: That crispy shell gives way to the creamy red bean paste, and the sugar glaze seals the deal.
- Party in 20: I roll a batch on Sunday and freeze half for surprise guests or a Tuesday craving.
- Pocket Change Treat: A full dozen costs me less than a single bakery buchi, and they taste even better the next day.
Step-by-Step Instructions for Buchi
Here’s the method. Straightforward, tested, works every time.
Step 1: Prepare the Mochi Dough
In a large bowl, whisk together the 2 cups glutinous rice flour, 0.25 tsp salt, and 0.5 cup granulated sugar until evenly combined. This balance of sweet and salty creates that signature buchi flavor we all love.
Gradually pour in the 1 cup warm water and 1 tsp vanilla extract while stirring with a wooden spoon until a shaggy dough forms. I’ve found that using warm water helps activate the glutinous rice flour better, giving you a smoother, more elastic dough.
Knead the dough in the bowl for 5-7 minutes until it becomes smooth and slightly sticky. If it feels too wet, dust your hands with a bit of the 0.5 cup all-purpose flour set aside for dusting.
Step 2: Shape and Fill the Buchi
Divide the 1.5 cups red bean paste into 16 equal portions (about 1.5 tablespoons each) and roll them into balls. The paste should be firm enough to hold its shape but still pliable. If it’s too sticky, lightly dust your hands with cornstarch.
Divide the mochi dough into 16 equal pieces as well. Flatten each piece into a thin circle in your palm—about 3 inches in diameter. Place a red bean paste ball in the center of each dough circle.
Gently pull the edges of the dough up and around the filling, pinching to seal completely. Roll the filled buchi between your palms to smooth it into a perfect ball. The dough should completely encase the filling with no seams or cracks.
Step 3: Coat and Rest the Buchi
Lightly dust each buchi with cornstarch to prevent sticking. I like to roll them in the 2 tbsp sesame seeds at this stage—it adds a nutty flavor and helps create that beautiful crispy texture when fried.
Place the coated buchi on a parchment-lined tray, making sure they don’t touch each other. Let them rest at room temperature for 15-20 minutes. This resting period allows the dough to relax slightly, which helps prevent cracking during frying.
While they rest, you’ll notice the dough becomes slightly more translucent—that’s your sign they’re ready for the oil.
Step 4: Deep Fry to Crispy Perfection
Heat the 4 cups vegetable oil in a deep pot to 350°F. Use a thermometer for accuracy—this temperature is crucial for achieving that perfect crispy exterior without burning the sesame seeds. The oil should be deep enough to fully submerge the buchi.
Carefully lower 4-5 buchi at a time into the hot oil. Don’t overcrowd the pot—this would lower the oil temperature and result in greasy buchi. Fry for 4-5 minutes, gently stirring occasionally to ensure even cooking.
You’ll know they’re done when they turn a beautiful golden brown and float to the surface. Remove them with a slotted spoon and drain on a wire rack or paper towels. The buchi will puff up slightly as they cook, creating that signature crispy shell with a chewy interior.
Let them cool for 2-3 minutes before serving—the filling will be extremely hot! Serve warm for the best texture contrast between the crispy exterior and soft, sweet filling.
Pro Tips For Making Recipe For Buchi Filipino Food
- Use Warm Water: Mix the glutinous rice flour with warm water—around 100°F—to help the dough come together smoothly and prevent lumps that ruin the texture.
- Chill the Dough: After kneading, let the dough rest in the fridge for 30 minutes; it’s stickier than you expect, and this makes shaping the buchi balls much easier.
- Seal the Filling: Press the edges of the dough tightly around the red bean paste to avoid leaks during frying—I learned this the hard way after my first batch exploded in the oil.
- Test Oil Temperature: Drop a small piece of dough into the oil first; if it sizzles and rises immediately, it’s ready—any cooler and your buchi will absorb too much oil and turn greasy.
Regional Styles of This Recipe
Classical Filipino Style
This is the traditional approach I grew up with, using sweet red bean paste as the filling. The dough is rolled in toasted sesame seeds before frying, giving that nutty aroma and extra crunch. The key is using glutinous rice flour from Asian markets for authentic texture. 💛
Ube Halaya Variation
For a vibrant twist, swap the red bean paste with ube halaya (purple yam jam). It’s sweeter and creamier, with that signature purple color. I find Good Shepherd brand ube halaya works perfectly. The contrast with the crispy mochi shell is stunning.
Pandan Infused
Add 1 tsp pandan extract to the dough for a fragrant, tropical note. Pandan pairs beautifully with the sweet fillings. I use McCormick’s pandan extract, but fresh pandan leaves steeped in warm water work too. The aroma will transport you to a Filipino bakery.
Peanut Butter Surprise
Replace the red bean paste with a peanut butter and sugar mixture. Blend 1 cup smooth peanut butter with ¼ cup sugar and 2 tbsp cornstarch to thicken. This version is a hit with kids and adds a rich, nutty flavor. 🔥
Coconut Coated
After frying, roll the warm buchi in shredded coconut instead of sesame seeds. Use unsweetened for balance or sweetened for extra indulgence. The coconut adds a tropical touch that complements the chewy mochi perfectly.
Mini Buchi Bites
Make smaller versions by dividing the dough into 32 pieces and using 1 tsp filling per ball. These bite-sized treats are perfect for parties. Fry for 2-3 minutes until golden. They’re adorable and disappear quickly!
Nutrition Facts
Frequently Asked Questions
What can I use instead of red bean paste?
Ube halaya, lotus seed paste, or sweetened mashed sweet potatoes work well. Ensure the substitute is thick enough to hold its shape during frying.
Why did my buchi crack while frying?
This usually happens if the dough is too dry or didn’t rest long enough. Keep the dough slightly sticky and let it rest for 15-20 minutes before frying.
How do I store leftover buchi?
Keep in an airtight container at room temperature for 3-4 days. Reheat in the oven at 350°F for 5-10 minutes to restore crispiness.
Can I bake buchi instead of frying?
Baking won’t give the same crispy texture, but you can try at 375°F for 20-25 minutes. Brush with oil for better browning.

Trained in classic French technique but raised on slow-cooked ribs and spicy rubs, she blends culinary skill with smoke and soul.
- Octopus Recipe Pan Fried: Crispy Edges With Tender Bites - October 3, 2026
- Recipe For Fried Pork Chops In An Iron Skillet: Crispy Crust With Juicy Centers - October 3, 2026
- Recipe for Fully Cooked Spiral Ham: Sweet Glaze and Effortless Elegance - October 3, 2026