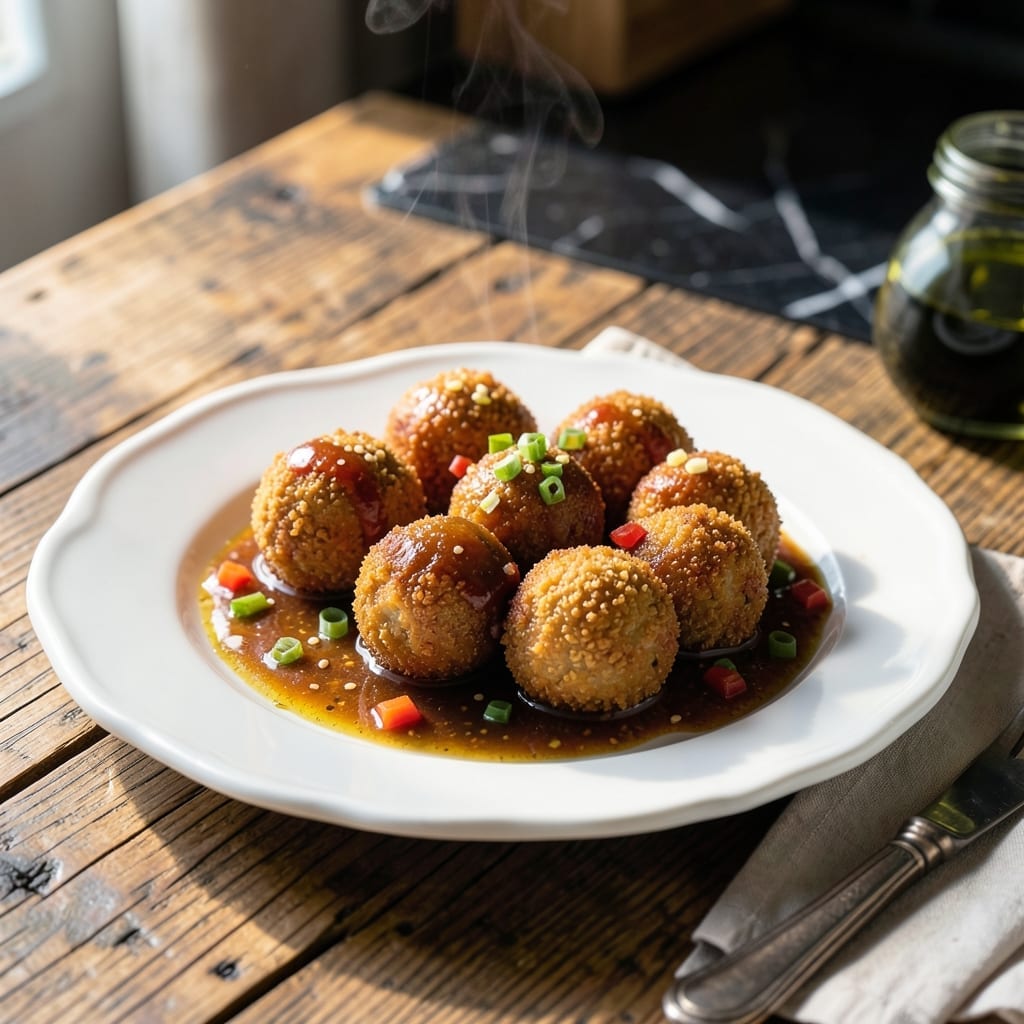
There’s something universally satisfying about crispy chicken balls paired with tangy sweet and sour sauce that brings people together. I’ve tested this combination countless times to perfect the balance between texture and flavor.
The chicken stays juicy inside while developing a golden, shatteringly crispy exterior. Meanwhile, the sauce achieves that ideal sweet-tart harmony with just the right thickness to cling to each bite.
This dish delivers restaurant-quality results at home with straightforward techniques. The key is maintaining oil temperature and working in batches to ensure even cooking without crowding.
Serve immediately for maximum crunch, with extra sauce on the side for dipping. The contrast between the hot, crispy chicken and cool, tangy sauce makes every bite memorable.
Ingredients for Recipe for Chicken Balls with Sweet and Sour Sauce
Pantry staples and fresh produce create these crispy bites with tangy dip at home.
| Ingredient | Amount | Notes |
|---|---|---|
| Boneless Chicken Breast 🍗 | 1 ½ lb | Cut into 1-inch cubes |
| All-Purpose Flour 🌾 | 1 cup | For initial dredging |
| Large Eggs 🥚 | 2 whole | Beaten for binding |
| Panko Breadcrumbs 🍞 | 1 ½ cups | For extra crispiness |
| Cornstarch 🌾 | ¼ cup | Mixed with flour for coating |
| Vegetable Oil 🫒 | 4 cups | For deep frying |
| Ketchup 🍅 | ¾ cup | Base for sauce |
| Rice Vinegar 🍶 | ¼ cup | For tang in sauce |
| Brown Sugar 🍚 | ½ cup | Packed for sweetness |
| Soy Sauce 🫙 | 2 tbsp | Low-sodium preferred |
| Garlic Cloves 🧄 | 3 cloves | Minced for sauce |
| Fresh Ginger 🌿 | 1 tbsp | Grated for depth |
| Green Bell Pepper 🌶️ | ½ whole | Diced for sauce texture |
| Pineapple Chunks 🍍 | ½ cup | Canned or fresh |
| Salt 🧂 | 1 tsp | For seasoning chicken |
[recipe_ingredient_scaler]
The chicken quality is paramount for achieving that shatteringly crispy texture. Boneless, skinless chicken breast is ideal for even cooking and consistent results. Most grocers carry Panko breadcrumbs in the Asian aisle—Kikkoman is a reliable brand. For the oil, peanut or vegetable oil works best due to their high smoke points. Always check the freshness of your baking powder if using it as a leavening agent in the batter.
No Panko? Regular breadcrumbs in a pinch, but the texture won’t be as crisp. Swap apple cider vinegar for rice vinegar if needed, though the flavor profile will shift slightly. For a gluten-free version, use cornstarch and gluten-free flour. The pineapple can be omitted, but it adds a nice brightness to the sweet and sour balance. Fresh ginger is preferred, but ground ginger at one-fourth the amount works.
Fry the chicken in batches and keep warm in a 200°F oven while finishing. The sauce can be made ahead and reheated gently—it keeps for 3 days in the fridge. Leftovers are best reheated in the oven to maintain crispiness.
Why You’ll Love This Recipe
- One Bowl Wonder: I love that I can mix the flour, eggs, and panko right in one bowl—no fancy prep, just bread the chicken and go.
- Crispy Meets Tangy: Those panko breadcrumbs give the perfect crunch, and the sweet and sour sauce? Honestly, it’s the balance of flavors that keeps me coming back.
- Crowd Pleaser: Between us, kids and adults alike devour these—great for game nights or when I need a quick appetizer.
- Leftovers? No Problem: The chicken balls reheat beautifully, and the sauce stays vibrant for days. My secret weapon for stress-free lunches.
Step-by-Step Instructions for Chicken Balls With Sweet and Sour Sauce
Master the technique for achieving a crispy exterior and juicy interior with this foolproof method.
Step 1: Prepare and Season the Chicken
Begin by cutting the 1.5 lb boneless chicken breast into uniform 1-inch cubes. This size ensures even cooking and optimal crispiness. Season the chicken with the 1 tsp salt, tossing gently to coat all pieces evenly. Proper seasoning at this stage enhances the flavor throughout.
Allow the chicken to rest for 5 minutes after seasoning. This brief rest helps the salt penetrate the meat, ensuring every bite is flavorful. Meanwhile, set up your breading station with three shallow dishes for efficient coating.
Step 2: Create the Crispy Breading Layers
In the first dish, combine the 1 cup all-purpose flour and 0.25 cup cornstarch. This blend creates an ultra-crispy crust by absorbing moisture from the chicken surface. In the second dish, beat the 2 whole large eggs until smooth and homogeneous.
Place the 1.5 cups panko breadcrumbs in the third dish. Panko’s coarse texture is key to achieving the promised crispiness. Dredge each chicken cube in the flour mixture, shaking off excess, then dip in the beaten eggs. Finally, roll in the panko, pressing gently to ensure full coverage. The triple-coating technique guarantees maximum crunch.
Step 3: Deep-Fry to Golden Perfection
Heat the 4 cups vegetable oil in a deep, heavy-bottomed pot to 350°F. Use a kitchen thermometer to monitor the temperature accurately. Maintaining consistent heat is crucial for even cooking without burning the exterior.
Working in batches to avoid overcrowding, carefully lower the breaded chicken cubes into the hot oil. Fry for 4-5 minutes, turning occasionally, until they achieve a deep golden brown color. The chicken balls are done when they float to the surface and the coating is crisp. Transfer to a wire rack or paper towels to drain excess oil.
Step 4: Prepare the Sweet and Sour Sauce
In a saucepan, combine the 0.75 cup ketchup, 0.25 cup rice vinegar, 0.5 cup brown sugar, 2 tbsp soy sauce, minced 3 cloves garlic cloves, and grated 1 tbsp fresh ginger. Bring to a gentle simmer over medium heat, stirring frequently to dissolve the sugar.
Once simmering, add the diced 0.5 whole green bell pepper and 0.5 cup pineapple chunks. Cook for 3-4 minutes until the sauce thickens slightly and the vegetables soften. The sauce should coat the back of a spoon. Remove from heat and keep warm until serving.
Step 5: Serve Immediately for Maximum Crispiness
Arrange the crispy chicken balls on a serving platter. For the best texture, serve them immediately while still hot and crisp. The contrast between the hot, crunchy exterior and the tangy, sweet sauce is what makes this dish exceptional.
Offer the warm sweet and sour sauce on the side for dipping or drizzle it over the chicken balls. The sauce’s balance of sweetness from the brown sugar and pineapple, tang from the vinegar, and depth from the soy sauce complements the crispy chicken perfectly. Enjoy while hot for the ultimate experience.
Pro Tips For Making Recipe For Chicken Balls With Sweet And Sour Sauce
- Chill the Chicken: After cutting the chicken into cubes, refrigerate for 20 minutes before breading—this makes them easier to coat and keeps the shape intact during frying.
- Double Coat for Crisp: Dip the chicken in cornstarch first, then egg, then panko, and repeat the egg and panko step for an extra-crispy crust that holds up to the sauce.
- Skip the Overcrowding: Fry the chicken balls in batches with space between each piece, or they’ll steam instead of crisp—about 5-6 at a time in a standard pan works.
- Warm the Sauce: Heat the sweet and sour sauce gently before tossing with the chicken so it clings better and doesn’t cool down the crispy coating.
Regional Styles of This recipe for chicken balls with sweet and sour sauce
Chinese Takeout Classic
This version mimics your favorite Chinese restaurant style with extra-crispy panko coating and a glossy, thick sweet and sour sauce. I add 1 tsp five-spice powder to the flour mixture for that authentic depth. The sauce includes 1 tbsp hoisin for complexity. 🗺️
Southern Comfort Twist
Inspired by my Nana Mae’s Atlanta diner, I use buttermilk instead of eggs for dipping and swap panko for crushed cornflakes. The sauce gets 2 tbsp apple cider vinegar and a pinch of cayenne for Southern tang. David always asks for this version.
Thai-Inspired Variation
For a Bangkok street food vibe, I add 1 tbsp fish sauce and 1 minced Thai chili to the sauce. The chicken gets a dusting of rice flour in the final coating for extra crunch. Serve with lime wedges for that signature Thai brightness.
Kid-Friendly Version
Emma and Jack prefer a milder approach. I reduce the vinegar to 2 tbsp and add 2 tbsp honey to the sauce. For extra fun, use cookie cutters to shape the chicken into stars or hearts before breading. Biscuit loves sneaking these too! 💛
Spicy Szechuan Style
Bring the heat with 1 tbsp Szechuan peppercorns toasted and ground into the flour mix. The sauce includes 1 tbsp chili garlic sauce and 1 tsp sriracha. Garnish with sliced scallions and sesame seeds for a fiery finish.
Air Fryer Adaptation
For a lighter take, I spray breaded chicken with avocado oil and air fry at 375°F for 12-15 minutes, flipping halfway. The sauce stays the same but thicken it with 1 tsp cornstarch slurry to compensate for less oil absorption.
Nutrition Facts
Frequently Asked Questions
Can I bake these instead of frying?
Yes! Place breaded pieces on a rack over a baking sheet. Bake at 400°F for 20-25 minutes, flipping halfway. Spray lightly with oil first for extra crispiness.
How do I keep them crispy while serving?
Place cooked chicken balls on a wire rack in a 200°F oven between batches. Avoid stacking or covering, as trapped steam will make them soggy. Serve within 30 minutes for best texture.
What’s the best way to thicken the sauce?
Mix 1 tsp cornstarch with 1 tbsp cold water and stir into simmering sauce. Cook for 1-2 minutes until thickened. Avoid over-boiling, which can make it too thin.
Can I make the sauce ahead?
Prepare sauce up to 3 days in advance. Store in an airtight container in the fridge. Reheat gently over low heat, stirring occasionally.

Trained in classic French technique but raised on slow-cooked ribs and spicy rubs, she blends culinary skill with smoke and soul.
- Best Smoked Oxtail Recipe: Deep-Rich Flavor After Low-and-Slow Cooking - October 14, 2026
- Pit Boss Smoked Prime Rib Roast Recipe: Bark-to-Bone Crispness in 4 Hours - October 14, 2026
- Smoked Tuna Steak Recipe: Seared Crust Meets Silky Centers - October 14, 2026