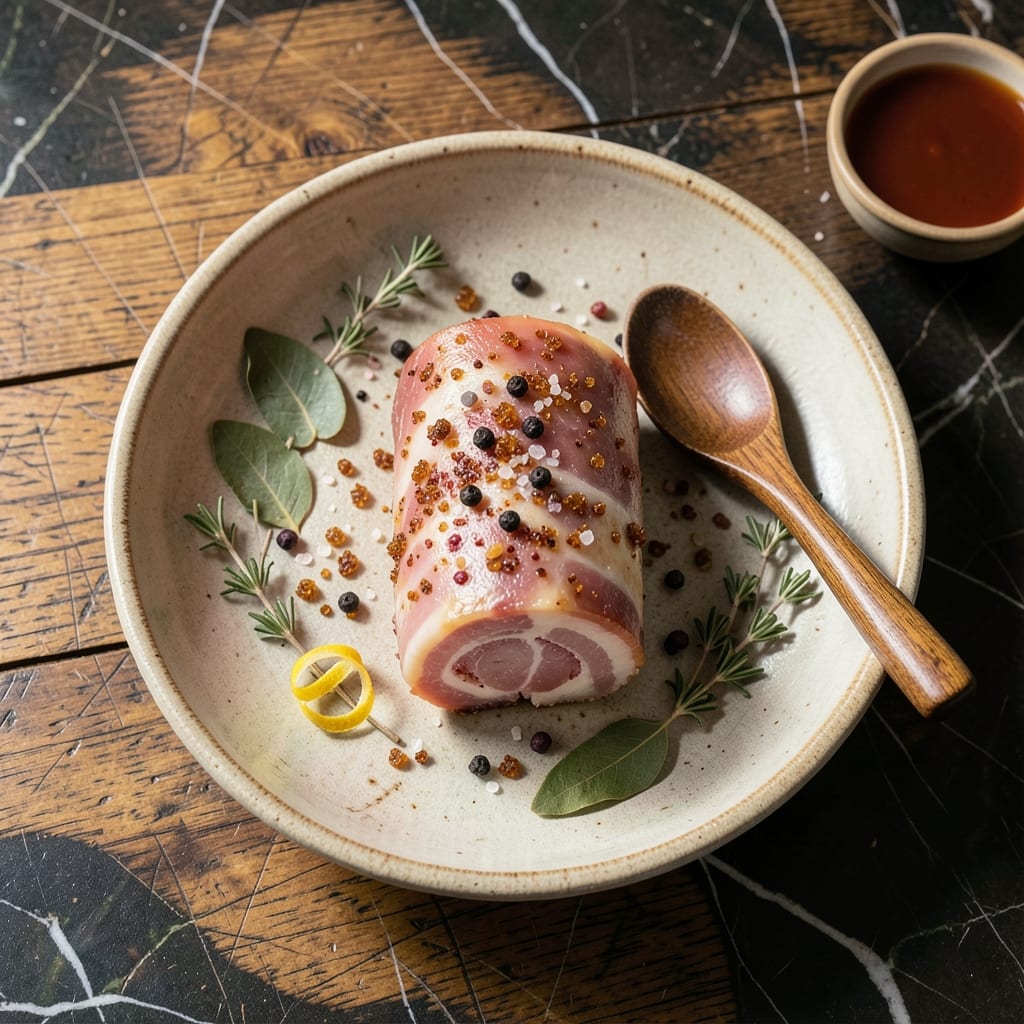
Curing your own pancetta at home delivers authentic Italian flavor that store-bought versions simply can’t match. This traditional method transforms pork belly into a delicately spiced, silky cured meat through a precise combination of salt, herbs, and time.
The process requires patience but rewards with exceptional taste. I’ve refined this technique to ensure consistent results, using a carefully balanced cure of sea salt, black pepper, and aromatic spices. The pork belly absorbs these flavors over a 10-day curing period.
After curing, the pancetta develops a firm yet supple texture with a complex, savory profile. Whether sliced thin for antipasto or diced into pasta dishes, this homemade version elevates any recipe with its rich, artisanal quality.
This method preserves the integrity of traditional Italian charcuterie while making it accessible to home cooks. The attention to detail in each step guarantees a superior product.
Ingredients for Recipe for Pancetta
Authentic Italian charcuterie begins with pork belly, salt, and a careful blend of spices for curing.
| Ingredient | Amount | Notes |
|---|---|---|
| Pork Belly 🥓 | 2 lb | Skin-on, evenly trimmed |
| Coarse Sea Salt 🧂 | ½ cup | Non-iodized, fine grain avoided |
| Black Peppercorns 🌶️ | 2 tbsp | Freshly cracked for best flavor |
| Juniper Berries 🌿 | 2 tsp | Lightly crushed to release oils |
| Bay Leaves 🍃 | 4 whole | Dried, high quality |
| Dried Thyme 🌿 | 1 tbsp | Rubbed between fingers to activate |
| Dried Rosemary 🌿 | 1 tbsp | Finely chopped for even distribution |
| Red Pepper Flakes 🌶️ | 1 tsp | Adjust to preferred spice level |
| Garlic Cloves 🧄 | 6 cloves | Smashed, peeled, and halved |
| White Wine 🍷 | ½ cup | Dry variety like Pinot Grigio |
| Pink Curing Salt 🧂 | ¼ tsp | Essential for safe curing, precise measurement required |
| Brown Sugar 🍚 | ¼ cup | Light or dark, packed firmly |
[recipe_ingredient_scaler]
The pork belly is non-negotiable—source from a trusted butcher or specialty grocer like Whole Foods. Look for skin-on pieces with even fat-to-meat ratios and no bruising. The curing salt (Prague Powder #1) is critical for safety and color development. Do not substitute regular salt. Freshly cracked black peppercorns and whole juniper berries provide depth of flavor that pre-ground spices cannot match.
For the wine, any dry white variety works—Pinot Grigio or Sauvignon Blanc are excellent choices. If alcohol is a concern, substitute white grape juice with a splash of apple cider vinegar. The juniper berries can be found in the spice aisle of specialty stores or ordered online. Fresh rosemary or thyme can replace dried at a 3:1 ratio, but dried is preferred for consistency in the cure.
The curing mix can be prepared 1 day ahead and stored in an airtight container. Once applied to the pork, the mixture keeps the meat safe during the 10-day cure in the refrigerator. After curing, pancetta keeps in the fridge for 3 weeks or can be frozen for 6 months.
Why You’ll Love This Recipe
- Five Minute Prep: Honestly, it’s just rubbing spices on pork belly—coarse salt, crushed peppercorns, juniper, bay leaf—then waiting for the cure to work its magic.
- Deep Umami Punch: That first bite hits with salty-sweet pork, piney juniper, and the earthy bite of black pepper—crave-worthy every time.
- Breakfast to Dinner: I fry slices for carbonara, toss cubes into soups, or crisp them for a salad topping—one batch covers the week.
- Stretches the Budget: A single pork belly cures into months of pancetta, and a little goes a long way in pasta or on charcuterie boards.
Step-by-Step Instructions for Pancetta
Master the art of traditional Italian curing with this time-tested method for perfectly spiced pork belly.
Step 1: Prepare the Dry Cure Mixture
In a bowl, combine the 0.5 cup coarse sea salt, 0.25 tsp pink curing salt, and 0.25 cup brown sugar. These form the base of your cure, with the pink salt ensuring safe preservation and the sugar balancing the saltiness.
Add the 2 tbsp black peppercorns (freshly cracked), 2 tsp juniper berries (lightly crushed), 4 whole bay leaves, 1 tbsp dried thyme, 1 tbsp dried rosemary, and 1 tsp red pepper flakes. Mix thoroughly to distribute the spices evenly—this blend creates the signature aromatic profile of authentic pancetta.
Step 2: Rub and Cure the Pork Belly
Place the 2 lb pork belly skin-side down on a clean surface. Rub the cure mixture aggressively into all exposed surfaces, pressing firmly to ensure full contact. The cure should adhere completely, with no dry spots visible.
Place the pork belly in a non-reactive container (glass or food-grade plastic) and add the 6 cloves garlic cloves (smashed, peeled, and halved) around it. Pour the 0.5 cup white wine over the pork belly—this adds moisture and depth to the cure. Cover and refrigerate.
Cure the pork belly for 7 days, flipping it daily to ensure even penetration. The flesh should feel firm to the touch when properly cured.
Step 3: Rinse and Dry the Cured Pork
After 7 days, remove the pork belly from the cure and rinse it briefly under cold water to remove excess salt and spices. Pat it completely dry with paper towels—this prevents mold growth during the drying phase.
Let the pork belly air-dry uncovered in the refrigerator for 24-48 hours. The surface should develop a slightly tacky texture, known as the “pellicle,” which helps the pancetta absorb smoke if you choose to cold-smoke it later.
Step 4: Roll and Tie for Aging
Lay the cured pork belly skin-side up on a clean surface. Starting from one end, roll it tightly into a cylinder, keeping the skin on the outside. This traditional log shape ensures even drying and consistent flavor distribution.
Secure the roll with kitchen twine, tying it every 2 inches to maintain its shape. The ties should be snug but not so tight that they cut into the meat. This rolled form is classic for pancetta and makes it easier to slice uniformly later.
Step 5: Age to Perfection
Hang the tied pancetta in a cool, dry place with good airflow (50-60°F is ideal) for 4-6 weeks. Use a meat hook or string to suspend it, allowing air to circulate around the entire surface.
Check the pancetta periodically for any signs of spoilage (off smells or mold that isn’t white and dusty). The pancetta is ready when it feels firm throughout and has lost about 30% of its original weight. Slice thinly against the grain for the best texture and flavor in your dishes.
Pro Tips For Making Recipe For Pancetta
- Cure Evenly: Rub the salt and spice mix into every crevice of the pork belly—I learned this the hard way after finding uncured pockets in my first batch. Use about 1.5 tablespoons of salt per pound for consistent flavor.
- Toast Your Spices: Lightly toast the black peppercorns, juniper berries, and bay leaves in a dry pan before grinding. Sounds weird, but it works: the warmth releases oils that make the cure taste deeper.
- Skip the Rush: Resist the urge to slice into your pancetta before the full 7-10 day cure. I was skeptical until I tried it—waiting guarantees the texture stays firm and the flavor develops fully.
- Wrap It Tight: Press the pork belly into a zip-top bag and remove all the air before refrigerating. This isn’t the prettiest method, but it’s the tastiest—no dry spots, just even curing.
Storing and Reheating This Dish
Refrigerator Storage
After the full 10-day cure, wrap your pancetta tightly in cheesecloth or parchment paper, then place it in a ziplock bag. It will keep beautifully in the fridge for up to 3 weeks—the flavors continue to develop over time. ❄️
Freezer Storage
For longer storage, vacuum-seal slices or the whole roll before freezing. Properly sealed, it maintains quality for up to 6 months. I recommend slicing before freezing for easy portion control. Thaw overnight in the refrigerator before using.
Cold-Smoked Pancetta
If you cold-smoked your pancetta, store it wrapped in butcher paper in the fridge for up to 1 month. The smoke adds complexity but shortens shelf life slightly. Keep it in the coldest part of your fridge for best results.
Reheating Tips
Pancetta is typically used raw or lightly cooked, but if you’ve rendered it, store the fat in the fridge for up to 2 weeks. Gently reheat the crispy bits in a 300°F oven for 5-10 minutes to restore texture.
Slicing Before Storage
For convenience, slice the cured pancetta into ¼-inch thick pieces before storing. Layer between parchment paper in an airtight container. This makes it easy to grab just what you need for pasta or salads.
Reviving Dried Pancetta
If your stored pancetta seems dry, soak thin slices in olive oil for 10-15 minutes before using. This restores moisture and enhances flavor. Works wonders for older pieces. 💡
Nutrition Facts
Frequently Asked Questions
Can I use regular salt instead of curing salt?
No, pink curing salt is essential for safety and proper preservation. Regular salt lacks nitrates that prevent botulism. Always use the specified 0.25 tsp of Prague Powder #1 in your cure.
How do I know when it’s properly cured?
The pork belly should feel firm throughout after 7 days in the fridge. If it still feels soft or squishy, extend the curing time by 2-3 days and check again.
Can I skip rolling and tying the belly?
Rolling and tying creates the classic shape and ensures even drying. Without it, the pancetta may dry unevenly and develop an inconsistent texture.
What if white mold appears during aging?
White, dusty mold is normal and harmless—simply wipe it off with a paper towel. Discard only if you see colorful mold or smell off odors, as these indicate spoilage.

Trained in classic French technique but raised on slow-cooked ribs and spicy rubs, she blends culinary skill with smoke and soul.
- Smoked Teriyaki Beef Jerky Recipe: Umami-Deep Flavor in Every Chewy Bite - October 15, 2026
- Stewed Beef Brisket Recipe: Deep-Rich Flavor After 8 Hours of Slow Simmering - October 15, 2026
- Beef Brisket Rolls Recipe: Flaky Layers and Smoky Sweet Filling - October 15, 2026