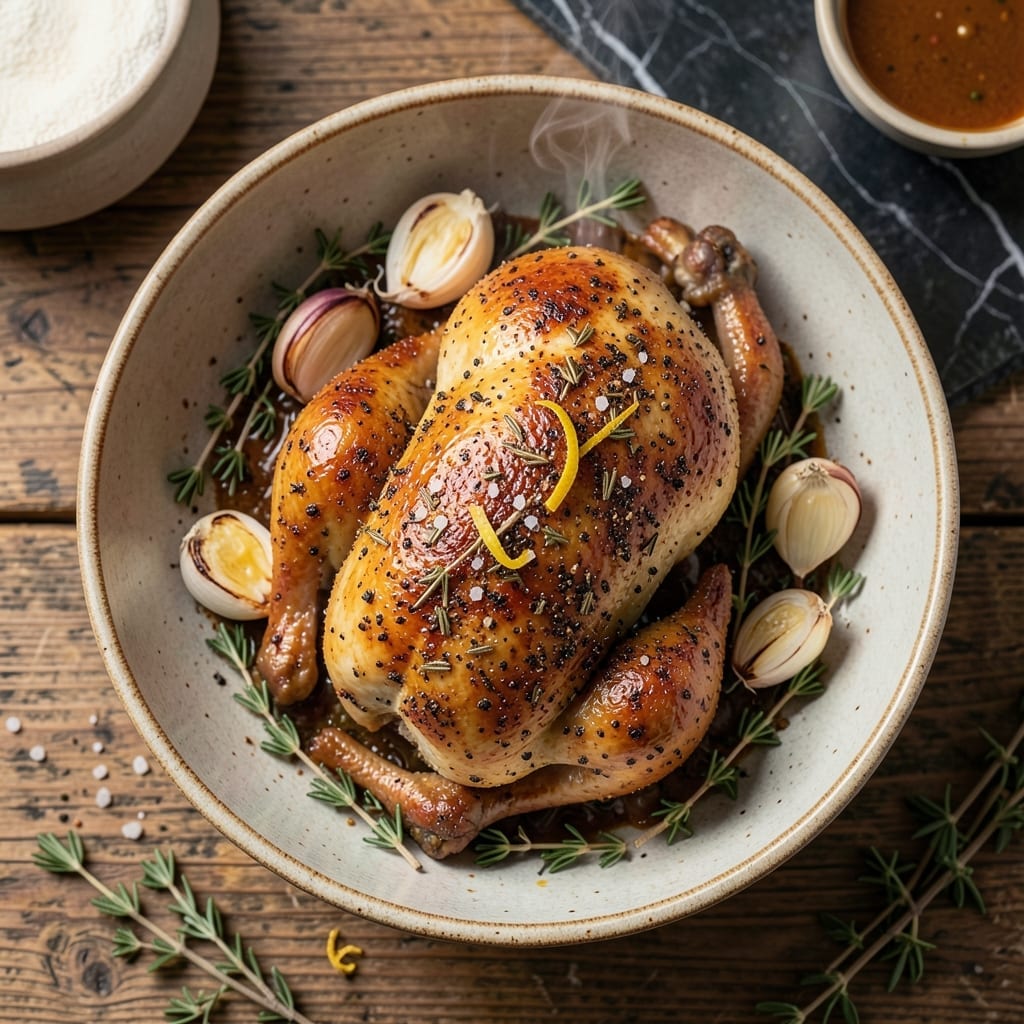
There’s a reason farmhouse-style chicken remains a classic—it delivers crispy, golden skin and juicy meat every time. This method relies on a simple technique: high heat and patience.
I’ve perfected this recipe over years of weekend cooking, focusing on a dry brine to lock in moisture and a hot oven to ensure that shatteringly crispy skin. The result is chicken that tastes like it came from a rustic country kitchen.
The secret is letting the skin dry out before roasting. This guarantees a perfectly crispy exterior while the meat stays tender and flavorful. No special equipment is needed—just a good roasting pan and a reliable oven.
Serve this with roasted potatoes or a simple green salad for a meal that feels both hearty and comforting. The flavors are straightforward but unforgettable.
Ingredients for Red Barn Chicken
Simple ingredients yield that signature farmhouse crispy skin with juicy meat every time.
| Ingredient | Amount | Notes |
|---|---|---|
| Whole Chicken 🍗 | 1 whole | 3-4 lb, patted dry inside and out |
| Kosher Salt 🧂 | 1 tbsp | Diamond Crystal preferred for dry brine |
| Black Pepper 🌶️ | 1 tsp | Freshly ground for best flavor |
| Garlic Powder 🧄 | 1 tsp | Not garlic salt substitute |
| Onion Powder 🧅 | 1 tsp | Enhances depth of flavor |
| Dried Thyme 🌿 | 1 tsp | Crushed between fingers to release oils |
| Dried Rosemary 🍃 | 1 tsp | Crushed to activate aroma |
| Unsalted Butter 🧈 | 4 tbsp | Melted for basting skin |
| Fresh Thyme Sprigs 🌿 | 4 pieces | Optional for cavity aromatics |
| Lemon 🍋 | 1 whole | Halved for cavity and basting |
| Olive Oil 🫒 | 1 tbsp | For initial skin coating |
| Paprika 🌶️ | 1 tsp | Smoked or sweet for color |
[recipe_ingredient_scaler]
The bird itself is the foundation—opt for a 3-4 lb whole chicken with unbroken skin (check the packaging date for freshness). Diamond Crystal kosher salt is ideal for the dry brine as it dissolves cleanly and penetrates evenly. For herbs, Penzeys offers exceptional quality, but any well-stocked grocery store’s bulk section works. The butter should be high-quality European-style if available, as its higher fat content browns better for basting.
Swapping fresh herbs for dried? Use one-third the amount since dried are more concentrated. No thyme? Poultry seasoning can substitute in a pinch. If you lack garlic powder, fresh minced garlic works—just rub it under the skin. The paprika is primarily for color, so turmeric can replace it if needed, though the flavor profile will shift slightly.
The unbasted bird can rest uncovered in the fridge for 12-24 hours to dry the skin—this is key for maximum crispiness. Leftovers (if any exist) keep in the fridge for 3-4 days and reheat best in a 350°F oven to maintain texture.
Why You’ll Love This Recipe
- Five Ingredient Magic: I love that this only needs chicken and a handful of pantry staples I always have.
- Crispy, Savory Skin: The garlic and onion powder give it that irresistible golden crust every time.
- Weeknight Hero: Honestly, it’s my go-to when I need a solid dinner with zero stress.
- Leftovers for Days: One whole chicken means meals for two nights—my wallet thanks me.
Step-by-Step Instructions for Farmhouse-Style Roasted Chicken
Here’s the professional method for achieving exceptionally crispy skin and juicy meat with this dish.
Step 1: Dry Brine and Season the Whole Chicken
Pat the whole chicken completely dry inside and out with paper towels. This step is crucial for achieving that coveted crispy skin. In a small bowl, combine the kosher salt, black pepper, garlic powder, onion powder, dried thyme, dried rosemary, and paprika.
Rub this seasoning blend all over the chicken, including inside the cavity. I always let the seasoned chicken sit uncovered in the refrigerator for at least 1 hour (or up to 24 hours) to allow the salt to penetrate and the skin to dry thoroughly. This dry brine technique ensures both flavor and texture perfection.
Step 2: Prepare the Chicken for Roasting
Remove the chicken from the refrigerator and let it come to room temperature for 30 minutes. Preheat your oven to 425°F. Meanwhile, prepare the aromatics: halve the lemon and set aside one half for basting. Place the other lemon half inside the cavity along with the fresh thyme sprigs.
Truss the chicken legs together with kitchen twine and tuck the wings under the body. This compact shape promotes even cooking and prevents the delicate breast meat from drying out during the high-heat roasting process.
Step 3: Initial Roasting and Basting
Place the chicken breast-side up on a roasting rack set in a rimmed baking sheet. Brush the skin with the olive oil to create an initial barrier that promotes browning. Roast for 20 minutes at 425°F to start the browning process.
After 20 minutes, reduce the oven temperature to 375°F. Melt the unsalted butter and mix it with the juice from the reserved lemon half. Baste the chicken generously with this butter mixture, ensuring you coat all exposed skin surfaces. This basting step adds flavor and helps create that beautiful golden-brown crust.
Step 4: Complete the Roasting Process
Continue roasting at 375°F, basting the chicken with the butter-lemon mixture every 15-20 minutes. The total roasting time will be about 1 hour to 1 hour 15 minutes for a 3-4 lb chicken, depending on your oven.
You’ll know the chicken is done when an instant-read thermometer inserted into the thickest part of the thigh (not touching bone) reads 165°F. The skin should be a deep golden brown and crisp to the touch, and the juices should run clear when you pierce the thigh.
Step 5: Rest and Serve
Transfer the chicken to a cutting board and tent loosely with foil. Let it rest for 15-20 minutes before carving. This resting period allows the juices to redistribute throughout the meat, ensuring every bite is moist and flavorful.
The internal temperature will rise a few degrees during this rest (carryover cooking), and the meat will become more tender. Carve the chicken and serve immediately while still warm, with the pan juices spooned over the top for maximum flavor impact.
Pro Tips For Making Red Barn Chicken
- Dry the Skin: Pat the chicken completely dry with paper towels before seasoning—I learned this the hard way after my first few attempts came out steamed instead of crispy.
- Season Under Skin: Gently loosen the skin and rub some of the salt, pepper, and powder mix underneath; it actually changes the outcome more than just surface seasoning.
- Skip the Crowding: If roasting with veggies, spread them in a single layer around the chicken—resist the urge to pile everything in or it’ll steam instead of brown.
- Rest Before Carving: Let the chicken rest 15 minutes under foil after roasting, my grandmother swore by this, and she was right.
Health Benefits of These Flavors
High-Protein Powerhouse
This dish delivers about 45 grams of protein per serving (for a 3-4 lb chicken), supporting muscle maintenance and repair. Chicken is a complete protein, meaning it contains all nine essential amino acids your body can’t produce on its own. I find it keeps me full for hours after eating. 💪
Low in Saturated Fat
With most of its fat in the skin (which you can remove before eating), this meal offers lean protein without excessive saturated fat. A skinless serving contains only about 3 grams of saturated fat, making it heart-healthy when prepared as part of a balanced diet.
Rich in B Vitamins
Chicken is packed with B6 and B12, vital for energy metabolism and brain function. A single serving provides over 30% of your daily B6 needs and nearly 20% of B12. These vitamins help convert food into usable energy.
Mineral Boost
You’ll get a healthy dose of selenium and phosphorus from this dish. Selenium acts as a powerful antioxidant, while phosphorus supports bone health. A 3-4 lb chicken provides about 70% of your daily selenium needs.
Low Calorie Option
Without the skin, each serving contains roughly 165 calories, making it an excellent choice for weight management. Even with the crispy skin (the best part!), it stays under 250 calories per serving. Perfect for a satisfying yet light meal. ✨
Immune Support
The zinc in chicken plays a crucial role in immune function. Each serving provides about 15% of your daily zinc needs, helping your body fight off infections and heal wounds more efficiently.
Nutrition Facts
Frequently Asked Questions
What temperature should I use for roasting?
Start with 425°F for the first 20 minutes, then reduce to 375°F for the remaining time. This high-to-low method ensures crispy skin and even cooking.
How do I know when it’s done?
Use an instant-read thermometer—the thigh should reach 165°F. The skin will be golden-brown and crisp, with clear juices when pierced.
Can I skip the dry brine step?
Not recommended! The dry brine (salt rub + fridge rest) is key for flavor and crispiness. Even 1 hour makes a difference, but 12-24 hours is ideal.
What’s the best way to rest the chicken?
Tent loosely with foil and rest for 15-20 minutes. This keeps it warm while juices redistribute for moist, flavorful meat.

Trained in classic French technique but raised on slow-cooked ribs and spicy rubs, she blends culinary skill with smoke and soul.
- Recipe for Cream of Rice: Silky Smooth Breakfast Comfort - October 3, 2026
- Old Fashioned Beef and Noodles Recipe Crock Pot: Set-It-and-Forget-It Hearty Meal - October 3, 2026
- Recipe for Deep Fry Turkey: Crispy Golden Skin and Juicy Meat - October 3, 2026