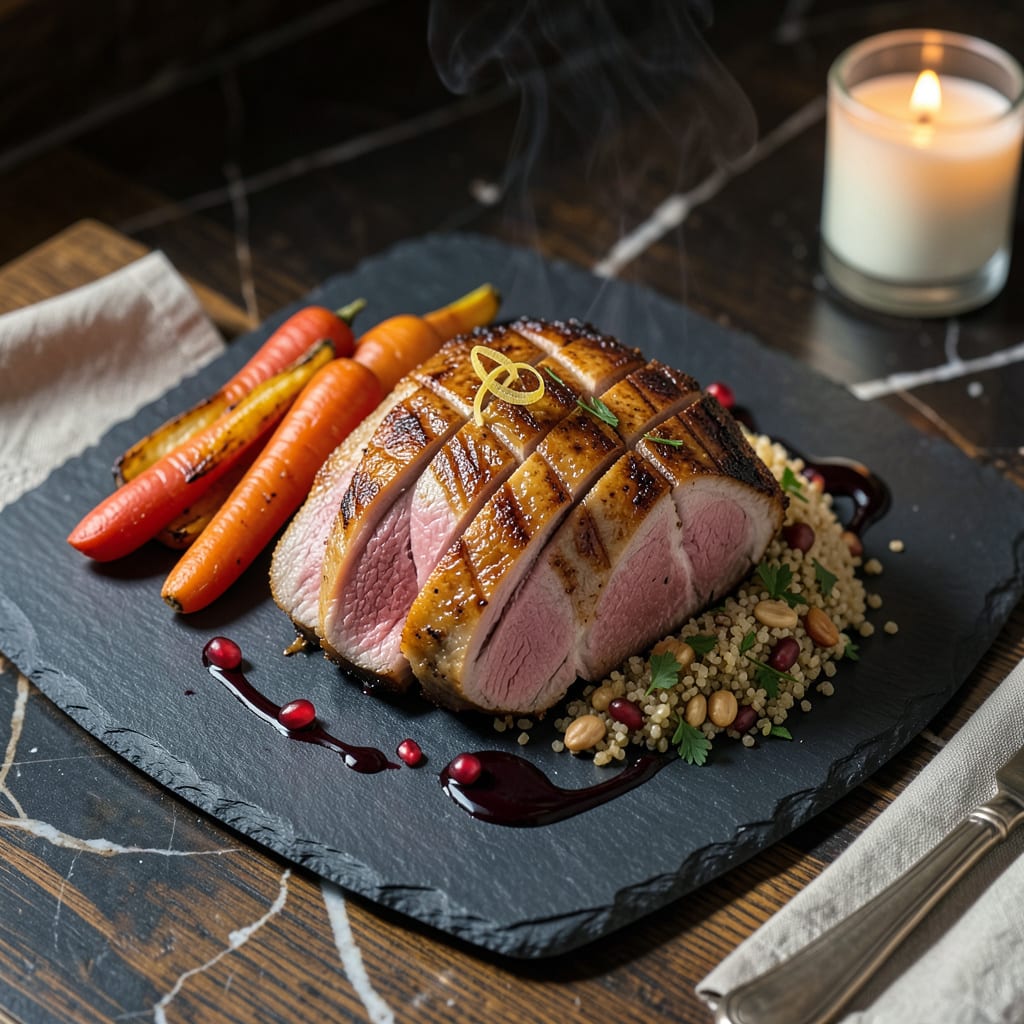
I’ll be real with you—duck breast used to intimidate me until I discovered the reverse sear method. This technique changed everything, delivering perfectly pink centers and that coveted crispy skin without any guesswork. After burning through a few attempts (literally), I finally nailed the temperature dance that makes this dish foolproof.
The secret is starting low and slow in the oven, then finishing with a blazing-hot sear. This gives you complete control over doneness while rendering out fat for maximum crispiness. I use a meat thermometer to hit that sweet spot of 130°F for medium-rare—juicy, tender, and never overcooked. The skin becomes shatteringly crisp when it hits that screaming hot pan at the end.
What you get is restaurant-quality duck with minimal effort: rosy pink meat that melts in your mouth, encased in golden, crackling skin. The reverse sear method eliminates the stress of timing everything perfectly on the stovetop. I serve mine with a quick cherry reduction that cuts through the richness—simple but impressive.
Fair warning: once you try this method, you’ll never go back to traditional pan-searing. The texture and flavor are next-level, and the technique works for other proteins too. Here’s how to master it.
📚 In This Guide
- What You’ll Need
- Instructions
- Tips and Common Mistakes
What Youll Need
- ● Duck breast (1–2 breasts, ~6–8 oz each, skin-on, preferably Grade A or Moulard)
- ● Kosher salt (1 tbsp per breast for dry-brine—Diamond Crystal preferred)
- ● Black pepper (freshly cracked, to taste)
- ○ Optional seasonings: smoked paprika, garlic powder, or Chinese five-spice (½ tsp per breast)
- ● Tools & Equipment: Wire rack + baking sheet (for air-drying)
- ● Oven-safe thermometer (instant-read preferred, e.g., Thermapen)
- ● Cast-iron skillet (10–12″ for searing) or heavy stainless-steel pan
- ● Tongs (heat-resistant)
- ● Paper towels (for patting skin dry)
- ○ Optional: Blowtorch (for extra-crispy skin 🔥) or weight (e.g., another pan) to press duck while searing
- ● Prerequisites: 2–24 hours for dry-brining (longer = better flavor!)
- ● 1–2 hours for air-drying (uncovered in the fridge)
- ● Oven preheated to 200–250°F (low-and-slow is key!)
Step-by-Step Instructions for Reverse Sear Duck Breast
This method delivers restaurant-quality results—crispy skin and perfectly pink centers—every single time.
Prepare and Dry the Duck Breasts
Start by patting the duck breasts completely dry with paper towels. This is the most critical step for achieving crispy skin later. Pay special attention to the skin side, pressing firmly to remove all moisture. I like to score the skin in a crosshatch pattern using a sharp knife, cutting through the fat but not into the meat—this helps render the fat more efficiently.
Place the prepared duck breasts on a wire rack set over a baking sheet, skin-side up. This allows air to circulate around the entire piece of meat, which is essential for even drying. Let them rest uncovered in the refrigerator for at least 4 hours or preferably overnight. The longer drying time ensures the skin becomes paper-thin and ultra-crispy when cooked.
Slow Cook in a Low Oven
Preheat your oven to 250°F—this low temperature allows the duck to cook gently and evenly. Place the duck breasts on the wire rack, still skin-side up. The rack elevates the meat, ensuring hot air circulates completely around each breast for consistent cooking.
Roast the duck for 45-60 minutes until the internal temperature reaches 130°F when measured at the thickest part. You’ll notice the fat beginning to render slowly, and the meat will take on a beautiful pink hue. Don’t rush this step; the slow cooking process is what makes the final texture so tender and juicy while preventing the meat from becoming tough.
Rest and Prepare for Searing
Remove the duck from the oven and let it rest for 10 minutes. This brief rest allows the juices to redistribute throughout the meat. While the duck rests, pour off any rendered fat from the baking sheet—this is pure duck fat and can be saved for cooking potatoes or other vegetables later.
Heat a heavy skillet (cast iron works best) over medium heat for 5 minutes to get it evenly hot. You want the pan hot enough to create a good sear but not so hot that it burns the skin before it crisps. The duck breasts should be at room temperature by now, which helps ensure even cooking during the searing process.
Sear for Perfectly Crispy Skin
Place the duck breasts in the hot skillet skin-side down. You’ll hear an immediate sizzle—that’s the sound of perfect crisping beginning. Cook for 6-8 minutes without moving them, allowing the skin to develop a deep golden-brown crust. The fat will render out completely, creating a crispy, crackling-like texture.
Flip the duck breasts and sear the meat side for just 1-2 minutes. The internal temperature should reach 135°F for medium-rare doneness. Watch for the edges to become slightly firm but still springy to the touch. Remove the duck from the pan and let it rest on a cutting board for 5 minutes before slicing—this final rest ensures all the juices stay locked inside.
Slice and Serve Immediately
Slice the duck breasts against the grain into ½-inch thick pieces. You’ll see the beautiful gradient from crispy golden skin to perfectly pink centers. The texture should be tender with a slight resistance when bitten into, and the skin should provide a satisfying crunch with each mouthful.
Serve immediately while still warm. I like to arrange the slices on a platter, fanning them out slightly to showcase the perfect doneness. Any pan juices can be drizzled over the top for extra flavor. This method guarantees duck that’s juicy and tender inside with skin so crispy it shatters delightfully with each bite.
Tips and Common Mistakes
Mastering this technique comes down to patience and precision—here’s what I’ve learned from years of perfecting duck.
The Drying Process: Don’t rush the 4-hour (or overnight) refrigeration in Step 1. This isn’t just about drying the surface—it’s about transforming the skin’s texture at a cellular level. The longer you dry, the more moisture evaporates, creating that paper-thin crispiness we’re after. I’ve tested this side-by-side, and overnight drying consistently produces skin that shatters like glass when bitten.
Low and Slow Precision: That 250°F oven temperature in Step 2 isn’t arbitrary—it’s the sweet spot where fat renders gently without tightening the meat fibers. Use an oven thermometer to verify your actual temperature (many ovens run 25°F hot or cold). The 45-60 minute window accounts for size variations, but always go by the 130°F internal temperature, not time alone.
Searing Technique: When you hear that immediate sizzle in Step 4, resist the urge to peek or move the duck for the full 6-8 minutes. The Maillard reaction needs uninterrupted contact to develop that deep golden crust. I like to press down gently with a spatula after the first minute to ensure even contact—this prevents any warping as the fat renders.
Fat Utilization: That rendered duck fat you pour off in Step 3 is liquid gold. Strain it through a fine-mesh sieve and store in the fridge for up to 3 months. It’s incredible for roasting potatoes (they’ll be the crispiest you’ve ever made) or for adding depth to pan sauces. Between us, I sometimes brush a little on the duck skin just before the final sear for extra richness.
Pro Tips for Reverse Sear Duck Breast
- Mastering this technique comes down to patience and precision—here’s what I’ve learned from years of perfecting duck.
- The Drying Process: Don’t rush the 4-hour (or overnight) refrigeration in Step 1. This isn’t just about drying the su…
- Low and Slow Precision: That 250°F oven temperature in Step 2 isn’t arbitrary—it’s the sweet spot where fat renders g…
Frequently Asked Questions
Got questions about reverse searing duck breast? You’re not alone! Here are the most common queries—answered simply so you can cook with confidence.
Do I need a meat thermometer for reverse sear duck breast?
Absolutely! A reliable instant-read thermometer is key. Duck breast is best at 130–135°F (54–57°C) for medium-rare. Guessing can lead to overcooking (dry meat) or undercooking (chewy texture). Invest in one—it’s a game-changer!
How long does reverse searing duck breast take?
Plan for 1.5–2 hours total:
- Low oven (200–250°F): 45–60 mins (until internal temp hits 110°F/43°C).
- Sear (high heat): 2–3 mins per side in a screaming-hot pan.
- Rest: 10 mins before slicing.
Can I use a grill instead of an oven for the reverse sear?
Yes! Set up your grill for indirect heat (200–250°F) with a drip pan. Smoke with fruitwood (like cherry) for extra flavor. Finish with a direct sear over high heat. Watch for flare-ups—duck fat is flammable!
Why is my duck skin not crispy?
Three likely culprits:
- Moisture: Pat the skin bone-dry before searing.
- Low heat: Your pan wasn’t hot enough (use smoking-hot oil).
- Overcrowding: Sear one breast at a time for even browning.
What’s a good alternative if I don’t have duck breast?
Try reverse sear duck legs (longer cook time: 2–3 hours at 275°F) or swap for skin-on chicken thighs (brine first for juiciness). For a similar rich flavor, goose breast or venison backstrap work too!
The reverse sear method is the secret to restaurant-quality duck breast at home—juicy, tender meat with crispy, golden skin every time. By starting low and slow, then finishing with a quick sear, you’ll avoid overcooking while locking in rich, savory flavor. 🦆✨
Ready to impress? Grab a duck breast, fire up your oven, and give this technique a try! For extra inspiration, pair it with a bold red wine reduction or a tangy orange glaze. Happy cooking!

Trained in classic French technique but raised on slow-cooked ribs and spicy rubs, she blends culinary skill with smoke and soul.
- Recipe for Boneless Pork Chops in Cast Iron Skillet: Sear and Baste to Juicy Perfection - October 3, 2026
- Recipe for Boneless Cross Rib Roast: Slow-Roasted Beef with Herb Crust - October 3, 2026
- Hamburgers in Sauce Recipe Crock Pot: Slow-Cooked Savory Delight - October 3, 2026