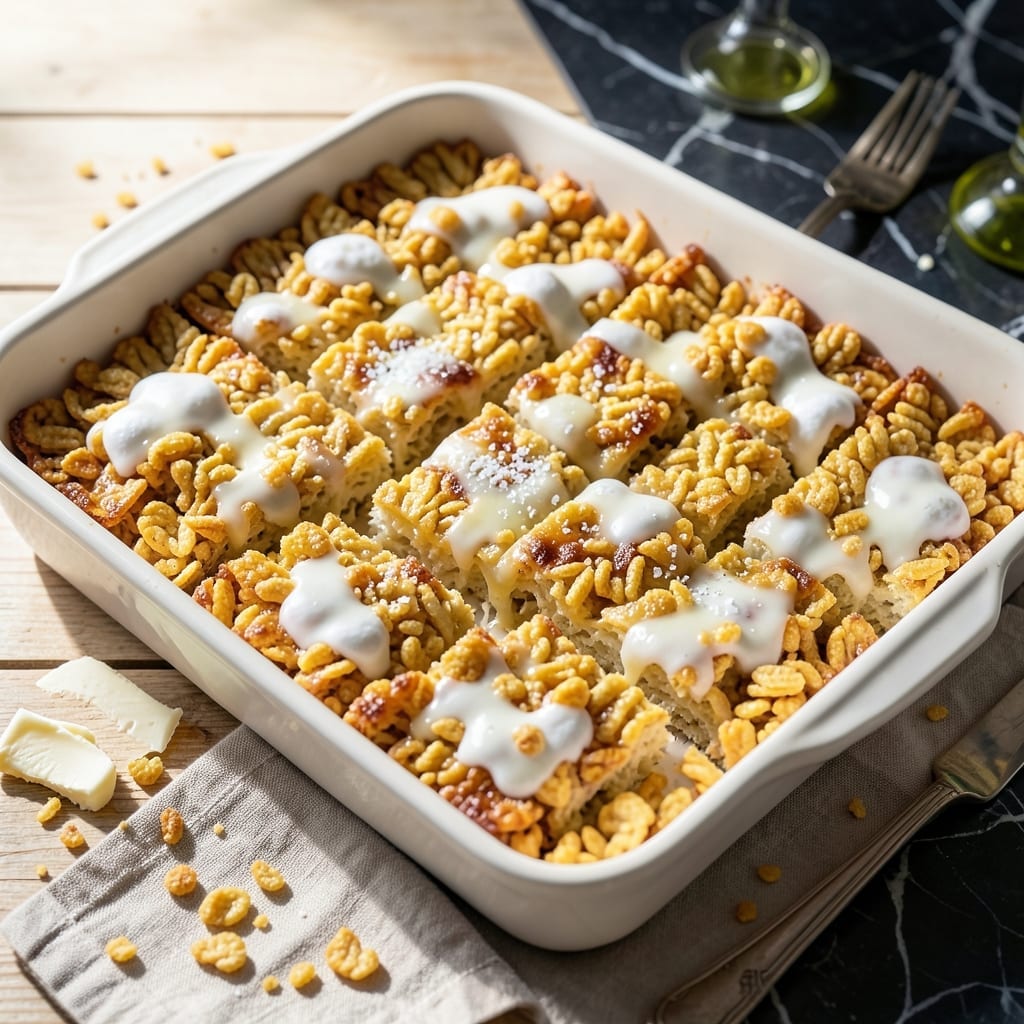
This recipe transforms classic rice crispy treats with an extra dose of marshmallow fluff for a lighter, cloud-like texture. The secret is combining melted marshmallows with additional fluff for maximum gooeyness.
You’ll end up with crispy edges and a melt-in-your-mouth center that’s impossible to resist. Perfect for parties, lunchboxes, or a quick sweet fix.
Ingredients for Rice Crispy Treats Recipe with Fluff
A few pantry staples and one secret ingredient create these dreamy, cloud-like treats.
| Ingredient | Amount | Notes |
|---|---|---|
| Rice Krispies Cereal 🥣 | 6 cups | Standard variety, not puffed rice |
| Mini Marshmallows 🍬 | 10 oz | Divided: 6 oz melted, 4 oz folded in |
| Marshmallow Fluff ☁️ | 2 cups | Store-bought or homemade |
| Unsalted Butter 🧈 | 6 tbsp | Divided: 4 tbsp for melting, 2 tbsp for greasing |
| Vanilla Extract 🌿 | 1 tsp | Pure extract for best flavor |
| Fine Sea Salt 🧂 | ¼ tsp | Balances sweetness |
| Light Corn Syrup 🧴 | 2 tbsp | Keeps treats soft and chewy |
| Powdered Sugar 🍚 | ¼ cup | Optional for dusting |
[recipe_ingredient_scaler]
The marshmallow fluff is non-negotiable here—Jet-Puffed is my go-to brand (that stuff in the glass jars). Kraft mini marshmallows melt the smoothest, but any generic brand works in a pinch. Butter quality matters less here since it’s mostly for greasing, but I always use Land O’Lakes unsalted. The cereal? Only Kellogg’s Rice Krispies—off-brands just don’t have the same snap.
No fluff? Whip up a quick batch with egg whites and sugar (though that’s technically not vegetarian-friendly). Swap corn syrup for honey or agave—just know the texture changes slightly. Out of vanilla? Almond extract at half the amount adds a nice twist. The salt can be skipped, but don’t—it cuts the sweetness perfectly.
These keep for 3 days at room temp in an airtight container (if they last that long). Freeze for up to 2 months—thaw at room temp before serving. Pro tip: Press them into a greased pan with damp hands to avoid sticking.
Why You’ll Love This Recipe
- One Bowl Wonder: I melt the butter and fluff right in the same pot, then stir in the cereal—no extra dishes, no fuss.
- Extra Gooey: The marshmallow fluff makes them even stickier and sweeter than the classic version, with that perfect chewy pull.
- Party Ready: I bring these to potlucks and they disappear first, every single time.
- Budget Stretcher: A box of cereal and a jar of fluff make two dozen treats for less than the cost of a coffee.
Step-by-Step Instructions for Rice Crispy Treats with Fluff
This method guarantees extra gooey, cloud-like treats that hold their shape perfectly.
Step 1: Prepare the Pan and Melt the Butter
Grease a 9×13-inch baking dish thoroughly with 2 tbsp of the unsalted butter, making sure to cover all sides and corners. I like to use a paper towel to spread it evenly and get into every nook. This prevents sticking and makes cleanup a breeze later.
In a large pot, melt the remaining 4 tbsp unsalted butter over low heat. Add 6 oz of the mini marshmallows and the 2 cups Marshmallow Fluff. The low heat is crucial—too high and the marshmallows will burn instead of melting smoothly.
Step 2: Create the Marshmallow Base
Stir the marshmallow mixture constantly with a silicone spatula until completely melted and smooth. This should take about 5-7 minutes. You’ll notice the mixture becomes glossy and pulls away from the sides of the pot slightly when it’s ready.
Once melted, stir in the 2 tbsp light corn syrup, 1 tsp vanilla extract, and 0.25 tsp fine sea salt. The corn syrup adds that signature chewiness, while the salt balances all the sweetness. Mix for another 30 seconds until fully combined.
Step 3: Incorporate the Cereal and Extra Marshmallows
Remove the pot from heat and immediately add all 6 cups Rice Krispies Cereal. Using the same spatula, fold gently but quickly to coat every piece evenly. The cereal should be completely saturated but not mushy—this is where timing matters.
Now fold in the remaining 4 oz mini marshmallows. These will soften slightly but maintain some shape, creating those delicious gooey pockets in every bite. Work fast here—the mixture will start to set as it cools.
Step 4: Press and Set the Treats
Transfer the mixture to your prepared baking dish. Using the same greased spatula (or lightly buttered hands), press everything down evenly into the dish. I aim for about 1-inch thickness throughout. Don’t compact too hard or the treats will be dense rather than light and crispy.
Let the treats cool at room temperature for 30-45 minutes until firm enough to cut but still slightly tacky to the touch. This cooling time allows the marshmallows to set properly while maintaining that perfect texture.
Step 5: Cut and Finish
Once set, use a sharp knife to cut into 2-inch squares. For cleaner cuts, dip the knife in hot water between slices. If desired, dust the tops lightly with 0.25 cup powdered sugar for a bakery-style finish.
Store in an airtight container at room temperature for up to 3 days, though they’re best enjoyed the same day when they’re at peak freshness and have that ideal crispy-chewy contrast.
Pro Tips For Making Rice Crispy Treats Recipe With Fluff
- Melt Butter Low: Keep the heat on medium-low when melting butter to prevent browning—burnt butter will make your treats taste bitter. I learned this the hard way after ruining a batch with overzealous heat.
- Use Fresh Fluff: Marshmallow Fluff can dry out over time, so check the jar’s date and give it a good stir before measuring. Sounds weird, but it actually changes the outcome.
- Skip the Overmixing: Once the cereal is coated, stop stirring—overworking the mixture makes the treats dense instead of light and crispy. My grandmother swore by this, and she was right.
- Press Lightly: Use a greased spatula or your fingers to press the mixture into the pan, but don’t compact it too hard. This isn’t the prettiest method, but it keeps them airy and crisp.
Essential Equipment for Perfect Results
Large Melting Pot
A heavy-bottomed 5-6 quart pot is essential for even melting without burning. I use my Le Creuset Dutch oven—its thick walls distribute heat perfectly. Avoid nonstick pots as they can’t handle the high sugar content of melting marshmallows. 🔥
Silicone Spatula
You need a heat-resistant silicone spatula to stir the marshmallow mixture. I love the OXO Good Grips model—it scrapes every last bit from the pot. Wooden spoons can work, but silicone won’t scratch your pot or melt.
The flat edge helps press the cereal into the pan evenly later.
9×13-Inch Baking Dish
A 9×13-inch baking dish gives you the perfect thickness for these treats. I prefer glass (Pyrex is my go-to) because it lets me see when the bottom layer is properly greased. Metal pans work too but can react with acidic ingredients.
Sharp Chef’s Knife
For clean cuts, use a sharp 8-inch chef’s knife. I keep my Wüsthof honed for this job. Dip the blade in hot water between cuts to prevent sticking. Dull knives will squish the treats rather than slice them.
Offset Spatula
An offset spatula is perfect for pressing the mixture into the pan evenly. The angled blade lets you spread right to the edges. I use a 10-inch Ateco model—it’s the right size for this dish. Lightly butter it first to prevent sticking.
Mixing Bowls
Have a few mixing bowls ready for pre-measuring ingredients. I like stainless steel for the cereal—it won’t absorb odors. A 2-cup measure is perfect for scooping the fluff directly into your pot. 💫
Nutrition Facts
Frequently Asked Questions
Can I use regular marshmallows instead of mini?
Yes, but chop them into smaller pieces first. Mini marshmallows melt faster and more evenly, but regular ones work in a pinch. Expect a slightly longer melting time.
Why does the recipe call for both marshmallows and fluff?
The melted marshmallows create the sticky base, while the fluff adds extra gooeyness and a lighter texture. This combo ensures every bite has that signature cloud-like consistency.
How do I keep the treats from sticking to my hands?
Lightly butter your hands or spatula before pressing the mixture into the pan. This creates a barrier and makes handling much easier.
Can I make these ahead of time?
Store in an airtight container at room temperature for up to 3 days. For longer storage, freeze for up to 2 months and thaw before serving.

Trained in classic French technique but raised on slow-cooked ribs and spicy rubs, she blends culinary skill with smoke and soul.
- Recipe for Boneless Pork Chops in Cast Iron Skillet: Sear and Baste to Juicy Perfection - October 3, 2026
- Recipe for Boneless Cross Rib Roast: Slow-Roasted Beef with Herb Crust - October 3, 2026
- Hamburgers in Sauce Recipe Crock Pot: Slow-Cooked Savory Delight - October 3, 2026