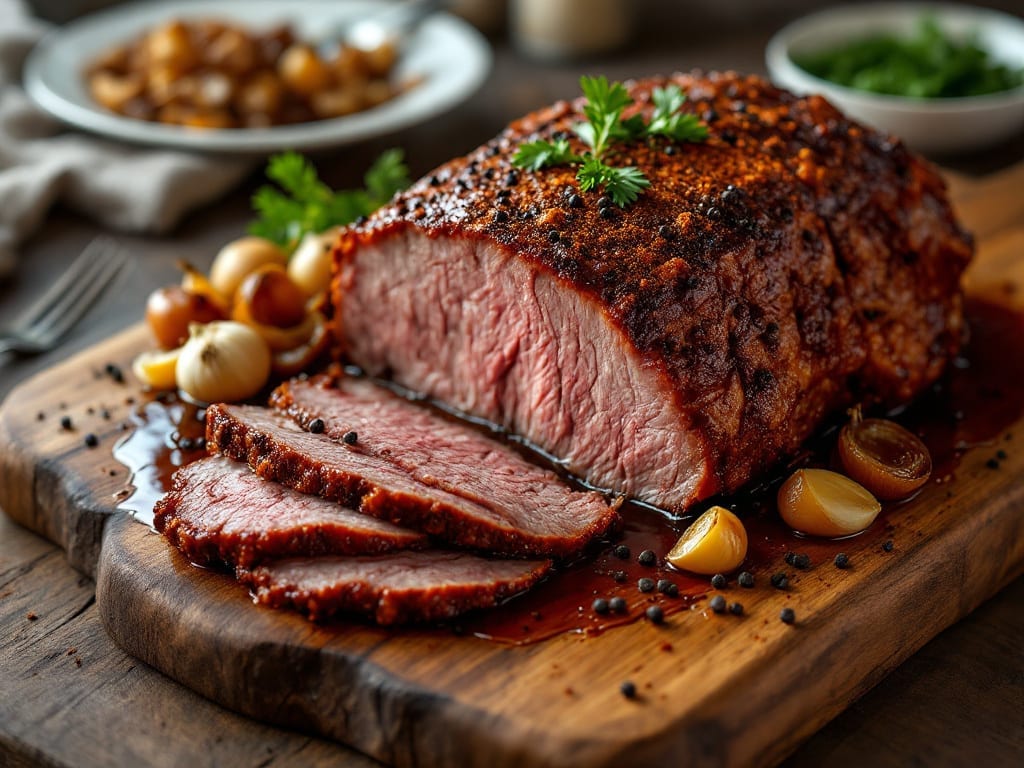
Mastering a roast brisket recipe with smoky depth and crispy bark transforms tough cuts into melt-in-your-mouth perfection—exactly what I learned from my grandfather’s backyard cookouts. The key lies in patience: low-and-slow roasting until the meat nearly falls apart, then finishing with high heat to create that coveted crust.
This method delivers restaurant-quality results at home, whether you’re feeding a crowd or craving a Sunday centerpiece.
What sets this brisket apart is the balance of technique and simplicity. Start with a dry rub of coarse salt, black pepper, and smoked paprika—no fancy ingredients, just bold flavor. The brisket cooks for hours at 275°F, allowing fat to render and collagen to break down into tender, juicy meat.
The final crispy bark comes from a quick sear in a screaming-hot oven, locking in moisture while creating that addictive texture. Every step builds on the last, ensuring you’ll end up with a brisket that’s worth the wait.
By the time you slice into that golden-brown crust, you’ll uncover meat so tender it practically dissolves on your tongue, infused with deep smoky notes from the rub. The aroma alone will have everyone gathering around the table, and the first bite will silence any doubters.
This is the kind of brisket that turns casual dinners into memorable feasts—no shortcuts, just time-honored technique perfected in my own kitchen. Let’s get started on creating yours.
Pair it with classic sides like creamy mashed potatoes, tangy coleslaw, or a rich onion gravy to soak up every last drop of that flavorful juices. The beauty of this recipe?
It scales effortlessly, whether you’re cooking for four or twelve. Once you try it, you’ll never settle for anything less than homemade again.
Ingredients for roast brisket
Bold flavors and simple ingredients transform tough brisket into melt-in-your-mouth perfection.
| Ingredient | Amount | Notes |
|---|---|---|
| Beef Brisket 🥩 | 8 lb | Whole packer cut, fat cap intact |
| Coarse Kosher Salt 🧂 | ½ cup | Diamond Crystal preferred |
| Smoked Paprika 🌶️ | 3 tbsp | Honduran or Spanish for depth |
| Freshly Ground Black Pepper 🌶️ | 2 tbsp | Cracked peppercorns preferred |
| Garlic Powder 🧄 | 1 tbsp | Freshly ground preferred |
| Onion Powder 🧅 | 1 tbsp | No added MSG |
| Ground Mustard 🌿 | 1 tbsp | Dijon preferred for tang |
| Brown Sugar 🍯 | 2 tbsp | Light or dark works |
| Apple Cider Vinegar 🍎 | 2 tbsp | For tenderizing |
| Beef Tallow or Shortening 🧈 | ¼ cup | For fat cap rendering |
| Wood Chips (Hickory or Oak) 🌳 | 2 cups | Soaked for 30 minutes |
| Beef Broth 💧 | 2 cups | Low-sodium preferred |
| Yellow Onion 🧅 | 1 whole | Quartered for aromatics |
| Fresh Rosemary 🌿 | ¼ cup | Chopped, for sprigging |
[recipe_ingredient_scaler]
The brisket is everything. Whole packer cuts from Costco or local butchers have that perfect fat cap—don’t trim it, that’s where the flavor hides. Look for bright red meat with good marbling, not gray or slimy. I always grab mine from Whole Foods or my neighborhood butcher shop when they have fresh cuts. The fat cap should be about 1/4-inch thick—thicker means more rendering, more flavor. If your brisket comes pre-trimmed, skip the tallow and just use the fat on the meat itself. And trust me, never skip the fat cap—that’s where the juices hide.
No smoked paprika? Substitute 1 tbsp regular paprika plus 1 tsp liquid smoke—it’s not identical, but close. Freshly ground black pepper is ideal, but pre-ground works in a pinch (just add a pinch extra). For the brown sugar, coconut sugar adds a subtle caramel note if you’re feeling fancy. The apple cider vinegar can be swapped for red wine vinegar, but it’ll taste different. If you’re cooking for a crowd and short on time, pre-mixed rubs from Penzeys save effort—just add the vinegar and tallow yourself. The wood chips? Hickory gives classic BBQ flavor, but oak is more versatile if you’re not sure.
This brisket needs time—12-16 hours in the fridge before cooking if you can plan ahead. The rub stays good for 2 weeks in an airtight container, but the meat itself? Use it within 5 days for best texture. The cooked brisket keeps 5-7 days in the fridge, wrapped tightly in foil with all those juices. Freeze portions for up to 3 months—just thaw overnight in the fridge. Pro tip: Slice against the grain for that melt-in-your-mouth texture, and save those juices for gravy or a quick pan sauce.
Why You’ll Love This Recipe
- Five-Ingredient Magic: I swear by this combo—just brisket, salt, smoked paprika, pepper, and garlic powder. That’s it. The kosher salt does all the heavy lifting, while the paprika adds this smoky whisper that makes it taste like it’s been slow-smoked for hours.
- Weeknight Hero: Between us, I’ve pulled this together at 6:30 PM after a long day. Toss the brisket in the oven, let it roast while you chop veggies or fold laundry—it’s that kind of reliable. The garlic powder gives it a punch that feels fancy, but honestly? It’s just dinner.
- Leftovers That Win: This isn’t one of those recipes where leftovers get sad. Shred it for tacos, sandwiches, or even a quick breakfast hash the next morning. I’ll be real: my kids actually ask for brisket leftovers, and that’s saying something.
- Budget-Friendly Feast: A whole brisket feeds my family for days without breaking the bank. The coarse salt and spices cost pennies, and the meat stretches across meals like a champ. Plus, it’s cheaper than takeout—and way better. No contest.
Step-by-step instructions for roast brisket recipe
Here’s how to transform a tough cut into tender, smoky perfection with that coveted crispy bark.
Prepare the Brisket and Rub
First, trim the fat cap of the 8 lb beef brisket down to about ¼-inch thickness using a sharp boning knife. This ensures even cooking while preserving flavor. Pat the entire surface dry with paper towels—moisture is the enemy of crispy bark.
In a large bowl, combine the 0.5 cup coarse kosher salt, 3 tbsp smoked paprika, 2 tbsp freshly ground black pepper, 1 tbsp garlic powder, 1 tbsp onion powder, 1 tbsp ground mustard, 2 tbsp brown sugar, and 2 tbsp apple cider vinegar. Mix thoroughly to create a coarse, flavorful crust. Rub this mixture generously over the brisket, pressing it into every crevice. The vinegar helps tenderize while the spices create that signature bark.
Let the seasoned brisket sit at room temperature for 1 hour before cooking. This step is crucial—it allows the rub to penetrate and the meat to cook more evenly. I know it seems like a long wait, but trust me, it makes all the difference in the final texture.
Set Up the Smoker
Soak the 2 cups wood chips (hickory or oak) in water for at least 30 minutes before using. This prevents them from burning too quickly and gives you steady, flavorful smoke. Fill your smoker with the soaked wood chips and preheat to 225°F. I’ve found this low-and-slow temperature is key for breaking down the tough brisket fibers without drying it out.
While the smoker heats, prepare a water pan by combining 2 cups beef broth in a shallow metal pan. Place this in the smoker to maintain moisture throughout the cook. When the smoker reaches temperature and you see clean, blue smoke (not thick white steam), you’re ready to add the brisket. Position it fat-side up on the grill grates—this allows the rendered fat to baste the meat as it cooks.
Close the lid and resist the urge to peek. Every time you open it, you lose heat and add 15-20 minutes to your cook time. This is where patience pays off—consistent temperature is everything for tender brisket.
Smoke Until Probe-Tender
Smoke the brisket undisturbed for 6-8 hours, or until the internal temperature reaches 165-170°F. This is when you’ll hit “the stall”—a period where the temperature stops rising as moisture evaporates. Don’t panic; this is completely normal and expected with brisket. The reason we wait until this point is that the meat needs to reach this temperature before we can wrap it.
At this stage, wrap the brisket tightly in butcher paper (not aluminum foil—paper allows for better bark development). This technique, called the “Texas crutch,” helps power through the stall while preserving that beautiful crust. Return it to the smoker and continue cooking until the internal temperature reaches 200-205°F and a meat probe slides in like butter with no resistance. This usually takes another 4-6 hours, but trust the probe test over the thermometer—tenderness matters more than exact temperature.
Rest and Slice
Once probe-tender, remove the brisket from the smoker and let it rest in the butcher paper for at least 1 hour (I prefer 2 hours wrapped in towels in a cooler). This resting period allows the juices to redistribute throughout the meat, ensuring every slice is moist and flavorful. The brisket will continue to rise in temperature during this time—this is normal carryover cooking.
Unwrap the brisket and locate the grain direction—you’ll see lines running through the meat. Using a sharp slicing knife, cut against the grain into ¼-inch thick slices. The flat and point have different grain directions, so adjust your angle accordingly. The slices should be tender enough to pull apart with a gentle tug, not so soft they fall apart, and not tough or chewy.
Here’s the final touch: while the brisket rests, melt the 0.25 cup beef tallow or shortening in a small saucepan over low heat. Brush this rendered fat generously over each slice before serving. It adds an extra layer of richness and helps maintain moisture. Garnish with chopped fresh rosemary and quartered yellow onion for freshness and presentation.
Pro Tips For Making Roast Brisket
- SEAR THE FAT SIDE DOWN: After salting the brisket, sear the fatty side first—this renders fat away from the meat, not into it. I used to skip this and ended up with a greasy pan and a brisket that didn’t crisp properly.
- SALT 12 HOURS IN ADVANCE: Kosher salt needs time to work its magic—cover the brisket and let it sit overnight. I learned this the hard way when my first attempt turned out bland, even with extra seasoning.
- CHECK INTERNAL TEMP AT 195°F: Use a meat thermometer to probe the thickest part—when it hits 195°F, the collagen will break down into gelatin, making the brisket fork-tender. Guessing leads to disappointment.
- REST UNDER FOIL FOR 10 MINUTES: After roasting, tent the brisket with foil and let it sit—this keeps it juicy while you prep sides. I know, I know, but rushing this step means dry slices. (Your future self will thank you.)
Essential equipment for this recipe
Smoker Essentials
You don’t need a fancy smoker to nail this brisket—I’ve cooked perfect batches in everything from a Traeger Pellet Grill to a Weber Smokey Mountain (the classic offset smoker). For beginners, I recommend the Traeger Pro 575—it’s foolproof and handles temperature swings better than most.
If you’re on a budget, a charcoal offset smoker like the Masterbuilt 200715 works well once you get the hang of managing the fire. The key is maintaining that 225°F temperature, so invest in a good thermometer—my go-to is the ThermoWorks Smoke dual-probe model. 🌡️
Heat Source Options
Charcoal is my first love for that authentic smoky flavor, but wood pellets are a game-changer for consistency. If you’re using charcoal, I swear by Kingsford Briquetttes for steady burns and hickory or oak chunks for deep flavor.
For pellet smokers, Traeger’s hickory pellets are my top pick—they smoke hot and clean without overpowering the meat. Pro tip: Soak your wood chips for 30 minutes before using to prevent flare-ups and ensure even smoke production.
Must-Have Accessories
A meat probe thermometer is non-negotiable—it’s how you know when the brisket is truly done. I also keep a butcher paper roll (like Pink Butcher Paper) on hand for wrapping during the Texas crutch phase.
A heavy-duty aluminum pan for the water bath keeps your smoker’s moisture levels stable, and a meat hook makes flipping the brisket effortless. Don’t forget a sharp boning knife and slicing knife—I use a Dexter-Russell 12-inch for slicing, and it’s a game-changer for clean cuts.
Budget-Friendly Swaps
No smoker? No problem. A grill with a smoker box (like the Weber Spirit II) can work if you’re patient—just use indirect heat and wood chunks. For the rub, skip the smoked paprika and add 1 tsp liquid smoke to the mix.
If you’re short on time, a slow cooker can handle the low-and-slow phase (though it won’t give you that smoky bark). The most important tool? A reliable thermometer—even a $20 digital probe beats guessing.
Pro Upgrades
Ready to level up? A digital temperature controller like the Pit Boss Elite keeps your smoker’s temp within ±5°F, eliminating the guesswork. For the ultimate bark, I’ve had great results with a reverse sear finish in a cast-iron skillet on the stovetop after smoking.
And if you’re foraging like I do, fresh rosemary sprigs and wild thyme add a unique depth to the rub. 💫
Nutrition facts
Frequently asked questions
Why does the brisket need to rest after cooking?
Resting lets the juices redistribute throughout the meat instead of pooling on the cutting board. When you slice into brisket that hasn’t rested, all those precious juices escape, leaving you with dry, tough slices. For this recipe, aim for 1-2 hours of resting time wrapped in butcher paper—this ensures every bite stays moist and flavorful.
Can I use an oven instead of a smoker for this recipe?
Preheat your oven to 275°F and place a water pan on the bottom rack to maintain moisture. Use a meat thermometer to monitor internal temperature, and wrap the brisket in butcher paper when it hits 165°F. The cook time will be similar—just expect slightly less smoky flavor without wood chips.
What’s the difference between the flat and point cuts of brisket?
The flat is leaner with a more uniform grain, while the point (or deckle) has more fat and a different grain direction. For best results, separate them before cooking—the flat cooks faster and can overcook if left attached. Slice each against its own grain for maximum tenderness.
How do I know when the brisket is done?
Use a meat probe to check internal temperature—it should reach 200-205°F and slide in like butter with no resistance. The probe test is more reliable than time alone, as brisket size and smoker variations affect cook times. If the meat feels tender but the temp is lower, let it rest—the carryover cooking will push it to the right temperature.
Can I make this brisket ahead of time?
Yes! Cooked brisket keeps 5-7 days in the fridge when tightly wrapped in foil with all its juices. For longer storage, portion and freeze slices for up to 3 months. Thaw overnight in the fridge before reheating—never microwave from frozen. A quick sear in a cast-iron skillet revives the bark beautifully.

Trained in classic French technique but raised on slow-cooked ribs and spicy rubs, she blends culinary skill with smoke and soul.
- Best Smoked Oxtail Recipe: Deep-Rich Flavor After Low-and-Slow Cooking - October 14, 2026
- Pit Boss Smoked Prime Rib Roast Recipe: Bark-to-Bone Crispness in 4 Hours - October 14, 2026
- Smoked Tuna Steak Recipe: Seared Crust Meets Silky Centers - October 14, 2026