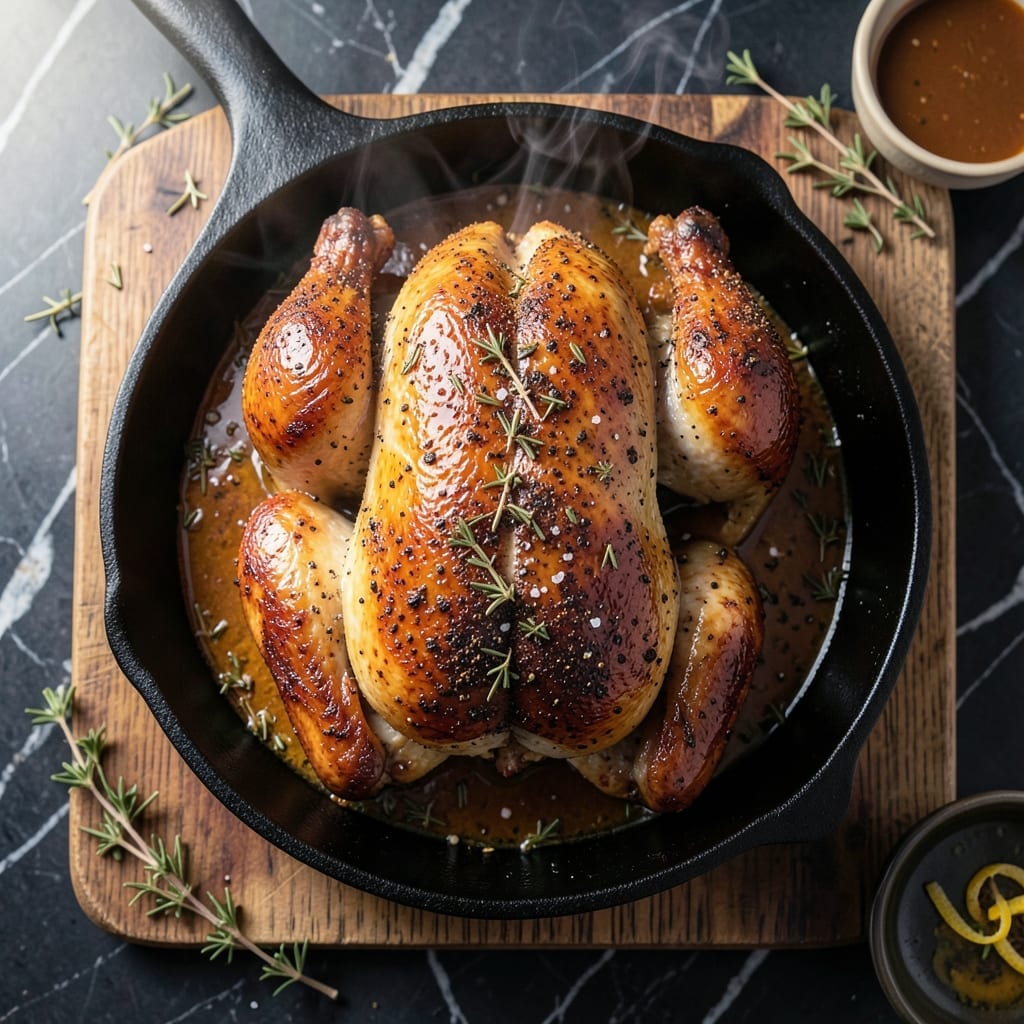
I spent weeks perfecting this method to achieve the moist meat and golden skin of rotisserie chicken at home. The oven does most of the work with a simple technique.
This approach uses high heat to crisp the skin while keeping the inside juicy. A dry brine and proper resting time ensure every bite stays flavorful and tender.
You’ll end up with a beautiful golden bird ready to serve as the centerpiece of any meal. The skin crackles with each cut, revealing perfectly cooked meat underneath.
This works for Sunday dinners or weeknight meals when you need reliable results. The method is straightforward but delivers impressive quality.
Ingredients for Rotisserie Chicken Recipe Oven
A whole bird and pantry spices transform into this juicy, golden centerpiece.
| Ingredient | Amount | Notes |
|---|---|---|
| Whole Chicken 🍗 | 4 lb | Giblets removed, patted dry |
| Kosher Salt 🧂 | 1 ½ tbsp | Diamond Crystal preferred for dry brine |
| Black Pepper 🌶️ | 1 tsp | Freshly ground for best flavor |
| Garlic Powder 🧄 | 1 tsp | Not garlic salt |
| Onion Powder 🧅 | 1 tsp | Enhances savory depth |
| Dried Thyme 🍃 | 1 tsp | Or use rosemary instead |
| Paprika 🌶️ | 1 tsp | Sweet or smoked for color |
| Unsalted Butter 🧈 | 4 tbsp | Melted for basting |
| Olive Oil 🫒 | 2 tbsp | For crisping the skin |
| Lemon 🍋 | 1 whole | Halved for cavity, optional |
| Fresh Rosemary Sprigs 🌿 | 2 whole | Optional for aroma |
| Carrots 🥕 | 2 whole | Chopped for roasting pan |
| Onions 🧅 | 1 whole | Quartered for roasting pan |
| Celery Stalks 🥬 | 2 whole | Chopped for roasting pan |
[recipe_ingredient_scaler]
The chicken quality is non-negotiable. Look for air-chilled birds at Whole Foods or Trader Joe’s—they retain moisture better than water-chilled. Aim for 4 lbs (a standard size that cooks evenly). Pat it thoroughly dry before seasoning; wet skin steams instead of crisps. The salt should be Diamond Crystal kosher salt for even distribution and proper dry-brine penetration.
Out of garlic powder? Fresh minced garlic at double the amount works, but distribute it under the skin to prevent burning. No thyme? Poultry seasoning at half the quantity covers the base flavors. The butter can be swapped for olive oil, but you’ll sacrifice some richness in the basting. Skip the lemon if you prefer, but its acidity brightens the finished bird.
Rest the chicken 15-20 minutes before carving to redistribute juices. Leftovers keep 3-4 days in the fridge or freeze for 3 months. Reheat gently in a covered dish to preserve moisture (or shred for sandwiches, soups, and salads).
Why You’ll Love This Recipe
- Set and Forget: I rub the chicken with salt, pepper, and those powders, pop it in the oven, and walk away—no basting, no flipping.
- Crispy, Juicy Magic: The skin comes out golden and crackling, while the meat stays tender from the dry brine of kosher salt.
- Meal Prep Hero: One bird gives me sandwiches, tacos, and soup for days—just shred and store.
- Budget Winner: A whole chicken costs less than pre-cut pieces, and honestly, it tastes better than store-bought rotisserie.
Step-by-Step Instructions for Rotisserie Chicken in the Oven
Here’s the method. Straightforward, tested, works every time.
Step 1: Dry Brine and Season the Chicken
Pat the 4 lb Whole Chicken completely dry inside and out with paper towels. This is crucial for achieving crispy skin. In a small bowl, mix the 1.5 tbsp Kosher Salt, 1 tsp Black Pepper, 1 tsp Garlic Powder, 1 tsp Onion Powder, 1 tsp Dried Thyme, and 1 tsp Paprika.
Rub this seasoning blend all over the chicken, including inside the cavity. I press it firmly into the skin to ensure it adheres well. Place the chicken on a wire rack set over a plate and refrigerate uncovered for at least 1 hour or up to 24 hours. This dry brine draws moisture from the meat, which then gets reabsorbed with the seasoning, ensuring moist meat and crispy skin.
Step 2: Prepare the Roasting Pan and Prep for Oven
Remove the chicken from the refrigerator and let it sit at room temperature for 30 minutes. Preheat your oven to 425°F. While the oven heats, melt the 4 tbsp Unsalted Butter and mix in the 2 tbsp Olive Oil.
Chop the 2 whole Carrots, quarter the 1 whole Onions, and chop the 2 whole Celery Stalks. Place these vegetables in the bottom of your roasting pan. If using, add the 1 whole Lemon (halved) and 2 whole Fresh Rosemary Sprigs to the cavity of the chicken. The vegetables will create a natural rack and add flavor to the drippings.
Step 3: Roast and Baste for Even Cooking
Place the chicken breast-side up on the vegetables in the roasting pan. Brush the chicken generously with the butter and olive oil mixture. Roast in the preheated oven for 15 minutes at 425°F, then reduce the heat to 375°F and continue roasting.
Baste the chicken with the pan juices every 20 minutes. After 1 hour of total roasting time, flip the chicken breast-side down and baste again. This ensures even cooking and a uniformly crispy skin. The chicken is done when the internal temperature reaches 165°F in the thickest part of the thigh (not touching bone).
Step 4: Rest and Serve
Once the chicken reaches the correct internal temperature, remove it from the oven. Transfer the chicken to a cutting board, tent it loosely with foil, and let it rest for 15-20 minutes. This resting period allows the juices to redistribute throughout the meat, ensuring moist, flavorful chicken.
Carve the chicken and serve with the roasted vegetables and pan juices. The skin should be golden brown and crispy, and the meat should be tender and juicy. The aromatics used in the cavity and roasting pan will infuse the chicken with a subtle, savory depth of flavor.
Pro Tips For Making Rotisserie Chicken Recipe Oven
- Start Hot, Finish Low: I learned this the hard way—blast the oven at 425°F for the first 20 minutes to get that golden skin, then drop to 350°F to cook the chicken through without drying it out.
- Dry the Skin: Pat the chicken bone dry with paper towels before seasoning—this makes a real difference in getting that crispy, rotisserie-style skin.
- Don’t Skip the Rest: After pulling it from the oven, let it rest 10-15 minutes under foil. I used to cut in right away and the juices would run everywhere.
- Season Under the Skin: Rub some of that salt, garlic powder, and onion powder mix under the skin—it actually changes the outcome, infusing flavor deep into the meat.
Troubleshooting This Dish
Skin Not Crispy
If your skin isn’t crisping, your bird likely wasn’t dry enough before roasting. I pat mine with paper towels inside and out until no moisture remains. Also, ensure your oven is fully preheated to 425°F before putting the chicken in. 💡
Uneven Cooking
This usually happens when the chicken sits directly on the pan bottom. Always use the chopped Carrots, Celery Stalks, and Onions as a rack to allow air circulation. Flip the bird breast-side down after 1 hour for even browning.
Dry Meat
Overcooking is the main culprit. Pull your chicken when the thickest part of the thigh reaches 165°F. Use a reliable meat thermometer—I trust my ThermoWorks model. Resting for 15-20 minutes also prevents dryness by redistributing juices.
Basting Issues
If your basting liquid burns, you’re likely opening the oven too frequently. I baste every 20 minutes only, using the butter and Olive Oil mixture. Keep the oven door closed as much as possible to maintain consistent heat. 🔥
Seasoning Too Light
For more flavor, ensure you’re using the full 1.5 tbsp Kosher Salt in your dry brine. I press the seasoning firmly into the skin so it adheres well. Don’t skip the cavity seasoning—it adds depth to every bite.
Sticking to Pan
Prevent this by using enough chopped vegetables to create a stable base. The natural sugars in Carrots and Onions can caramelize and stick, so I line my pan with parchment paper underneath the veggie rack for easy cleanup.
Nutrition Facts
Frequently Asked Questions
What temperature should I use for oven roasting?
Start at 425°F for 15 minutes, then reduce to 375°F. This high-to-low method ensures crispy skin while cooking the meat through evenly.
How do I know when it’s fully cooked?
The thickest part of the thigh should reach 165°F. Always use a meat thermometer for accuracy—visual cues alone can be misleading.
Can I skip the dry brine step?
Not recommended. The dry brine (using 1.5 tbsp Kosher Salt) ensures seasoning penetrates deeply and skin crisps properly. Even 1 hour makes a noticeable difference.
What if my skin isn’t crispy enough?
Pat the chicken completely dry before seasoning and ensure your oven is fully preheated. Adding 2 tbsp Olive Oil to the butter baste also helps achieve that perfect crunch.

Trained in classic French technique but raised on slow-cooked ribs and spicy rubs, she blends culinary skill with smoke and soul.
- Best Smoked Oxtail Recipe: Deep-Rich Flavor After Low-and-Slow Cooking - October 14, 2026
- Pit Boss Smoked Prime Rib Roast Recipe: Bark-to-Bone Crispness in 4 Hours - October 14, 2026
- Smoked Tuna Steak Recipe: Seared Crust Meets Silky Centers - October 14, 2026