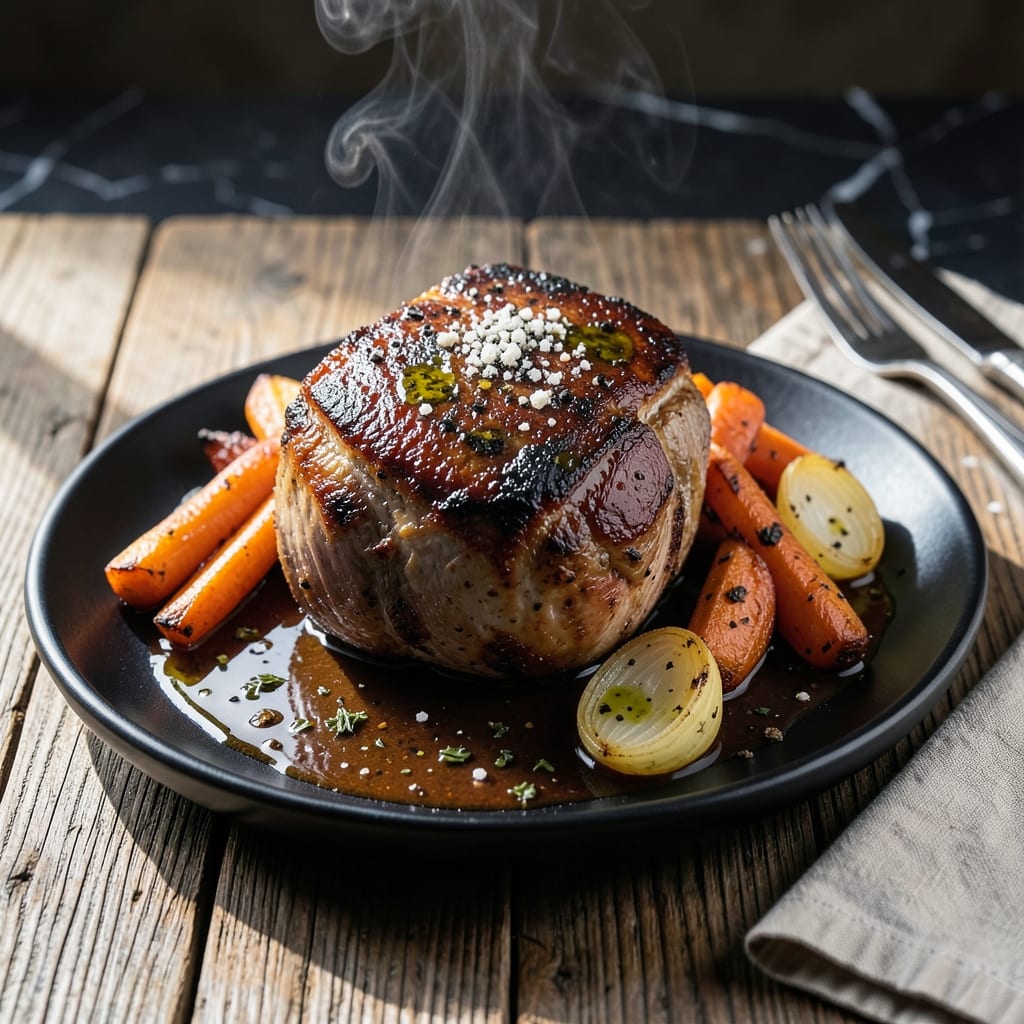
This Dutch oven method transforms tough rump roast into fall-apart tender meat with minimal effort. The slow braising process breaks down connective tissue, creating melt-in-your-mouth results every time.
I developed this technique after years of experimenting with different cuts and cooking methods. The key is maintaining a steady simmer and allowing enough time for the collagen to convert into rich, velvety gelatin.
What emerges is a roast so tender it shreds with a fork, surrounded by a deeply flavorful sauce perfect for serving over mashed potatoes or crusty bread. The Dutch oven traps heat and moisture, ensuring even cooking.
This method works for any tough cut, not just rump roast. The hands-off approach makes it ideal for weekend cooking when you want impressive results without constant attention.
Ingredients for Rump Roast Recipe Stove Top
Transform a humble cut into a showstopper with these carefully selected ingredients for a deeply flavorful braise.
| Ingredient | Amount | Notes |
|---|---|---|
| Rump Roast 🥩 | 2 ½ lb | Well-marbled, trimmed of excess fat |
| Kosher Salt 🧂 | 2 tsp | Diamond Crystal preferred for even seasoning |
| Black Pepper 🌶️ | 1 tsp | Freshly ground for optimal aroma |
| Olive Oil 🫒 | 2 tbsp | Extra-virgin for searing depth |
| Yellow Onion 🧅 | 1 whole | Medium size, diced uniformly |
| Carrots 🥕 | 3 whole | Peeled and cut into chunks |
| Celery Stalks 🌿 | 2 whole | Trimmed and sliced into pieces |
| Garlic Cloves 🧄 | 4 cloves | Peeled and smashed for robust flavor |
| Tomato Paste 🍅 | 2 tbsp | Concentrated for umami richness |
| Beef Stock 🥣 | 3 cups | Low-sodium for controlled seasoning |
| Red Wine 🍷 | 1 cup | Dry variety for acidity and depth |
| Fresh Thyme Sprigs 🌿 | 3 whole | Tied with kitchen twine for easy removal |
| Fresh Rosemary Sprigs 🌿 | 2 whole | Woody stems removed before serving |
| Bay Leaves 🍃 | 2 whole | Dried, for aromatic complexity |
[recipe_ingredient_scaler]
The rump roast is the foundation—look for good marbling and a deep red color, which signals quality. Butcher shops or Whole Foods typically carry well-sourced options, but most supermarkets stock it too. If buying pre-cut, ask for a piece from the center of the roast for even cooking. The beef stock should be homemade or high-quality store-bought (I recommend Better Than Bouillon).
No red wine? Substitute additional beef stock with a splash of balsamic vinegar. Fresh herbs are ideal, but dried at one-third the amount works in a pinch (just add them directly to the liquid). If tomato paste feels excessive for a single use, opt for the squeeze tubes from Trader Joe’s. The carrots and celery can be swapped for parsnips or leeks if preferred.
Store the roast in the fridge for up to 3 days before cooking, or freeze for 6-12 months. Leftover braised meat keeps for 4-5 days refrigerated or freezes beautifully for 3 months. Reheat gently to preserve the tender texture.
Why You’ll Love This Recipe
- One Pan Wonder: I love that this rump roast cooks entirely on the stovetop—just one pot, one burner, and minimal cleanup.
- Rich and Savory: The onion caramelizes in the olive oil, and the salt and pepper create this deep, meaty flavor that’s hard to resist.
- Feeds the Family: Between us, this makes enough for dinner tonight and sandwiches tomorrow—no extra effort.
- Budget Friendly: Honestly, rump roast is affordable, and with just a few pantry staples, it feels like a special meal.
Step-by-Step Instructions for Rump Roast
Master the Dutch oven method for melt-in-your-mouth braised beef with rich, aromatic depth.
Step 1: Sear the Rump Roast to Develop Flavor
Pat the 2.5 lb rump roast completely dry with paper towels. Season it aggressively on all sides with the 2 tsp kosher salt and 1 tsp black pepper, pressing the seasoning into the meat so it adheres during cooking.
Heat the 2 tbsp olive oil in a Dutch oven over medium-high heat until it shimmers. Add the rump roast and sear undisturbed for 4-5 minutes per side until a deep, mahogany crust forms. This creates the flavor foundation through the Maillard reaction.
Step 2: Sauté Aromatic Vegetables and Build the Base
Remove the seared rump roast and set aside. In the same Dutch oven, add the diced 1 whole yellow onion, chunked 3 whole carrots, and sliced 2 whole celery stalks. Cook for 5-6 minutes until the vegetables begin to soften and develop color.
Add the 4 cloves garlic cloves and 2 tbsp tomato paste, stirring constantly for 1-2 minutes until the tomato paste darkens slightly and coats the vegetables. This step intensifies the umami depth in the final dish.
Step 3: Deglaze and Establish the Braising Liquid
Pour in the 1 cup red wine, scraping the browned bits from the bottom of the Dutch oven with a wooden spoon. Let it simmer for 2-3 minutes until reduced by half. This deglazing captures all the concentrated flavor from the searing process.
Return the rump roast to the Dutch oven. Add the 3 cups beef stock, 3 whole fresh thyme sprigs, 2 whole fresh rosemary sprigs, and 2 whole bay leaves. The liquid should come about halfway up the roast—add water if needed to reach this level.
Step 4: Braise to Fall-Apart Tenderness
Bring the liquid to a gentle simmer, then reduce heat to low. Cover the Dutch oven and maintain a steady, barely bubbling simmer. Cook for 2.5-3 hours, turning the rump roast every 45 minutes to ensure even cooking and prevent sticking.
You’ll know it’s ready when the rump roast shreds easily with a fork and the internal temperature reaches 195-200°F. The meat should be so tender that it nearly collapses when you attempt to lift it, with the braising liquid transformed into a rich, velvety sauce.
Step 5: Rest and Serve
Carefully remove the rump roast from the Dutch oven and transfer to a cutting board. Discard the fresh thyme sprigs, fresh rosemary sprigs, and bay leaves from the braising liquid. Let the meat rest for 10-15 minutes before slicing or shredding.
Skim excess fat from the braising liquid if desired, then serve the rump roast with the vegetables and sauce spooned over the top. The sauce should be thick enough to coat the back of a spoon, with all the flavors melded into a complex, savory harmony.
Pro Tips For Making Rump Roast Recipe Stove Top
- Sear It Hard: Get your pan screaming hot before adding the rump roast—about 2 tablespoons of olive oil, then sear each side for 3-4 minutes until deeply browned. I learned this the hard way: a pale sear means weak flavor.
- Salt Generously: Use more kosher salt than you think, especially on a tough cut like rump roast. About 1 teaspoon per pound, rubbed in at least 30 minutes before cooking—this actually changes the texture.
- Don’t Crowd the Pan: If your pan isn’t big enough for the roast and onions in a single layer, cook the onions separately. Steaming from overcrowding ruins the crust you worked so hard to build.
- Rest Before Slicing: Let the rump roast rest under foil for 15-20 minutes after cooking. Sounds weird, but it works: all the juices redistribute instead of pouring out onto the cutting board.
Common Mistakes When Making Great rump roast recipe stove top
Skipping the Sear
Never skip searing the 2.5 lb rump roast before braising. This step develops the Maillard reaction, creating deep, complex flavors that can’t be achieved otherwise. I always use medium-high heat for 4-5 minutes per side to get that perfect crust.
Insufficient Liquid
Your braising liquid should come halfway up the roast. Using only 3 cups beef stock without accounting for evaporation can leave the meat exposed. Add 1 cup water if needed to maintain the proper level throughout the 2.5-3 hour cook time.
Boiling Instead of Simmering
A rolling boil can make the meat tough. Maintain a gentle, barely bubbling simmer on low heat. If your Dutch oven runs hot, place a heat diffuser underneath or partially cover the lid to regulate temperature.
Overcrowding the Pot
Allow space between the roast and vegetables for proper heat circulation. If using extra veggies beyond the 1 yellow onion, 3 carrots, and 2 celery stalks, cook them in batches first. This prevents steaming instead of searing. 🔥
Rushing the Process
This dish can’t be hurried. The connective tissue needs 2.5-3 hours at a simmer to break down properly. I check for doneness when the internal temperature hits 195-200°F and the meat shreds easily with a fork.
Forgetting to Turn
Turn the roast every 45 minutes during braising to ensure even cooking and prevent sticking. I set a timer to remind myself, as this simple step makes a significant difference in the final texture.
Nutrition Facts
Frequently Asked Questions
What’s the ideal temperature for the braising liquid?
Keep it at a gentle simmer on low heat. A rolling boil will toughen the meat. Aim for just a few bubbles breaking the surface occasionally.
Can I use a regular pot instead of a Dutch oven?
Yes, but a heavy-bottomed pot with a tight lid works best. A Dutch oven distributes heat evenly, which is key for the 2.5-3 hour cook time. Avoid thin pots that may scorch the liquid.
How do I know when it’s done without a thermometer?
Pierce the meat with a fork—if it slides in effortlessly and the meat shreds easily, it’s ready. The internal texture should be buttery, not fibrous.
Can I add potatoes to the pot?
Yes, but add them during the last 45 minutes to prevent mushiness. Use waxy varieties like Yukon Golds, which hold their shape better during braising.

Trained in classic French technique but raised on slow-cooked ribs and spicy rubs, she blends culinary skill with smoke and soul.
- Smoked Teriyaki Beef Jerky Recipe: Umami-Deep Flavor in Every Chewy Bite - October 15, 2026
- Stewed Beef Brisket Recipe: Deep-Rich Flavor After 8 Hours of Slow Simmering - October 15, 2026
- Beef Brisket Rolls Recipe: Flaky Layers and Smoky Sweet Filling - October 15, 2026