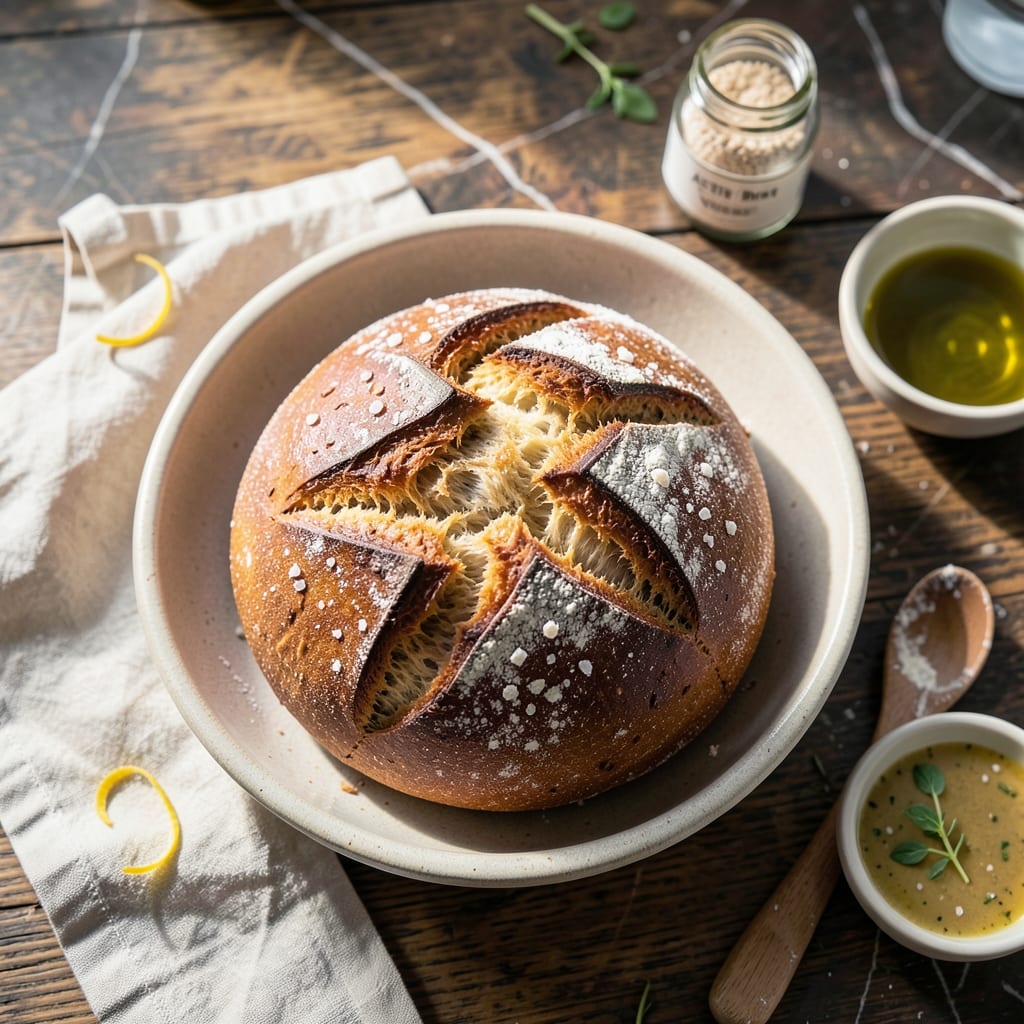
There’s something deeply satisfying about pulling a loaf of homemade bread from the oven, its crust crackling as it cools. I developed this recipe to capture that bakery-quality texture with minimal effort.
The secret lies in a long, slow fermentation that builds flavor and creates those coveted air pockets. With just 5 basic ingredients and 15 minutes of active prep time, anyone can achieve professional results at home.
What emerges is a loaf with a shatteringly crisp crust and an open, airy crumb that’s perfect for sandwiches or simply slathered with butter. The aroma alone will have your kitchen smelling like a European bakery.
David always steals the heel—the best part, he claims. This bread keeps well for days, though it rarely lasts that long.
Ingredients for Rustic Bread Recipe with Yeast
Five simple ingredients transform into bakery-quality bread with minimal effort.
| Ingredient | Amount | Notes |
|---|---|---|
| Bread Flour 🌾 | 3 ½ cups | High-protein for structure |
| Active Dry Yeast 🍞 | 1 tsp | Proofed in warm water |
| Sea Salt 🧂 | 1 ½ tsp | Fine grain for even distribution |
| Filtered Water 💧 | 1 ½ cups | Warm, about 110°F |
| Olive Oil 🫒 | 1 tbsp | Extra-virgin for flavor |
[recipe_ingredient_scaler]
The flour is critical here. King Arthur Bread Flour is my go-to for its consistent high protein content (12.7%), which develops that open crumb structure. Bob’s Red Mill also works well. For the yeast, SAF Instant Yeast is professional-grade and reliable—find it at Whole Foods or bulk food stores. Always check the expiration date; old yeast is the most common reason for bread that doesn’t rise.
No bread flour? All-purpose flour plus 1 tbsp vital wheat gluten per cup mimics the protein content. For a whole-grain version, substitute 1 cup whole wheat flour for 1 cup bread flour (add 1 extra tbsp water). The olive oil can be swapped for melted butter if you prefer a richer flavor. Sea salt is non-negotiable—Diamond Crystal is my brand of choice for its clean taste.
The dough ferments best at 70-75°F. Store flour in an airtight container for up to 1 year. Yeast keeps in the freezer for 6-12 months—just bring to room temperature before using. Baked loaves stay fresh wrapped in a tea towel for 3-4 days.
Why You’ll Love This Recipe
- One Bowl Magic: I mix everything right in the same bowl—no fancy tools, just bread flour, yeast, and water coming together with minimal cleanup.
- Crusty Perfection: That first crackle when I slice into the golden crust, with the sea salt and olive oil adding just the right depth.
- Breakfast to Dinner: Honestly, it’s my morning toast, my soup dipper at lunch, and the star of dinner with a drizzle of olive oil.
- Penny-Wise Loaf: A bag of bread flour and a packet of yeast make two beautiful loaves for the price of one store-bought boules.
Step-by-Step Instructions for Rustic Bread With Yeast
Master the art of artisan bread with this straightforward, no-fail method for perfect results.
Step 1: Activate the Yeast in Warm Water
Begin by combining the 1 tsp Active Dry Yeast with the 1.5 cups Filtered Water in a small bowl. The water should be warm, about 110°F, which feels slightly warm to the touch but not hot enough to scald.
Let the mixture sit for 5-10 minutes until it becomes frothy and bubbly. This visual cue confirms the yeast is active and ready to proof. If it doesn’t bubble, your yeast may be expired—start over with fresh yeast to ensure proper rise.
Step 2: Mix and Knead the Dough
In a large mixing bowl, combine the 3.5 cups Bread Flour and 1.5 tsp Sea Salt. Add the yeast mixture and 1 tbsp Olive Oil, then stir with a wooden spoon until a shaggy dough forms. The dough will be sticky but cohesive.
Turn the dough onto a lightly floured surface and knead for 8-10 minutes by hand. The goal is to develop the gluten until the dough becomes smooth and elastic. You’ll notice it transforms from rough and sticky to supple and slightly tacky. If it sticks to your hands, add a dusting of flour, but avoid over-flouring.
Step 3: First Rise Until Doubled in Volume
Place the kneaded dough in a clean, lightly oiled bowl, turning once to coat all sides. Cover it with a damp kitchen towel or plastic wrap. Allow it to rise in a warm, draft-free spot for 1 to 1.5 hours, or until it has visibly doubled in size.
Check for doneness by pressing a finger gently into the dough. If the indentation remains, the dough is ready. This first rise is critical for developing flavor and texture. If your kitchen is cool, the rise may take longer—be patient.
Step 4: Shape, Second Rise, and Preheat
Gently deflate the dough by pressing it down with your hands. Shape it into a round loaf by folding the edges toward the center and pinching the seams. Place it seam-side down on a parchment-lined baking sheet or in a Dutch oven.
Cover the shaped dough and let it rise again for 30-45 minutes until puffy. Meanwhile, preheat your oven to 425°F. The second rise ensures the bread bakes with the right structure for an airy crumb and crisp crust.
Just before baking, use a sharp knife or razor to score the top of the loaf in a shallow cross or diagonal pattern. This step allows the bread to expand properly in the oven.
Step 5: Bake to Golden Perfection
Bake the loaf on the middle rack for 30-35 minutes, or until the crust is a deep golden brown and the internal temperature reaches 200-210°F on an instant-read thermometer. For a crispier crust, place a pan of water on the lower rack to create steam during the first 15 minutes of baking.
Remove the bread from the oven and let it cool on a wire rack for at least 1 hour before slicing. This cooling period allows the crumb to set completely. Slicing too early will result in a gummy texture. The finished loaf should have a thick, crackly crust and an open, airy interior.
Pro Tips For Making Rustic Bread Recipe With Yeast
- Warm Your Water: Use water around 110°F—hot enough to activate the yeast but not so hot it kills it. I learned this the hard way after a few loaves refused to rise.
- Knead Just Enough: Stop kneading once the dough is smooth and elastic, usually 8-10 minutes by hand. Overworking it makes the bread tough, and nobody wants that.
- Skip Cold Ingredients: Pull your flour and water out an hour before starting so everything’s room temperature. Cold ingredients slow yeast activity, and your dough will take forever to rise.
- Oil the Bowl: Coat the rising bowl with about a teaspoon of olive oil before adding the dough—it prevents sticking and makes cleanup a breeze. Sounds simple, but it actually changes the outcome.
Storing and Reheating Leftovers
Room Temperature Storage
I keep my loaf wrapped in a clean linen tea towel on the counter for up to 3 days. The towel allows the crust to breathe while preventing it from drying out. David swears the flavor improves overnight as the starches retrogradate. 💪
Refrigerator Storage
For longer storage, slice the bread and place in an airtight container or zip-top bag. It will keep in the fridge for up to 1 week, though the crust may soften. I learned this trick working at Nana Mae’s diner—she’d toast slices to revive them.
Freezing for Long-Term
Wrap the whole loaf tightly in plastic wrap, then foil, and freeze for up to 3 months. To freeze slices, separate them with parchment paper before wrapping. This prevents freezer burn and makes it easy to grab just what you need. ❄️
Oven Reheating
Preheat your oven to 350°F and wrap the bread in foil. Heat for 10-15 minutes to restore the crust’s crispness. For slices, toast directly on the oven rack for 3-5 minutes until warm and crisp.
I tested this method on different ovens in Austin—works every time.
Steam Method Revival
Spritz the loaf with water and bake at 400°F for 5 minutes. This mimics the initial baking environment. The steam helps re-crisp the crust beautifully, just like fresh from the oven.
Nutrition Facts
Frequently Asked Questions
Can I use all-purpose flour instead of bread flour?
Yes, but add 1 tbsp vital wheat gluten per cup of all-purpose flour to match the protein content. Bread flour’s higher protein creates the chewy texture and open crumb.
Why didn’t my dough rise?
Old yeast is the most common culprit. Always check the expiration date and proof it in warm 110°F water first. A cool kitchen can also slow rising—try placing the bowl near a warm oven.
How do I get a crispier crust?
Place a pan of water on the oven’s lower rack during the first 15 minutes of baking. The steam prevents the crust from forming too early, allowing maximum expansion.
Can I make this bread without kneading?
Yes! Let the dough rest for 10 minutes after mixing, then fold it over itself a few times in the bowl. This no-knead method develops gluten with minimal effort.

Trained in classic French technique but raised on slow-cooked ribs and spicy rubs, she blends culinary skill with smoke and soul.
- Smoked Teriyaki Beef Jerky Recipe: Umami-Deep Flavor in Every Chewy Bite - October 15, 2026
- Stewed Beef Brisket Recipe: Deep-Rich Flavor After 8 Hours of Slow Simmering - October 15, 2026
- Beef Brisket Rolls Recipe: Flaky Layers and Smoky Sweet Filling - October 15, 2026