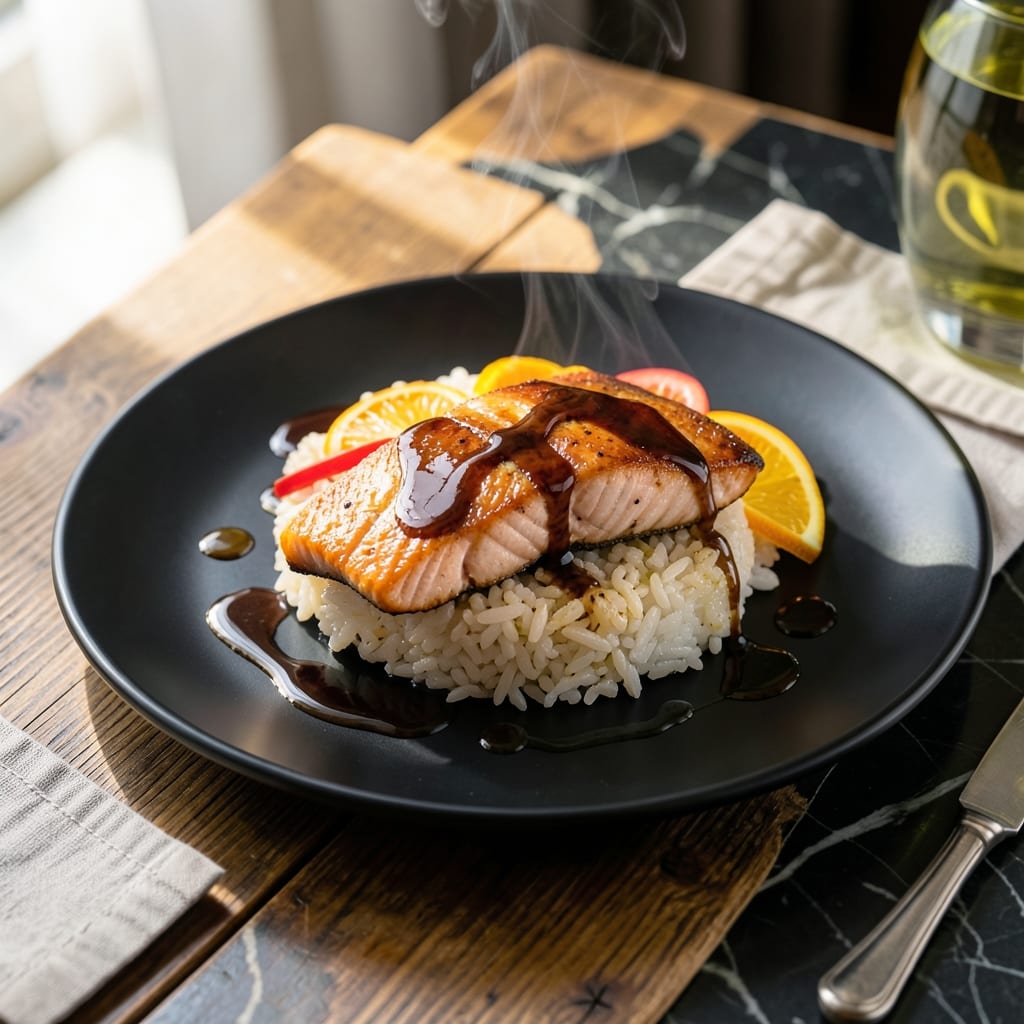
This Japanese-inspired baked salmon brings restaurant-quality flavors to your home kitchen. I developed this recipe after years of testing, perfecting the balance between tender salmon and bright citrus glaze.
The secret is baking at 400°F for exactly 12-15 minutes, creating a flaky interior with a caramelized exterior. The citrus glaze adds a tangy contrast that elevates each bite.
What emerges is perfectly cooked salmon with a glossy, slightly sticky glaze that pairs beautifully with sushi rice. The combination of textures and flavors makes this dish feel special without being complicated.
Serve with pickled ginger and wasabi for a complete experience. This method delivers consistent results every time.
Ingredients for Salmon Baked Recipe Sushi
Elevate your home kitchen with these Japanese-inspired ingredients for perfect baked salmon.
| Ingredient | Amount | Notes |
|---|---|---|
| Salmon Fillets 🐟 | 4 whole | Skin-on or skinless, wild-caught preferred |
| Sushi Rice 🍚 | 2 cups | Uncooked, short-grain preferred |
| Rice Vinegar 💧 | ¼ cup | Seasoned for sushi rice |
| Granulated Sugar 🧂 | 1 tbsp | For balancing vinegar |
| Sea Salt 🧂 | 1 tsp | Fine grain for seasoning |
| Soy Sauce 🫒 | ¼ cup | Low-sodium preferred |
| Fresh Orange Juice 🍊 | ¼ cup | Freshly squeezed for glaze |
| Fresh Lemon Juice 🍋 | 2 tbsp | Freshly squeezed for brightness |
| Honey 🍯 | 2 tbsp | For natural sweetness in glaze |
| Fresh Ginger 🌿 | 1 tbsp | Peeled, finely grated |
| Garlic Cloves 🧄 | 2 cloves | Minced for glaze |
| Pickled Ginger 🌼 | ¼ cup | For serving, sliced thin |
| Wasabi Paste 🟢 | 2 tbsp | Prepared or powdered |
| Sesame Seeds 🌰 | 1 tbsp | Toasted for garnish |
| Green Onions 🧅 | 2 whole | Thinly sliced for garnish |
[recipe_ingredient_scaler]
The salmon quality is paramount here. Wild-caught sockeye or king salmon offers the best flavor and texture (rich, buttery, and flaky). Source from reputable seafood counters like Whole Foods or local fishmongers—avoid pre-packaged fillets with liquid, as they often indicate thawed fish. For sushi rice, Koshihikari or Nishiki brands are ideal, available at most Asian markets or well-stocked supermarkets.
Short on citrus? Lime juice at a 1:1 ratio works in the glaze, though orange offers the classic sweetness. No honey? Agave nectar or maple syrup can substitute, but reduce by 25% as they’re sweeter. For the rice, apple cider vinegar with a pinch of sugar mimics seasoned rice vinegar. Wasabi paste not available? Freshly grated wasabi root is authentic but harder to find—skip the powdered version if possible.
Store raw salmon wrapped in paper towels, then plastic, for 1-2 days max. Cooked salmon keeps for 3-4 days refrigerated. Sushi rice is best used fresh but can be refrigerated overnight. The glaze components can be mixed ahead and stored for 1 week in the fridge.
Why You’ll Love This Recipe
- One Pan Wonder: I just toss the salmon and seasoned rice on a sheet pan—no rolling, no fuss, and the oven does the rest.
- Sweet-Savory Magic: The rice vinegar and sugar create this subtle tangy-sweetness that pairs with the rich salmon in the most addictive way.
- Weeknight Hero: Honestly, it’s my go-to for busy evenings when I want sushi flavors without the sushi effort.
- Leftovers? Yes Please: The salmon stays moist, and the rice soaks up extra flavor overnight—lunch the next day tastes even better.
Step-by-Step Instructions for Baked Salmon with Sushi Rice and Citrus Glaze
Master the technique for perfectly cooked salmon paired with seasoned sushi rice and vibrant citrus glaze.
Step 1: Prepare and Cook the Sushi Rice
Rinse the 2 cups Sushi Rice thoroughly under cold water until the water runs clear, removing excess starch. This prevents the rice from becoming gummy during cooking. Combine the rice with 2 cups of water in a saucepan.
Bring to a boil, then reduce heat to low, cover, and simmer for 15-18 minutes until the water is absorbed and the rice is tender. Remove from heat and let it sit covered for 10 minutes. Stir in the 0.25 cup Rice Vinegar, 1 tbsp Granulated Sugar, and 1 tsp Sea Salt until evenly distributed. The rice should be glossy and slightly sticky.
Step 2: Create the Citrus Glaze
In a small saucepan, combine the 0.25 cup Soy Sauce, 0.25 cup Fresh Orange Juice, 2 tbsp Fresh Lemon Juice, 2 tbsp Honey, 1 tbsp Fresh Ginger, and 2 cloves Garlic Cloves (minced). Bring to a gentle simmer over medium heat.
Reduce the heat to medium-low and let it cook for 8-10 minutes until the glaze thickens slightly and coats the back of a spoon. Stir occasionally to prevent burning. The glaze should have a balanced sweet, tangy, and umami flavor profile.
Step 3: Bake the Salmon Fillets
Preheat your oven to 400°F. Place the 4 whole Salmon Fillets on a parchment-lined baking sheet, skin-side down if they have skin. Brush the fillets generously with the prepared citrus glaze, ensuring even coverage on all sides.
Bake for 12-15 minutes until the salmon flakes easily with a fork and reaches an internal temperature of 145°F. The edges should be slightly caramelized from the glaze. Avoid overcooking, as the salmon will continue to cook slightly from residual heat.
Step 4: Assemble and Garnish
Divide the seasoned sushi rice among four serving plates, creating a bed for each salmon fillet. Place a fillet on top of each rice portion. Drizzle any remaining glaze over the salmon and rice.
Garnish each plate with 0.25 cup Pickled Ginger (sliced thin), a dollop of 2 tbsp Wasabi Paste, 1 tbsp Sesame Seeds (toasted), and 2 whole Green Onions (thinly sliced). The pickled ginger adds a refreshing contrast, while the wasabi provides a spicy kick.
Pro Tips For Making Salmon Baked Recipe Sushi
- Preheat Your Oven: Always start with a fully preheated oven at 400°F—salmon bakes unevenly if the temperature climbs mid-cook, and I learned this the hard way after one too many dry fillets.
- Rinse the Rice: Wash sushi rice until the water runs clear—skipping this leaves a gummy texture, and the vinegar seasoning just doesn’t stick as well.
- Don’t Overbake Salmon: Pull the salmon at 125°F internal temp; it’ll keep cooking off the heat, and overdoing it turns that buttery flesh as dry as cardboard.
- Warm the Vinegar Mix: Dissolve the sugar and salt in the rice vinegar over low heat first—it blends into the rice way better than cold seasoning, and I was skeptical until I tried it.
Essential Equipment for Perfect Results
Oven and Baking Sheet
I always use my convection oven for even heat distribution, though conventional works fine. A half-sheet pan (13×18 inches) gives perfect spacing for 4 salmon fillets. Line it with parchment paper for easy cleanup and to prevent sticking. 💡
Mixing Bowls and Whisks
For the citrus glaze, a small saucepan (1-2 quarts) works best. I prefer stainless steel for even heating. A silicon whisk helps incorporate the honey without scratching your cookware.
Rice Cooker or Pot
A rice cooker ensures perfect sushi rice every time. I use my Zojirushi model with the sushi rice setting. No rice cooker? A heavy-bottomed pot with a tight lid works just as well.
Sharp Knives
Invest in a 8-inch chef’s knife for portioning salmon and a serrated knife for clean garnish slices. I keep mine sharp with a honing steel before each use. Sharp knives make all the difference in presentation. ✨
Measuring Tools
Accurate measurements matter for the glaze. I use OXO Good Grips measuring cups and spoons. A kitchen scale helps for precise salmon portions—aim for 6-8 oz fillets each.
Thermometer
An instant-read thermometer is non-negotiable for perfect salmon. I recommend ThermoWorks ThermoPop for its accuracy and speed. Check the thickest part of each fillet for 145°F. 🌡️
Nutrition Facts
Frequently Asked Questions
What’s the best way to prevent sushi rice from sticking?
Rinse the rice thoroughly before cooking and use a nonstick pot or rice cooker. Keep your hands wet when shaping to prevent sticking.
Can I use a different type of fish?
Yes, but choose firm, sushi-grade fish like tuna or halibut. Adjust baking time to 10-12 minutes for thinner fillets.
How do I know when the salmon is done?
It should flake easily with a fork and reach 145°F internally. The flesh turns opaque and pulls apart cleanly.
Can I make the glaze ahead of time?
Store it in an airtight container in the fridge for up to 1 week. Reheat gently before using.

Trained in classic French technique but raised on slow-cooked ribs and spicy rubs, she blends culinary skill with smoke and soul.
- Best Smoked Oxtail Recipe: Deep-Rich Flavor After Low-and-Slow Cooking - October 14, 2026
- Pit Boss Smoked Prime Rib Roast Recipe: Bark-to-Bone Crispness in 4 Hours - October 14, 2026
- Smoked Tuna Steak Recipe: Seared Crust Meets Silky Centers - October 14, 2026