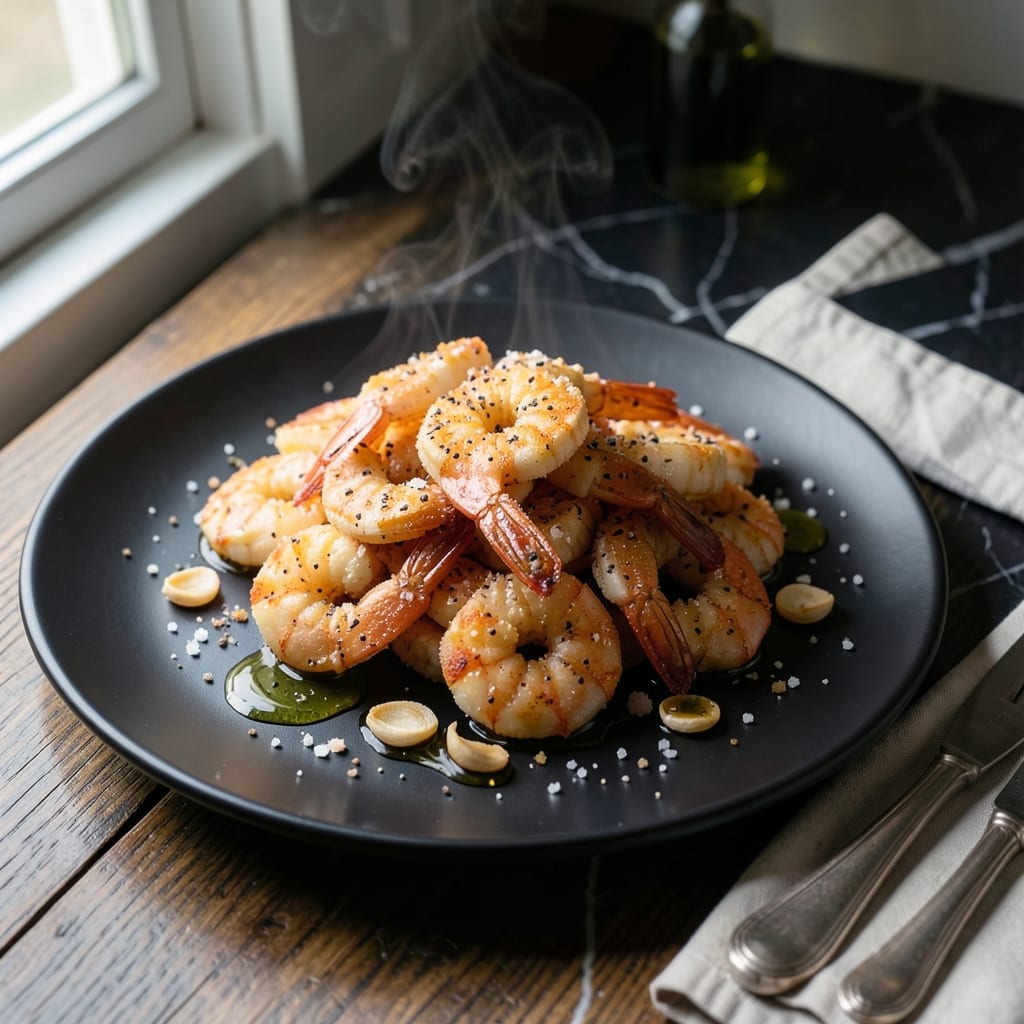
This wok-tossed shrimp delivers crispy perfection with every bite, no shells to peel. I developed this method after years of testing to achieve that ideal texture without the mess.
The secret is a quick high-heat sear that locks in moisture while creating a golden crust. A simple blend of salt, pepper, and cornstarch transforms ordinary shrimp into restaurant-quality bites.
You’ll end up with tender shrimp encased in a seasoned, crispy coating that’s impossible to resist. The technique works with any size shrimp, making it versatile for weeknight dinners or entertaining.
Serve immediately for the best texture. Here’s how to make it right every time.
Ingredients for Salt and Pepper Shrimp Recipe No Shell
Crispy, golden shrimp with minimal effort and maximum flavor. No shells, no stress.
| Ingredient | Amount | Notes |
|---|---|---|
| Large Shrimp 🍤 | 1 ½ lb | Peeled, deveined, tails removed |
| Cornstarch 🌾 | ½ cup | For crispy coating |
| Kosher Salt 🧂 | 1 ½ tsp | Diamond Crystal preferred |
| Freshly Ground Black Pepper 🌶️ | 1 ½ tsp | Coarse grind for texture |
| Vegetable Oil 🫒 | ½ cup | High smoke point for frying |
| Garlic Cloves 🧄 | 4 cloves | Minced for aromatic base |
| Green Onions 🧅 | 4 whole | Thinly sliced for garnish |
| Dry Sherry 🍷 | 2 tbsp | Optional for depth of flavor |
| Soy Sauce 🫙 | 1 tbsp | Low-sodium recommended |
| Sesame Oil 🫒 | 1 tsp | Toasted, for finishing |
| Red Pepper Flakes 🌶️ | ½ tsp | Adjust for heat preference |
[recipe_ingredient_scaler]
The shrimp quality is paramount here. Wild-caught Gulf shrimp or frozen at sea varieties from Whole Foods or Trader Joe’s yield the best texture. Size matters—aim for 16/20 count for even cooking. The cornstarch must be pure, unmodified for that signature crispiness. Never use pre-seasoned blends, as they contain anti-caking agents that inhibit browning.
No dry sherry? Shaoxing wine is ideal, but dry white wine works too. For a non-alcoholic option, rice vinegar with a pinch of sugar mimics the acidity. The soy sauce can be tamari for gluten-free needs. If avoiding alcohol entirely, chicken stock (or vegetable stock for pescatarian strictness) with a splash of vinegar is a fine substitute.
Fry shrimp in batches to avoid crowding—this maintains oil temperature for optimal crispiness. Store cooked shrimp in a single layer on paper towels, not stacked. Best consumed immediately, but leftovers keep 1-2 days in the fridge. Reheat in a dry skillet to revive the crust.
Why You’ll Love This Recipe
- I’ll be real: a pound of shrimp feeds my family of four with leftovers for lunch the next day.
- Minimal Fuss: Five ingredients and one pan. I toss the shrimp in cornstarch, fry them up, and boom—dinner’s done.
- Addictive Crunch: That first bite with the crispy cornstarch shell and the punch of fresh black pepper? I could eat a mountain of these.
- Weeknight Hero: Here’s what sold me—it’s ready before the rice finishes cooking, so even chaotic evenings feel manageable.
Step-by-Step Instructions for Salt and Pepper Shrimp No Shell
Master this technique for restaurant-quality shrimp with an irresistibly crispy coating every time.
Step 1: Prepare the Shrimp for Maximum Crispiness
Pat the 1.5 lb Large Shrimp completely dry with paper towels—this is non-negotiable for achieving that perfect crisp. Any moisture will cause the cornstarch to clump and steam rather than fry.
In a large bowl, toss the shrimp with the 0.5 cup Cornstarch, 1.5 tsp Kosher Salt, and 1.5 tsp Freshly Ground Black Pepper until evenly coated. The coarse grind of the black pepper adds texture and visual appeal to the finished dish.
Let the shrimp rest for 5 minutes while you prep the remaining ingredients. This brief pause allows the cornstarch to adhere better, creating a more uniform crust during frying.
Step 2: Fry the Shrimp to Golden Perfection
Heat the 0.5 cup Vegetable Oil in a wok or large skillet over medium-high heat until it shimmers—this indicates it’s reached the ideal frying temperature of about 350-375°F.
Carefully add the shrimp in a single layer, working in batches if necessary to avoid crowding the pan. Fry for 2-3 minutes per side until the shrimp turn golden brown and the coating becomes crisp. The shrimp should curl into a C-shape when done, signaling proper cooking.
Use a slotted spoon to transfer the fried shrimp to a paper towel-lined plate to drain excess oil. The paper towel absorbs any residual grease while preserving the crisp texture you’ve worked to achieve.
Step 3: Create the Aromatic Sauce Base
After removing the shrimp, carefully discard all but 2 tablespoons of the oil from the pan. Return it to medium heat and add the 4 cloves Garlic Cloves, minced. Sauté for 30 seconds just until fragrant—garlic burns quickly, so stay attentive.
Immediately add the 4 whole Green Onions, thinly sliced, and stir-fry for another 30 seconds to soften slightly. The green onions should retain some bite and bright color, adding freshness to balance the rich flavors.
Step 4: Finish with the Signature Seasoning
Return all the shrimp to the pan and add the 2 tbsp Dry Sherry, 1 tbsp Soy Sauce, 0.5 tsp Red Pepper Flakes, and 1 tsp Sesame Oil. Toss everything together over medium-high heat for 1-2 minutes until the shrimp are thoroughly coated and the sauce has slightly reduced.
The dry sherry deglazes the pan, lifting all the flavorful browned bits, while the soy sauce adds umami depth. The red pepper flakes provide a subtle heat that complements the bold black pepper flavor.
Serve immediately while hot and crispy, garnished with any remaining green onions. The contrast between the crunchy exterior and tender shrimp inside should be evident in every bite.
Pro Tips For Making Salt And Pepper Shrimp Recipe No Shell
- Heat the Oil High: Get the oil smoking hot—about 375°F—before adding the shrimp. I learned this the hard way after too many batches came out soggy instead of crisp.
- Pat Shrimp Dry: After peeling, pat the shrimp completely dry with paper towels. Even a little moisture makes the cornstarch coating slide right off.
- Skip Overcrowding: Cook in batches with space between each shrimp. Crowding drops the oil temp fast, and you’ll end up with steamed shrimp instead of crispy ones.
- Double-Coat Cornstarch: Toss the shrimp in cornstarch once, shake off the excess, then do it again. Sounds tedious, but it’s the only way to get that extra-crunchy texture that makes this dish worth making.
Best Sauces and Condiments for These Flavors
Classic Dipping Sauce
I always serve this with a simple sauce of 3 tbsp soy sauce, 1 tbsp rice vinegar, and 1 tsp sesame oil. David swears this is the only way to eat it. The tang balances the rich, crispy shrimp perfectly.
Spicy Sriracha Mayo
Mix ½ cup mayo with 1-2 tbsp Sriracha and 1 tsp lime juice for a creamy, spicy kick. I use Duke’s mayo from Austin farmers markets—it has that perfect Southern tang. 🔥
This pairs especially well when you want to turn up the heat.
Sweet Chili Glaze
Combine ¼ cup sweet chili sauce with 1 tsp lime zest and 1 tbsp chopped cilantro. The sweetness contrasts beautifully with the peppery crust.
Garlic Butter Drizzle
Melt 4 tbsp butter with 2 minced garlic cloves and a pinch of salt. Drizzle over the shrimp just before serving for a decadent finish.
Lime-Cilantro Dip
Blend ½ cup Greek yogurt, 2 tbsp lime juice, ¼ cup chopped cilantro, and ½ tsp salt. This bright, herby dip cuts through the richness. 💛
Nutrition Facts
Frequently Asked Questions
Can I use frozen shrimp for this method?
Yes, but thaw completely and pat very dry first. Frozen shrimp release moisture that can make the coating soggy.
What oil works best for frying?
Use oils with a high smoke point like vegetable, peanut, or avocado oil. Avoid olive oil—it burns at frying temps.
Why did my coating fall off?
The shrimp weren’t dry enough or the oil wasn’t hot enough. Ensure 350-375°F oil and completely dry shrimp before frying.
Can I bake instead of fry?
Yes! Toss coated shrimp with 1 tbsp oil and bake at 400°F for 12-15 minutes, flipping halfway. Crispiness won’t be as pronounced but still tasty.

Trained in classic French technique but raised on slow-cooked ribs and spicy rubs, she blends culinary skill with smoke and soul.
- Stewed Beef Brisket Recipe: Deep-Rich Flavor After 8 Hours of Slow Simmering - October 15, 2026
- Beef Brisket Rolls Recipe: Flaky Layers and Smoky Sweet Filling - October 15, 2026
- Masterbuilt Smoker Beef Brisket Recipe: Bark-To-Meat Ratio Hack for Unmatched Flavor - October 15, 2026