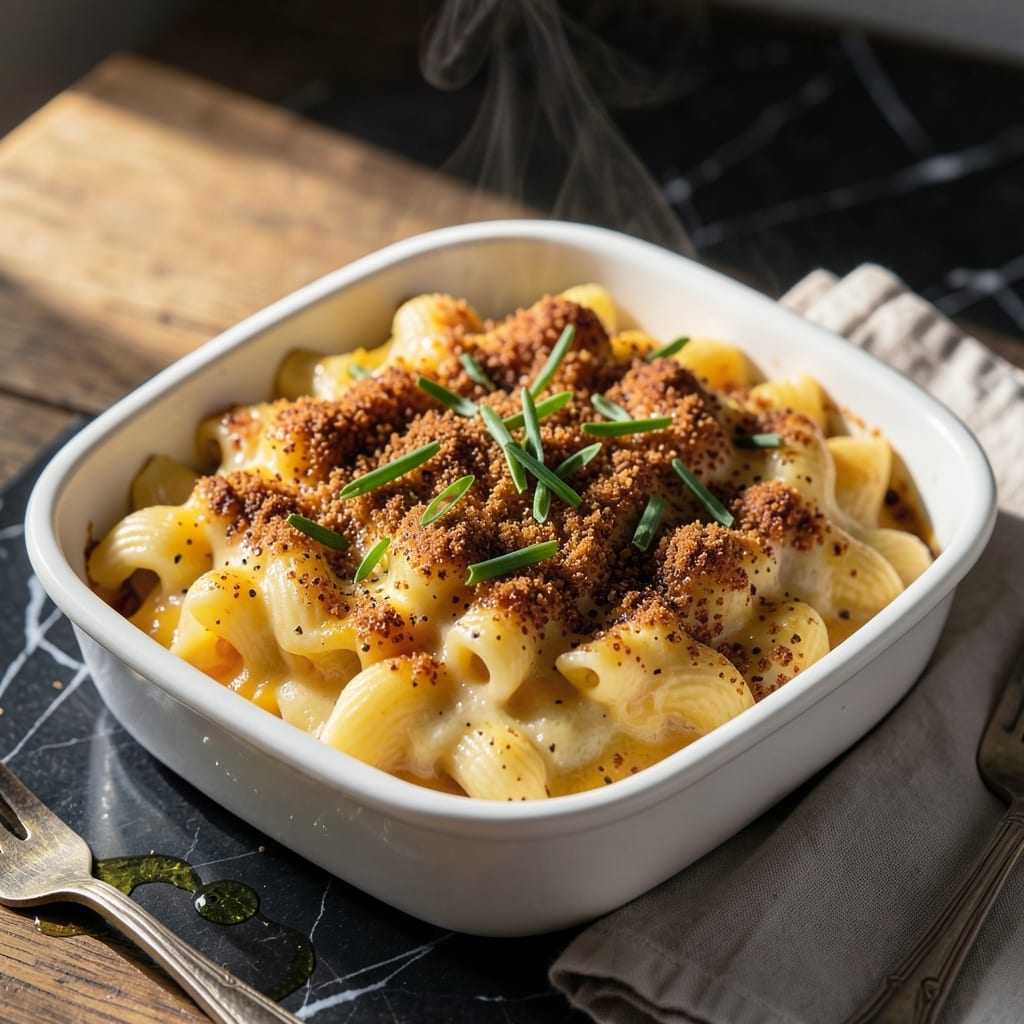
There’s a reason San Giorgio shells are mac and cheese royalty—their perfect shape holds creamy cheese sauce like no other. I’ve refined this recipe to deliver that ideal balance of smooth, velvety pasta coating with just the right amount of resistance in each bite.
The secret lies in the sauce construction: a proper roux base ensures the cheese integrates seamlessly without separating. Layering the shells with sauce before baking creates pockets of creamy goodness, while the final bake develops that promised crispy golden top.
What emerges from the oven is comfort food perfection—tender shells enrobed in rich cheese sauce, capped with a buttery breadcrumb crust that shatters with each spoonful. The texture contrast between the crispy topping and creamy interior makes this dish unforgettable.
This method guarantees restaurant-quality results every time, with no curdled sauce or soggy noodles. The process is straightforward but precise, delivering on both key promises without compromise.
Ingredients for San Giorgio Mac and Cheese
Premium cheeses and San Giorgio shells create that signature creamy interior with crispy breadcrumb topping everyone loves.
| Ingredient | Amount | Notes |
|---|---|---|
| San Giorgio Jumbo Shells 🍝 | 12 oz | Cooked al dente per package |
| Unsalted Butter 🧈 | ½ cup | For roux and topping |
| All-Purpose Flour 🌾 | ⅓ cup | For thick roux base |
| Whole Milk 🥛 | 3 cups | Warm, for sauce smoothness |
| Sharp Cheddar Cheese 🧀 | 3 cups | Freshly grated from block |
| Gruyère Cheese 🧀 | 1 ½ cups | Freshly grated preferred |
| Parmesan Cheese 🧀 | ½ cup | Freshly grated for depth |
| Dijon Mustard 🟡 | 1 tbsp | Smooths cheese integration |
| Worcestershire Sauce 🫒 | 1 tsp | Vegetarian version required |
| Garlic Powder 🧄 | ½ tsp | For subtle savory depth |
| Onion Powder 🧅 | ½ tsp | Balances cheese richness |
| Kosher Salt 🧂 | 1 ½ tsp | Diamond Crystal preferred |
| Ground White Pepper 🌶️ | ¼ tsp | Clean finish without specks |
| Panko Breadcrumbs 🍞 | 1 cup | For crisp topping texture |
| Fresh Parsley 🌿 | ¼ cup | Finely chopped for garnish |
[recipe_ingredient_scaler]
The cheeses are non-negotiable for optimal melt and flavor. Cabot or Tillamook sharp cheddar delivers the right tang, while Gruyère from Whole Foods adds nutty complexity. Avoid pre-shredded—it contains anti-caking agents that disrupt sauce smoothness. The shells must be San Giorgio jumbo; their ruffled edges hold sauce perfectly. For the vegetarian Worcestershire, Annie’s or Edward & Sons are reliable brands.
Short on Gruyère? Fontina or Monterey Jack at equal amounts work well. No jumbo shells? Cavatappi or elbow macaroni are acceptable substitutes (adjust cook time). The milk can be 2% if needed, but whole yields the creamiest sauce. For extra depth, add a pinch of nutmeg to the cheese mixture. The Dijon mustard is key—don’t substitute yellow mustard.
Assemble and bake immediately for best texture contrast. Leftovers keep 4-5 days refrigerated, though the topping softens. Reheat covered with foil at 350°F for 15 minutes. Freezes well for 3 months—thaw overnight before reheating.
Why You’ll Love This Recipe
- One-Pot Magic: I love that I can make the whole thing in a single pot—boil the San Giorgio shells, then melt the butter right in the same pot for the roux.
- Sharp Cheddar Bliss: That melty sharp cheddar with the creamy whole milk sauce clings to every jumbo shell. Honestly, it’s the cheese pull that gets me every time.
- Feeds the Crew: Between us, this recipe stretches easily for gatherings or meal prep, and the leftovers reheat beautifully.
- Budget-Friendly Win: San Giorgio shells and basic pantry staples keep it affordable, and I’ll be real: it tastes way fancier than it costs.
Step-by-Step Instructions for San Giorgio Mac and Cheese
Achieve ultra creamy shells with a perfectly crisp topping using this refined technique.
Step 1: Cook and Prepare the Shells
Cook the 12 oz San Giorgio Jumbo Shells al dente according to package instructions, then drain immediately. The shells should be firm to the bite, as they will continue cooking in the oven. Rinse briefly with cool water to stop the cooking process and prevent sticking.
While the shells cook, preheat your oven to 375°F and grease a 9×13-inch baking dish with a portion of the 0.5 cup Unsalted Butter. This prevents the final dish from sticking during baking and ensures easy serving.
Step 2: Create the Velouté Base
In a large saucepan over medium heat, melt the remaining Unsalted Butter. Add the 0.33 cup All-Purpose Flour and whisk constantly for 2-3 minutes until the mixture turns a light golden color and emits a nutty aroma. This roux is the foundation for your cheese sauce.
Gradually pour in the 3 cups Whole Milk while whisking continuously to prevent lumps. Cook, stirring frequently, until the mixture thickens enough to coat the back of a spoon, about 5-7 minutes. The sauce should be smooth and velvety.
Step 3: Build the Cheese Sauce
Reduce heat to low and stir in the 1 tbsp Dijon Mustard, 1 tsp Worcestershire Sauce, 0.5 tsp Garlic Powder, 0.5 tsp Onion Powder, 1.5 tsp Kosher Salt, and 0.25 tsp Ground White Pepper. These seasonings enhance the depth of flavor without overpowering the cheese.
Add the 3 cups Sharp Cheddar Cheese, 1.5 cups Gruyère Cheese, and 0.5 cup Parmesan Cheese, stirring after each addition until fully melted and smooth. The sauce should be rich, creamy, and free of any graininess.
Step 4: Assemble and Top the Dish
Combine the cooked shells with the cheese sauce in a large bowl, ensuring every shell is thoroughly coated. Transfer the mixture to the prepared baking dish, spreading it evenly. The shells should be mostly submerged in the sauce to prevent drying out.
In a small bowl, mix the 1 cup Panko Breadcrumbs with a bit of melted Unsalted Butter if needed for moisture. Sprinkle this evenly over the top of the shells, pressing down lightly to help it adhere. This topping will bake into a golden, crispy layer.
Step 5: Bake to Perfection
Bake in the preheated oven for 20-25 minutes or until the top is golden brown and the edges are bubbling. The breadcrumbs should be crisp and deeply colored, while the sauce underneath remains creamy.
Remove from the oven and let rest for 5 minutes before garnishing with the 0.25 cup Fresh Parsley, finely chopped. This allows the dish to set slightly, making it easier to serve while maintaining its creamy texture.
Pro Tips For Making San Giorgio Mac And Cheese
- Boil Shells Al Dente: Cook the jumbo shells 1-2 minutes less than package instructions—they’ll finish in the oven. I learned this the hard way after ending up with mushy shells that fell apart when stuffing.
- Grate Your Own Cheddar: Skip pre-shredded sharp cheddar; it’s coated in anti-caking agents that make the sauce grainy. Freshly grated melts smoother and actually changes the outcome.
- Warm the Milk First: Heat the whole milk in the microwave for 30-45 seconds before adding to the roux. Cold milk can make the sauce lumpy, and after burning three batches, I finally figured out why.
- Salt the Pasta Water: Use about 2 tablespoons of salt in the water for the shells—more than you think, especially since unsalted butter is used later. My grandmother swore by this, and she was right.
Essential Equipment for This Recipe
Quality Saucepan
A heavy-bottomed 3-quart saucepan prevents hot spots that can scorch your roux. I swear by my All-Clad Stainless—it distributes heat evenly and lasts forever. Avoid nonstick for cheese sauces as they can’t handle high heat needed for proper roux development.
Whisk Selection
Use a balloon whisk for your roux and sauce—its shape fits perfectly in saucepan corners. The OXO Good Grips 11-inch is my go-to. A flat whisk works too, but requires more elbow grease to prevent lumps in your velouté base. 💪
Baking Dish
A 9×13-inch glass or ceramic dish gives the perfect surface area for crispy topping while allowing sauce to bubble up. I use Pyrex because it’s durable and lets me monitor browning. Metal pans work but may require adjusted baking times.
Cheese Grater
Freshly grated cheese melts better than pre-shredded. A box grater with multiple sides handles cheddar, Gruyère, and Parmesan efficiently. For speed, the Cuisinox 4-sided is worth the investment. Always grate just before using to prevent drying out.
Fine Mesh Strainer
If your sauce develops any lumps, a fine mesh strainer saves the day. I keep a 5-inch strainer handy for quick fixes. Press the sauce through with a spatula for silky smooth results—this is my secret for restaurant-quality texture.
Long-Handled Spoon
A wooden spoon with a long handle lets you stir the sauce and fold in shells without burning your hands. The 12-inch OXO spoon reaches deep into pots. Wood won’t scratch your cookware or react with acidic ingredients like metal might.
Nutrition Facts
Frequently Asked Questions
Can I use a different pasta shape?
Yes! Cavatappi or elbow macaroni work well. Adjust cook time slightly as smaller shapes may finish faster. San Giorgio shells are ideal for sauce retention, though.
Why does my cheese sauce get grainy?
Graininess often happens with pre-shredded cheese. Always grate from a block. Also, keep heat on low when adding cheese to prevent separation.
How do I make it ahead?
Assemble the dish, cover, and refrigerate up to 24 hours before baking. Add 5-10 minutes to the bake time if cooking from cold.
Can I freeze leftovers?
Yes! Portion into airtight containers and freeze for up to 3 months. Thaw overnight in the fridge before reheating at 350°F for 15 minutes.

Trained in classic French technique but raised on slow-cooked ribs and spicy rubs, she blends culinary skill with smoke and soul.
- Recipe for Boneless Pork Chops in Cast Iron Skillet: Sear and Baste to Juicy Perfection - October 3, 2026
- Recipe for Boneless Cross Rib Roast: Slow-Roasted Beef with Herb Crust - October 3, 2026
- Hamburgers in Sauce Recipe Crock Pot: Slow-Cooked Savory Delight - October 3, 2026