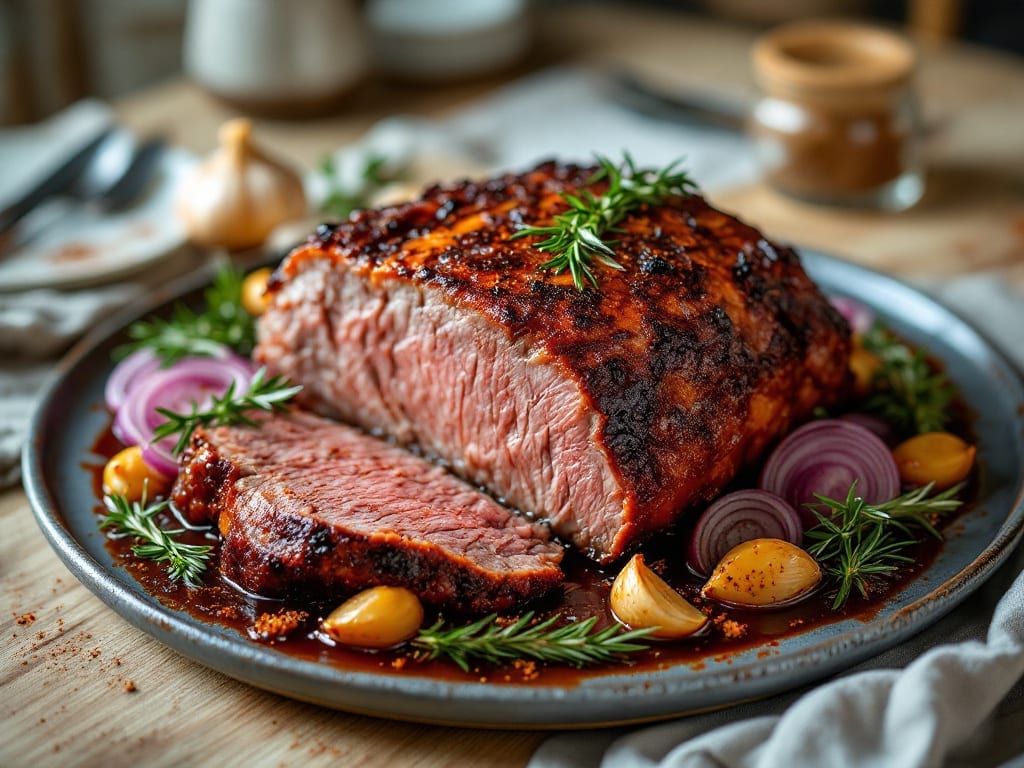
Mastering a savory brisket recipe that delivers fall-apart tenderness requires patience, precision, and the right techniques—something I perfected after years of test-kitchen experiments. The key lies in low-and-slow cooking, where time transforms tough cuts into melt-in-your-mouth perfection.
My grandmother’s Sunday roast chicken taught me the value of slow cooking, and this brisket builds on that same principle, ensuring every bite is rich, juicy, and deeply flavorful.
This recipe isn’t just about the meat—it’s about the method. We’ll use a combination of dry rubs and aromatics to create a bark that locks in moisture while the interior breaks down into tender strands. The process takes time—around 12 hours—but the result is worth every minute.
No fancy equipment is needed; just a reliable oven or smoker, a meat thermometer, and a little attention to detail. The secret? Keeping the temperature steady and letting the collagen render naturally for that unmatched tenderness.
By the time you’re done, you’ll have brisket so tender it nearly dissolves on your tongue, with a crust that’s crisp enough to stand up to even the heartiest sides.
Serve it with classic pairings like creamy mashed potatoes, tangy coleslaw, or buttery cornbread to soak up every last drop of that savory, smoky sauce. This isn’t just a recipe—it’s a centerpiece for gatherings, a labor of love that turns a simple cut of meat into something extraordinary.
Whether you’re hosting a weekend barbecue or treating yourself to a slow-cooked masterpiece, this brisket delivers restaurant-quality results at home. The techniques here are foolproof, tested with home cooks of all skill levels, so you can confidently create a dish that’ll have everyone asking for seconds.
Let’s get started on your perfect brisket.
Ingredients for savory brisket
The right ingredients transform tough brisket into melt-in-your-mouth perfection—no shortcuts here.
| Ingredient | Amount | Notes |
|---|---|---|
| Packer Brisket 🥩 | 6 lb | Whole packer cut with fat cap |
| Yellow Onion 🧅 | 2 whole | Yellow or red, sliced thick |
| Garlic Cloves 🧄 | 8 cloves | Peeled, smashed for aroma |
| Fresh Thyme 🌿 | ½ cup | Stems removed, loosely packed |
| Fresh Rosemary 🌿 | ¼ cup | Needles only, chopped |
| Smoked Paprika 🌶️ | 2 tbsp | For deep smoky flavor |
| Ground Black Pepper 🌶️ | 1 ½ tbsp | Freshly cracked for heat |
| Diamond Crystal Kosher Salt 🧂 | 1 tbsp | Coarse grain preferred |
| Brown Sugar 🍯 | 2 tbsp | Light or dark, packed |
| Ground Cumin 🌿 | 1 tbsp | Toasted for earthy depth |
| Apple Cider Vinegar 🍏 | ¼ cup | For tenderizing brisket |
| Beef Broth 🍲 | 2 cups | Low-sodium preferred |
| Yellow Mustard 🥬 | 2 tbsp | For moisture retention |
| Unsalted Butter 🧈 | ½ cup | Cold, cubed for basting |
| Beef Fatback 🍖 | ½ lb | Diced for fat rendering |
[recipe_ingredient_scaler]
The brisket is the star, so pick a packer cut with good marbling—that fat cap is your friend, locking in moisture. Costco and local butchers often have the best quality, but the grocery store packer cut works too. Look for a cut with at least 1/4-inch fat cap and vibrant red color. If you can’t find a whole packer, a flat cut with a thick fat cap will do. The aromatics—fresh thyme and rosemary—are non-negotiable for that restaurant-quality depth. I always grab mine from the produce section at Whole Foods or Trader Joe’s where they’re freshest, but the dried versions work in a pinch if you’re in a hurry.
No smoked paprika? Regular paprika plus a pinch of liquid smoke gets you close. Short on fresh herbs? Dried thyme and rosemary at one-third the amount will work, but the flavor won’t be as bright. The apple cider vinegar is key—it tenderizes the meat while adding a subtle tang. Substitute lemon juice if that’s what you have, but the acidity level won’t be identical. For the beef broth, low-sodium is critical—you don’t want to over-salt your brisket. The mustard might seem odd, but it helps retain moisture during the long cook. If you’re avoiding it, just add an extra splash of beef broth to compensate. The fatback can be swapped for bacon, but it won’t render the same way—stick with it if you can find it.
The dry rub keeps for 3 months in an airtight container, so make extra. Store the brisket uncovered in the fridge for 24 hours before cooking—this helps the rub adhere better. Once cooked, slice against the grain and serve immediately if possible, but it reheats beautifully. I always portion leftovers into single-serving containers—this brisket is too good to waste. The rendered fat and juices can be frozen for up to 3 months and used in future recipes like mashed potatoes or gravy. Trust me, you’ll have leftovers.
Why You’ll Love This Recipe
- Minimal Chopping Needed: I swear by this—just dice one onion and smash a few garlic cloves. That’s it. No fancy prep, no peeling hours of herbs. The thyme and rosemary add depth without the fuss, and honestly? The brisket does most of the work.
- Herb-Packed Umami Bomb: Between us, that crispy rosemary and thyme crust on the brisket? Chef’s kiss. The garlic and onion caramelize into something rich and savory, while the packer brisket’s natural fat keeps it juicy. It’s the kind of flavor that makes you close your eyes mid-bite.
- Leftovers That Don’t Suck: This isn’t one of those recipes where day-old brisket turns to shoe leather. Slice it thin, reheat with a splash of broth, and it’s still tender and packed with flavor. I’ve fed my family for three meals from one cook—no waste, no regret.
- Weeknight Crowd-Pleaser: Whether it’s a lazy Sunday or a last-minute dinner for friends, this brisket delivers. It’s hearty enough for a big group but simple enough to throw together when you’re beat. Plus, the rosemary and thyme make it feel fancy without the effort. (Yes, even on a Tuesday night.)
Step-by-step instructions for savory brisket mastery
Here’s the precise method I’ve perfected for achieving that legendary fall-apart texture while keeping every bite rich and flavorful.
Prepare the Brisket with the Dry Rub
Begin by trimming the fat cap of the 6 lb packer brisket down to about ¼ inch thickness using a sharp boning knife. This thickness allows for proper smoke penetration while maintaining moisture. Pat the entire surface completely dry with paper towels – any moisture will prevent that perfect bark from forming.
In a medium bowl, combine the 2 tbsp smoked paprika, 1.5 tbsp ground black pepper, 1 tbsp diamond crystal kosher salt, 2 tbsp brown sugar, and 1 tbsp ground cumin. Add the 0.5 cup fresh thyme and 0.25 cup fresh rosemary needles, then mix thoroughly. Generously coat the brisket with this rub, pressing it firmly into all surfaces including the fat cap. Let the seasoned brisket sit at room temperature for 1 hour before cooking – this allows the rub to penetrate deeply and creates an even cooking surface.
Create the Aromatic Base for Braising
While the brisket seasons, heat a Dutch oven over medium heat. Add the 0.5 lb diced beef fatback and cook until the fat renders and the pieces become golden brown, about 5 minutes. Remove the fatback with a slotted spoon and set aside, leaving the rendered fat in the pot.
In the same Dutch oven, add the 2 whole yellow onions sliced into thick rounds and the 8 smashed garlic cloves. Cook until the onions soften and begin to caramelize, about 8 minutes. Pour in the 0.25 cup apple cider vinegar and let it bubble away for 1 minute to deglaze the pan, scraping up any browned bits. This aromatic base forms the flavor foundation for your brisket.
Braise the Brisket Low and Slow
Return the rendered beef fatback to the Dutch oven along with the 0.5 cup cubed unsalted butter. Place the seasoned brisket fat-side up in the pot. Pour in the 2 cups beef broth and add the 2 tbsp yellow mustard. The mustard helps retain moisture while adding subtle tang.
Bring the mixture to a gentle simmer, then cover tightly with a lid. Transfer to a preheated 300°F oven and cook for 4 hours. Here’s where patience pays off – the low temperature ensures tender meat without drying it out. After 4 hours, check the internal temperature using a meat thermometer. It should read 195-200°F – this is when the connective tissue breaks down completely for that signature fall-apart texture.
Rest and Serve for Maximum Tenderness
Once the brisket reaches the proper internal temperature, remove it from the oven and transfer to a cutting board. Tent loosely with aluminum foil and let it rest for at least 30 minutes. This resting period is crucial – it allows the juices to redistribute throughout the meat, preventing them from running out when you slice.
After resting, slice the brisket against the grain into ½-inch thick slices. The meat should be so tender it practically falls apart with gentle pressure. Serve the sliced brisket over the braising liquid reduced in a saucepan until slightly thickened, or use it as a filling for sandwiches with all the aromatic juices. Each bite should deliver that perfect combination of smoky, sweet, and savory flavors with melt-in-your-mouth tenderness.
Pro Tips For Making Savory Brisket
- Trim the Fat Cap: Packer brisket comes with a thick fat cap—leave at least ¼-inch on the flat side. I learned this the hard way when I trimmed too much and ended up with dry, stringy meat. That fat renders down into flavor gold, so resist the urge to go overboard.
- Sear in Batches: A crowded pan steams instead of sears. Cut your brisket into two pieces if needed and work in batches—high heat, 3-4 minutes per side—until deep brown. This isn’t the prettiest method, but it’s the tastiest, locking in juices that disappear when you rush.
- Char the Aromatics: Don’t just dice those onions and garlic—char them first. Sauté until blackened in spots (about 8-10 minutes) before adding thyme and rosemary. This adds a smoky depth that raw aromatics just can’t match, and it takes almost no extra time.
- Deglaze Aggressively: After searing, scrape every last bit of browned bits from the pan with a wooden spoon. Add a splash of water or broth, let it bubble, then reduce by half. This paste is pure flavor—skip it, and you’re missing out on the richest part of the dish.
Serving suggestions for this recipe
Classic BBQ Spread
Serve your brisket on a rustic wooden board with classic barbecue fixings. I like to arrange ½-inch slices alongside homemade white bread for sandwiches, pickled jalapeños for heat, and crispy potato chips for crunch.
Add a small bowl of the reduced braising liquid for dipping—it’s packed with all those rich, smoky flavors. 🍞
Southern Comfort Plating
For a traditional Southern-style presentation, create a layered platter. Start with creamy mashed potatoes> topped with caramelized onions, then add brisket slices arranged in a fan shape. Finish with shredded cheddar cheese> and a drizzle of honey butter>.
The contrast of textures and temperatures makes every bite exciting. I always garnish with fresh parsley> for a pop of color.
Taco Night Twist
Shred the brisket and use it as a filling for corn tortillas> with all the fixings. Set out bowls of pickled red onions>, avocado slices>, crumbled cotija cheese>, and cilantro-lime crema>.
This is a fantastic way to use leftovers—just reheat the brisket with a splash of beef broth to keep it moist. 🌮
Garnish Like a Pro
Fresh garnishes elevate your brisket from good to showstopping. Sprinkle toasted sesame seeds> for nutty crunch or crispy fried shallots> for a gourmet touch. A few drops of hot sauce> (like Cholula>) on the side lets guests control the heat.
I also love adding microgreens> for a vibrant, fresh contrast to the rich meat.
Bread Basket Essentials
No brisket meal is complete without a basket of fresh bread. I recommend crusty sourdough>, buttery dinner rolls>, and cornbread> for soaking up those delicious juices.
Warm the bread in the oven for 5 minutes at 350°F> so it’s soft and ready to serve. A side of honey butter> makes everything better. 🥖
Sauce Pairings
While the braising liquid is fantastic on its own, try pairing your brisket with complementary sauces. A smoky chipotle aioli> adds heat, while a creamy horseradish sauce> brings a tangy kick.
For something lighter, a fruit salsa> with diced mango and jalapeño cuts through the richness beautifully. Serve these in small bowls so guests can customize their plates.
Nutrition facts
Frequently asked questions
How do I know when brisket is perfectly cooked?
Use a meat thermometer to check the internal temperature—it should reach 195-200°F in the thickest part. The probe should slide in like butter, and the meat should pull apart easily with two forks. This low-and-slow method ensures tender, juicy results every time.
Can I cook brisket without a smoker or Dutch oven?
Use a heavy pot with a tight lid or even a slow cooker on low for 8-10 hours. For the oven method, place the brisket on a rack over a tray of water to create steam. The key is maintaining a steady 300°F temperature.
What’s the best way to reheat leftover brisket?
Slice the brisket and reheat in a skillet with a splash of beef broth over low heat for 5-10 minutes. Avoid microwaving—it dries out the meat. For sandwiches, warm the bread first, then layer with brisket and juices.
Why is my brisket tough instead of tender?
Tough brisket usually means it didn’t cook long enough or at a low enough temperature. Aim for 195-200°F internal temp and cook at 300°F for 4+ hours. Also, slice against the grain—this shortens muscle fibers for easier chewing.
Can I make this recipe with a flat cut instead of packer brisket?
Yes, but choose a flat cut with a thick fat cap (1/4-inch) for moisture. Trim excess fat to 1/4-inch thickness and follow the same cooking method. The flat cut has less connective tissue, so it may cook slightly faster—watch for 195°F internal temp.

Trained in classic French technique but raised on slow-cooked ribs and spicy rubs, she blends culinary skill with smoke and soul.
- Best Smoked Oxtail Recipe: Deep-Rich Flavor After Low-and-Slow Cooking - October 14, 2026
- Pit Boss Smoked Prime Rib Roast Recipe: Bark-to-Bone Crispness in 4 Hours - October 14, 2026
- Smoked Tuna Steak Recipe: Seared Crust Meets Silky Centers - October 14, 2026