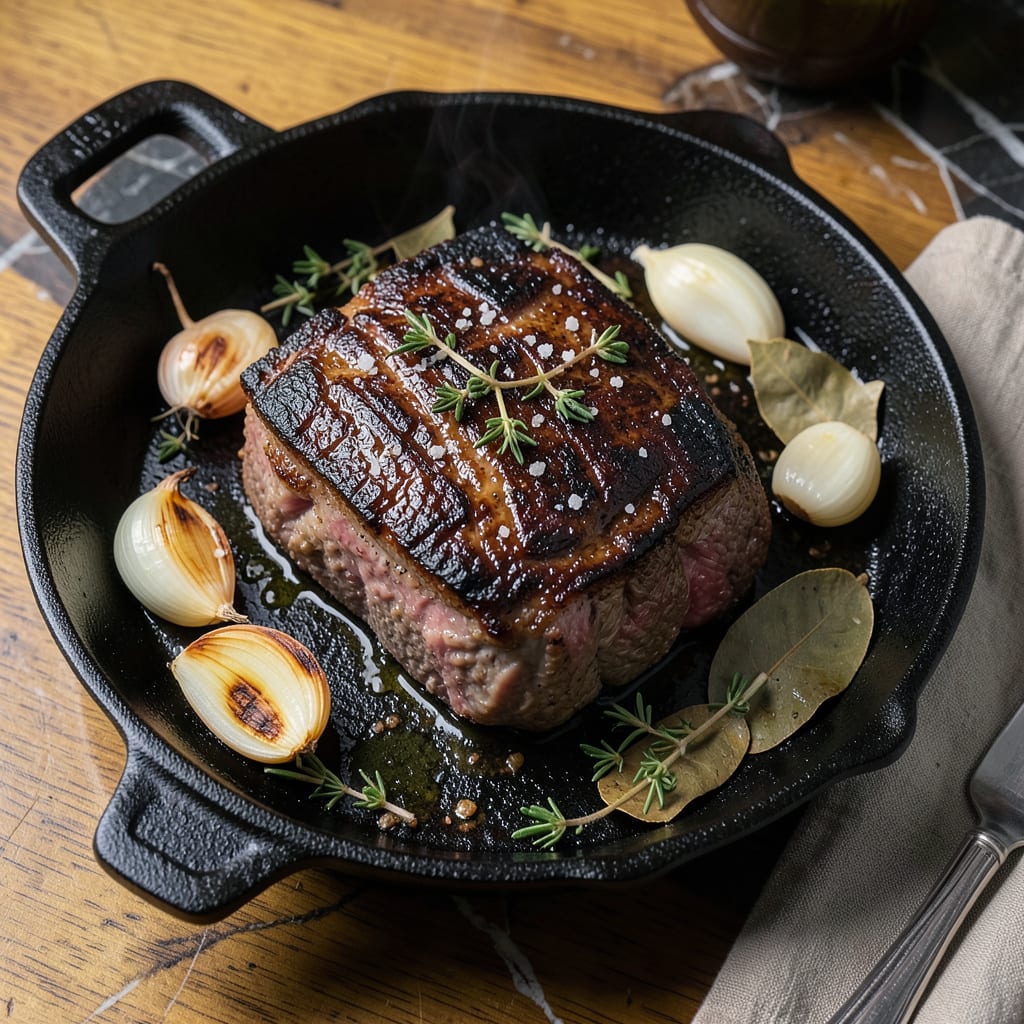
Let me tell you something that changed my pot roast game forever: searing that chuck roast before it hits the crock pot. I grew up watching my dad man the grill, but it wasn’t until I started playing with French techniques that I realized what we were missing. That first sizzle in a screaming hot pan isn’t just for show—it’s where all the deep, meaty flavor gets locked in.
Here’s the thing—most people just dump everything in the slow cooker and walk away. But taking those extra 10 minutes to get a proper crust on your roast makes the difference between “good pot roast” and “holy cow, this is restaurant-quality” tender meat. The Maillard reaction (that’s just fancy talk for browning) creates layers of flavor that plain old stewing can’t touch. And yes, I’ve burned my fair share learning this lesson.
What you’re left with after 8 hours on low is fall-apart tender chuck roast that’s rich, beefy, and packed with complex flavors from that initial sear. The crock pot does its magic turning tough meat into buttery softness, but it’s that first step that makes people ask for seconds. I serve mine over mashed potatoes with the juices spooned on top—simple, but it lets the meat shine.
Don’t skip the sear. That’s where the soul of this dish lives. The rest is just waiting for the magic to happen in your slow cooker. Trust me, your taste buds will know the difference.
📚 In This Guide
- What You’ll Need
- Instructions
- Tips and Common Mistakes
What Youll Need
- ● Chuck roast: 3–4 lbs (1.4–1.8 kg), boneless, well-marbled (look for “chuck pot roast” or “chuck shoulder roast”) 🥩
- ● Kosher salt: 1–2 tbsp for seasoning (plus extra to taste)
- ● Black pepper: 1 tbsp freshly ground
- ● High-smoke-point oil: 2 tbsp (avocado, grapeseed, or refined coconut oil work best)
- ○ Aromatics (optional but recommended): 1 onion (sliced), 3 garlic cloves (minced), 1 tbsp tomato paste
- ● Liquid for crock pot: 1–2 cups (beef broth, red wine, or a mix—enough to cover ⅓ of the roast)
- ● Heavy skillet: Cast iron or stainless steel (10–12″ wide) (nonstick won’t sear as well!)
- ● Tongs: 12″ long, heat-resistant (avoid piercing the meat with a fork)
- ● Crock pot/slow cooker: 6-quart or larger (with a “sear” or “high” setting if available)
- ○ Meat thermometer: Instant-read (optional but handy for perfect doneness) 🌡️
- ● Paper towels: For patting the roast dry (key for a good sear!)
- ● Wooden spoon: For deglazing the skillet (to scrape up those flavorful browned bits!)
Instructions for Searing Chuck Roast Before the Crock Pot
This simple technique transforms your pot roast from good to extraordinary with just a few extra minutes.
Prepare the Chuck Roast for Searing
Start by patting the chuck roast completely dry with paper towels. This is the most important step—any moisture on the surface will steam instead of sear, preventing that beautiful brown crust we’re after. I like to press down firmly with multiple paper towels to absorb all the moisture.
Season the roast generously with salt and pepper on all sides. Don’t be shy here—the searing process intensifies the flavor, so you want a visible layer of seasoning. Let the seasoned roast sit at room temperature for about 15 minutes while you heat your pan.
Heat the Pan Properly for Maximum Browning
Choose a heavy pan that can handle high heat—I prefer cast iron for its even heat distribution. Place it over medium-high heat and add just enough oil to lightly coat the bottom (about 1-2 tablespoons). You want the oil to shimmer but not smoke when you add the meat.
Here’s the thing—if the pan isn’t hot enough, the meat will steam instead of sear. Test the pan by flicking a drop of water onto it. If it dances and evaporates immediately, your pan is ready. If it just sits there, wait another 30 seconds and test again.
Sear the Roast on All Sides
Carefully place the roast in the hot pan. You should hear an immediate sizzle—if you don’t, your pan isn’t hot enough. Let it sear undisturbed for 3-4 minutes until a deep brown crust forms. Don’t move it around! This is how you develop those rich, caramelized flavors.
Use tongs to flip the roast and sear each side, including the ends. You’ll know it’s ready to turn when the meat releases easily from the pan. For a 3-4 pound roast, this should take about 10-12 minutes total. The goal is a uniform dark brown crust on all surfaces.
Deglaze and Transfer to Crock Pot
Once the roast is beautifully browned, transfer it to your crock pot. Now comes the flavor bonus: pour about ½ cup of liquid (beef broth, red wine, or even water) into the hot pan. Use a wooden spoon to scrape up all those browned bits—they’re packed with flavor.
Pour this flavorful liquid over the roast in the crock pot. These browned bits, called fond, will dissolve during the slow cooking process, infusing your entire dish with deep, complex flavors. This is what makes searing worth the extra effort.
Slow Cook to Tender Perfection
Add your remaining ingredients to the crock pot around the roast. Cover and cook on low for 8-10 hours or high for 5-6 hours. The seared crust will help the roast retain moisture while breaking down the connective tissues.
You’ll know it’s done when the meat falls apart easily with a fork. The searing step ensures that even after hours of cooking, your roast will have incredible depth of flavor in every bite, not just tenderness. The difference is noticeable from the first taste.
Tips and Common Mistakes
These simple adjustments will take your seared chuck roast from good to unforgettable, with rich flavor in every bite.
The Heat Factor: Getting your pan to the right temperature before adding the meat is everything. When you see the oil shimmering but not smoking at medium-high heat, that’s your sweet spot. I learned this the hard way after trying to rush the process—patience during those 30 seconds makes all the difference between a perfect sear and a steamed surface.
Timing Secret: Those 3-4 minutes per side might feel long when you’re watching the pan, but resist the urge to peek or move the roast. The crust forms when the meat stays undisturbed against the hot surface. Trust me, the 10-12 minutes total for a 3-4 pound roast creates that deep brown color that translates to incredible flavor later.
Resting Matters: Letting the seasoned roast sit at room temperature for 15 minutes before searing isn’t just about even cooking—it helps the salt penetrate the surface. I noticed a huge difference in flavor depth when I started being religious about this step. The meat also sears more evenly when it’s not ice cold from the fridge.
Deglazing Tip: When you pour that ½ cup of liquid into the hot pan, really scrape those browned bits—they’re flavor gold. I like to tilt the pan slightly to pool the liquid, then use the wooden spoon at an angle to get every last bit. This step only takes a minute but adds layers of complexity to your final dish.
Pro Tips for Sear Chuck Roast Before Crock Pot
- These simple adjustments will take your seared chuck roast from good to unforgettable, with rich flavor in every bite.
- The Heat Factor: Getting your pan to the right temperature before adding the meat is everything. When you see the oil…
- Timing Secret: Those 3-4 minutes per side might feel long when you’re watching the pan, but resist the urge to peek o…
Frequently Asked Questions
Do I have to sear the chuck roast before the crock pot? Can I skip it?
While you can skip searing, you’ll miss out on deep, caramelized flavor! Searing creates a Maillard reaction (browning) that adds richness. If short on time, sear just the fat cap or sides for 2–3 minutes total. For tender results, never skip seasoning—even if you skip searing!
How long should I sear each side of the chuck roast?
Sear for 2–3 minutes per side over medium-high heat until a dark crust forms. Use tongs (not a fork!) to avoid piercing the meat. For a 3–4 lb roast, aim for 8–10 minutes total. Overcrowding the pan? Sear in batches to maintain high heat.
What’s the best oil for searing chuck roast?
Use oils with a high smoke point: avocado oil, refined coconut oil, or vegetable/peanut oil work great. Avoid butter (burns easily) or olive oil (unless it’s light olive oil). A splash of oil + the roast’s rendered fat = perfect sear!
Can I sear the roast in my Instant Pot instead of a skillet?
Use the “Sauté” function on high heat. Let the pot get ripping hot (3–5 mins) before adding oil and meat. Work in batches if needed—don’t overcrowd! Deglaze with broth afterward to scrape up those flavorful browned bits.
Why did my chuck roast turn out tough after searing and slow cooking?
Toughness usually means undercooking (not enough time) or overcooking (dried out). Cook on LOW 8–10 hours or HIGH 5–6 hours until fork-tender. Also, slice against the grain when serving. Pro tip: Let it rest 10 mins post-cooking to redistribute juices!
Searing your chuck roast before the crock pot is the secret to rich, layered flavor and melt-in-your-mouth tenderness. 🍖 With just a few extra minutes of prep, you’ll transform a simple pot roast into a restaurant-worthy meal that’ll have everyone asking for seconds.
Ready to try it? Grab your cast-iron skillet, fire up the stove, and let that Maillard reaction work its magic. Your taste buds (and dinner guests) will thank you! For next-level results, pair your seared roast with our favorite crock pot side dishes—happy cooking! 😊

Trained in classic French technique but raised on slow-cooked ribs and spicy rubs, she blends culinary skill with smoke and soul.
- Recipe for Boneless Pork Chops in Cast Iron Skillet: Sear and Baste to Juicy Perfection - October 3, 2026
- Recipe for Boneless Cross Rib Roast: Slow-Roasted Beef with Herb Crust - October 3, 2026
- Hamburgers in Sauce Recipe Crock Pot: Slow-Cooked Savory Delight - October 3, 2026