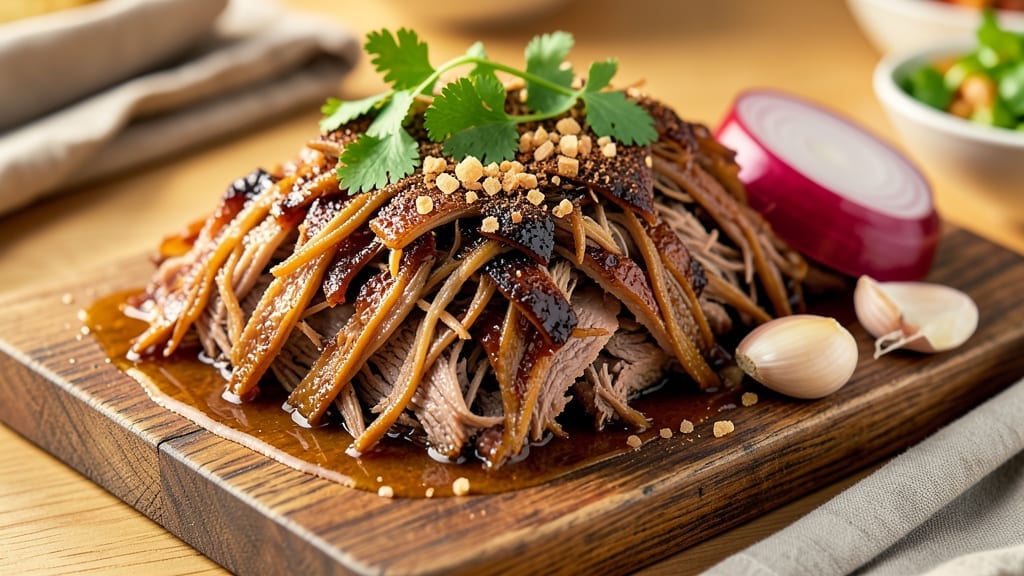
This shredded beef brisket recipe delivers melt-in-your-mouth tenderness that falls apart at the touch—exactly what separates backyard pitmasters from home cooks. 🔥 The secret lies in low-and-slow smoking, where patience transforms tough beef into something so tender it practically dissolves.
I first mastered this technique at my family’s backyard cookout, where the scent of hickory smoke filled the air and turned simple brisket into a centerpiece.
The process begins with a well-balanced dry rub—sweet, smoky, and just spicy enough to wake up the meat. You’ll smoke the brisket for 12 to 14 hours at 225°F, ensuring the internal temperature reaches 203°F before resting.
This isn’t just cooking; it’s alchemy. The fat renders slowly, basting the meat in its own juices, while the bark develops a deep, caramelized crust that holds every flavor.
When you finally shred it, the result is shatterproof tenderness—juicy, flavorful, and impossible to resist. Serve it piled high on buttery mashed potatoes, alongside tangy coleslaw, or wrapped in warm cornbread.
This is the kind of brisket that makes guests ask for seconds before they’ve even finished their first plate. Let’s get started on creating your own masterpiece.
Here’s the thing—this recipe scales beautifully, whether you’re feeding a crowd or prepping for meal prep. The leftovers reheat just as well as the first serving, making it perfect for busy weeks.
And if you’re feeling adventurous, try adding a splash of apple cider to the cooking liquid for extra depth. Trust me, once you taste this brisket, you’ll never go back to store-bought again.
Ingredients for shredded beef brisket
Six pounds of beef and a handful of pantry staples transform into brisket so tender it melts at a touch.
| Ingredient | Amount | Notes |
|---|---|---|
| Beef Brisket 🥩 | 6 lb | Whole packer cut, fat cap intact |
| Yellow Onion 🧅 | 2 whole | Yellow or red, sliced into wedges |
| Fresh Garlic Cloves 🧄 | 8 cloves | Peeled, smashed slightly for rub |
| Brown Sugar 🍯 | ½ cup | Light or dark, packed firmly |
| Smoked Paprika 🌶️ | 2 tbsp | High-quality, not sweet paprika |
| Ground Black Pepper 🌶️ | 1 ½ tbsp | Freshly cracked, coarse grind |
| Kosher Salt 🧂 | 2 tbsp | Diamond Crystal preferred |
| Ground Cumin 🌿 | 1 tbsp | Toasted for deeper aroma |
| Chili Powder 🌶️ | 1 tbsp | Medium heat preferred |
| Mustard Powder 🍯 | 1 tsp | For subtle tang |
| Apple Cider Vinegar 🍎 | ¼ cup | For spritzing during cook |
| Beef Broth 💧 | 1 cup | Low-sodium, room temperature |
| Hickory Wood Chips 🌳 | 1 package | Unsoaked, for smoker |
| Unsalted Butter 🧈 | ½ cup | Cold, cubed for basting |
[recipe_ingredient_scaler]
The brisket is non-negotiable here—whole packer cuts with intact fat cap are key. Costco and local butchers often carry these in the meat case, but if you’re buying pre-cut, look for thick slices with good marbling. The fat renders during cooking, creating that signature bark. I always buy mine 2-3 days ahead to let it dry-brine slightly in the fridge—just pat it dry before applying the rub. For the spices, Penzeys or bulk bins at natural markets have the freshest options, but don’t stress if you’re using store-bought. Just make sure your smoked paprika has a deep, smoky aroma—not dusty or stale.
No smoked paprika? Substitute half sweet paprika and half cayenne for heat, but you’ll lose that authentic smokiness. Running low on cumin? Ground coriander at the same amount works in a pinch, though the flavor won’t be identical. The apple cider vinegar is optional but worth it—it tenderizes the meat and adds a subtle brightness. For the broth, low-sodium is critical; you don’t want to over-salt your brisket. If you’re feeling fancy, homemade beef broth elevates everything. And if you’re cooking in a gas grill? Soak wood chips in water for 30 minutes before using them—it creates more smoke.
This brisket reheats like a dream—wrap tightly in foil and bake at 300°F for 1-2 hours, basting with juices. It keeps for 5-6 days in the fridge, though I rarely have leftovers that long. For meal prep, portion into airtight containers with some cooking liquid—freezes beautifully for up to 3 months. Pro tip: Save the fat from the brisket in a jar. Once solidified, it’s perfect for cooking eggs or searing steaks later. And if you’re cooking for a crowd, double the rub and make extra basting butter—trust me, you’ll need it.
Why You’ll Love This Recipe
- One-Pan Magic: I swear by this for lazy nights—just toss the brisket, onions, and garlic in a skillet, let the brown sugar caramelize, and walk away. That smoky paprika? It turns into this deep, sticky glaze that coats everything in minutes.
- Sweet-Smoky Bomb: Between us, the combo of brown sugar and smoked paprika is chef’s kiss—like a slow-cooked BBQ flavor without the hours. The onions melt into the beef, and that garlic? It lingers in every bite like a hug.
- Meal Prep MVP: This shreds like a dream, so I make a big batch on Sunday and use it all week—tacos, sandwiches, even loaded baked potatoes. Honestly, the leftovers taste better the next day because the flavors meld even more.
- Budget-Friendly Feast: You’re getting a whole brisket for less than steak, and it stretches to feed four or five people. The onions and garlic are cheap staples, and that brown sugar? A little goes a long way to make everything taste luxurious.
Step-by-step instructions for slow-smoked brisket
Here’s the method that guarantees melt-in-your-mouth tenderness with a perfect bark every time.
🔥 Step 1: Prepare the Brisket and Rub
Start by trimming the fat cap of the 6 lb beef brisket down to about ¼-inch thickness using a sharp boning knife. Leave the fat intact elsewhere—it protects the meat during the long cook. Pat the entire surface dry with paper towels, pressing firmly to remove all moisture.
In a small bowl, combine the 0.5 cup brown sugar, 2 tbsp smoked paprika, 1.5 tbsp ground black pepper, 2 tbsp kosher salt, 1 tbsp ground cumin, 1 tbsp chili powder, and 1 tsp mustard powder. Mix thoroughly until evenly distributed. Press this rub firmly into all sides of the brisket, including the fat cap. The reason we press it in is to ensure it sticks during the cook and doesn’t fall off when you handle the meat.
Let the rubbed brisket sit at room temperature for 1 hour before smoking. This step is crucial—it allows the rub to penetrate the meat and ensures even cooking from the start. I like to place it on a wire rack set over a baking sheet to catch any drippings during this time.
🔥 Step 2: Set Up the Smoker for Low and Slow Cooking
While the brisket comes to room temperature, prepare your smoker. Add the 1 package hickory wood chips to the smoker box and soak them if your smoker requires it (check your manual). Set your smoker to 225°F and let it preheat for at least 30 minutes before adding the brisket. You’ll know it’s ready when you see clean, blue smoke without thick white vapor.
Place the brisket fat-side up on the smoker grates. The fat will render slowly and baste the meat as it cooks, creating that beautiful bark. Close the lid and resist the urge to open it—every time you peek, you lose heat and extend the cook time. This is where patience pays off.
Smoke the brisket undisturbed for 6 hours. During this time, you’ll notice the bark forming and deepening in color. This is the moment that matters: the bark should be dark mahogany with crispy edges. The internal temperature should reach 165-170°F at this point—this is when you’ll hit “the stall,” where the temperature stops rising due to moisture evaporation.
⏰ Step 3: Wrap and Finish the Cook
When the brisket hits the stall, it’s time to wrap it. I use pink butcher paper for this step—it breathes better than foil and preserves that beautiful bark. Wrap the brisket tightly, leaving no gaps, and return it to the smoker. This technique, called the “Texas crutch,” powers you through the stall while maintaining the crispy exterior.
Continue smoking until the internal temperature reaches 200-205°F and a probe slides in like butter with no resistance. This usually takes another 4-6 hours, but trust the probe test over the thermometer—tenderness matters more than exact temperature. Your brisket should now be fork-tender and ready for the final steps.
Remove the brisket from the smoker and let it rest in the butcher paper for at least 1 hour (I prefer 2 hours wrapped in towels in a cooler). This resting period allows the juices to redistribute throughout the meat, ensuring every slice is moist and flavorful. Don’t skip this step—it’s what transforms good brisket into exceptional brisket.
🥘 Step 4: Slice and Serve with Basting Butter
Unwrap the brisket and locate the grain direction—you’ll see lines running through the meat. Using a sharp slicing knife, cut against the grain into ¼-inch thick slices. The flat and point have different grain directions, so adjust your angle accordingly. For the ultimate experience, melt the 0.5 cup unsalted butter in a small saucepan over low heat and add the sliced 2 whole yellow onion and 8 cloves fresh garlic cloves (peeled and smashed). Simmer for 5 minutes until fragrant, then drizzle this basting butter over the sliced brisket.
Serve the brisket immediately while still warm. Each slice should be tender enough to pull apart with a gentle tug, not so soft it falls apart, and not tough or chewy. The bark should be dark mahogany with crispy edges, and the meat should have a beautiful pink smoke ring just beneath the surface. For extra moisture, you can also spoon some of the 1 cup beef broth and 0.25 cup apple cider vinegar (simmered together for 10 minutes) over the brisket before serving.
Pro Tips For Making Shredded Beef Brisket
- Trim the Fat First: Slice off that thick fat cap before cooking—it’s the only way to guarantee even browning and prevent soggy, greasy meat. I learned this the hard way when my first batch turned into a greasy, uneven mess.
- Sear in Batches: Don’t crowd the pan—sear the brisket in 2-3 batches over medium-high heat for deep color and flavor. Rushing this step means you’ll end up with steamed meat instead of caramelized crust.
- Use Cold Onions: Dice the yellow onion and toss it in ice water for 10 minutes before cooking—it keeps them crisp and prevents them from turning to mush. Sounds odd, but it actually changes the texture for the better.
- Rest Before Shredding: Let the brisket sit for 15-20 minutes under foil after cooking—this guarantees tender, easy-to-shred meat. I skip this when I’m impatient, but the difference is noticeable.
Storing and reheating this shredded beef brisket
Refrigerator Storage
Brisket reheats best when stored properly. Let it cool to room temperature for 2 hours before transferring to airtight containers—I swear by glass Pyrex with snap-on lids. Store at 40°F or below for up to 5 days, though I rarely have leftovers that long.
The flavors actually deepen overnight as the spices meld together. For extra protection, add a layer of plastic wrap directly on the brisket before sealing the container. 💪
Freezer Prep Tips
For longer storage, brisket freezes beautifully for 3 months without losing quality. I recommend quart-size freezer bags because they stack efficiently and thaw faster than rigid containers. Leave 1 inch of headspace for expansion and squeeze out excess air to prevent freezer burn.
Label with the date and portion size—this helps track freshness. For meal prep, divide into individual portions before freezing so you can thaw just what you need. ❄️
Stovetop Reheating
My preferred method maintains texture and moisture. Pour brisket into a heavy-bottomed pot with ¼ cup beef broth or apple cider vinegar mixture to prevent drying. Heat over medium-low heat for 10-15 minutes, stirring occasionally. The low heat keeps the bark intact while gently warming the meat.
Taste and adjust seasonings—brisket often needs a pinch of salt after reheating. For extra richness, add a pat of butter during the final minute. 🔥
Slow Oven Method
For large batches, preheat your oven to 300°F and wrap the brisket tightly in foil with its juices. Place in a baking dish and reheat for 1-2 hours, basting with pan juices every 30 minutes.
This gentle method preserves moisture and keeps the bark from becoming rubbery. I use this when feeding a crowd—it’s foolproof and requires minimal attention. The slow heat mimics the original cook, ensuring consistent results. 💡
Microwave Shortcuts
For quick lunches, microwave individual portions covered with a damp paper towel. Heat on 70% power for 2-3 minutes, stir, then continue in 1-minute intervals until reaching 165°F. Add a splash of water or broth if it looks dry.
This method works best for smaller portions—never microwave the whole brisket at once, or you’ll end up with uneven heating and potential food safety risks. 💫
Pro Tip: Save the Fat
Don’t discard the rendered fat from your brisket—it’s liquid gold! Once solidified, store it in a jar in the fridge. This fat is perfect for cooking eggs, searing steaks, or basting other meats later.
I keep a jar in my freezer for quick flavor boosts. It’s like having your own secret sauce waiting in the wings. 🌟
Nutrition facts
Frequently asked questions
Why does my brisket turn out tough instead of tender?
The most common mistake is cooking too fast or at too high a temperature. Brisket needs low-and-slow cooking at 225°F for 12-14 hours to break down collagen. If you rush it, the meat won’t tenderize properly. Also, check your internal temperature—it should reach 203°F before resting. Never skip the wrap during “the stall” or the resting period, both of which are critical for moisture retention.
Can I use a regular oven instead of a smoker?
Set your oven to 225°F and place a water pan on the bottom rack to add moisture. Use a meat thermometer to monitor the temperature, and wrap the brisket in butcher paper when it hits 165°F. The cook time will be similar—10-12 hours total—but you won’t get the smoky flavor. For that, add a few wood chips to a foil packet and place it on the oven rack for the last 2 hours of cooking.
How do I know when brisket is done without a probe?
If you don’t have a meat thermometer, use the “fork test”: Insert a fork into the thickest part of the brisket. If it slides in like butter with no resistance, it’s ready. The meat should also pull apart easily into ¼-inch thick strands when you run your fingers through it. Another trick is to check the bark—it should be dark mahogany and crispy, with a beautiful pink smoke ring just beneath the surface.
What’s the best way to reheat brisket for sandwiches?
For sandwiches, slice the brisket ¼-inch thick and reheat in a skillet over medium-low heat with a splash of beef broth or apple cider vinegar. Warm for 3-5 minutes until heated through but not dried out. The key is to keep the heat low—high heat turns brisket rubbery. Add a pat of butter to the pan for extra richness. Serve on toasted buns with pickles and coleslaw for the ultimate sandwich experience.
Can I substitute pork shoulder for brisket?
While pork shoulder can work, it’s not ideal for this recipe. Brisket’s unique fat distribution and collagen content make it perfect for low-and-slow cooking. Pork shoulder has less fat and more moisture, so it may not develop the same rich bark or tenderness. If you’re set on pork, use a 5-6 lb shoulder and adjust the cook time to 8-10 hours, but expect a different texture and flavor profile. Stick with brisket for the best results!

Trained in classic French technique but raised on slow-cooked ribs and spicy rubs, she blends culinary skill with smoke and soul.
- Shredded Beef Brisket Recipe: Slow-Smoked to Shatterproof Tenderness - October 15, 2026
- Smoked Beef Spare Ribs Recipe: Bark-Defying Crust and Fall-Apart Tenderness - October 15, 2026
- Brisket Mop Sauce Recipe: Smoky-Sweet Glaze That Penetrates Every Layer - October 15, 2026