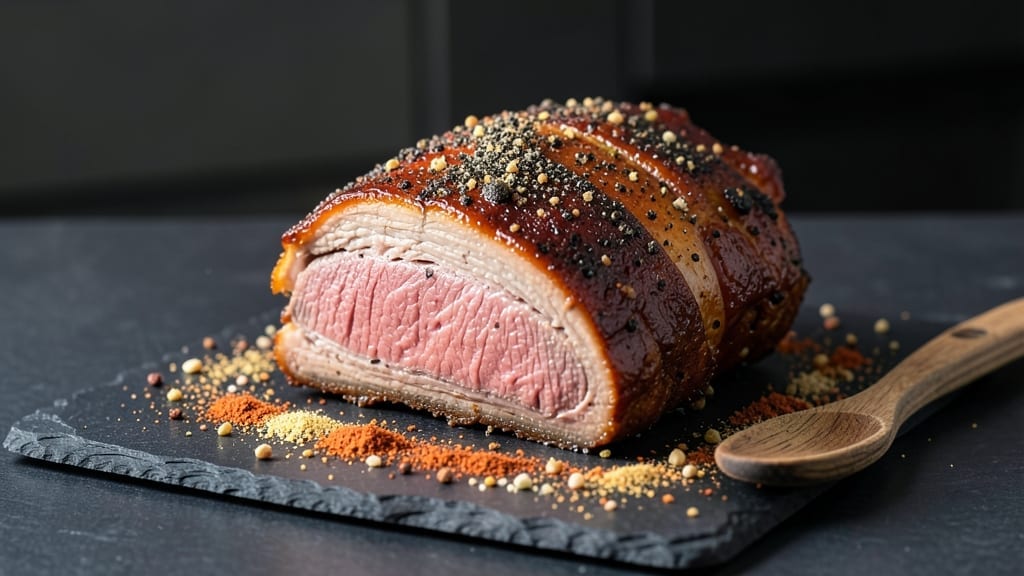
Mastering slow-roast brisket in your oven delivers that same fall-apart tenderness you crave without needing a smoker. After years of experimenting with my grandmother’s handwritten notes—where she’d simply write “cook until tender”—I’ve perfected a method that transforms tough cuts into melt-in-your-mouth perfection using just your home oven.
The secret lies in low-and-slow cooking with precise temperature control, ensuring every bite is juicy and rich.
This recipe relies on simple ingredients and a foolproof technique: a long cook at 275°F with occasional basting to lock in moisture. No special equipment required—just patience and attention to detail. The result?
Brisket that’s so tender it practically shreds at the touch, with a deep, smoky flavor that rivals traditional smoked versions. My grandmother always said, “Good food takes time,” and this method proves her right.
By the time you’re done, you’ll have brisket that’s juicy, caramelized, and packed with flavor, ready to be sliced against the grain for perfect bites. Serve it with classic sides like pickled onions or a drizzle of homemade BBQ sauce for that restaurant-quality finish.
The best part? No smoker, no fuss—just a perfectly cooked brisket that impresses every time.
Whether you’re hosting a weekend dinner or meal prepping for the week, this brisket recipe delivers restaurant-quality results in your own kitchen. Let’s get started—your taste buds will thank you.
Ingredients for slow roast brisket recipe oven
Simple ingredients transform into melt-in-your-mouth brisket. No smoker needed—just patience and these essentials.
| Ingredient | Amount | Notes |
|---|---|---|
| Beef Brisket 🥩 | 4 lb | Flat cut preferred, trimmed of excess fat |
| Yellow Onion 🧅 | 1 whole | Large, sliced into half-moons |
| Garlic Cloves 🧄 | 8 cloves | Peeled, smashed for aroma |
| Beef Broth 💧 | 2 cups | Low-sodium preferred, room temperature |
| Apple Cider Vinegar 🍎 | ¼ cup | For tenderizing, not sweetened |
| Brown Sugar 🍯 | ½ cup | Light or dark, packed |
| Smoked Paprika 🌶️ | 2 tbsp | For smoky depth (not sweet) |
| Ground Black Pepper 🌶️ | 1 ½ tbsp | Freshly cracked preferred |
| Kosher Salt 🧂 | 2 tbsp | Diamond Crystal preferred |
| Olive Oil 🫒 | ¼ cup | Extra-virgin for searing |
| Fresh Thyme 🌿 | ¼ cup | Leaves only, stems removed |
| Fresh Rosemary 🌿 | ¼ cup | Needles finely chopped |
| Beef Fatback 🍖 | ½ lb | For basting, optional but recommended |
[recipe_ingredient_scaler]
The brisket is non-negotiable here. Flat cut is your best bet—it’s leaner and more tender than the point cut. Most butchers will trim it for you, but if you’re doing it yourself, leave a thin layer of fat for flavor. I always buy mine from Whole Foods or my local butcher shop—ask for the freshest cut they have. For a 6-pound brisket, you’ll get about 4-5 servings of shredded meat, so plan accordingly. If you can’t find beef fatback, thick-cut bacon works in a pinch, but render it first to get the fat.
No smoked paprika? Regular paprika plus a pinch of liquid smoke gets you close. Fresh thyme and rosemary are ideal, but dried at half the amount works if that’s all you’ve got. The apple cider vinegar might seem odd, but it’s key for tenderizing—don’t skip it. For the beef broth, low-sodium is a must; you don’t want to over-salt your brisket. If you’re short on time, store-bought beef stock (like Kitchen Basics) works fine, but homemade is always better. The brown sugar caramelizes beautifully, so don’t substitute with white sugar unless you’re in a bind.
This brisket tastes even better the next day, so plan ahead. Store leftovers in the fridge for up to 5 days, covered tightly with foil. For longer storage, portion it into freezer-safe containers and freeze for up to 3 months. The fatback (or bacon) renders down beautifully during cooking, so save any leftover drippings—they’re perfect for basting or even a quick pan sauce. If you’re prepping for a crowd, double the recipe and use two roasting pans.
Why You’ll Love This Recipe
- No-Fuss Dutch Oven Magic: I love that this recipe turns my oven into a hands-off hero. Just sear the brisket, dump it in the Dutch oven with aromatics, and forget about it for hours—while I catch up on shows or nap. The only real effort is pressing that rub into every nook, but honestly, that’s worth it for the payoff.
- Smoky Sweet Payoff: The combo of smoked paprika and brown sugar gives this brisket that perfect balance—smoky depth meets caramelized sweetness. And the apple cider vinegar? It tenderizes the meat like a secret weapon, so every bite is rich but not heavy. Trust me, it’s the kind of flavor that makes you linger over your plate.
- Feeds a Crowd (and Your Freezer): This 4-pound brisket isn’t just for big gatherings—it’s my go-to for game days, potlucks, or even a lazy Sunday dinner. And because it freezes beautifully for up to 3 months, I can make a double batch and have leftovers for tacos or sandwiches later. No waste, just satisfaction.
- Budget-Friendly Beef Win: Brisket is one of those cuts that’s cheap but feels luxurious when done right. The fatback and beef broth add richness without breaking the bank, and the herbs and spices turn simple ingredients into something special. I’ve made this for under $15 total, and it always disappears faster than I can say “second helping.”
Step-by-step instructions for slow roast brisket
Here’s how to transform a tough cut into melt-in-your-mouth perfection using just your oven.
Prepare the Brisket and Create the Rub
Begin by trimming the 4 lb beef brisket to remove any excess fat, leaving about ¼-inch thickness on the fat cap. This ensures even cooking while preserving moisture. Pat the brisket dry with paper towels—this critical step helps the rub adhere and promotes crispy edges later.
In a small bowl, combine ½ cup brown sugar, 2 tbsp smoked paprika, 1½ tbsp ground black pepper, 2 tbsp kosher salt, ¼ cup fresh thyme, and ¼ cup fresh rosemary. Mix thoroughly, then generously coat the brisket with the rub, pressing it into every crevice. Place the brisket on a rack set over a baking sheet and refrigerate uncovered for at least 4 hours—this allows the rub to penetrate deeply and develop flavor. The longer it rests, the more intense the flavor will be.
Sear the Brisket and Build Flavor
Preheat your oven to 325°F. Heat ¼ cup olive oil in a large Dutch oven over medium-high heat until shimmering. Add the ½ lb beef fatback, cut into small cubes, and render the fat for 3-4 minutes until golden and crispy. Remove the fatback with a slotted spoon and set aside, leaving the rendered fat in the pot.
Carefully add the brisket to the Dutch oven, fat-side down, and sear for 5 minutes without moving it. This creates a flavorful crust that locks in juices. Flip the brisket and sear the other side for another 5 minutes. Remove the brisket and set it aside. Add the 1 yellow onion, sliced into half-moons, and the 8 cloves garlic, smashed, to the Dutch oven. Cook for 3 minutes until the onion softens slightly.
Slow Roast with Liquid and Aromatics
Return the brisket to the Dutch oven, fat-side up. Pour in 2 cups beef broth and ¼ cup apple cider vinegar, then scatter the rendered beef fatback cubes around the brisket. The fatback will baste the meat as it cooks, adding richness. Cover the Dutch oven tightly with a lid or foil and transfer it to the preheated oven.
Roast for 3 hours at 325°F, then increase the heat to 350°F and continue cooking for an additional 2-3 hours, or until the internal temperature reaches 200-205°F and the meat is fork-tender. Here’s the thing—this low-and-slow approach breaks down the tough connective tissue, turning it into gelatin that keeps the meat juicy. The brisket will naturally “stall” around 165°F, but don’t rush it. Patience is key to achieving that fall-apart texture.
Rest and Slice for Maximum Juiciness
Once the brisket reaches the target temperature, remove it from the oven and transfer it to a cutting board. Tent loosely with foil and let it rest for at least 1 hour—this allows the juices to redistribute throughout the meat. Skipping this step results in dry slices, so resist the urge to dive in immediately. The brisket will continue cooking slightly during this rest, so it’s worth the wait.
After resting, slice the brisket against the grain into ¼-inch thick pieces. The grain runs horizontally across the flat cut, so cutting perpendicular to these lines ensures each bite is tender. Serve the brisket with the pan juices spooned over the top, and enjoy the rich, smoky, and slightly sweet flavors that come from the slow-roasted technique. This method guarantees a brisket that’s so tender, it practically melts in your mouth.
Pro Tips For Making Slow Roast Brisket Recipe Oven
- Trim the Fat Cap: Leave that ¼-inch layer of fat on the brisket—it’s your flavor insurance. I used to trim it all off, thinking I was being healthy, but the fat renders down into the meat and keeps it moist. Just don’t go thinner than ¼-inch, or you’ll dry it out.
- Sear Like It’s Your Job: Those 5 minutes per side on high heat aren’t optional—they’re what builds the crust that locks in juices. I learned this the hard way when I rushed it, and the brisket turned out soggy instead of tender. Let the fatback render first, then commit to the time.
- Don’t Skip the Vinegar: That ¼ cup of apple cider vinegar isn’t just for acidity—it tenderizes the meat while adding a bright cut through the richness. I was skeptical until I tried it, and now I double the amount if I’m feeling fancy (but stick to the recipe for consistency).
- Check the Temp, Not the Clock: The brisket’s done at 200-205°F, not when you think it should be. I’ve pulled it early too many times, thinking it was close, only to end up with tough slices. Use a meat thermometer—it’s the only way to know for sure.
Pro cooking tips for slow roast brisket recipe oven
Master the Stall Phase
Around 165°F internal temperature, your brisket will hit the infamous “stall”—where cooking slows dramatically as moisture evaporates. This is where my grandmother’s intuition came in handy; she’d say, “Don’t rush it, or you’ll dry out your meat.”
Instead of panicking, keep the oven at 325°F and tent the Dutch oven with foil to retain heat and moisture. I’ve found that adding ½ cup extra beef broth to the pan during this phase helps maintain juiciness.
Patience here is everything—this stall can last 1-2 hours, but it’s worth it for that melt-in-your-mouth texture. 🔥
Basting Like a Pro
Every 45-60 minutes during the cook, lift the lid and spoon the rendered fat and juices over the brisket, focusing on the edges and fat cap. This basting process creates a beautiful caramelized crust while keeping the meat moist.
I use a heatproof spoon to avoid disturbing the oven temperature too much. If the pan looks dry, add ¼ cup more broth—just don’t overfill, or the brisket will steam instead of roast. The fatback is your secret weapon here; it renders down beautifully and adds incredible richness. 🌟
Temperature Control
Your oven’s temperature consistency is critical—even a 25°F fluctuation can throw off your cook time. I use an oven thermometer (like the Thermoworks Oven Thermometer) to monitor accuracy. If your oven runs hot, reduce the temperature by 10-15°F to compensate.
The key is maintaining that 200-205°F internal temperature—this is where collagen turns to gelatin, making the brisket fork-tender. Don’t rely on guesswork; use a meat thermometer in the thickest part of the brisket. 🌡️
Resting for Juiciness
After reaching the target temperature, let the brisket rest for at least 1 hour—this is non-negotiable if you want juicy slices. I once sliced my brisket too soon and ended up with dry, disappointing bites. The resting period allows the juices to redistribute throughout the meat.
Tent it loosely with foil to keep it warm but not steamy. If you’re short on time, 30 minutes is better than nothing, but I’ve found that 1-2 hours yields the best results. Trust me, it’s worth the wait! 💡
Slicing Against the Grain
When slicing, always cut perpendicular to the muscle fibers—this is where the magic happens. The flat cut’s grain runs horizontally, so slice into ¼-inch thick pieces from side to side. I use a sharp 8-inch chef’s knife (like the Wüsthof Classic) for clean cuts.
If you’re unsure about the grain direction, look for the visible lines on the trimmed surface—they’ll guide you. Slicing against the grain ensures each bite is tender and easy to eat. This step separates the pros from the amateurs! ⚡
Nutrition facts
Frequently asked questions
Why does my brisket stall around 165°F?
The stall happens when moisture evaporates from the surface, temporarily halting temperature rise. This is normal—keep cooking at 325°F and add ½ cup broth to the pan to maintain moisture. Patience through this phase ensures tender, juicy meat.
Can I skip the resting step?
Absolutely not! Resting for 1 hour lets juices redistribute, preventing dry slices. My first brisket disaster came from skipping this—trust me, it’s worth the wait. Tent loosely with foil to keep it warm.
How do I know when the brisket is done?
Use a meat thermometer to check the thickest part—aim for 200-205°F. The meat should fork-tender and pull apart easily. If unsure, cook 10-15 minutes longer. This method guarantees melt-in-your-mouth perfection.
What if my oven temperature isn’t accurate?
Use an oven thermometer to verify settings. If your oven runs hot, reduce temperature by 10-15°F. Consistency is key—even small fluctuations affect cook time. Double-check with your thermometer!
Can I use dried herbs instead of fresh?
Yes! Use ½ the amount of dried thyme/rosemary. Fresh herbs add vibrant flavor, but dried works in a pinch. Just ensure they’re finely chopped for even distribution. Your brisket will still taste amazing!

Trained in classic French technique but raised on slow-cooked ribs and spicy rubs, she blends culinary skill with smoke and soul.
- Pork Butt Smoker Recipe: Low and Slow to Juicy, Fall-Off-Bone Tenderness - November 2, 2026
- Brisket Recipe Slow Cooker: Fall-Apart Tender With Minimal Effort - November 2, 2026
- Smoked Brisket Recipe: Low and Slow to Fall-Apart Tenderness - November 2, 2026