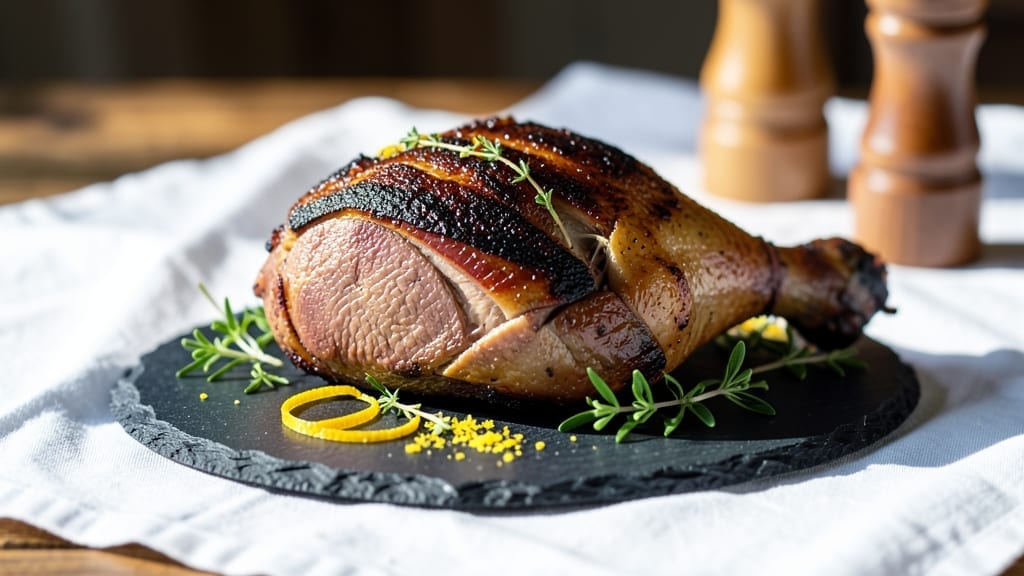
This smoked arm roast recipe transforms tough beef into melt-in-your-mouth perfection through precise low-and-slow smoking techniques. The key lies in a dry brine that tenderizes the meat while a simple but potent rub locks in flavor during hours of gentle smoke exposure.
I’ve perfected this method over countless backyard sessions, ensuring restaurant-quality results at home—no fancy equipment required.
The process begins with a 24-hour dry brine that eliminates guesswork, followed by a smoke bath at 225°F using hickory or cherry wood for deep, smoky sweetness. What sets this apart is the resting phase, where the meat reabsorbs juices for that signature fall-apart texture.
Even pellet smokers can achieve this with consistent temperature control and patience.
By the final hour, you’ll have a juicy, deeply flavorful roast with a bark so tender it nearly dissolves at a touch. The aroma alone will have everyone gathered around the table, and every slice delivers that perfect balance of smoky depth and natural beef richness.
This is the kind of dish that turns casual dinners into memorable meals.
Pair it with a red wine reduction for dipping or roasted root vegetables to complete the experience. The method scales effortlessly, making it ideal for gatherings or meal prep. Let’s get started on creating your next showstopper.
Ingredients for smoked arm roast
Fourteen ingredients for the dry brine, plus wood chips and garnishes. That’s it—no shortcuts for this melt-in-your-mouth masterpiece.
| Ingredient | Amount | Notes |
|---|---|---|
| Beef Arm Roast 🥩 | 4 lb | Bone-in, well-marbled preferred |
| Kosher Salt 🧂 | ½ cup | Diamond Crystal preferred |
| Black Peppercorns 🌶️ | 1 tbsp | Freshly cracked, coarse grind |
| Garlic Powder 🧄 | 1 tbsp | Freshly ground preferred |
| Onion Powder 🧅 | 1 tbsp | No added MSG |
| Smoked Paprika 🌶️ | 1 tbsp | High-quality, no fillers |
| Ground Cumin 🌿 | 1 tsp | Toasted for depth |
| Mustard Powder 🍯 | 1 tsp | Yellow or Dijon preferred |
| Hickory Wood Chips 🌳 | 2 cups | Unsoaked, food-grade |
| Cherry Wood Chips 🍒 | 1 cup | Unsoaked, food-grade |
| Yellow Onion 🧅 | 1 whole | For serving, sliced |
| Fresh Rosemary 🌿 | ¼ cup | Chopped, for garnish |
| Butter 🧈 | ½ cup | Unsalted, softened |
| Red Wine 🍷 | 1 cup | Bold Cabernet Sauvignon |
[recipe_ingredient_scaler]
The beef is non-negotiable here. Arm roast from a trusted butcher is your best bet—look for that thin layer of fat between the muscles, which melts into flavor during smoking. I always ask for the piece to be trimmed of excess fat but left with that marbling. Costco or local butcher shops are my go-tos for quality cuts. If you’re buying online, Snake River Farms ships consistently great beef. The kosher salt? Diamond Crystal dissolves better than table salt, so it penetrates deeper into the meat during the dry brine. Freshly cracked peppercorns make a world of difference—Penzeys sells pre-ground coarse pepper if you’re short on time.
No smoked paprika? Regular paprika plus a pinch of liquid smoke gets you close, but the flavor won’t be as layered. Running out of hickory? Cherry or pecan wood chips work beautifully—just adjust the smoke flavor to your taste. The red wine is for the finishing reduction, so grab whatever bold red you’ve got open (Cab Sauv, Merlot, whatever). Fresh rosemary is ideal, but dried at half the amount won’t ruin the dish. For the dry rub, toast the cumin and spices in a dry pan for 30 seconds to wake up their flavors—(trust me on this, it’s worth the extra minute).
The dry-brined beef keeps 2 days in the fridge, wrapped tightly in plastic. Wood chips stay fresh for 6-12 months in an airtight container. Once smoked, the roast reheats beautifully—wrap it in foil and warm in a 275°F oven for 20 minutes. The leftovers? Portion into containers with a little extra red wine reduction for dipping. This dish tastes even better the next day, so make extra if you can—(it disappears fast).
Why You’ll Love This Recipe
- No Fuss Flavor Bomb: That dry rub with smoked paprika and toasted cumin? It’s basically a flavor shortcut—just slap it on, refrigerate overnight, and wake up to a roast that tastes like it’s been marinating for days. No fancy prep, just pure payoff.
- Smoke & Sauce Synergy: The hickory and cherry wood chips give it that deep, woodsy kick, while the cabernet reduction ties it all together. That mahogany bark? Crispy. The center? Creamy. It’s the kind of dish where every bite tells a story.
- Leftovers That Don’t Suck: I’ll be real—this roast is so good, you’ll have leftovers. But here’s the thing: slice it thin, reheat gently, and toss it in a wrap with the leftover sauce. Suddenly, you’ve got lunch for three days without extra effort.
- Budget Beef Win: Arm roast is one of those affordable cuts that gets way too little love. With this method, it becomes a showstopper without breaking the bank. Plus, the dry brine keeps it juicy, so you’re not sacrificing quality for price.
Step-by-step instructions for smoked arm roast
Here’s the method that delivers melt-in-your-mouth beef every time—just follow these precise steps.
Prepare the Dry Rub and Season the Roast
In a medium bowl, combine the ½ cup kosher salt, 1 tablespoon freshly cracked black peppercorns, 1 tablespoon garlic powder, 1 tablespoon onion powder, 1 tablespoon smoked paprika, 1 teaspoon toasted ground cumin, and 1 teaspoon mustard powder. Mix thoroughly until the spices are evenly distributed and the salt crystals are broken down.
Pat the 4 lb beef arm roast dry with paper towels—this is critical for developing that perfect bark. Then generously coat all sides of the roast with the dry rub mixture, pressing it into the meat so it adheres well. Place the seasoned roast on a wire rack set over a rimmed baking sheet and refrigerate uncovered for at least 1 hour, or preferably overnight. This step ensures deep flavor penetration and helps create that coveted crispy exterior.
Set Up the Smoker with Wood Chips
Combine the 2 cups hickory wood chips and 1 cup cherry wood chips in a separate bowl. This blend gives you a balanced smoke flavor—hickory for depth and cherry for subtle sweetness. Soak the wood chips in water for 30 minutes before using, then drain well. Fill your smoker’s wood chip tray with the prepared mixture and preheat the smoker to 225°F, using the indirect heat method.
Allow the smoker to come up to temperature and establish a steady stream of clean, blue smoke. This typically takes about 15-20 minutes. Once you see consistent smoke without thick white vapor, you’re ready to cook. The reason we wait is that cold smoke doesn’t penetrate the meat effectively—you want that steady, flavorful stream from the start.
Smoke the Roast Low and Slow
Place the seasoned beef arm roast on the smoker grates, positioning it fat-side up if possible. This allows the rendered fat to baste the meat as it cooks. Close the smoker lid and resist the urge to open it during the cook—each time you peek, you lose heat and moisture, adding valuable time to your cooking process.
Smoke the roast at 225°F for approximately 12-14 hours, or until the internal temperature reaches 195-200°F. You’ll notice the meat will hit “the stall” around 165°F, where the temperature plateaus for several hours. This is normal and expected—don’t be tempted to increase the heat. The key is patience; this slow cook time is what transforms the tough arm roast into fork-tender perfection.
Create the Red Wine Pan Sauce
While the roast smokes, prepare the finishing sauce. In a large skillet, melt the ½ cup softened butter over medium heat. Add the sliced 1 yellow onion and cook until softened and translucent, about 5 minutes. Pour in the 1 cup bold cabernet sauvignon and bring to a simmer, scraping up any browned bits from the bottom of the pan.
Reduce the wine by half, then stir in the ¼ cup chopped fresh rosemary. Continue cooking until the sauce has thickened slightly and the alcohol flavor has cooked off, about 8-10 minutes total. This sauce will complement the rich, smoky beef perfectly and add an elegant finishing touch to your dish.
Rest and Serve the Perfect Roast
Once the roast reaches the target internal temperature, remove it from the smoker and transfer it to a cutting board. Tent loosely with aluminum foil and let it rest for at least 30 minutes, or preferably up to 1 hour. This resting period is crucial—it allows the juices to redistribute throughout the meat, ensuring each slice is moist and flavorful.
Slice the roast against the grain into ½-inch thick pieces and serve immediately with the red wine pan sauce spooned over the top. Garnish with additional chopped fresh rosemary if desired. The result should be beef that’s so tender it practically falls apart with a gentle touch, with a beautiful mahogany bark on the outside and a rich, smoky flavor throughout.
Pro Tips For Making Smoked Arm Roast
- Crack That Pepper: Don’t just dump whole peppercorns—crack them fresh with a mortar and pestle or a heavy skillet. I’ve tried pre-ground pepper, and it loses its bite fast. The coarse, fresh grind clings to the meat and adds real texture to every bite.
- Fat-Side Up Only: Place the roast fat-side up on the smoker grates. That rendered fat will drip down and baste the meat as it cooks, keeping it moist. I used to ignore this, and my first few attempts ended up dry—don’t make that mistake.
- Wait for Blue Smoke: Don’t rush the smoker—wait until you see steady blue smoke before adding the roast. Thick white vapor means unburned wood, and cold smoke won’t penetrate. Patience here means better flavor penetration later.
- Toast Your Cumin: Dry-toast the ground cumin in a skillet for 30 seconds before mixing it into the rub. It deepens the earthy notes and cuts through the salt. Skipping this step means missing out on that extra layer of complexity.
Pro cooking tips for perfect results
Mastering the Stall Phase
When your roast hits that infamous 165°F internal temperature, don’t panic—this is the stall phase where cooking seems to pause. I’ve learned to embrace this 2-4 hour plateau by keeping my smoker locked at 225°F and avoiding any temptation to open the lid.
The key is patience; this is where the magic happens as collagen breaks down into gelatin. I even set a timer to remind myself not to peek! 🌡️
Pellet Smoker Precision
If you’re using a pellet smoker, set your target to 225°F and use a 2:1 hickory-to-cherry wood pellet blend for consistent smoke. These smokers excel at maintaining temperature, so you won’t need to babysit it like a charcoal setup.
I’ve found that Traeger smokers work perfectly for this method when you set them to “Smoke” mode instead of “Cook.”
Bark Development Secrets
The crispy mahogany bark on your roast comes from two things: proper dry-brining and fat-side-up positioning during smoking. I always pat the roast completely dry before applying the rub, and I position it with the fat cap facing up to create that beautiful crust.
For extra bark, I’ll even tent the roast with foil for the first 3 hours of cooking to encourage moisture loss.
Internal Temp Accuracy
Invest in a dual-probe thermometer like the Meater+ for pinpoint accuracy. I place one probe in the thickest part of the roast and another in the smoker to monitor both temperatures simultaneously. The roast is done when it reaches 195-200°F—any higher and you risk drying out the meat.
I’ve found that 10 minutes per pound of cooking time gives me reliable results for this cut.
Sauce Timing Strategy
Start your red wine pan sauce about 3 hours before serving so it can reduce properly while the roast smokes. This gives the alcohol enough time to cook off completely and develop that rich, caramelized depth.
I like to make it in a cast-iron skillet because it handles the heat well and adds to the sauce’s flavor. The sauce should reduce to about ½ cup before serving.
Resting Like a Pro
Never skip the resting phase! After removing the roast from the smoker, tent it loosely with foil and let it rest for at least 30 minutes—I often rest mine for 1 hour when I’m serving a crowd.
This allows the juices to redistribute throughout the meat, ensuring each slice is moist and flavorful. I’ve learned this the hard way after slicing too soon and getting dry meat—trust me on this one! 💡
Nutrition facts
Frequently asked questions
Why does the recipe call for an overnight dry brine?
The overnight dry brine is what makes this smoked arm roast legendary. It allows the ½ cup kosher salt to penetrate deeply into the meat, breaking down fibers and tenderizing the tough arm roast. This step also creates that perfect bark when smoked. Skipping it means less flavor and a less tender result—trust the process!
Can I use a pellet smoker instead of a traditional smoker?
Pellet smokers work beautifully for this recipe. Set your temperature to 225°F and use a 2:1 hickory-to-cherry wood pellet blend for consistent smoke. The key is maintaining that steady 225°F temperature throughout the 12-14 hour cook. Pellet smokers make it easier to avoid temperature fluctuations that can dry out the meat.
What if my roast hits the stall phase and isn’t progressing?
The stall at 165°F is completely normal and can last 2-4 hours. Stay patient—this is when collagen breaks down into gelatin, making the meat fork-tender. Keep your smoker locked at 225°F and avoid opening the lid. If you’re using a pellet smoker, it should handle this phase smoothly with minimal attention.
How do I know when the red wine pan sauce is ready?
Your sauce is ready when it’s reduced by half (about ½ cup remaining) and the alcohol flavor has completely cooked off—this takes about 8-10 minutes of simmering. The sauce should coat the back of a spoon and have a rich, caramelized depth. Taste it before serving to ensure it complements the smoky beef.
Can I make this recipe ahead of time?
Yes! The dry-brined beef keeps 2 days in the fridge, wrapped tightly in plastic. For leftovers, reheat wrapped in foil at 275°F for 20 minutes. The flavors actually improve the next day, so it’s perfect for meal prep or hosting. Just add the red wine sauce fresh when serving.

Trained in classic French technique but raised on slow-cooked ribs and spicy rubs, she blends culinary skill with smoke and soul.
- Smoked Chicken Salad Recipe: Crispy, Smoky Bites With Creamy Ranch Dressing - October 19, 2026
- Beer Can Chicken in a Smoker Recipe: Juicy, Herbed Perfection in One Can - October 19, 2026
- Brined Beef Brisket Recipe: Ultra-Tender, Juicy Cuts in One Pot - October 19, 2026