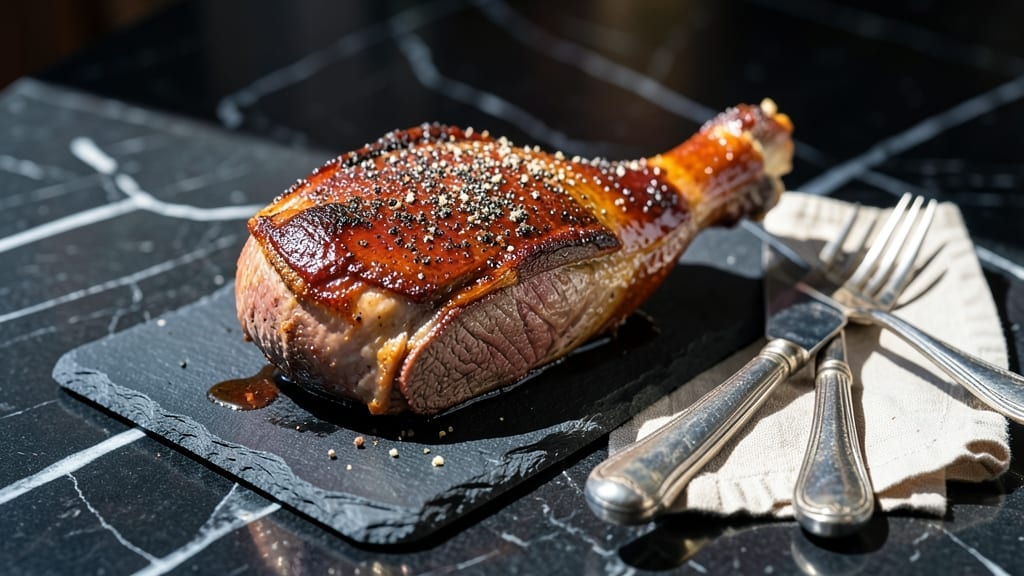
Mastering a smoked beef arm roast transforms tough, lean meat into melt-in-your-mouth perfection through patience and precision. The key lies in low-and-slow smoking—cooking the roast at a steady 225°F until the internal temperature reaches 125°F for medium-rare, then finishing with a reverse sear for a crisp crust.
I first learned this technique from my grandfather, who swore by the method after years of perfecting his backyard pit.
The process begins with a dry rub of coarse salt, black pepper, and smoked paprika, letting the flavors penetrate the meat overnight. Using hickory or cherry wood chips adds depth without overpowering the beef’s natural richness.
The real magic happens during the smoke: maintaining consistent temperature and humidity ensures even cooking, while the final sear locks in juices for that irresistible crust.
What you’ll end up with is a roast so tender it practically falls apart at the touch, with a deep smoky aroma that fills your home. The exterior develops a beautiful mahogany crust while the interior remains juicy and pink throughout.
This is the kind of dish that makes Sunday dinners feel like a celebration—no matter how many people you’re feeding.
Serve with roasted garlic mashed potatoes or caramelized onions for a complete meal. The leftovers reheat beautifully, making this a perfect recipe for meal prep or hosting. Let’s get started on creating your perfect smoked beef arm roast.
Ingredients for smoked beef arm roast
A 5-pound arm roast, a handful of spices, and patience create this legendary smoked beef masterpiece.
| Ingredient | Amount | Notes |
|---|---|---|
| Beef Arm Roast 🥩 | 5 lb | Center-cut, bone-in preferred |
| Coarse Kosher Salt 🧂 | 2 tbsp | For dry rub |
| Black Pepper, Coarsely Ground 🌶️ | 1 ½ tbsp | Freshly ground preferred |
| Smoked Paprika 🌶️ | 1 ½ tbsp | Sweet or medium heat |
| Garlic Powder 🧄 | 1 tbsp | For dry rub |
| Onion Powder 🧅 | 1 tbsp | For dry rub |
| Brown Sugar 🍚 | 1 tbsp | For caramelization |
| Hickory Wood Chips 🌳 | 1 lb | Soaked in water |
| Apple Cider Vinegar 🍎 | ½ cup | For basting |
| Butter 🧈 | ½ cup | Full-fat for richness |
| Fresh Garlic Cloves 🧄 | 4 cloves | For basting |
| Rosemary Sprigs 🌿 | ½ cup | Fresh or dried |
[recipe_ingredient_scaler]
The beef arm roast is your star—center-cut, bone-in gives you the most flavorful meat. Costco or your local butcher will have it prepped for you, but if you’re buying whole, ask for the arm section (it’s the most forgiving cut). Look for good marbling—fat equals flavor. I usually grab mine from Whole Foods since they always have it fresh, but any grocery store with a meat counter works. The wood chips? Hickory is classic, but cherry adds a fruity note if you want something different. Soak them in water for at least 30 minutes before using.
No hickory wood chips? Apple wood chips work great—they add a subtle sweetness that pairs nicely with beef. Short on garlic powder? Fresh garlic cloves in the basting liquid (minced) will do the trick. Want to skip the brown sugar? A splash of Worcestershire sauce in the basting adds depth. For the rosemary, dried works but fresh is better—just halve the amount. If you’re in a rush, pre-soaked wood chips from the store save you time, but homemade soaking gives you more control over the smoke. The apple cider vinegar is non-negotiable—it keeps the meat from drying out and adds a tangy brightness.
This roast is all about patience—smoke it low and slow for 4-5 hours, then rest for at least an hour before slicing. The wood chips keep for up to 6 months in an airtight container, but once soaked, use them within 24 hours. Store the dry rub ingredients in sealed jars away from light for up to 1 year. The roast itself? Reheats beautifully—just wrap it in foil and warm in the oven at 200°F for 20 minutes. I always make extra because leftovers make the best sandwiches the next day.
Why You’ll Love This Recipe
- Let’s be real: a 5 lb beef arm roast is cheaper than you’d think, especially when you’re feeding a whole family. The dry rub costs pennies, and the hickory wood chips last forever if stored properly. Wrap it in foil with rosemary, and you’ve got a restaurant-quality dish without the restaurant price tag. Plus, it’s the kind of meal that makes people stop mid-conversation and ask, “What’d you make?”—because it’s that good.
- No-Fuss Smoking: This isn’t a project—it’s a set-it-and-forget-it. Just slap on that dry rub with 2 tbsp coarse kosher salt, 1.5 tbsp smoked paprika, and 1 tbsp brown sugar (trust me, the sugar caramelizes into a gorgeous crust), let it sit 30 minutes, then fire up the smoker at 225°F with soaked hickory wood chips. Baste every 45 minutes with butter and apple cider vinegar—seriously, that’s it. Even my least patient roommate could handle this.
- Smoky-Sweet Perfection: The garlic powder and onion powder in that rub? They’re the secret handshake. Then you add fresh rosemary sprigs during the wrap phase, and suddenly you’ve got that perfect balance of smoky, sweet, and herby. The apple cider vinegar in the basting keeps it from getting too rich, while the full-fat butter makes it melt-in-your-mouth luxurious. It’s like a hug for your taste buds.
- Budget-Friendly Luxe: Let’s be real: a 5 lb beef arm roast is cheaper than you’d think, especially when you’re feeding a whole family. The dry rub costs pennies, and the hickory wood chips last forever if stored properly. Wrap it in foil with rosemary, and you’ve got a restaurant-quality dish without the restaurant price tag. Plus, it’s the kind of meal that makes people stop mid-conversation and ask, “What’d you make?”—because it’s that good.
Step-by-step instructions for smoked beef arm roast
Here’s how to transform a simple beef arm roast into a fall-off-the-bone masterpiece.
Prepare the Dry Rub and Season the Roast
In a small bowl, combine the 2 tablespoons coarse kosher salt, 1½ tablespoons black pepper, 1½ tablespoons smoked paprika, 1 tablespoon garlic powder, 1 tablespoon onion powder, and 1 tablespoon brown sugar. Mix thoroughly until evenly distributed—this is your dry rub. The brown sugar will help create a beautiful caramelized crust while the spices penetrate the meat.
Pat the 5 lb beef arm roast dry with paper towels, removing any moisture from the surface. This step is crucial—wet surfaces prevent the rub from sticking properly. Using your hands, press the dry rub firmly into every inch of the roast, including the cavity if your cut includes one. Let it sit at room temperature for 30 minutes before smoking. This resting period allows the rub to adhere better and ensures even cooking from edge to center.
Set Up the Smoker and Prepare the Wood Chips
Soak the 1 lb hickory wood chips in water for at least 30 minutes before using. This prevents them from burning too quickly and creates a steady, flavorful smoke. Fill your smoker’s wood chip tray with the soaked wood chips and preheat the smoker to 225°F. You’ll know it’s ready when you see thin, blue smoke—this indicates proper combustion without excess heat.
While the smoker heats up, prepare a small bowl for basting. In it, combine the ½ cup apple cider vinegar and ½ cup butter. The vinegar adds brightness and helps tenderize the meat, while the butter contributes rich, velvety flavor. Keep this mixture nearby—you’ll use it to baste the roast during smoking. Once the smoker reaches temperature, place the beef arm roast on the grill grates, fat-side up, and close the lid. Resist the urge to peek—every time you open it, you lose heat and extend cooking time.
Smoke the Roast Low and Slow
Smoke the beef arm roast for 4-5 hours, maintaining a consistent temperature of 225°F. During this time, baste the roast every 45 minutes with the apple cider vinegar and butter mixture. Use a basting brush or spoon to coat all sides evenly. The vinegar and butter will create a glossy, flavorful crust while keeping the meat moist. You’ll notice the roast developing a deep mahogany bark—this is your signal that the Maillard reaction is working its magic, creating those complex, smoky flavors.
Here’s where patience pays off: the internal temperature should reach 195-203°F by the end of this stage. Use a meat thermometer to check the thickest part of the roast, avoiding the bone. The meat should be fork-tender, with just a slight resistance when pierced. If the smoker temperature fluctuates, adjust the vents to maintain that steady 225°F. The goal is slow, even cooking that transforms tough connective tissue into melt-in-your-mouth tenderness.
Wrap and Finish for Maximum Juiciness
Once the internal temperature hits 195°F, it’s time to wrap the roast. This technique, known as the “Texas crutch,” helps break down collagen and ensures a juicy, tender result. Line a large piece of heavy-duty aluminum foil with ½ cup rosemary sprigs (lightly crushed to release their aroma). Place the roast on the foil, then fold the foil tightly around it, sealing all edges completely. Return the wrapped roast to the smoker and continue cooking until the internal temperature reaches 203°F, which should take another 1-2 hours.
The rosemary sprigs infuse the roast with their piney, herbal notes while the wrap traps steam, keeping the meat moist. During this final stage, the connective tissue fully breaks down, resulting in that signature beef arm roast tenderness. Avoid the temptation to overcook—once it hits 203°F, remove it from the smoker immediately. Overcooking can turn tender meat into dry, stringy disappointment, and we’re aiming for juicy perfection.
Rest and Slice for Serving
Transfer the wrapped roast to a cutting board and let it rest for 30-45 minutes before slicing. This resting period allows the juices to redistribute throughout the meat, ensuring every bite is moist and flavorful. While it rests, tent the foil loosely with another piece of foil to keep it warm. The temperature will rise slightly during resting—this is normal and desirable, as it carries over from the residual heat in the meat.
When ready to serve, slice the beef arm roast against the grain into ¼-inch thick slices. The grain runs lengthwise along the roast, so cutting perpendicular to it shortens the muscle fibers, making each bite more tender. Serve immediately with any accumulated juices from the foil—these are packed with flavor and will elevate your dish. The final result should be a beautifully browned, smoky roast with a crisp exterior and a juicy, melt-in-your-mouth interior that falls apart with just a touch.
Pro Tips For Making Smoked Beef Arm Roast
- Preheat Smarter: Your smoker should hit 225°F with thin blue smoke before the roast goes in—any thicker smoke means the wood chips are burning too hot, and that’ll dry out your meat faster. I learned this the hard way after my first batch came out tough; now I wait until I see that steady, pale smoke before committing.
- Press the Rub Hard: Don’t just sprinkle that dry rub—dig your fingers into the beef and work it into every crevice, especially the bone side if it’s bone-in. The brown sugar needs direct contact to caramelize properly, and the spices won’t penetrate if you’re half-hearted. I used to skip this, and my bark was always patchy.
- Baste Like It Matters: That apple cider vinegar-butter mix isn’t just for flavor—it’s the difference between a dry roast and one that’s glistening and juicy. Every 45 minutes, coat it generously, even the sides. I once rushed this step and ended up with a roast that looked smoked but tasted like it had seen better days.
- Wrap Tight, No Shortcuts: When you hit 195°F and wrap that roast, make the foil airtight—no gaps, no lazy folds. The rosemary sprigs should be crushed just enough to release aroma, not pulverized into dust. I once left a tiny opening, and the steam escaped, leaving me with meat that was tender but not melt-in-your-mouth perfect.
Storing and reheating your smoked beef arm roast
Refrigerator Storage
Once your smoked beef arm roast cools to room temperature, transfer it to an airtight container—I use glass Pyrex containers with tight-sealing lids. Store it in the refrigerator for up to 4 days at 40°F or below.
The flavors deepen overnight as the spices meld together, making it even more delicious the next day. I always save the juices from the foil for extra moisture. ❄️
Freezer Storage
For longer storage, wrap the roast tightly in heavy-duty aluminum foil and place it in a freezer-safe bag. It keeps well for up to 3 months without losing quality.
I like to slice it first before freezing—this makes reheating easier. Just remove any excess air from the bag to prevent freezer burn.
Oven Reheating
This is my preferred method because it maintains the best texture. Preheat your oven to 200°F and place the roast (still wrapped in foil) on a baking sheet.
Reheat for 20-30 minutes, depending on how thick the slices are. For extra crispiness, uncover the foil for the last 5 minutes.
Skillet Reheating
For a quick lunch, heat a cast-iron skillet over medium-low heat and add a splash of beef broth to prevent sticking. Place the roast slices in the skillet, cover, and cook for 5-7 minutes until warmed through. This method works best with thinner slices.
Microwave Reheating
If you’re in a hurry, microwave individual portions covered with a damp paper towel. Heat on 50% power for 2-3 minutes, then let it sit for 1 minute before eating. Add a splash of water if it looks dry. This method is quick but sacrifices some texture.
Nutrition facts
Frequently asked questions
Why does the beef arm roast need to rest before slicing?
Resting is critical—it lets the juices redistribute evenly throughout the meat after smoking. If you slice too soon, all those delicious fluids will spill out, leaving you with dry slices instead of tender, melt-in-your-mouth perfection. 30-45 minutes at room temperature ensures every bite stays juicy, just like your pitmaster taught you.
Can I use a different type of wood for smoking?
While hickory is classic, cherry adds a fruity sweetness or apple wood brings a milder, slightly tangy note. Just soak the chips for 30 minutes before smoking to avoid burning. The key is consistency—stick to one wood type for balanced flavor.
What if my smoker temperature fluctuates during cooking?
Adjust the vents to maintain that steady 225°F—open vents for more heat, close them to reduce it. Fluctuations can lead to uneven cooking or dry spots. If your smoker struggles, add a water pan to stabilize humidity. Patience is key—consistency turns tough cuts into fall-apart tenderness.
How do I know when the roast is done?
Use a meat thermometer to check the thickest part (avoid the bone). Aim for 195-203°F—this range breaks down collagen for melt-in-your-mouth texture. The meat should feel fork-tender but still hold its shape. Overcooking ruins the juiciness, so pull it off the heat at the first sign of doneness.
Can I skip wrapping the roast in foil?
Wrapping (the “Texas crutch”) traps steam and speeds up collagen breakdown, but you can skip it for a drier, barkier exterior. If you omit it, smoke until the internal temp hits 203°F and rest extra long—1 hour—to compensate. The crust will be crispier, but the meat may be slightly less juicy.

Trained in classic French technique but raised on slow-cooked ribs and spicy rubs, she blends culinary skill with smoke and soul.
- Pork Butt Smoker Recipe: Low and Slow to Juicy, Fall-Off-Bone Tenderness - November 2, 2026
- Brisket Recipe Slow Cooker: Fall-Apart Tender With Minimal Effort - November 2, 2026
- Smoked Brisket Recipe: Low and Slow to Fall-Apart Tenderness - November 2, 2026