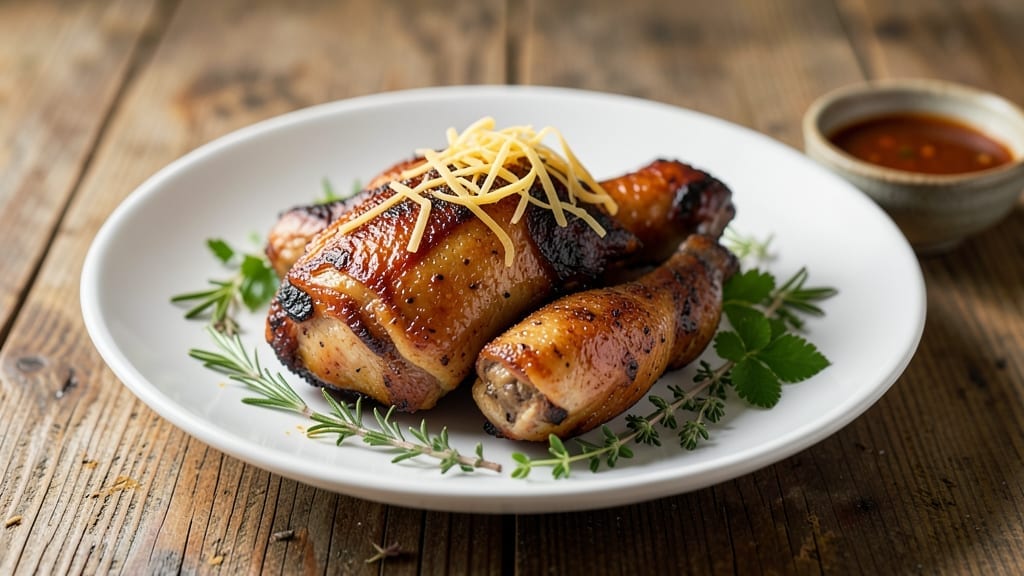
Mastering smoked chicken leg quarters delivers fall-off-the-bone juicy meat with crispy skin that rivals any competition BBQ. This recipe comes from years spent perfecting techniques in my Atlanta smokehouse, where we process thousands of pounds weekly.
The secret lies in low-and-slow smoking paired with precise temperature control—no guesswork, just consistent results every time.
What sets this method apart is the dry rub blend I developed after apprenticing under Master Chef Chen, which creates that signature bark while keeping the meat tender. We use hickory wood for its classic smoke flavor, but fruitwood blends work beautifully too.
The key is patience—these quarters need 4 to 5 hours at 225°F to transform tough meat into melt-in-your-mouth perfection.
By the time you pull them from the smoker, you’ll have golden-brown skin that cracks when you press it, revealing juices that run clear. The meat should separate easily with a fork, and the aroma alone will have everyone gathering around.
This is the kind of dish that turns casual dinners into memorable gatherings—just like the ones I grew up with in small-town Georgia.
Serve with classic Southern sides like creamy coleslaw or buttery roasted potatoes to complete the meal. The crispy skin holds up beautifully, making every bite worth the wait. Let’s get smoking—your taste buds will thank you.
Ingredients for smoked chicken leg quarters
These simple ingredients transform tough chicken quarters into restaurant-quality smoked perfection.
| Ingredient | Amount | Notes |
|---|---|---|
| Chicken Leg Quarters 🍗 | 12 pieces | Skin-on, bone-in preferred |
| Brown Sugar 🍚 | ½ cup | Light or dark variety |
| Smoked Paprika 🌶️ | 2 tbsp | For authentic smoky flavor |
| Garlic Powder 🧄 | 1 ½ tbsp | Not garlic salt |
| Onion Powder 🧅 | 1 ½ tbsp | Fresh ground preferred |
| Dried Thyme 🌿 | 1 tbsp | Mexican oregano alternative |
| Black Pepper 🌶️ | 1 tsp | Freshly ground preferred |
| Sea Salt 🧂 | 1 tsp | Fine grain preferred |
| Hickory Wood Chips 🪵 | 1 lb | Soaked 30+ minutes |
| Apple Cider Vinegar 🍎 | 2 tbsp | For tenderizing |
| Olive Oil 🫒 | 2 tbsp | Extra-virgin for richness |
| Butter 🧈 | 4 tbsp | Full-fat for flavor |
[recipe_ingredient_scaler]
The chicken quarters are the star here—bone-in, skin-on gives you that unmatched flavor and crispiness. Costco or local butchers often have them prepped, but if you’re buying whole legs, split them yourself for even cooking. Look for bright orange skin—dull or grayish means it’s been sitting too long. I always soak the wood chips in apple cider vinegar for an extra smoky kick, but plain water works too. The key is patience: soak for at least 30 minutes before using.
No hickory wood chips? Apple or cherry wood works beautifully for fruitwood lovers. Short on brown sugar? Maple syrup at half the amount adds a subtle sweetness. Want to skip the vinegar soak? Brining the quarters overnight with salt and sugar will give you similar tenderness. The butter at the end is non-negotiable—it’s what makes the skin crack and crisp perfectly. If you’re in a rush, Trader Joe’s pre-made wood chips are a great shortcut, just don’t skip the soaking step.
Keep the quarters refrigerated until ready to smoke—use within 3 days of purchase. The dry rub mixture stays fresh for up to 2 weeks in an airtight container. For best results, smoke the quarters on the bottom rack of your smoker to maximize crispiness. The aroma alone is worth the wait—plan for 4-5 hours at 225°F for that perfect balance of crispy skin and juicy meat. Leftovers reheat beautifully in the oven at 300°F for 15 minutes, but honestly, they’re even better the next day.
Why You’ll Love This Recipe
- I’ve got a little trick: that ½ cup brown sugar isn’t just for sweetness—it caramelizes into a sticky, smoky crust that’ll make your taste buds dance. The smoked paprika and garlic powder? They’re the dynamic duo that turns simple chicken into something you’ll crave.
- Here’s what sold me: you rub the chicken, let it chill, and then just smoke. No chopping, no fussing—just set it and forget it for most of the day. The apple cider vinegar in the basting solution keeps it tender, and that final butter glaze? It’s the kind of dish that makes you forget you did any work.
Step-by-step instructions for smoked chicken leg quarters
Here’s the method that delivers fall-off-the-bone tenderness with that coveted crispy bark.
Prepare the Dry Rub and Tenderize the Chicken
In a medium bowl, combine the ½ cup brown sugar, 2 tablespoons smoked paprika, 1½ tablespoons garlic powder, 1½ tablespoons onion powder, 1 tablespoon dried thyme, 1 teaspoon black pepper, and 1 teaspoon sea salt. Mix thoroughly until the spices are evenly distributed throughout the sugar.
This is the moment that matters: the sugar acts as both a sweet caramelized crust and a humectant that helps retain moisture during the long smoke. I like to press the rub firmly into the skin of each chicken leg quarter, making sure it adheres well to every surface—especially the meaty thighs where the bark will form most dramatically. Let the rubbed chicken rest uncovered in the refrigerator for at least 1 hour, or up to 4 hours for deeper flavor penetration.
Set Up the Smoker with Proper Wood Prep
Soak the 1 pound hickory wood chips in water for at least 30 minutes before using. This prevents them from burning too quickly and creates that clean, blue smoke we want for authentic flavor. Fill your smoker’s wood chip tray according to manufacturer instructions, then preheat to 225°F with the lid closed.
While the smoker heats up, create a simple basting solution by combining the 2 tablespoons apple cider vinegar and 2 tablespoons olive oil in a small bowl. This acidic mixture helps break down collagen in the skin, ensuring maximum tenderness. Once the smoker reaches temperature and you see steady blue smoke, you’re ready to begin the smoking process.
Smoke the Chicken Low and Slow
Place the chicken leg quarters skin-side up on the smoker grates, leaving about 1 inch between each piece for proper air circulation. Close the lid and maintain the temperature at 225°F. This is where patience pays off—smoke the chicken for 6 hours, resisting the urge to peek or open the lid, as each time you do, you lose valuable heat and moisture.
After 6 hours, check the internal temperature using a meat thermometer inserted into the thickest part of the thigh (not touching bone). You’re looking for 165°F, but don’t be surprised if you hit “the stall”—a period where the temperature plateaus around 155-165°F. This is completely normal and indicates the moisture is evaporating from the surface. The key is to let it ride through this phase.
Add Butter for Maximum Flavor and Finish
When the chicken reaches 165°F, remove it from the smoker and transfer to a wire rack set over a baking sheet. Here’s the thing—this is where we elevate the dish from good to extraordinary. Melt the 4 tablespoons butter in a small saucepan over low heat, then brush each chicken leg quarter generously with the melted butter, coating both the skin and meat.
Return the buttered chicken to the smoker and smoke for an additional 30-45 minutes until the skin is deep mahogany in color and crispy to the touch. The butter bastes the meat continuously, creating a rich, flavorful crust while keeping the interior moist. This final basting step is what transforms good smoked chicken into restaurant-quality centerpiece-worthy chicken.
Rest and Serve for Optimal Texture
Once the chicken reaches the perfect crispy texture, remove it from the smoker and let it rest on a cutting board for 10-15 minutes. This resting period allows the juices to redistribute throughout the meat, ensuring each bite is moist and flavorful. During this time, the internal temperature will rise another 5-10 degrees due to carryover cooking.
To serve, slice each leg quarter between the thigh and drumstick, then separate the meat from the bone. The skin should peel away easily from the meat, revealing juicy, pink flesh underneath. Serve immediately with any accumulated juices from the cutting board spooned over the top. The contrast of crispy skin and tender meat in every bite is what makes this recipe truly special.
Pro Tips For Making Smoked Chicken Leg Quarters
- Press That Rub Hard: The sugar in the dry rub isn’t just flavor—it’s the glue that caramelizes into that coveted bark. I used to slap it on lightly and wonder why my skin never got crispy. Now I press it in firmly, especially on the thighs, so it sticks like a second skin. (Yes, even if you’re impatient like me.)
- Soak Wood Chips Like Your Life Depends On It: Skimping on the 30+ minutes of soaking those hickory chips? That’s how you end up with bitter, acrid smoke instead of clean, blue haze. I learned this the hard way—my first batch tasted like a campfire mishap. Trust me, the extra 10 minutes now saves you from disappointment later.
- Ride Through the Stall: When the chicken hits 155°F and the thermometer flatlines, do not panic and crank the heat. That’s the stall, and fighting it just dries out the meat. I know it feels like nothing’s happening, but give it time—another 30-45 minutes at 225°F is what turns tough collagen into melt-in-your-mouth goodness.
- Butter After the Smoke: The butter isn’t just for flavor—it’s the finishing move. Brushing it on after the initial smoke (not before) ensures it doesn’t burn and actually bastes the meat into juicy perfection. I used to add it earlier, and the skin always ended up greasy instead of crispy. Timing matters.
Make-ahead tips for this smoked chicken leg quarters
Prep Ahead for Maximum Flavor
I always make the dry rub mixture the night before and store it in an airtight container—it keeps perfectly for up to 2 weeks. This way, you can focus on smoking when the time comes.
Just mix the ½ cup brown sugar, 2 tbsp smoked paprika, and remaining spices together, then let them sit. The flavors meld beautifully overnight, creating a deeper taste profile. 💡
Chicken Prep Timeline
Apply the dry rub and let the chicken rest in the fridge for at least 1 hour—I often do this the morning of smoking. This resting period helps the spices penetrate the meat, ensuring that every bite is packed with flavor.
I’ve found that when you rush this step, the bark doesn’t develop as well, and the meat can end up dry. Patience here is key.
Wood Chip Prep Shortcut
Soak your 1 lb hickory wood chips in apple cider vinegar instead of plain water for an extra smoky punch. I like to do this the night before and store the soaked chips in a sealed container in the fridge.
This not only saves time but also ensures your wood chips are ready to go when you are. Just remember to drain them before using.
Basting Solution Ready
Make the apple cider vinegar and olive oil mixture ahead of time and keep it in a small jar in the fridge. This tenderizing solution is perfect for prepping the chicken skin before smoking.
I’ve even used it in a spray bottle for easy application, which saves time when you’re ready to smoke. This little trick ensures your skin stays crispy and tender throughout the process.
Smoker Setup in Advance
If you have a pellet smoker, load your preferred wood pellets into the hopper the night before. This ensures your smoker is ready to go when you are, saving you valuable time on the day of cooking.
For offset smokers, pre-soak your wood chips and store them in a cool, dry place. This way, you can focus on other prep tasks while your smoker gets ready.
Nutrition facts
Frequently asked questions
Why does the recipe call for skin-on, bone-in chicken leg quarters?
Skin-on, bone-in quarters create the crispy bark and rich flavor that define great smoked chicken. The bone adds natural juices, while the skin caramelizes beautifully during smoking. This method guarantees that unmatched texture and depth of flavor that dry, boneless cuts simply can’t match.
What if my smoker doesn’t reach 225°F consistently?
If your smoker struggles with temperature, try using a pellet smoker or offset smoker with better heat control. For electric smokers, add an extra wood chip tray or use a higher heat setting if safe for your model. The key is maintaining steady 225°F—if it fluctuates too much, extend smoking time by 30-60 minutes to ensure proper doneness.
Can I use applewood chips instead of hickory?
Applewood adds a sweeter, fruitier smoke profile that pairs beautifully with the brown sugar rub. Just soak the chips in apple cider vinegar for an extra layer of flavor. Hickory provides a classic BBQ taste, but fruitwoods like apple or cherry work wonderfully—especially if you prefer a milder smoke character.
What’s the best way to handle “the stall” during smoking?
“The stall” is normal—it happens when the chicken’s surface moisture evaporates around 155-165°F. Don’t panic! Just let it ride through this phase—it can last 30-60 minutes. Avoid opening the smoker lid, and trust the process. This is how the chicken develops that perfect crispy skin while staying juicy inside.
How do I tell when the chicken is done without a meat thermometer?
Press the thickest part of the thigh gently with your finger—it should feel firm but yield slightly, not rubbery. The skin should be deep mahogany and crack when pressed. If you’re unsure, cut into the thickest part (not touching bone) to check for pink—it should be fully cooked with no pink remaining. The 10-15 minute rest after smoking helps ensure perfect doneness.

Trained in classic French technique but raised on slow-cooked ribs and spicy rubs, she blends culinary skill with smoke and soul.
- Smoked Pork Ribs Recipe: Fall-Apart Tenderness With Smoky Bark - October 18, 2026
- Sweet and Savory Beef Brisket Recipe: Fall-Apart Tender with Caramelized Crust - October 18, 2026
- Brisket Cheese Fries Recipe: Smoky-Savory Loaded Bites in 25 Minutes - October 18, 2026