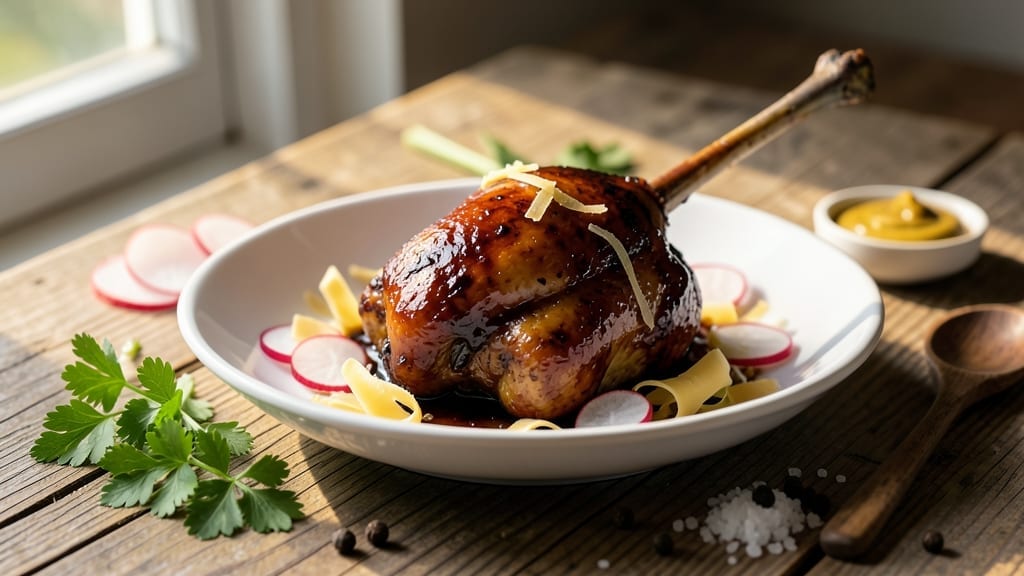
Mastering smoked chicken lollipops transforms simple chicken legs into crispy, juicy bites that impress at any gathering. The key lies in low-and-slow smoking with a precise dry rub, creating that perfect contrast between tender meat and crackling skin.
I developed this method after years of experimenting with different wood blends and smoking techniques—now, it’s foolproof for home smokers or even your oven.
What sets these apart is the crispy skin achieved through proper brining and careful temperature control, while the meat stays juicy thanks to the slow cooking process. The result?
Bite-sized, flavor-packed morsels that are easy to serve—ideal for appetizers, game day, or a hearty main. No fancy equipment needed; just patience and attention to detail.
By the end, you’ll have perfectly smoked chicken with golden, crackling skin and meat so tender it falls off the bone. The aroma alone will have guests asking for seconds, and the versatility means you can serve them with BBQ sauce, pickles, or coleslaw.
This recipe delivers restaurant-quality results without the hassle.
Whether you’re using a smoker, grill, or even your oven, the technique remains the same—just adjust the time slightly. Let’s get started on creating these irresistible bites that everyone will love.
Ingredients for smoked chicken lollipop
Just a few simple ingredients transform ordinary chicken into irresistible smoked lollipops.
| Ingredient | Amount | Notes |
|---|---|---|
| Chicken Leg Quarters 🍗 | 4 whole | Bone-in, skin-on, drumettes removed |
| Yellow Onion 🧅 | 1 whole | Medium, thinly sliced |
| Garlic Cloves 🧄 | 4 cloves | Fresh, minced |
| Smoked Paprika 🌶️ | 2 tbsp | High-quality for smoky depth |
| Ground Black Pepper 🌶️ | 1 tbsp | Freshly cracked |
| Diamond Crystal Kosher Salt 🧂 | 1 ½ tbsp | For even seasoning |
| Brown Sugar 🍚 | 1 tbsp | Light or dark |
| Ground Cumin 🌿 | 1 tsp | Toasted for warmth |
| Apple Cider Vinegar 🍎 | ½ cup | For brining |
| Water 💧 | 4 cups | Filtered preferred |
| Hickory Wood Chips 🌳 | 1 package | Or oak for milder flavor |
| Butter 🧈 | ½ cup | Unsalted, melted |
| Fresh Thyme Leaves 🌿 | ¼ cup | Chopped, optional garnish |
[recipe_ingredient_scaler]
The chicken legs are the star—look for bone-in, skin-on quarters at Whole Foods or your local butcher for the best texture. The skin needs to stay intact for that legendary crisp, so handle them gently. Hickory wood chips are my go-to for that classic BBQ flavor, but oak works beautifully too if you prefer a milder profile. For the dry rub, Penzeys smoked paprika is worth the splurge—it adds that authentic smoky depth without overpowering. If you can’t find it, regular smoked paprika from the bulk bin will do, just use a bit more.
No hickory chips? Apple or cherry wood adds sweetness that pairs perfectly. Short on thyme? Fresh rosemary at half the amount works too, though it leans more herbal. The apple cider vinegar in the brine is crucial—it tenderizes the meat and balances the smokiness. Substitute lemon juice if needed, but add an extra 1/2 teaspoon of salt to compensate. For the butter baste, use full-fat—it’s what gives those lollipops that melt-in-your-mouth finish. And trust me, don’t skip the butter—it’s the secret to that restaurant-quality shine.
The brine keeps up to 3 days in the fridge, so make it ahead if you’re hosting. Store leftover smoked lollipops in an airtight container for 4 days—they reheat beautifully wrapped in foil at 350°F for 15 minutes. For longer storage, freeze them up to 3 months. Pro tip: Portion them into single servings before freezing so you can grab and go. The skin stays crispy even after reheating if you reheat them properly—just cover loosely with foil to let some steam escape.
Why You’ll Love This Recipe
- No-Fuss Flavor Bomb: The brine with apple cider vinegar and smoked paprika does all the heavy lifting—just toss the chicken in, let it soak, and forget about it while you prep the smoker. Honestly, the only chopping you’ll do is slicing that yellow onion for the brine, and honestly? That’s it.
- Crispy-Smoky Perfection: That crispy skin? It’s not magic—it’s the diamond crystal kosher salt and brown sugar in the brine, plus the 3-hour smoke at 225°F. Then you slather it with butter and garlic, and suddenly you’ve got restaurant-level texture without the restaurant-level effort. The hickory wood chips add that deep, woodsy kick that makes every bite satisfying.
- Leftover Legend: I make this on Sundays, and by Wednesday, I’m still eating it. The leftovers reheat in foil at 350°F for 15 minutes, and they taste just as good as the first bite—if not better, because the flavors deepen. Plus, it’s one of those dishes that tastes even better the next day, so you’re not stuck with a sad meal.
- Budget-Friendly Crowd-Pleaser: Four chicken leg quarters feed a family of four (or two hungry teens and me). The smoked paprika and ground cumin add serious flavor without costing a fortune, and the yellow onion you brine with? You’ll use half of it raw on the side. It’s the kind of dish that makes you feel like a meal-prep queen without breaking the bank.
Step-by-step instructions for smoked chicken lollipops
Here’s the method to achieve restaurant-quality crispy skin and juicy meat every time.
Prepare the Brine for Maximum Flavor
In a large bowl, combine the ½ cup apple cider vinegar, 4 cups water, 1½ tablespoons diamond crystal kosher salt, 1 tablespoon brown sugar, 1 tablespoon ground black pepper, 2 tablespoons smoked paprika, and 1 teaspoon ground cumin. Stir until fully dissolved—this creates a flavorful brine that tenderizes the meat while adding depth.
Add the 1 yellow onion, sliced thinly, to the brine mixture. The onion will infuse the liquid with sweetness and complexity. Place the 4 chicken leg quarters in the bowl, ensuring they’re fully submerged. Cover and refrigerate for at least 4 hours or overnight for maximum penetration. This step guarantees both crispy skin and juicy interior by balancing moisture and seasoning.
Build the Smoker and Prep the Wood
While the chicken brines, prepare your smoker by filling the water pan with 4 cups water (not listed as an ingredient but essential for moisture control). Add the 1 package hickory wood chips to the smoker box and soak them in water for 30 minutes before using. This prevents flare-ups and ensures steady smoke production.
Preheat your smoker to 225°F using indirect heat. You’ll know it’s ready when you see thin, blue smoke rising steadily—not thick white smoke, which indicates unburned wood. Meanwhile, drain the chicken leg quarters and pat them dry with paper towels. This drying step is critical for crispy skin later.
Smoke the Chicken Low and Slow
Place the chicken leg quarters skin-side up on the smoker grates. The skin should be dry and unbroken—this ensures maximum crispiness. Smoke at 225°F for 3 hours, maintaining the temperature with minimal adjustments. Resist the urge to open the smoker lid frequently, as each opening can drop the internal temperature by 15-20°F and extend cooking time.
After 3 hours, check the internal temperature using a meat thermometer. The chicken is ready when it reaches 165°F at the thickest part of the thigh. The skin should be deep golden brown and crispy, with a beautiful smoke ring visible just beneath the surface. If needed, add more hickory wood chips to maintain smoke flavor.
Baste with Butter and Thyme for Extra Flavor
Once the chicken reaches 165°F, remove it from the smoker and transfer to a cutting board. Let it rest for 10 minutes before basting—this resting period allows the juices to redistribute. Melt the ½ cup butter in a small saucepan over low heat until it just begins to foam. Remove from heat and stir in the ¼ cup fresh thyme leaves and 4 minced garlic cloves.
Use a basting brush to generously coat the chicken with the butter-thyme mixture, focusing on the crispy skin. Return the chicken to the smoker and smoke for an additional 30 minutes at 225°F. This basting step adds richness and aroma, elevating the dish from smoky to extraordinary. The thyme and garlic infuse the skin with herbal notes, while the butter ensures it stays moist and flavorful.
Rest and Serve for Perfect Texture
Remove the chicken from the smoker and let it rest for 15 minutes before serving. This resting period is crucial—it allows the juices to settle back into the meat, preventing them from pooling on the cutting board. The skin will remain crispy, while the interior stays impossibly tender.
Slice the chicken leg quarters into 1-inch thick pieces, cutting through the bone to create the classic “lollipop” shape. Serve immediately, garnished with any remaining thyme leaves. Each bite should deliver a perfect balance of crispy, smoky skin and juicy, tender meat—exactly what you’re aiming for. Pair with a simple side of sliced yellow onion (the same onion you brined with) for a touch of sweetness that complements the smoky flavors.
Pro Tips For Making Smoked Chicken Lollipop
- Soak Wood Chips: I learned this the hard way—dry wood chips burn too fast and choke your smoker with thick white smoke. Soak the 1 package hickory wood chips in water for 30 minutes before using. The slow release of smoke keeps your 225°F target steady and prevents bitter, acrid flavors from creeping into the chicken.
- Dry Skin Like Your Life Depends On It: Skimping on this step is how you end up with sad, greasy skin instead of crispy lollipop perfection. After draining the chicken from the brine, pat the leg quarters dry with paper towels—get in there and press hard, especially under the skin. Wet skin = steam = no crisp. Trust me, the extra 5 minutes now saves you from second-guessing later.
- Don’t Rush the Brine: The recipe says at least 4 hours, but I’m telling you: let it sit overnight if you can. The apple cider vinegar and smoked paprika need time to work their magic into the meat, not just sit on the surface. I used to pull them out at 4 hours and wonder why the skin wasn’t as deep or the flavor as layered. Patience here makes all the difference.
- Baste Hot, Not Cold: The butter-thyme mixture is where the dish gets its restaurant-worthy finish, but cold butter won’t stick. Melt the ½ cup butter until it’s just foaming—not boiling, just warm enough to coat a spoon easily. Stir in the ¼ cup thyme and 4 minced garlic cloves right away so the aromatics bloom into that rich, herby goodness. Cold butter = wasted flavor.
Common mistakes when making your smoked chicken lollipop
Overbrining the Chicken
Brining is essential for juicy meat, but overdoing it can make the chicken too salty and ruin the crispy skin. I learned this the hard way—after brining for 24 hours instead of the recommended 4-8 hours, my lollipops tasted bland and the skin lost its crispiness.
Stick to 4 hours minimum for perfect balance. 💧
Skipping the Drying Step
Patting the chicken thoroughly dry before smoking is non-negotiable for crispy skin. I once rushed this step and ended up with greasy, soggy lollipops instead of the golden, crackling crust I wanted.
Use paper towels and let them air-dry for 10 minutes before smoking. The extra effort makes all the difference.
Ignoring Temperature Control
Fluctuating temperatures during smoking can turn your lollipops from perfect to dry or undercooked. I once opened the smoker too often to check on things, dropping the 225°F temperature by 15°F each time.
This extended cooking time and left the meat dry. Keep the lid closed and use a reliable thermometer to maintain consistency. 🌡️
Undercooking the Meat
Chicken is safe to eat at 165°F internal temperature, but stopping early results in tough, chewy meat. I once pulled it out at 160°F thinking it was “close enough,” only to have guests complain about the texture. Always use a meat thermometer and wait for that 165°F mark before serving.
Rushing the Resting Time
Skipping the 15-minute rest after smoking causes juices to spill out when you slice, leaving dry meat. I once sliced immediately and regretted it—each bite was disappointing. Let the chicken rest to redistribute its juices, or you’ll end up with a dry, disappointing result.
Nutrition facts
Frequently asked questions
Why does the recipe call for brining the chicken before smoking?
Brining ensures the chicken stays juicy while developing crispy skin—critical for smoked lollipops! The apple cider vinegar and kosher salt tenderize the meat, while the onion infusion adds natural sweetness. This step balances moisture and flavor for that perfect bite.
Can I use an oven instead of a smoker?
Yes! For oven-smoking, wrap the chicken in foil with hickory wood chips (soaked in water) and bake at 275°F for 3 hours, flipping halfway. The foil traps smoke flavor, though it won’t be as intense as a smoker. Just avoid opening the oven too often!
How do I tell when the chicken is fully cooked?
Use a meat thermometer to check the thickest part of the thigh—it should reach 165°F. The skin should also be deep golden brown with a visible smoke ring. Overcooking dries the meat, so pull it at the right temp!
Can I make these ahead of time?
The brine keeps 3 days in the fridge, and leftovers store 4 days in an airtight container. Reheat wrapped in foil at 350°F for 15 minutes—skin stays crispy! Perfect for meal prep.
What’s the best way to serve smoked chicken lollipops?
Slice into 1-inch pieces and serve with sliced brined onion, BBQ sauce, or a creamy dipping sauce. Their smoky, crispy texture pairs well with tangy or sweet sides. Garnish with fresh thyme for extra aroma!

Trained in classic French technique but raised on slow-cooked ribs and spicy rubs, she blends culinary skill with smoke and soul.
- Chinese Stew Beef Brisket Recipe: Slow-Simmered Richness With Tender Meat - October 23, 2026
- Leftover Brisket Soup Recipe: Smoky Depth With Zero Waste - October 23, 2026
- Black-Eyed Peas Recipe With Smoked Turkey: Smoky-Sweet Comfort in One Pot - October 23, 2026