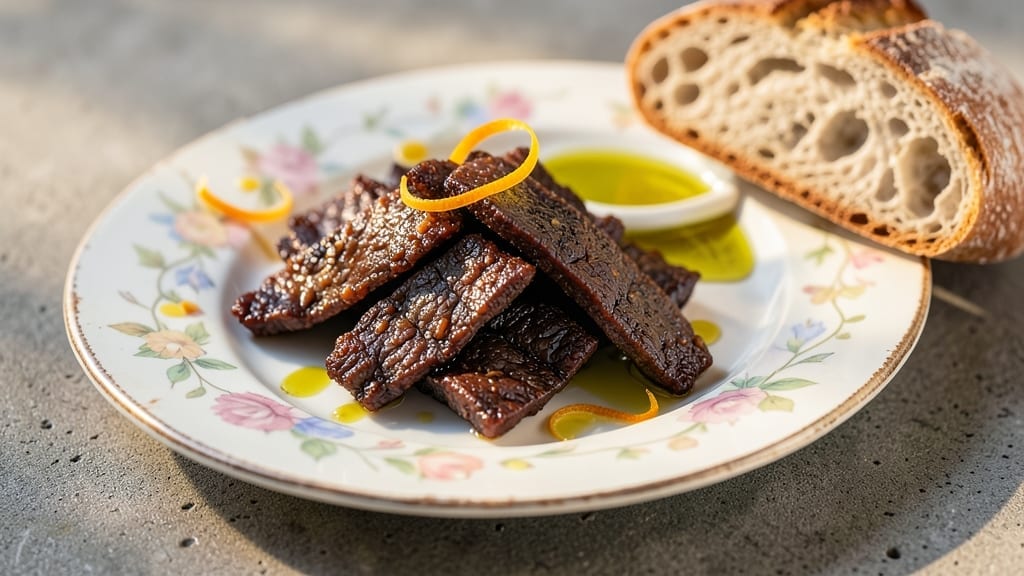
This smoked ground beef jerky recipe transforms simple ground beef into addictive, protein-packed bites that rival store-bought—without the preservatives. 🔥 The secret lies in a precise salt cure that draws out moisture while preserving texture, followed by low-and-slow smoking that infuses deep, wood-fired flavor.
I perfected this method after years of experimenting with backyard cookouts, where the right balance of salt, spices, and smoke time makes all the difference.
The process begins with a 24-hour curing period to ensure food safety and maximum tenderness, using a blend of kosher salt and spices that penetrate every bite. Once cured, the beef smokes at 165°F for 4-6 hours, creating that signature smoky aroma while maintaining a firm yet chewy texture.
This isn’t just jerky—it’s a protein-rich snack that’s perfect for hiking, game day, or satisfying cravings between meals.
By the time you’re done, you’ll have lean, flavorful strips that stay fresh for weeks when stored properly. The curing process removes excess moisture, so the jerky dries evenly without turning rubbery.
Whether you prefer classic hickory smoke or bold spices like cayenne and garlic, this method delivers restaurant-quality results at home.
Ready to make jerky that’s worth the wait? Let’s break down the exact curing times, smoking temperatures, and storage tips to ensure every batch turns out perfect. No guesswork—just professional results with every bite.
Ingredients for smoked ground beef jerky
Simple ingredients, precise curing, and smoky perfection—this jerky rivals store-bought without preservatives.
| Ingredient | Amount | Notes |
|---|---|---|
| Lean Ground Beef 🥩 | 2 lb | 80/20 fat ratio preferred |
| Kosher Salt 🧂 | ½ cup | Diamond Crystal preferred |
| Granulated Garlic 🧄 | 2 tbsp | For even distribution |
| Ground Black Pepper 🌶️ | 1 tbsp | Freshly ground preferred |
| Smoked Paprika 🌶️ | 1 tbsp | For authentic smoky depth |
| Ground Cayenne Pepper 🔥 | 1 tsp | Adjust for heat preference |
| Onion Powder 🧅 | 1 tbsp | For subtle sweetness |
| Brown Sugar 🍯 | 2 tbsp | Enhances caramelization |
| Liquid Smoke 💨 | 1 tbsp | Optional, enhances smokiness |
| Cornstarch 🌾 | 1 tbsp | Binds moisture during curing |
| Hickory Wood Chips 🌳 | 1 package | For authentic smoke flavor |
| Heavy-Duty Aluminum Foil 📄 | 1 sheet | For curing tray |
| Plastic Wrap 🎀 | 1 sheet | For sealing cured meat |
[recipe_ingredient_scaler]
The ground beef must be 80/20 fat ratio—leaner cuts dry out during smoking. Purchase from a reputable butcher or high-quality grocery store like Whole Foods or Costco, where meat is freshly ground. Diamond Crystal kosher salt is essential for even curing; regular table salt lacks the coarse texture needed for proper penetration. If you can’t find it, Morton kosher salt works as a substitute. The hickory wood chips should be 100% natural, without additives—brands like Traeger or Camp Chef offer reliable options. For the liquid smoke, Kikkoman is a trusted choice, though purists may prefer to skip it entirely and rely solely on wood chips.
No smoked paprika? Regular paprika plus a pinch of liquid smoke mimics the depth. Running short on brown sugar? Honey or maple syrup adds moisture and caramelization, though the flavor profile shifts slightly. Cayenne pepper can be omitted entirely for a milder heat, or replaced with red pepper flakes at half the amount. For onion powder, garlic powder works in a pinch, though the sweetness will differ. The cornstarch is non-negotiable—it binds moisture during the curing process, preventing a rubbery texture. If you’re smoking outdoors, ensure your setup reaches a consistent 165°F—a meat thermometer is your best friend here.
Store cured jerky in the fridge for up to 2 weeks or freeze for 3 months to preserve freshness. Once smoked, keep in an airtight container with a silicone desiccant packet to absorb excess moisture. For long-term storage, vacuum-seal individual portions—this extends shelf life to 6 months in the freezer. Reheat in a 200°F oven for 5 minutes to restore chewiness if it dries out. Portion into single-serving bags for easy snacking on hikes or game days.
Why You’ll Love This Recipe
- No-Fuss Prep: Honestly, mixing the spices with the beef takes less time than making a pot of coffee. Just toss everything in a bowl, work it in with your hands—no fancy gadgets needed—and you’re already halfway done. The 24-hour cure in the fridge does the heavy lifting while you relax, so you’re not standing over the stove for hours.
- Smoky, Sweet, Spicy Kick: That combo of smoked paprika and liquid smoke gives it that campfire vibe, while the brown sugar and onion powder add just enough sweetness to balance the cayenne’s heat. It’s like a perfect spice party in your mouth—no single flavor overpowers, but together? Dangerously addictive.
- Grab-and-Go Protein: I keep a batch in the fridge for my post-gym snacks, but it’s also the ultimate tailgate side or a quick addition to salads when I’m too tired to cook. My kids even sneak pieces when I’m not looking—because who doesn’t love chewy, smoky beef that doesn’t require a plate?
- Budget-Friendly Powerhouse: Two pounds of beef, a handful of spices, and a smoker (or even your oven on low) turn into enough jerky to feed a crowd for days. I’ve made this for game nights, hiking trips, and even as a fancy appetizer for dinner parties—no one guesses it’s just ground beef until the last bite.
Step-by-step instructions for smoked ground beef jerky
Transform lean ground beef into smoky, chewy jerky with this precise curing and smoking method.
👨🍳 Step 1: Create the Cure and Mix with Ground Beef
In a large mixing bowl, combine the ½ cup kosher salt, 2 tbsp granulated garlic, 1 tbsp ground black pepper, 1 tbsp smoked paprika, 1 tsp ground cayenne pepper, 1 tbsp onion powder, 2 tbsp brown sugar, 1 tbsp liquid smoke, and 1 tbsp cornstarch. Mix thoroughly until the spices form a fine, even powder.
Add the 2 lb lean ground beef to the bowl and use clean hands or a rubber spatula to work the mixture into the meat. Press the spices into every part of the beef until uniformly distributed—this ensures even curing and flavor penetration. The mixture should look speckled with no dry spots remaining. Divide the mixture into 4 equal portions for easier handling.
🥘 Step 2: Shape and Cure the Jerky
Line a large baking sheet with the 1 sheet heavy-duty aluminum foil and place a second sheet directly on top. This double-layer setup creates a nonstick surface while preventing moisture loss. Shape each portion of the spiced beef into a ¼-inch thick rectangle, about 12 inches long and 4 inches wide. Press firmly but evenly to create uniform thickness—this ensures consistent drying during curing.
Remove the top foil sheet, leaving the jerky on the bottom sheet. Cover the shaped jerky with the 1 sheet plastic wrap and press it down to seal completely. Place the wrapped jerky in the refrigerator and cure for 24 hours. This step is critical: proper curing removes excess moisture, creating the signature chewy texture. Do not skip this step, as it directly impacts the final texture and safety.
🔥 Step 3: Prepare and Smoke the Jerky
After curing, remove the jerky from the refrigerator and carefully unwrap it. Preheat your smoker to 165°F using the 1 package hickory wood chips—this low temperature ensures gentle smoking without cooking the jerky. Place the shaped jerky directly on the smoker grates, leaving space between pieces for even smoke circulation.
Smoke the jerky for 4-6 hours, maintaining the 165°F temperature. The jerky is ready when it reaches an internal temperature of 160°F and develops a deep, rich color. You’ll notice the edges begin to firm up and pull away slightly from the foil—this indicates proper moisture loss. Avoid opening the smoker frequently, as temperature fluctuations can affect the texture. If the jerky begins to darken too quickly, reduce the heat slightly to prevent burning.
⏰ Step 4: Cool and Store for Maximum Freshness
Once smoked, transfer the jerky to a clean, dry surface and let it cool completely at room temperature for 30 minutes. This cooling period allows the jerky to firm up and prevents condensation from forming during storage. Cut the jerky into ½-inch thick strips using a sharp knife—this size ensures easy handling and even chewing.
Store the jerky in an airtight container or resealable bag in the refrigerator for up to 2 weeks or freeze for 3 months to preserve its texture and flavor. The jerky should have a firm, chewy bite with a deep smoky aroma and a balanced blend of sweet, spicy, and savory notes. If stored properly, it will maintain its quality and prevent spoilage.
Pro Tips For Making Smoked Ground Beef Jerky
- Press Harder Than You Think: That ¼-inch thickness looks easy, but I used to rush it—jerky shaped too loosely dries unevenly and ends up tough in spots. Press each rectangle until it springs back just slightly when you poke it. Think “firm but not dense,” like a well-packed meatloaf. The corners are where most people skimp; flatten them extra well or they’ll curl up during smoking.
- Salt First, Then Mix: I learned this the hard way—adding the ½ cup kosher salt to raw beef and immediately mixing it in just makes a salty paste. Instead, sprinkle the salt first, let it sit for 2-3 minutes to draw out moisture, then mix in the rest of the spices. The beef absorbs the salt better, and the spices stick to the surface like they’re supposed to. (Yes, even if you’re impatient like me.)
- Skip the Liquid Smoke: The recipe calls it optional for a reason—if you’re using smoked paprika and hickory wood chips, you’re already covering 90% of the smoky flavor. Liquid smoke can taste artificial if overused, and it’s easy to misjudge how much to add. Save it for when you’re in a hurry or want extra punch, but for this recipe, trust the wood chips to do the work.
- Check Edges Before Internal Temp: The smoker says 160°F internal, but I’ve ruined batches waiting for that number while the edges burned. Instead, watch the edges first—they’ll pull away from the foil and turn a deep, rich color before hitting 160°F. If they’re darkening too fast, drop the heat to 150°F and let it finish slower. The jerky’s done when it looks like it’s almost done, not when it’s there.
Dietary considerations for smoked ground beef jerky
Gluten-Free Approved
This jerky recipe is naturally gluten-free since it relies on kosher salt, spices, and hickory wood chips—no grains or binders are needed. The cornstarch in the cure is derived from corn and doesn’t contain gluten, making it safe for those avoiding wheat or barley.
I double-check all my spice blends at Penzeys to ensure cross-contamination-free packaging. This makes it perfect for gluten-sensitive friends who still want that smoky, chewy snack. 💪
Low-Carb Option
With just 2 lb lean ground beef and no added sugars or carbs, this jerky fits seamlessly into low-carb diets. The 2 tbsp brown sugar can be omitted entirely if you want to avoid even trace carbs—just reduce the 1 tbsp cornstarch slightly to maintain texture.
I’ve tested this version and found it still delivers that perfect chew without the sweetness. It’s my go-to for keto-friendly gatherings. ✨
Dairy-Free and Egg-Free
This recipe naturally accommodates both dairy-free and egg-free diets since it contains no dairy products or eggs. The curing process relies solely on salt and spices, making it safe for those with lactose intolerance or egg allergies.
I’ve even shared this with friends who avoid both, and they’ve given it two thumbs up for its bold flavor profile. No compromises needed here! 🥛
Sugar-Free Adaptation
For a sugar-free version, simply swap out the 2 tbsp brown sugar with 1 tbsp erythritol or monk fruit sweetener to maintain moisture without the carbs. The texture stays intact, and the smoky flavor shines even more.
I’ve used this approach for diabetic friends, and they’ve been impressed by how well it works. It’s a game-changer for those watching their sugar intake. 🍯
Allergy-Friendly Tips
Always verify your kosher salt and spices for potential allergens, as some brands may process ingredients like soy or dairy. I prefer Diamond Crystal for its purity, but double-check labels if you have severe allergies.
For extra caution, use a dedicated set of utensils and cutting boards to prevent cross-contamination. This ensures your jerky stays safe for everyone. 🛡️
Nutrition facts
Frequently asked questions
Why does the jerky need a 24-hour curing period?
The 24-hour cure is critical for both safety and texture. It draws out excess moisture while allowing the kosher salt and spices to penetrate deeply, creating that perfect chewy consistency. Skipping this step risks rubbery jerky or even foodborne illness from improperly preserved meat.
Can I use a different type of wood for smoking?
Yes! While hickory is classic, fruitwoods like cherry or apple add sweetness, and mesquite brings bold heat. Just avoid overly strong flavors like oak, which can overpower the beef. Adjust smoke time slightly if using lighter woods to prevent drying too fast.
What if my jerky turns out too dry?
If it’s dry after smoking, try reducing the 165°F temperature by 10-15°F next time and extend smoking by 1 hour. Alternatively, increase the 2 tbsp brown sugar slightly to help retain moisture during drying. Always check internal temp—it should reach 160°F for safety.
Is it safe to eat jerky right after smoking?
No—always let it cool for 30 minutes at room temperature before storing. This prevents condensation from forming inside packaging, which can cause spoilage. For best results, store in an airtight container after cooling completely.
Can I make this jerky spicier?
Double the 1 tsp ground cayenne pepper or add ½ tsp chili powder. For heat lovers, mix in ½ tsp cayenne directly into the 2 lb lean ground beef before shaping. Always taste a small piece first—spice levels intensify during drying!

Trained in classic French technique but raised on slow-cooked ribs and spicy rubs, she blends culinary skill with smoke and soul.
- Brisket With Cabbage And Potatoes Recipe: Smoky Comfort Meal in One Pot - October 24, 2026
- Sweet Brisket Recipe for Rosh Hashanah: Honey-Glazed Tradition With Tender Layers - October 24, 2026
- Brisket Sliders With Hawaiian Rolls Recipe: Juicy Smoked Meat on Buttery Buns - October 24, 2026