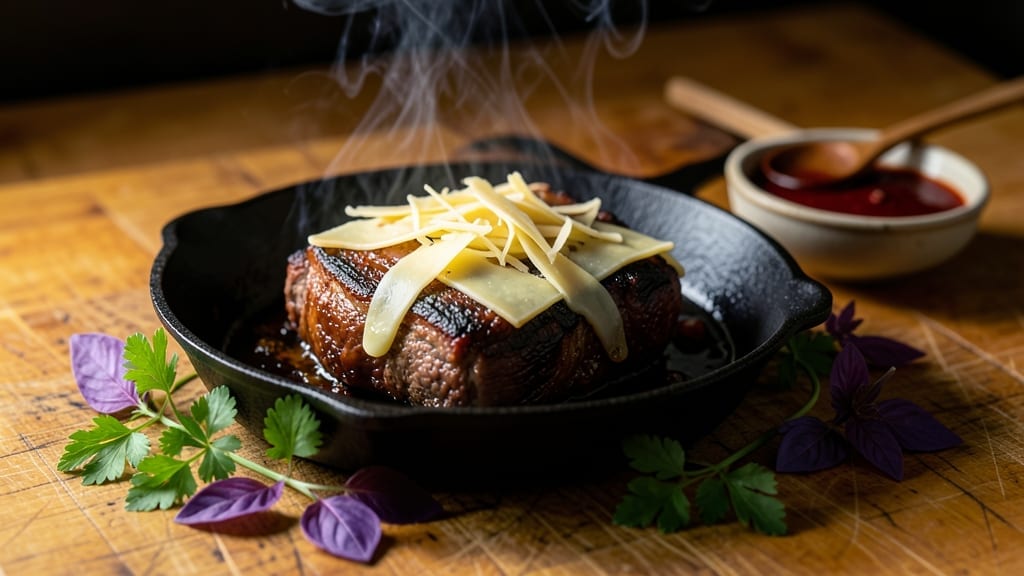
This smoked Italian beef recipe transforms tough cuts into melt-in-your-mouth perfection—just like the sandwiches I grew up with at my nonna’s kitchen table. The secret lies in a balanced Italian-inspired rub and low-and-slow smoking until the meat practically falls apart.
I’ve perfected this method over years of backyard cookouts, where the scent of hickory smoke and garlic mingling in the air always signals dinner’s ready.
The magic happens when you combine Italian seasonings with a touch of sweetness, creating a crust that’s both aromatic and tender. A 3-4 hour smoke at 225°F ensures the beef stays juicy while developing deep, smoky flavors.
The sweet garlic spread at the end ties everything together—sticky, tangy, and impossible to resist. This isn’t just a recipe; it’s a taste of tradition, elevated with professional technique.
By the time you’re done, you’ll have fork-tender beef that slices effortlessly, ready to be piled high on crusty rolls with that sweet garlic spread. The sides—whether roasted potatoes or grilled vegetables—just become supporting actors to this star.
It’s the kind of meal that turns weeknights into celebrations, and the best part? Every bite carries that smoky-sweet harmony I’ve been chasing since my first backyard cookout.
Serve with a simple arugula salad or crusty bread to soak up every last drop of that garlic spread. The key to success? Patience—let the meat rest before slicing, and trust the process.
This is how you make Italian beef that rivals the best deli, right in your own backyard. Let’s get smoking.
Ingredients for smoked italian beef
Tender beef, smoky aroma, and sweet garlic spread—this is nonna’s recipe, perfected for your backyard.
| Ingredient | Amount | Notes |
|---|---|---|
| Chuck Roast 🥩 | 4 lb | With visible marbling, trimmed of excess fat |
| Italian Seasoning 🌿 | 2 tbsp | Dried blend of oregano, basil, thyme |
| Garlic Powder 🧄 | 1 tbsp | Not garlic salt, freshly ground preferred |
| Dried Oregano 🍃 | 1 tbsp | Mexican oregano if available |
| Black Pepper 🌶️ | 1 tbsp | Freshly ground, coarse |
| Brown Sugar 🍚 | 2 tbsp | Light or dark, packed |
| Sea Salt 🧂 | 1 tbsp | Kosher or flaky, fine grain preferred |
| Hickory Wood Chips 🔥 | 1 lb | Soaked in water 30+ minutes |
| Butter 🧈 | ½ cup | Full-fat, unsalted preferred |
| Mayonnaise 🥛 | ½ cup | High-quality, full-fat |
| Garlic Cloves 🧄 | 6 cloves | Fresh, minced finely |
| Yellow Mustard 🍯 | 2 tbsp | For tanginess, not sweet |
| Sugar 🍚 | 2 tbsp | Granulated, packed |
| Apple Cider Vinegar 🍎 | 1 tbsp | For brightness, not balsamic |
| Crusty Bread Rolls 🍞 | 12 whole | For serving, lightly toasted |
[recipe_ingredient_scaler]
The chuck roast is your star here. Look for a 4-pound piece with good marbling—it’s the sweet spot for flavor and tenderness. Costco or Whole Foods usually have it pre-trimmed, but if you’re buying raw, ask the butcher to remove excess fat. I always grab mine from Trader Joe’s when I want to save time, but the regular supermarket stuff works just fine if you’re patient with the trimming. The key is to let it sit at room temp for 1 hour before smoking—this ensures even cooking and maximum tenderness. Trust me, the wait is worth it for that melt-in-your-mouth texture.
No hickory wood chips? Apple wood or pecan wood works in a pinch—just soak them for 30 minutes instead of 30+ minutes. Want to skip the vinegar in the spread? A splash of lemon juice adds brightness without changing the flavor profile. Running low on mayo? Greek yogurt at half the amount gives a lighter texture, though the richness is different. And if your garlic is old and dry? Fresh roasted garlic takes it to the next level—just wrap cloves in foil and bake at 400°F for 10 minutes. The bread rolls should be fresh, but if you’re using day-old ones, lightly toast them to revive the crust.
This recipe is all about patience—the meat needs to rest 15 minutes after smoking before slicing. I always wrap it in foil and let it sit on a cutting board. The sweet garlic spread keeps for 5 days in the fridge, so I make extra to have on hand for sandwiches. Store the rolls in a bread box or paper bag to keep them fresh. If you’re doing a big cookout, prep the spread the night before—just stir it up before serving. The smoked beef itself can be reheated in a skillet for 2-3 minutes per side, adding a bit of butter to keep it moist. Don’t rush it—this isn’t a race, it’s a celebration.
Why You’ll Love This Recipe
- No-Fuss Smoking: I’ll admit it—I used to avoid smoking meat because I thought it was complicated. But this chuck roast? Just season it with that perfect blend of Italian seasoning, garlic powder, and brown sugar, then let the smoker do the work. Pat dry first, let it rest, and boom—you’re done in 4-5 hours with zero stress.
- Chewy, Caramelized Magic: That bark on the beef? It’s not just pretty—it’s packed with flavor from the hickory wood chips and the sticky rub. Inside, it’s fall-apart tender, and the sweet garlic spread? It’s like a hug for your sandwich. Trust me, the combo of fresh minced garlic, mustard, and apple cider vinegar makes every bite sing.
- Leftovers That Win: This recipe is my secret weapon for busy days. The beef reheats beautifully in a skillet with a splash of butter, and that spread? It keeps for 5 days. I’ll throw it on toast, mix it into pasta, or even use it as a dip for veggies. My kids ask for seconds every time—no guilt, just good food.
- Budget-Friendly Feast: A 4-pound chuck roast feeds a crowd without breaking the bank. Pair it with store-bought bread rolls, and you’ve got a meal that feels fancy but costs less than takeout. Plus, the ingredients are simple—no fancy tools or expensive shortcuts. Just good meat, great seasoning, and a little smoke.
Step-by-step instructions for smoked Italian beef
Here’s how to transform a simple chuck roast into melt-in-your-mouth smoked beef with a sweet garlic spread.
Prepare and Season the Chuck Roast
Start by removing the chuck roast from the refrigerator and letting it sit at room temperature for about 30 minutes. This ensures even cooking throughout the meat. Pat the roast dry with paper towels—this step is crucial for developing that perfect bark during smoking.
In a small bowl, combine 2 tablespoons Italian seasoning, 1 tablespoon garlic powder, 1 tablespoon dried oregano, 1 tablespoon black pepper, 2 tablespoons brown sugar, and 1 tablespoon sea salt. Mix well to create a balanced, aromatic rub. Generously coat the chuck roast with this mixture, pressing it into the meat so it adheres evenly. Let the seasoned roast rest for another 15 minutes before smoking—this allows the rub to penetrate slightly for deeper flavor.
Set Up the Smoker and Cook Low and Slow
Soak 1 pound hickory wood chips in water for at least 30 minutes before using. Fill the smoker’s wood chip tray with these soaked chips and preheat the smoker to 225°F. This low temperature is key to achieving tender, fall-apart beef without drying it out.
Place the seasoned chuck roast in the smoker, fat-side up. Close the lid and resist the urge to open it—every time you peek, you lose heat and moisture, extending the cooking time. Smoke the roast for 4 to 5 hours, or until the internal temperature reaches 195°F and the meat is fork-tender. The bark should be dark and slightly sticky, indicating the rub has caramelized beautifully.
Prepare the Sweet Garlic Spread
While the beef smokes, prepare the sweet garlic spread by combining ½ cup mayonnaise, ½ cup butter, 6 minced garlic cloves, 2 tablespoons yellow mustard, 2 tablespoons sugar, and 1 tablespoon apple cider vinegar in a bowl. Mix thoroughly until smooth and creamy. This spread is the perfect balance of tangy, sweet, and rich flavors that complement the smoked beef perfectly.
Transfer the spread to a serving dish and refrigerate until ready to use. The spread can be made up to 24 hours in advance, making it a great make-ahead component for your meal.
Rest and Slice the Beef
Once the internal temperature of the chuck roast reaches 195°F, remove it from the smoker and let it rest for 30 minutes. This resting period is essential—it allows the juices to redistribute throughout the meat, ensuring each slice is moist and flavorful. Tent the roast loosely with foil to keep it warm.
After resting, slice the beef thinly against the grain into ¼-inch thick slices. The grain direction will be visible as lines running through the meat. Serve the sliced beef on the 12 lightly toasted crusty bread rolls, topped generously with the sweet garlic spread. The contrast of the warm, tender beef with the cool, creamy spread is what makes this dish truly special.
Pro Tips For Making Smoked Italian Beef
- Trim the Fat First: I used to skip this step, thinking it was optional—until I ended up with greasy smoke and uneven cooking. Trim excess fat from the 4 lb Chuck Roast before seasoning; leave just enough marbling for flavor, but too much fat will clog your smoker and slow down the bark formation.
- Soak Wood Chips Properly: Dumping dry 1 lb Hickory Wood Chips straight into the smoker is a rookie move. Soak them for at least 30 minutes—they’ll burn slower, produce more smoke, and won’t turn your beef into charcoal. (Yes, even if you’re impatient like me.)
- Don’t Rush the Rest: Skipping the 30-minute rest after hitting 195°F is how you end up with dry, stringy slices. Tent that roast loosely with foil and let it chill out—it’s the only way to guarantee juicy, fork-tender beef that doesn’t fall apart when you slice.
- Mince Garlic Like You Mean It: The 6 cloves Garlic Cloves in the spread need to be finely minced—no big chunks hiding in your creamy mix. Pulse them in a food processor or chop them aggressively with a knife; trust me, your sandwiches will thank you. (And no, garlic powder won’t cut it here.)
Pro cooking tips for this recipe
Mastering the Rub
I always tell my students the rub is where the soul of the dish lives. For this smoked Italian beef, the key is balancing the Italian seasonings with a touch of sweetness.
I like to use 2 tbsp Italian seasoning mixed with 1 tbsp dried oregano (Mexican oregano if you can find it—it has that extra kick) and 1 tbsp garlic powder. The 2 tbsp brown sugar and 1 tbsp sea salt create that perfect caramelized crust when smoked.
Press the rub deep into the meat—don’t just sprinkle it on top. This ensures every bite carries that aromatic punch. 🌿
Smoker Setup Secrets
Your smoker’s temperature is everything. I swear by 225°F for this recipe—any hotter and you’ll dry out the meat before it gets tender. Soak those 1 lb hickory wood chips for at least 30 minutes before using.
I like to use a dual-probe thermometer—I monitor both the smoker temp and the meat’s internal temperature. When the beef hits 195°F, it’s done, but the bark should be dark and sticky, not burnt. Here’s the trick: resist opening the smoker lid.
Every time you peek, you lose heat and moisture, which can add 30-60 minutes to your cook time.
The Resting Game-Changer
This is where most people mess up—skipping the rest. After smoking, let the beef rest for 30 minutes under foil. This isn’t optional; it’s non-negotiable. The juices need time to redistribute, or you’ll end up with dry slices.
I’ve seen people slice it too soon and end up with a sad, tough sandwich. Trust me, the wait is worth it.
While it rests, I’ll usually hop on my vintage motorcycle for a quick ride along the coast to clear my head—smoking beef is a marathon, not a sprint. ✨
Slicing Like a Pro
Slice the beef ¼-inch thick against the grain—this is where the tenderness pays off. Use a sharp knife, and don’t rush it. The grain direction will be visible as faint lines in the meat. If you’re unsure, ask your butcher to show you how to identify it.
I’ve been known to slice directly on the countertop for a satisfying snap—it’s a little dramatic, but it’s also the best way to check your work. The slices should be tender enough to almost fall apart.
Spread Perfection
The sweet garlic spread is where the magic happens. I like to make it the day before so the flavors meld together. The ½ cup butter and ½ cup mayo create that rich base, while the 6 minced garlic cloves and 2 tbsp sugar add sweetness.
A splash of apple cider vinegar keeps it from being too heavy. Store it in an airtight container, and it’ll keep for 5 days in the fridge. I always make extra—it’s perfect for sandwiches, pasta, or even drizzled over roasted veggies.
Nutrition facts
Frequently asked questions
Why does the chuck roast need to rest after smoking?
Resting the beef for 30 minutes after smoking is essential—it lets the juices redistribute evenly throughout the meat. Skipping this step often results in dry slices. I always tent it loosely with foil while it rests to keep it warm. This patience pays off with melt-in-your-mouth tenderness!
Can I use a different type of wood for smoking besides hickory?
While hickory adds a classic smoky depth, apple or pecan wood also work beautifully. Just soak the chips for 30 minutes before using. The key is to avoid overly strong woods like mesquite, which can overpower the Italian flavors.
How do I know when the beef is fully cooked?
Use a meat thermometer to check the internal temperature—it should reach 195°F. The meat should also be fork-tender and have a dark, sticky bark. If it’s still firm, smoke for another 30-60 minutes. Patience here ensures perfect results!
What if I don’t have fresh garlic for the spread?
No problem! Roasted garlic cloves (baked at 400°F for 10 minutes) work wonderfully. Or, use 1 extra tablespoon of garlic powder in the spread for a milder but still flavorful option. The spread will still be delicious!

Trained in classic French technique but raised on slow-cooked ribs and spicy rubs, she blends culinary skill with smoke and soul.
- Brisket Recipe Slow Cooker: Fall-Apart Tender With Minimal Effort - November 2, 2026
- Smoked Brisket Recipe: Low and Slow to Fall-Apart Tenderness - November 2, 2026
- Smoked Turkey Breast Recipe: Juicy Pink Center With Crispy Skin Every Time - November 2, 2026