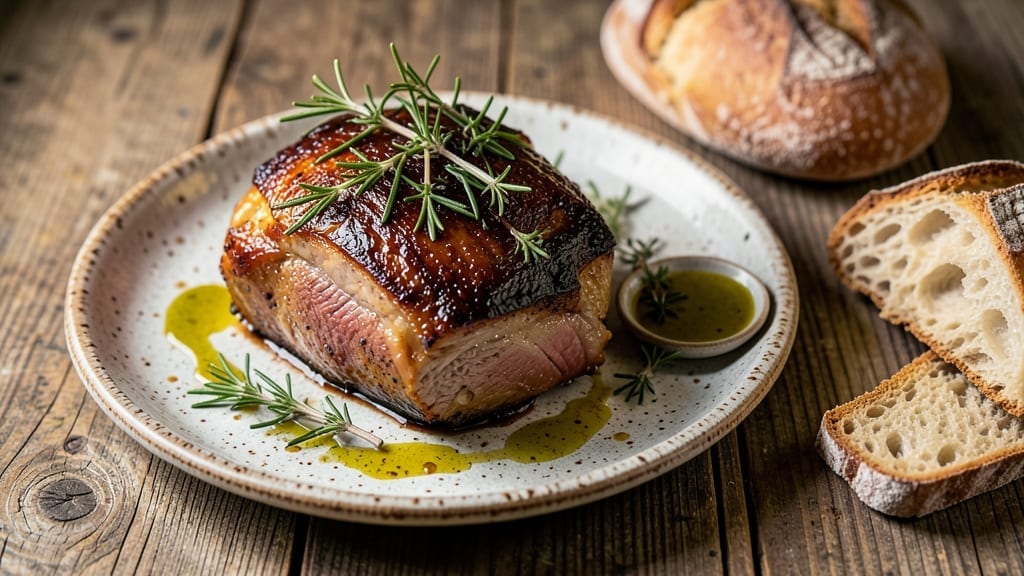
This smoked pork roast recipe delivers melt-in-your-mouth tenderness with a deep, smoky flavor that transforms any meal into a showstopper. 🌟 I developed this method after years of experimenting with cuts and techniques, and it consistently produces results that rival my Nonna’s legendary Sunday roasts—though with a smoky twist that feels more modern.
The secret lies in selecting the right cut and letting the smoker work its magic at just the right temperature.
Pork shoulder is the ideal choice for this recipe, as its generous fat content ensures rich flavor and fork-tender meat. We’ll dry-brine it overnight to enhance moisture and seasoning penetration, then smoke it low and slow until it reaches 203°F internal temperature—the magic number for fall-apart perfection.
The process requires patience, but the reward is a roast so tender it practically disintegrates at the touch of a fork.
What you’ll end up with is a roast that’s perfectly balanced between smoky depth and rich, savory meatiness. The bark that forms on the outside adds texture, while the interior remains juicy and rich.
This isn’t just a side dish—it’s the star of the meal, capable of feeding a crowd or satisfying a cozy weeknight dinner for two.
Pair it with classic sides like apple sauce, mashed potatoes, or a crisp coleslaw to complete the meal. Let’s get started on creating your own restaurant-quality smoked pork roast at home.
Ingredients for smoked pork roast
Pork shoulder, dry spices, and wood smoke. That’s all you need for restaurant-quality roast.
| Ingredient | Amount | Notes |
|---|---|---|
| Pork Shoulder (Boston Butt) 🐖 | 6 lb | Bone-in, skin-on preferred |
| Yellow Onion 🧅 | 1 whole | Large, sliced into wedges |
| Garlic Cloves 🧄 | 8 cloves | Peeled, smashed with side of knife |
| Dry Mustard 🌶️ | 1 tbsp | For bark development |
| Brown Sugar 🍯 | ½ cup | Light or dark preferred |
| Smoked Paprika 🌶️ | 2 tbsp | For deep smoky flavor |
| Ground Black Pepper 🌶️ | 1 ½ tbsp | Freshly cracked preferred |
| Kosher Salt 🧂 | ¾ cup | Diamond Crystal preferred |
| Apple Cider Vinegar 🍏 | ¼ cup | For dry brine |
| Wood Chips (Hickory or Apple) 🌳 | 2 cups | Soaked for 1 hour minimum |
| Unsalted Butter 🧈 | ¼ cup | Cold, cubed for basting |
| Fresh Thyme Leaves 🌿 | ½ cup | Chopped, for finishing |
| Fresh Rosemary 🌿 | ¼ cup | Chopped, for finishing |
[recipe_ingredient_scaler]
The pork shoulder is non-negotiable here—bone-in, skin-on delivers the best flavor and texture. Costco or local butcher shops often have it pre-cut, but if you’re buying whole, look for a roast with good marbling and at least 2-3 inches of fat cap. The fat renders down during smoking, basting the meat naturally. I always grab mine from Whole Foods when I can—they source their pork from family farms, and the difference in flavor is noticeable. If you’re on a budget, don’t skip the bone-in cut; it’s worth the extra money for this recipe. The wood chips? Hickory gives classic smoky flavor, while apple adds a touch of sweetness—mix them for balance.
No smoked paprika? Regular paprika plus a pinch of liquid smoke works in a pinch, but the flavor won’t be as authentic. Fresh thyme and rosemary are ideal, but dried at one-third the amount gets you close. Short on apple cider vinegar? White vinegar or lemon juice works for the dry brine. The mustard is key for bark development—don’t skip it. For the wood chips, if you can’t find pre-soaked, just wrap them in a damp towel and let them sit while you prep the pork. The butter basting? Use full-fat, cold butter—it adds richness and helps create that beautiful bark.
This roast tastes even better the next day, so make extra if you can. Store leftovers in the fridge for up to 5 days or freeze for 3 months. Wrap tightly in butcher paper or foil to retain moisture. For serving, let it rest at room temperature for 20-30 minutes before slicing—this keeps it juicy. I always portion mine into individual servings right away so it’s ready for sandwiches or leftovers. The bark gets crispier as it sits, so if you’re serving immediately, slice just before eating.
Why You’ll Love This Recipe
- No-Fuss Flavor Bomb: That dry brine with ½ cup brown sugar and ¼ cup apple cider vinegar? It’s the secret sauce. I mix it the night before, slap it on the pork, and wake up to a rub that’s already working its magic—no last-minute scrambling.
- Crispy-Sweet Perfection: The 1 tbsp dry mustard and 2 tbsp smoked paprika create that perfect bark, while the ½ cup fresh thyme and ¼ cup rosemary finish it off with herbal richness. It’s like eating a campfire in every bite—smoky, sweet, and just a little tangy.
- Leftovers That Shame No Leftovers: This feeds a crowd, but the real win? It’s five days in the fridge or three months frozen. I pull out slices for tacos, sandwiches, or just plain with pickles—no extra effort, just pure satisfaction.
- Budget-Friendly Luxury: A 6 lb pork shoulder is cheaper than you think, and with kosher salt and brown sugar doing most of the work, you’re not spending a fortune. Plus, the wood chips (just 2 cups!) give it that restaurant-quality smoke without breaking the bank.
Step-by-step instructions for smoked pork roast
Here’s the method for melt-in-your-mouth smoked pork that falls apart with every bite.
🔥 Step 1: Prepare the Dry Brine and Seasoning Rub
In a small bowl, combine the ¾ cup kosher salt, ½ cup brown sugar, 2 tbsp smoked paprika, 1½ tbsp ground black pepper, and 1 tbsp dry mustard. This blend creates the perfect balance of sweet, smoky, and tangy flavors that develop the signature bark. Mix well until fully incorporated and set aside.
Next, create the dry brine by whisking together the ¼ cup apple cider vinegar with ½ cup of the seasoning rub (reserve the rest for later). This acidic component helps tenderize the meat while adding depth of flavor. Pat the 6 lb pork shoulder completely dry with paper towels—moisture is the enemy of crispy bark. Apply the dry brine mixture all over the meat, including inside the cavity, pressing it into the surface so it adheres well.
Place the seasoned pork on a wire rack set over a baking sheet and refrigerate uncovered for 12-24 hours. This extended dry-brine process ensures maximum flavor penetration and creates that coveted crust. Here’s the thing—don’t skip this step. The longer you brine, the more tender and flavorful the final result will be.
🍳 Step 2: Set Up the Smoker and Prepare the Wood Chips
Soak the 2 cups wood chips (hickory or apple) in water for at least 1 hour to prevent flare-ups. While they soak, preheat your smoker to 225°F. I like to use a two-zone setup if possible—keep the cooking zone at 225°F and the smoke zone slightly hotter to generate clean, flavorful smoke. The reason we aim for low and slow is that pork shoulder benefits from this gradual cooking process, which breaks down connective tissues for that signature fall-apart tenderness.
Once the smoker reaches temperature, add the soaked wood chips to the smoker box. You’ll know it’s ready when you see steady, thin blue smoke (not thick white smoke). Place the pork shoulder fat-side up on the smoker grate. The fat will render and baste the meat as it cooks, creating that irresistible crust. Here’s a pro tip: don’t be tempted to open the smoker lid during the first 2 hours—each time you peek, you lose heat and extend cooking time.
🥘 Step 3: Smoke Until Probe-Tender and Wrap at the Stall
Smoke the pork shoulder undisturbed for 6-8 hours, or until the internal temperature reaches 165-170°F. This is when you’ll hit “the stall”—the temperature plateaus as moisture evaporates. Don’t panic; this is completely normal. At this point, I wrap the pork tightly in butcher paper (not foil—paper allows for better bark development). This technique, known as the “Texas crutch,” helps push through the stall while maintaining that crispy exterior.
Return the wrapped pork to the smoker and continue cooking until the internal temperature reaches 200-205°F and a meat thermometer inserted into the thickest part of the shoulder slides in like butter. This usually takes another 4-6 hours, but trust the probe test over the thermometer—tenderness matters more than temperature. Real talk: your oven or smoker might run hot, so start checking at the 18-hour mark if you’re cooking overnight.
⏰ Step 4: Rest and Finish with Herbs
Once probe-tender, remove the pork from the smoker and transfer it to a cutting board. Tent loosely with foil and let it rest for at least 1 hour (I prefer 2 hours wrapped in towels in a cooler). This resting period allows the juices to redistribute throughout the meat, ensuring every slice is moist and flavorful. Here’s the moment that matters: during the last 30 minutes of resting, prepare the herb butter by mixing the ¼ cup unsalted butter with the ½ cup fresh thyme leaves and ¼ cup fresh rosemary, chopped finely.
Just before serving, slice the herb butter into small cubes and rub them over the surface of the pork. The butter will melt slightly from the residual heat, infusing the meat with aromatic herbs. You’ll see the pork develop a beautiful sheen and those herbs will release their essential oils, adding another layer of complexity to the dish. The butter also helps keep the meat moist during slicing and serving.
🔪 Step 5: Slice Against the Grain and Serve
Unwrap the pork and locate the grain direction—you’ll see lines running through the meat. Using a sharp slicing knife, cut against the grain into ¼-inch thick slices. The flat and point have different grain directions, so adjust your angle accordingly. Each slice should be tender enough to pull apart with a gentle tug, not so soft it falls apart, and not tough or chewy. Here’s where it gets fun—serve immediately while still warm, and watch as everyone digs in for seconds.
The finished pork should have a dark mahogany bark on the outside and a beautiful pink smoke ring just beneath. The meat should be so tender it practically melts in your mouth, with layers of smoky, sweet, and tangy flavors in every bite. Pair with classic smoked sides like coleslaw or baked beans for the ultimate comfort meal experience.
Pro Tips For Making Smoked Pork Roast
- Smash That Garlic: DESCRIPTION: Don’t just peel those 8 cloves—give them a good whack with the side of your knife before adding them to the rub. I used to skip this, but smashed garlic releases more oils and blends into the seasoning better, so every bite gets that deep, aromatic punch. (Yes, even if you’re impatient like me.)
- Resist the Stall Panic: DESCRIPTION: When the pork hits 165°F and the temp freezes, don’t rush to crank the heat—wrap it in butcher paper and let it ride. I learned this the hard way after unwrapping too soon and ending up with a soggy mess. The paper keeps the moisture locked in while still letting that bark develop, so you get the best of both worlds.
- Soak Wood Chips Properly: DESCRIPTION: Those 2 cups of wood chips need a real soak—at least an hour, but I usually let them sit overnight if I’m planning ahead. Cold water, not warm, and no skimping. Dry chips burn fast and turn your smoker into a campfire, which means bitter smoke instead of that clean, sweet hickory or apple flavor you’re after.
- Butter Up Before Slicing: DESCRIPTION: That ¼ cup of cold, cubed butter isn’t just for flavor—it’s your secret weapon for juicy slices. Rub it on right before serving, and the residual heat melts it into the meat, keeping every bite tender. I used to skip this step, but now I swear by it—especially when serving to picky eaters who’d rather have dry meat than admit they don’t like pork.
Wine and beer pairings for this smoked pork roast
Bold Reds for Smoky Depth
For smoked pork roast, I reach for a bold Italian red wine like Chianti Classico from Tuscany. Its bright acidity and tangy cherry notes cut through the richness of the pork beautifully, balancing the smoky sweetness.
A 12-14% ABV bottle—like Castello Banfi—works perfectly; the alcohol level stands up to the pork’s intensity while keeping the palate fresh. Look for wines with Sangiovese as the primary grape for that signature herbal, earthy complexity. 🍷
Craft Beer Pairings
A smoked porter or barrel-aged stout is my go-to beer pairing—think Guinness Foreign Extra Stout or Founders Kentucky Breakfast Stout. The roasted malt flavors in these beers complement the smoky notes of the pork, while the slight bitterness cleanses the palate between bites.
For a lighter option, try a Belgian-style dubbel like Westmalle Tripel, whose caramel and spice notes harmonize with the herb butter finish. Avoid hoppy IPAs—they’ll clash with the pork’s richness. 🍺
Sweet and Tangy Balance
If you prefer something sweeter, a German Riesling Kabinett with residual sugar offers the perfect contrast. The wine’s peachy notes and gentle acidity mirror the pork’s smoky sweetness while keeping the dish from feeling too heavy.
I always serve it slightly chilled—around 50°F—to enhance its refreshing quality. For a non-alcoholic option, sparkling apple cider with a dash of bitter orange liqueur works surprisingly well, capturing that same sweet-tart balance. 🍏
Regional Beer Twist
Inspired by my Irish-Italian roots, I love pairing this roast with a New England IPA from a local Boston brewery like Allagash. The citrusy, juicy profile cuts through the pork’s fat without overpowering it.
The key is to choose one with low bitterness (IBU around 40-50) so the flavors complement rather than compete. This pairing feels like a nod to my Nonna’s kitchen—where bold flavors and regional ingredients always came together. 🌟
Avoid These Mistakes
Never pair this roast with a heavy, tannic red like Cabernet Sauvignon—the tannins will clash with the pork’s richness. Similarly, avoid light, unoaked whites like Sauvignon Blanc, which lack the body to stand up to the smoky flavors.
Stick to wines and beers with enough structure to match the pork’s depth, and you’ll create a truly satisfying meal. Here’s the thing: the right pairing elevates the pork from good to unforgettable. 💡
Nutrition facts
Frequently asked questions
Why does my smoked pork roast need to rest before slicing?
Resting is critical for juiciness! After smoking, the meat’s internal juices gather toward the center. Resting for at least 1 hour (or 2 hours in a cooler) lets those juices redistribute, ensuring every slice stays moist and flavorful. Skipping this step means dry, disappointing bites—trust me, your taste buds will thank you later.
What if my smoker runs hotter than 225°F?
No problem! If your smoker exceeds 225°F, just adjust the vent or move it slightly away from the heat source. The key is maintaining low and slow cooking—aim for 225°F as your target. If you’re unsure, use a meat thermometer to monitor internal temps instead of relying solely on the smoker’s gauge. Consistency matters more than perfection here.
Can I use foil instead of butcher paper when wrapping?
Butcher paper is ideal because it allows moisture to escape while keeping the meat warm. Foil traps steam, which can make the bark soggy. If you’re in a pinch, use foil but remove it briefly during the last 1-2 hours of cooking to crisp up the exterior. The texture won’t be as perfect, but it’ll still taste delicious!
How do I know when the pork is done without a thermometer?
Press the thickest part of the meat—it should feel like the tip of your nose (firm but yielding). If it jiggles like Jell-O, it’s done! For extra confidence, check for a pink smoke ring just beneath the bark. When in doubt, trust the probe test—it’s the most reliable method.
What’s the best way to reheat leftovers?
Gently warm slices in a 300°F oven for 10-15 minutes on a wire rack (not foil) to keep them crispy. Avoid microwaving—it makes the meat rubbery. For sandwiches, reheat the bread separately and layer with the pork to avoid sogginess. Leftovers taste even better the next day!

Trained in classic French technique but raised on slow-cooked ribs and spicy rubs, she blends culinary skill with smoke and soul.
- Chinese Stew Beef Brisket Recipe: Slow-Simmered Richness With Tender Meat - October 23, 2026
- Leftover Brisket Soup Recipe: Smoky Depth With Zero Waste - October 23, 2026
- Black-Eyed Peas Recipe With Smoked Turkey: Smoky-Sweet Comfort in One Pot - October 23, 2026