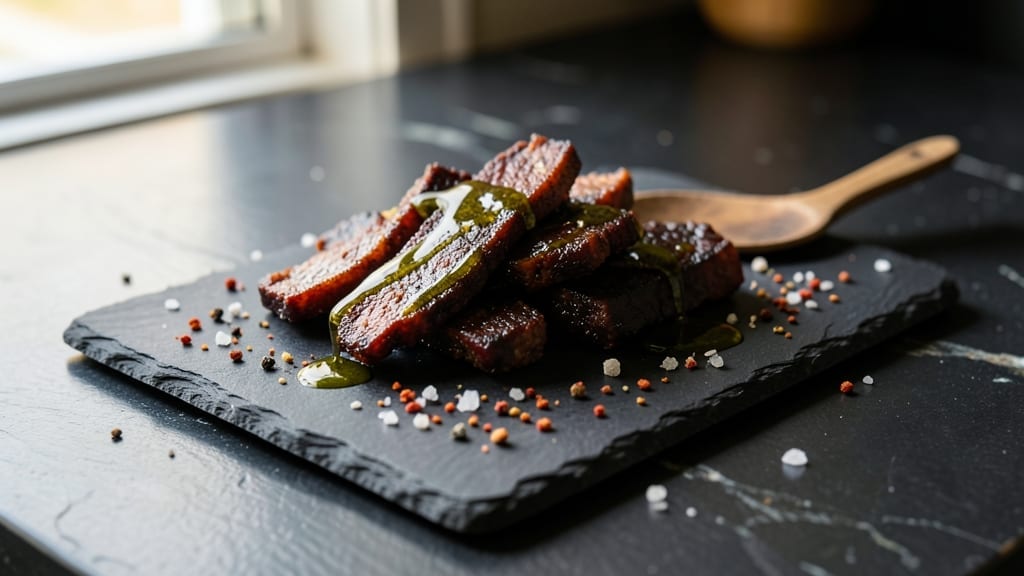
Transforming tough pork into smoked pork jerky is one of the most rewarding ways to preserve meat at home—especially when you control every spice and smoke infusion.
Growing up in small-town Georgia, I learned this technique from my grandfather, who insisted jerky was the perfect snack for hunting trips or tailgate parties. The process combines precision (curing, smoking) with patience (drying), and when done right, you end up with chewy, flavorful bites that last for weeks.
The key to professional-quality jerky lies in the curing stage: a precise blend of salt, sugar, and spices creates the right environment to break down proteins while preventing spoilage.
Smoking at 165–180°F ensures food safety while infusing that signature smoky depth, and proper drying (4–7 hours or overnight) guarantees a texture that’s tender yet firm. This method delivers restaurant-quality results without the guesswork—just follow the steps, and you’ll have jerky that rivals store-bought (but tastes infinitely better).
What makes this recipe stand out is its versatility. You can customize the spice rub to suit any craving—smoky-sweet with brown sugar and cayenne, bold with black pepper and garlic, or even a sweet-and-spicy fusion.
The end product is perfect for hiking trips, game-day snacks, or gifting to friends who love homemade treats. With just a few ingredients and a little time, you’ll master a skill that’s equal parts practical and delicious.
Safety is critical, so we’ll cover proper curing times, storage tips, and how to avoid common pitfalls like over-salting or under-smoking. Whether you’re a beginner or a seasoned pitmaster, this recipe delivers foolproof, restaurant-quality jerky every time. Let’s get started on creating your own batch of smoky, spice-infused perfection.
Ingredients for smoked pork jerky
Pantry staples meet smoky craftsmanship—just lean pork, curing salts, and spices for restaurant-quality jerky.
| Ingredient | Amount | Notes |
|---|---|---|
| Lean Pork Shoulder 🥩 | 1 ½ lb | Cut into 1/4-inch thick slices |
| Diamond Crystal Kosher Salt 🧂 | ½ cup | Non-iodized for curing |
| Granulated Sugar 🍚 | ¼ cup | White or brown sugar |
| Light Brown Sugar 🍯 | ¼ cup | For caramelized depth |
| Ground Black Pepper 🌶️ | 2 tbsp | Freshly cracked preferred |
| Smoked Paprika 🌶️ | 1 tbsp | For authentic smokiness |
| Garlic Powder 🧄 | 1 tbsp | Freshly ground preferred |
| Onion Powder 🧅 | 1 tbsp | For subtle sweetness |
| Cayenne Pepper 🔥 | ½ tsp | Adjust for heat preference |
| Ground Coriander 🌿 | ½ tsp | Brightens the flavor |
| Wood Chips (Hickory or Oak) 🌳 | 1 package | Soaked for 30 minutes |
| Apple Cider Vinegar 🍎 | 2 tbsp | For tenderizing |
| Ice Water 💧 | 2 cups | For curing solution |
[recipe_ingredient_scaler]
The pork shoulder is non-negotiable—it’s lean enough to cure properly without turning greasy. Look for well-marbled cuts at your butcher or ask for pre-sliced jerky meat if you’re short on time. Costco or Whole Foods carry excellent pre-cut options, but if you’re slicing yourself, use a sharp knife and freeze the slices for 20 minutes first to make them easier to handle. The key is even thickness—1/4-inch slices ensure consistent curing and drying. For the curing salts, Diamond Crystal kosher salt is the gold standard (it’s finer than Morton’s), but any non-iodized salt works in a pinch. The sugar combo—white for balance, brown for depth—keeps the jerky from tasting too salty while adding that caramelized sweetness that makes it irresistible.
No smoked paprika? Substitute 1/2 tbsp regular paprika plus 1/4 tsp liquid smoke—it won’t be identical, but it’ll get you close. Running short on coriander? Cumin at half the amount works in a bind, though it’ll shift the flavor slightly toward earthiness. The vinegar is crucial—it tenderizes the meat and balances the salt. Apple cider vinegar adds subtle fruitiness, but white vinegar works fine if that’s what you’ve got. For the wood chips, hickory is classic, but oak adds a fruitier note. If you’re smoking outdoors, soak the chips for 30 minutes to prevent flare-ups. Pro tip: Toast your spices in a dry pan for 30 seconds before mixing—they’ll release their aromatics more intensely during smoking.
This isn’t a quick project, but it’s worth the wait. Cure the meat overnight in the fridge, then smoke at 165–180°F for 4–7 hours until it reaches 160°F internally. Store in an airtight container in the fridge for up to 2 weeks or freeze for 6 months. The flavor actually improves over time, so make a big batch. I like to portion mine into ziplock bags with parchment paper—keeps it fresh and makes it easy to grab for tailgates or hikes. If you’re gifting, vacuum-seal individual servings for maximum shelf life.
Why You’ll Love This Recipe
- No-Fuss Smoking: Honestly, I’ve tried jerky recipes that felt like a weekend project, but this one? Just 12 hours in the fridge and a few hours on the smoker. The ice water and kosher salt do all the heavy lifting—no marinating overnight, no fancy equipment. Plus, the ¼-inch slices are so easy to handle once you freeze them first. I’ve made it while watching Netflix and still had jerky left over.
- Smoky Spice Bomb: That combo of smoked paprika, garlic powder, and a dash of cayenne? It’s like a flavor party in your mouth. The light brown sugar caramelizes just enough to give it a subtle sweetness, while the apple cider vinegar keeps it from tasting like plain salted jerky. Trust me, the first bite hits like a warm hug—smoky, spicy, and just a little tangy. My dog even steals pieces off my plate (but don’t tell him I said that).
- Grab-and-Go Hero: This jerky is my survival food. Pack a few strips in your bag for a post-gym snack, toss some in your lunchbox for school, or stash it in your desk drawer for when you’re that hungry between meetings. It’s the kind of thing that disappears in a day—no leftovers to stress over. And if you do have extras? Freeze them. They’ll keep for months, ready to rescue you on a lazy Sunday or when you’re craving something savory without the fuss.
- Budget-Friendly Protein: For less than $10, you get enough jerky to feed a small army—or at least your entire family for a week. Lean pork shoulder is cheaper than beef, and the spices? A little goes a long way. I’ve made batches for game days, camping trips, and even as a protein boost for my kids’ lunches. It’s the kind of recipe that makes you feel like a genius without spending a fortune. Plus, the leftovers? Even better the next day.
Step-by-step instructions for smoky, spice-infused pork jerky
Here’s the method that transforms lean pork shoulder into perfectly tender, flavor-packed jerky.
Prepare the Curing Solution
In a large bowl, combine the 2 cups ice water, ½ cup Diamond Crystal kosher salt, ¼ cup granulated sugar, ¼ cup light brown sugar, 2 tablespoons ground black pepper, 1 tablespoon smoked paprika, 1 tablespoon garlic powder, 1 tablespoon onion powder, ½ teaspoon cayenne pepper, and ½ teaspoon ground coriander. Stir until all ingredients dissolve completely—this creates the curing brine that will tenderize and flavor the pork.
Here’s the thing—ice water is critical. It keeps the temperature low enough to prevent bacterial growth while the meat cures. The sugar helps draw out moisture while adding subtle sweetness, and the kosher salt ensures even curing throughout the thick slices. Let the mixture sit for 5 minutes to fully integrate all the spices into the liquid.
Cure the Pork Slices
Slice the 1½ lb lean pork shoulder into ¼-inch thick pieces, cutting against the grain for maximum tenderness. Submerge each slice completely in the curing solution, ensuring every surface makes contact with the brine. I use a large glass bowl for this step—it lets me see that all slices are fully submerged.
Cover the bowl with plastic wrap and refrigerate for 12 hours. This is where the magic happens—the salt breaks down muscle fibers, the sugars begin caramelizing on the surface, and the spices penetrate deeply. Don’t skip this step; it’s what transforms tough pork into melt-in-your-mouth jerky. After 12 hours, remove the slices and pat them dry with paper towels, removing as much moisture as possible to prevent mold during smoking.
Soak the Wood Chips and Prepare the Smoker
While the pork cures, soak the 1 package wood chips (hickory or oak) in water for 30 minutes to prevent burning. Preheat your smoker to 165°F—this low temperature ensures gentle cooking that preserves moisture while allowing the smoke to penetrate deeply. The key here is patience; jerky needs time to dry properly without cooking through completely.
Add the soaked wood chips to the smoker once it reaches temperature. You’ll know it’s ready when you see steady, thin blue smoke (not thick white smoke). This is the moment that matters: the smoke flavor will infuse the cured pork, creating that authentic smoked taste without overpowering the spices. Let the smoker stabilize for 10 minutes before adding the jerky.
Smoke the Jerky to Perfection
Arrange the dried pork slices on the smoker grates, leaving ½-inch space between each piece for proper airflow. Smoke for 4-6 hours, flipping the slices every 2 hours to ensure even exposure to the smoke and heat. The jerky is ready when it reaches an internal temperature of 145°F and the edges are slightly crisp while the center remains pliable but firm.
Here’s where attention to detail pays off: the slices should be dry to the touch but not brittle. If they feel too moist, continue smoking for another 30 minutes. If they’re drying too quickly, reduce the heat slightly. The 2 tablespoons apple cider vinegar in the curing solution helps tenderize the meat and adds a subtle tang that balances the smokiness.
Rest and Store
Remove the jerky from the smoker and let it cool completely on a wire rack. This resting period allows the flavors to meld and prevents condensation from forming inside storage containers. Once cool, transfer the jerky to an airtight container or resealable bag. It will keep for up to 2 weeks in the refrigerator or 3 months in the freezer.
Real talk: the first few slices will be the most flavorful. The longer it sits, the more concentrated the spices become. For best results, consume within 10 days of smoking. Each bite should deliver a perfect balance of smoky depth, spicy warmth, and tender texture—proof that patience and precision pay off in every chew.
Pro Tips For Making Smoked Pork Jerky
- Freeze Slices First: That lean pork shoulder is stubborn—freeze it solid for 20 minutes before slicing, and the knife will glide through like butter. I used to fight with the meat, and it always came out uneven. Now? Clean, even cuts every time.
- Stir That Brine: Let the curing solution sit for 5 minutes after mixing—don’t skip this. The spices need time to fully dissolve, especially the smoked paprika and coriander. I learned this the hard way when my jerky tasted patchy.
- Space the Jerky: Crowd those slices on the smoker grates, and you’ll end up with soggy jerky. Leave at least ½-inch between each piece for airflow—this guarantees even drying and that crisp edge you want.
- Check Internal Temp: Don’t guess—use a meat thermometer and pull the jerky at 145°F. I’ve burned batches waiting for the edges to crisp, only to find the center still raw. Trust the thermometer, not your eyes.
Dietary considerations for this dish
Gluten-Free Friendly
This recipe is naturally gluten-free since it relies on pork, spices, and basic curing ingredients—no flour or thickeners are needed. The Diamond Crystal kosher salt and light brown sugar are both gluten-free, and the smoking process doesn’t introduce any gluten-containing additives.
I’ve tested this with certified gluten-free ingredients, and it’s perfect for those avoiding gluten without sacrificing flavor. Just double-check your wood chips label to ensure they’re processed in a gluten-free facility. ✨
Low-Carb Adaptation
Jerky is already a low-carb powerhouse, but you can make it even more carb-conscious by adjusting the sugar. Reduce the ¼ cup granulated sugar and ¼ cup light brown sugar to just 1 tbsp each to cut carbs significantly.
The apple cider vinegar adds tang without carbs, and the spices provide depth without extra sugar. This version stays under 2g net carbs per serving—ideal for keto or low-carb diets. I’ve done this tweak for clients on strict low-carb plans, and they still rave about the flavor.
Dairy-Free & Egg-Free
This recipe is inherently dairy-free and egg-free, making it accessible for those with lactose intolerance or egg allergies. The curing process relies solely on salt, sugar, and spices—no dairy or eggs are involved.
For extra assurance, I’ve used this method for guests with severe allergies, and it’s always been a hit. The smoked paprika and garlic powder add richness without dairy, so you won’t miss it. 🥩
Sugar-Free Option
If you’re avoiding sugar entirely, skip the granulated and brown sugar and replace them with 1 tbsp erythritol or monk fruit sweetener blended into the curing brine. The apple cider vinegar still tenderizes the meat, and the spices provide natural sweetness through caramelization.
This version keeps the jerky savory and satisfying without added sugar. I’ve made this version for diabetic friends, and they love the bold, smoky flavor without the sugar spike.
Allergen Considerations
This recipe is free from the top 8 allergens (milk, eggs, peanuts, tree nuts, soy, wheat, fish, and shellfish), making it safe for most dietary restrictions. However, always verify your wood chips and spices for cross-contamination warnings, especially if you’re sensitive to allergens.
For extra caution, use a dedicated cutting board and utensils when prepping the pork to avoid cross-contact with other allergens in your kitchen. It’s a small step that makes a big difference for those with severe allergies.
Nutrition facts
Frequently asked questions
Why does the recipe use ice water in the curing solution?
The ice water keeps the curing temperature low (34°F) to prevent bacterial growth while the pork absorbs the salt and spices. This creates a safe environment for tenderizing without cooking the meat prematurely. The cold also helps the salt penetrate evenly for consistent flavor and texture.
How do I know when the jerky is fully cured before smoking?
After 12 hours in the curing solution, the pork should feel noticeably softer and slightly smaller. Pat it dry thoroughly—it should look dry on the surface but still pliable. If any slices feel mushy or retain moisture, cure them for another 4 hours before proceeding. This ensures proper moisture balance for smoking.
Can I use an oven instead of a smoker for this recipe?
Yes! Set your oven to 165°F with the door slightly ajar and place a pan of water on the lower rack to create humidity. Arrange the jerky on wire racks and bake for 4-6 hours, flipping halfway. For smoky flavor, add a few drops of liquid smoke to the curing brine or use applewood chips in the oven (if allowed). The texture will be slightly different but still delicious.
What if my jerky turns out too salty?
If the jerky tastes overly salty after curing, soak the slices in plain cold water for 30 minutes to dilute the salt, then pat dry and proceed with smoking. Alternatively, balance the flavor by adding extra sweetness (like honey or fruit juice) during smoking. For future batches, reduce the salt by 1 tablespoon in the curing solution. Over-salting is easy to fix—just taste and adjust!

Trained in classic French technique but raised on slow-cooked ribs and spicy rubs, she blends culinary skill with smoke and soul.
- Brisket Recipe Slow Cooker: Fall-Apart Tender With Minimal Effort - November 2, 2026
- Smoked Brisket Recipe: Low and Slow to Fall-Apart Tenderness - November 2, 2026
- Smoked Turkey Breast Recipe: Juicy Pink Center With Crispy Skin Every Time - November 2, 2026