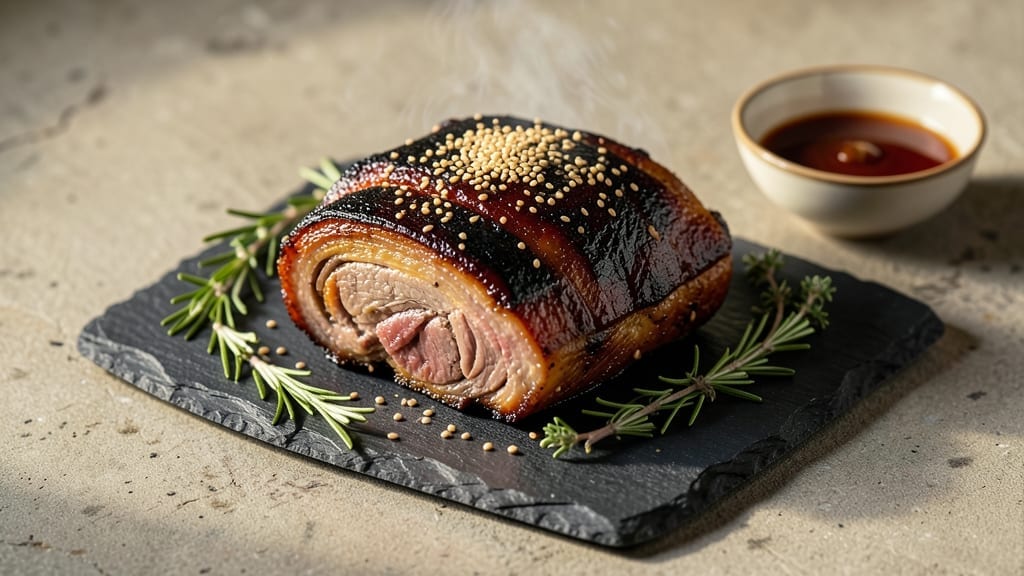
Mastering a smoked roast recipe transforms tough cuts into melt-in-your-mouth perfection—something I perfected after years of backyard cookouts and pitmaster experiments. The secret lies in patience: low heat, steady smoke, and letting the meat work with the fire until every fiber becomes tender.
That first whiff of hickory smoke still takes me back to my family’s cookouts, where the aroma meant dinner was on its way.
This method delivers restaurant-quality results without requiring fancy equipment. You’ll need a smoker (or even a grill with a water pan), quality wood chips, and a reliable thermometer to track internal temperatures.
The key steps—proper seasoning, maintaining consistent heat, and resting the meat—ensure a roast with a perfect bark and juicy interior that falls apart at the touch of a fork.
By the time you slice into your roast, you’ll see why this technique is worth the wait: deep, smoky flavors infused throughout, a crust that crackles with every bite, and meat so tender it practically melts.
The aroma alone will have everyone gathering around the table, and the first taste will make them ask for seconds. This is the kind of meal that turns a simple dinner into a memorable experience.
Whether you’re cooking for a crowd or treating yourself to a special meal, this smoked roast delivers. Pair it with roasted vegetables or crusty bread to soak up every last bit of that flavorful juices. Let’s get started on creating your perfect smoked roast.
Ingredients for smoked roast
Pantry staples plus a few specialty touches for that smoky magic you crave.
| Ingredient | Amount | Notes |
|---|---|---|
| Beef Chuck Roast 🥩 | 4 lb | Well-marbled, bone-in preferred |
| Yellow Onion 🧅 | 1 whole | Cut into wedges, skin on |
| Garlic Cloves 🧄 | 8 cloves | Crushed, skin on for flavor |
| Kosher Salt 🧂 | 1 ½ tbsp | Diamond Crystal preferred |
| Freshly Ground Black Pepper 🌶️ | 1 tbsp | Coarse grind for texture |
| Smoked Paprika 🌶️ | 1 tbsp | For deep smoky flavor |
| Ground Cumin 🌿 | 1 tsp | Toasted for richer taste |
| Dried Thyme 🍃 | 1 tsp | Or fresh, doubled amount |
| Hickory Wood Chips 🌳 | 1 package | Or oak for milder smoke |
| Beef Broth 💧 | 1 cup | Low-sodium preferred |
| Apple Cider Vinegar 🍎 | 1 tbsp | For tenderizing |
| Olive Oil 🫒 | 2 tbsp | For rub application |
[recipe_ingredient_scaler]
The beef is everything here—chuck roast with good marbling is non-negotiable. Look for cuts labeled ‘chuck’ or ‘shoulder’ at Costco or Whole Foods (they usually have the best selection). If you’re buying a whole roast, trim off any large fat caps—you want flavor, not grease. Hickory wood chips are my go-to for that classic BBQ taste, but oak works too if you’re feeling fancy. Grab them at Trader Joe’s or any outdoor cooking section—they’re cheaper than you’d think. Fresh thyme is ideal but dried works fine if you don’t have any (just double the amount).
No hickory wood chips? Cherry or pecan add sweetness to balance the beef’s richness. Running low on beef broth? Chicken broth with a splash of Worcestershire works in a pinch. The apple cider vinegar might seem odd, but trust me—it helps break down the meat fibers for that melt-in-your-mouth texture. For the rub, I like to mix everything in a bowl first, then rub it all over the beef with my hands (the oil helps it stick). Don’t skip the garlic wedges—they infuse amazing flavor into the meat as it smokes.
This roast tastes even better the next day, so plan ahead. Wrap the cooked roast tightly in foil and store in the fridge for up to 5 days—the flavors deepen overnight. For longer storage, slice against the grain and freeze portions for up to 3 months. The juices? Save them! Strain and freeze in ice cube trays for future recipes. Leftovers reheat beautifully—just warm in the oven with a splash of broth to keep them moist. Pro tip: Let the roast rest 15 minutes before slicing, or all those juices will pool on your plate.
Why You’ll Love This Recipe
- Smoker’s Secret Weapon: That hickory smoke and cumin rub? It’s like giving your roast a flavor hug—deep, smoky, and just a little spicy. The garlic and onion in the broth infuse the meat like no other, turning tough chuck into something so tender it falls apart at the touch. Honestly, the first bite is that good you’ll forget to breathe.
- One-Pan, One-Smoker Magic: No last-minute chopping or frantic cleanup here. You prep the rub in minutes, let it sit while you fire up the smoker, and then it’s hands-off for nearly a full day. The only real effort is resisting the urge to peek—trust me, patience pays off. Your kitchen stays clean, and you get to focus on sipping that beer while the magic happens.
- Feeds a Crowd (And Your Freezer): This isn’t just for Sunday dinners—it’s perfect for game day, holiday leftovers, or even a weeknight when you want to impress without stress. And if you cook it once, you’ve got enough for meals for days. Slice it against the grain, wrap it up, and freeze portions for up to three months. No more sad lunches—just delicious, smoky beef whenever you need it.
- Budget-Friendly Luxury: A 4-pound chuck roast is one of the most affordable cuts, but with this method, it tastes like a restaurant-worthy dish. The spices and broth cost pennies, and the apple cider vinegar trick tenderizes the meat so well you’ll swear it’s dry-aged. It’s the kind of recipe that makes you feel fancy without breaking the bank—every bite feels like a splurge, even on a Tuesday.
Step-by-step instructions for smoked roast recipe
Here’s the method to transform your beef chuck roast into melt-in-your-mouth perfection.
Prepare the Rub and Season the Roast
In a small bowl, combine the 1½ tablespoons kosher salt, 1 tablespoon freshly ground black pepper, 1 tablespoon smoked paprika, 1 teaspoon ground cumin, and 1 teaspoon dried thyme. This is your flavor foundation—don’t skip the cumin, it adds depth that complements the hickory smoke beautifully.
Pat the 4 lb beef chuck roast dry with paper towels, then rub the spice mixture all over, pressing it into the meat so it adheres well. The apple cider vinegar here is your secret weapon—mix the 1 tablespoon apple cider vinegar with the 2 tablespoons olive oil in a separate small bowl, then brush this mixture evenly over the roast. This tenderizes the meat and gives it a subtle tang that balances the richness.
Let the roast sit at room temperature for 30 minutes while you prepare your smoker. This resting period ensures even cooking throughout the meat—cold meat can create uneven doneness, and we’re aiming for perfect juiciness.
Set Up Your Smoker for Low and Slow Cooking
Fill a smoker box with the 1 package hickory wood chips and soak them in water for 15 minutes before using. This prevents them from burning too quickly and gives you that consistent, clean smoke we’re after. Set your smoker to 225°F—this low temperature is crucial for breaking down the connective tissue and creating that fork-tender texture.
Place the roast fat-side up on the smoker grate. The fat will render slowly, basting the meat and creating that beautiful bark we want. I like to position the roast so the wider end faces the front of the smoker—this helps the smoke circulate evenly around the meat.
Here’s where patience pays off: resist the urge to open the smoker lid. Every time you peek, you lose heat and moisture. Instead, trust the process and let the roast cook undisturbed for 6 hours. You’ll know it’s ready when the internal temperature reaches 165°F and the meat is fork-tender with just a slight resistance.
Add Liquid and Finish the Cook
After the initial 6 hours, remove the roast from the smoker and place it in a roasting pan. Pour the 1 cup beef broth into the pan and add the 1 yellow onion wedges and 8 crushed garlic cloves (skin on for maximum flavor). Return the roast to the smoker and continue cooking for another 2-3 hours until the internal temperature reaches 203°F.
This liquid braising step is what transforms tough connective tissue into silky, pull-apart tenderness. The onion and garlic infuse the broth with flavor that gets absorbed back into the meat. You’ll see the roast develop a deep mahogany color and that beautiful smoke ring just beneath the surface—signs of a perfectly executed smoked roast.
The reason we wait until 203°F is that this temperature ensures the collagen has fully broken down. The meat should practically fall apart when you slice into it, with juices flowing freely. If you check earlier and the meat feels firm, give it more time—this is where the magic happens.
Rest and Slice for Maximum Juiciness
Remove the roast from the smoker and transfer it to a cutting board. Tent it loosely with aluminum foil and let it rest for at least 30 minutes—this allows the juices to redistribute throughout the meat. I know it’s tempting to slice immediately, but skipping this step means losing all those precious juices that make this roast truly exceptional.
While the roast rests, preheat your oven to 300°F. This warm environment helps maintain the internal temperature as you slice. Using a sharp carving knife, slice the roast against the grain into ¼-inch thick pieces. The grain direction is easy to spot—you’ll see the muscle fibers running in one direction. Cutting against these fibers creates shorter muscle strands, making each bite more tender.
Serve immediately with any pan juices strained over the top. The result should be a roast that’s so juicy it practically melts in your mouth, with a perfect balance of smoky, spiced flavors from the rub and the sweet, caramelized notes from the braising liquid. This is the kind of dish that makes your whole kitchen smell amazing and leaves everyone at the table asking for seconds.
Pro Tips For Making Smoked Roast
- Soak Your Wood Chips: I learned this the hard way—dry wood chips burn fast and give bitter smoke. Soak that 1 package hickory wood chips for 15 minutes before using, even if you’re in a hurry. The extra moisture keeps the smoke steady and clean, which is the difference between “smoky” and “charred.”
- Don’t Skip the Vinegar Oil: That 1 tbsp apple cider vinegar mixed with 2 tbsp olive oil isn’t just for flavor—it’s your tenderizer. Brush it on before the rub, not after, so the acid works its magic deep into the meat. (Yes, even if you’re impatient like me.)
- Resist the 203°F Rush: The recipe says 203°F, and I know you’re watching that thermometer like a hawk. But if the meat’s still firm at 200°F, don’t panic—give it another hour. The collagen breaks down at its own pace, and that’s when the roast turns from tough to melt-in-your-mouth.
- Slice Against the Grain (Really): You will see the grain—those long muscle fibers running through the roast. Cutting perpendicular to them shortens the strands, making each bite tender. If you’re lazy and cut with the grain, you’ll regret it. (I did. Twice.)
Common mistakes when making this dish
Skipping the Rest Period
This is the most common mistake I see—people can’t wait to dig into that smoky goodness and slice right away. But skipping the 30-minute rest means losing all those precious juices that get trapped inside during cooking.
The meat will be dry and tough instead of tender and juicy. I promise, waiting just 30 minutes makes all the difference—trust me, your guests will notice the difference in every bite. 💫
Overpeeking the Smoker
Every time you open that smoker lid, you lose 10-15°F of heat and moisture—this disrupts the cooking process and can lead to uneven doneness. I know it’s tempting to check on your roast, but resist the urge for the first 6 hours.
Set a timer and trust the process. Your patience will be rewarded with perfect bark and juicy meat. 🔥
Using the Wrong Wood Chips
Hickory is my go-to for that classic BBQ flavor, but using the wrong wood chips can throw off your whole dish. Pine gives a harsh, resinous taste, while mesquite is too strong for most palates.
Stick with hickory or oak for a balanced, clean smoke. I always soak my wood chips for 15 minutes to prevent burning—this makes all the difference in smoke quality. 🌳
Not Checking Internal Temp
Relying on time alone is a recipe for disaster—every smoker cooks differently, and even slight temperature variations can affect doneness. Use a reliable meat thermometer to check internal temp.
I recommend the ThermoWorks Smoke model for accuracy. Aim for 165°F after the initial cook, then 203°F after braising. This ensures perfect tenderness every time. 🌡️
Skipping the Braising Step
The liquid braising step is what transforms tough connective tissue into silky, pull-apart meat. Skipping it means missing out on that deep, rich flavor infusion from the beef broth, onion, and garlic.
This step takes 2-3 hours, but it’s worth every minute for that restaurant-quality result. Don’t skip it—your roast will thank you! 💛
Nutrition facts
Frequently asked questions
Why does the recipe call for such a long cook time?
The low and slow method at 225°F for 8-9 hours total is what breaks down tough connective tissue in the beef chuck roast, turning it into fork-tender perfection. This process allows the fat to render slowly and the flavors from the smoked paprika and garlic to fully infuse into the meat. Patience here is key—rushing it would leave you with chewy results instead of melt-in-your-mouth goodness.
Can I use a different type of wood for smoking?
While hickory is my preferred choice for that classic BBQ flavor, you can experiment with oak for a milder taste or cherry for a subtle sweetness. Avoid pine or mesquite—they can overpower the beef’s natural taste. Just remember to soak the wood chips for 15 minutes before using to prevent burning and ensure a clean smoke.
What if my smoker doesn’t have a built-in thermometer?
Invest in a reliable meat thermometer like the ThermoWorks Smoke model—it’s a game-changer! You’ll want to check the internal temperature of the roast at 165°F after the initial 6 hours and again at 203°F after braising. If you don’t have one, use the “finger test”—press gently into the meat; it should feel like the softest part of your thumb.
How do I know when the roast is done without cutting into it?
Look for a few visual cues: the meat should develop a deep mahogany color with a beautiful smoke ring just beneath the surface. The juices should run clear when you pierce it with a knife (not pink). If you’re still unsure, use a thermometer to check the thickest part—it should read 203°F. This temperature ensures the collagen has fully broken down for that silky texture.
Can I make this recipe ahead of time?
The roast actually tastes even better the next day. Wrap it tightly in foil and store it in the fridge for up to 5 days. For longer storage, slice against the grain and freeze portions for up to 3 months. Reheat in the oven at 300°F with a splash of broth to keep it moist. The flavors deepen with time, so plan ahead for the best results!

Trained in classic French technique but raised on slow-cooked ribs and spicy rubs, she blends culinary skill with smoke and soul.
- Chinese Braised Beef Brisket with Daikon Recipe: Silky Tender Meat and Crunchy Roots - October 18, 2026
- Oklahoma Joe’s Smoked Beans Recipe: Slow-Smoked Flavor That Rivals the Original - October 18, 2026
- Beef Brisket Chili Recipe: Slow-Simmered Richness with Deep Flavor Layers - October 18, 2026