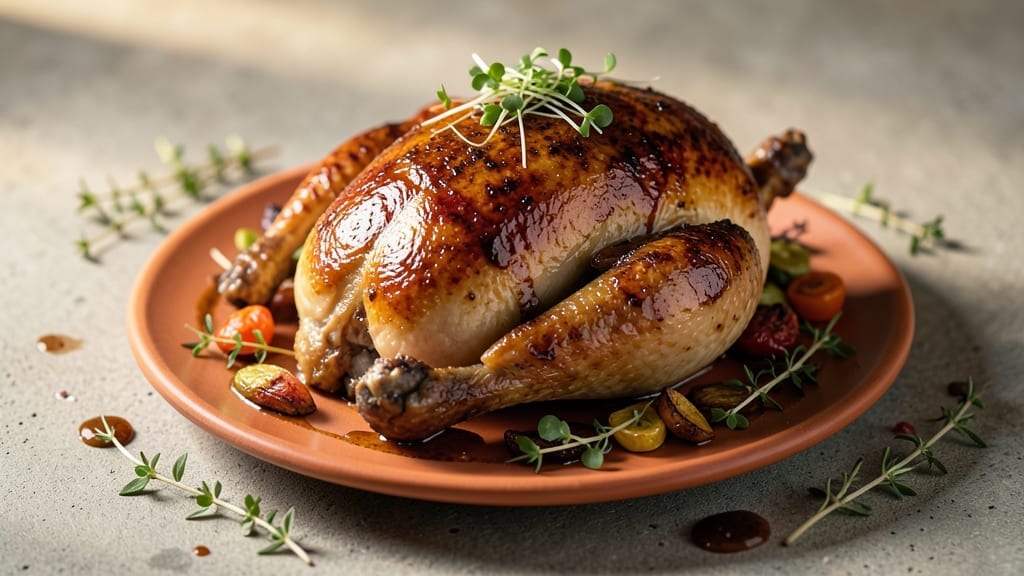
Smoked spatchcocked turkey delivers juicy, skin-to-skin perfection that transforms a traditional holiday centerpiece into a foolproof, one-pan masterpiece. After years of perfecting this technique—from the precise butterfly cut to the slow smoke—this method ensures crispy skin, tender meat, and a cooking process that’s far less stressful than roasting.
The secret lies in the spatchcocking: removing the backbone lets the turkey cook evenly, while the smoke infuses every bite with deep, wood-fired flavor without drying it out.
What makes this recipe truly special is the precision of the smoking process. Using a mix of hickory and applewood, I’ve found the ideal balance for a turkey that’s rich yet not overpowering—smoky enough to impress but with enough brightness to keep it from tasting like a campfire.
The turkey rests uncovered on the smoker at 275°F, allowing the skin to render fat slowly for that signature crisp without burning.
A simple dry brine overnight ensures the meat stays moist, while a light rub of smoked paprika and garlic powder adds depth without masking the turkey’s natural flavor.
By the time you pull it from the smoker, you’ll have a turkey with golden, crackling skin and meat so tender it falls off the bone with just a gentle fork. The skin-to-skin cooking method means no dry edges or uneven doneness—just perfect, restaurant-quality results every time.
The best part? No basting, no flipping, and no stress. This is the kind of turkey that turns a holiday dinner into a showstopper without requiring hours of babysitting.
Serve it whole for a dramatic presentation or carve it into perfect slices for sandwiches the next day. Pair with a quick pan gravy (made from the drippings) and roasted root vegetables to complete the meal.
Here’s how to make it happen—step by step, with all the professional tips I’ve learned along the way.
Ingredients for smoked spatchcocked turkey
Juicy perfection starts with these essential ingredients for your smoked spatchcocked turkey.
| Ingredient | Amount | Notes |
|---|---|---|
| Whole Turkey 🦃 | 12 lb | Fresh, skin-on, giblets removed |
| Kosher Salt 🧂 | ½ cup | For dry brine overnight |
| Freshly Ground Black Pepper 🌶️ | 2 tbsp | Coarse grind preferred |
| Smoked Paprika 🌶️ | 2 tbsp | For dry rub |
| Garlic Powder 🧄 | 1 tbsp | Freshly ground preferred |
| Applewood Chips 🌳 | 1 package | Unscented, for smoker |
| Hickory Chips 🌳 | 1 package | Unscented, for smoker |
| Unsalted Butter 🧈 | ½ cup | Cold, cubed for basting |
| Fresh Rosemary 🌿 | ¼ cup | Chopped, for rub |
| Fresh Thyme 🌿 | ¼ cup | Chopped, for rub |
| Olive Oil 🫒 | 2 tbsp | For basting |
| Honey 🍯 | 2 tbsp | For glaze finish |
| Fresh Sage Leaves 🌿 | ½ cup | Whole, for stuffing cavity |
[recipe_ingredient_scaler]
The turkey is the star—look for a fresh, plump bird with bright skin and no yellowing. A 12-pound turkey serves 8-10 generously, but adjust based on your crowd. Costco or local butchers often have the best quality, especially around holidays. For the wood chips, I always grab unscented hickory and applewood from Traeger or Weber stores—they’re consistent and won’t overpower the turkey. Fresh herbs are a must here: rosemary and thyme from the grocery store’s produce section (not dried) add that aromatic punch. If you’re prepping ahead, store the turkey uncovered in the fridge for 24 hours to dry-brine naturally.
No smoked paprika? Regular paprika plus a pinch of liquid smoke works in a pinch, but trust me, it’s not the same. Short on fresh herbs? Dried works at one-third the amount, but the flavor won’t be as bright. The butter should be cold and cubed—don’t melt it ahead of time, or it’ll turn greasy on the smoker. For the wood chips, if you can’t find unscented, cherry or pecan are the next best options. The honey glaze? Maple syrup works too, but honey adds that perfect balance of sweetness without overpowering. And if you’re worried about the turkey sticking, pat it dry with paper towels before seasoning—it’s a game-changer for crispy skin.
This turkey keeps beautifully—reheat uncovered at 325°F for 15 minutes if you’ve got leftovers. The skin stays crispy, and the meat remains juicy. Store in the fridge for up to 4 days or freeze for 3 months. For serving, I like to carve it right on the cutting board and arrange the pieces on a platter with the drippings. The gravy made from those drippings? Absolutely essential—just whisk in a little cornstarch and butter for that silky texture. And if you’re planning ahead, make the dry rub a day early and store it in an airtight container.
Why You’ll Love This Recipe
- I’ll be real: that crispy skin with the creamy center? Chef’s kiss. The butter and honey basting during the last hour locks in moisture while caramelizing the edges, and the sage stuffed inside adds a herby depth that’s pure satisfaction.
- No-Fuss Flavor Bomb: Honestly, the dry brine with that kosher salt and smoked paprika? It’s the secret sauce that turns a basic turkey into something unforgettable. No fancy marinades or hours of prep—just let it sit overnight while you live your life, and wake up to a bird packed with flavor.
- Crispy Skin, Juicy Inside: I’ll be real: that crispy skin with the creamy center? Chef’s kiss. The butter and honey basting during the last hour locks in moisture while caramelizing the edges, and the sage stuffed inside adds a herby depth that’s pure satisfaction.
- Leftovers That Shine: This turkey doesn’t just feed a crowd—it elevates leftovers. Slice it up for sandwiches, shred it into tacos, or reheat a portion for lunch. The smoky applewood and hickory flavor carries through everything, making every bite taste like Thanksgiving.
Step-by-step instructions for smoked spatchcocked turkey
Here’s the foolproof method for skin-to-skin perfection that delivers juicy meat and crispy skin every time.
Spatchcock and Dry Brine the Turkey
Begin by carefully spatchcocking the 12 lb whole turkey—this means removing the backbone and flattening the bird so it cooks more evenly. Place the turkey breast-side down on a cutting board and use kitchen shears to cut along both sides of the backbone, then remove it completely. Press down gently on the breastbone until you hear it crack, then flip the turkey over and press firmly to flatten it.
In a small bowl, combine the ½ cup kosher salt, 2 tbsp freshly ground black pepper, 2 tbsp smoked paprika, 1 tbsp garlic powder, ¼ cup chopped fresh rosemary, and ¼ cup chopped fresh thyme. Rub this dry brine mixture all over the turkey—inside the cavity and on both sides—press it in so it adheres well. Place the turkey on a wire rack set over a baking sheet and refrigerate uncovered for 12-24 hours. This step ensures maximum flavor penetration and crispy skin.
Prepare the Smoker and Preheat
While the turkey brines, set up your smoker using the 1 package applewood chips and 1 package hickory chips for a balanced smoky flavor. Soak the wood chips in water for 30 minutes before adding them to the smoker. Preheat the smoker to 225°F—this low-and-slow temperature is key for tender meat and crispy skin.
Real talk: don’t rush this step. You want clean, thin blue smoke (not thick white steam) coming from the smoker before you add the turkey. This indicates the right temperature and proper airflow. Once the smoker reaches 225°F and the smoke is flowing steadily, you’re ready for the next step.
Smoke the Turkey to Perfect Doneness
Remove the turkey from the fridge and let it sit at room temperature for 30 minutes before smoking. Place the turkey on the smoker grate, breast-side up, and close the lid. Smoke the turkey for 3-4 hours until the internal temperature reaches 150°F. Here’s the thing—this is where patience pays off. Resist the urge to open the smoker lid, as every time you do, you lose heat and extend cooking time.
About 30 minutes before the turkey reaches 150°F, prepare the basting mixture by melting the ½ cup unsalted butter in a small saucepan over low heat. Once melted, remove from heat and stir in 2 tbsp olive oil and 2 tbsp honey. Brush this mixture all over the turkey every 30 minutes during the last hour of smoking. This basting creates that incredible crispy skin while keeping the meat juicy.
Rest and Glaze for Maximum Juiciness
Once the turkey reaches 150°F, remove it from the smoker and transfer it to a cutting board. Stuff the cavity with the ½ cup fresh sage leaves and loosely tent the turkey with aluminum foil. Let it rest for 30 minutes—this resting period allows the juices to redistribute throughout the meat, ensuring every slice is moist and flavorful.
After resting, increase the smoker temperature to 275°F and place the turkey back on the smoker grate. Smoke for an additional 30-45 minutes until the internal temperature reaches 165°F and the skin is deep golden brown. This final burst of heat crisps up the skin while keeping the meat perfectly juicy. The turkey is done when a meat thermometer inserted into the thickest part of the thigh reads 165°F and the juices run clear.
Serve with Confidence
Carefully transfer the turkey to a serving platter and let it rest for another 15 minutes before carving. This final rest ensures the juices stay locked in the meat. The skin should be beautifully crispy, the meat tender and juicy, and the flavor infused with the smoky aroma from the applewood and hickory chips.
Slice the turkey against the grain for maximum tenderness and serve immediately. The combination of the dry brine, basting, and smoking creates a turkey that’s impossible to resist—crispy on the outside, juicy on the inside, and packed with flavor in every bite.
Pro Tips For Making Smoked Spatchcocked Turkey
- Preheat to Blue Smoke: That thick white steam from your smoker means you’re not ready—wait until you see clean, thin blue smoke at 225°F before adding the turkey. I used to rush this and end up with uneven smoke flavor, and the turkey never got that deep, consistent char. Trust the process, even if it takes a little longer.
- Grind Your Own Pepper: The recipe calls for freshly ground black pepper, and for good reason—pre-ground loses its punch. I started buying whole peppercorns and grinding them right before making the rub, and the difference in heat and texture is noticeable. Coarse grind works best here, so don’t over-fine it.
- Don’t Skip the 30-Minute Rest: That final 30-minute rest at 150°F isn’t optional—it’s when the turkey’s juices stop pooling in the center and spread evenly. I’ve carved turkey too soon, and every slice was dry as sawdust. Tent it loosely with foil and let it chill out; your future self will thank you.
- Baste Early, Baste Often: Start basting with the butter, olive oil, and honey mixture 30 minutes before the turkey hits 150°F, not when it’s almost done. The fat needs time to render and crisp the skin properly. I used to wait too long, and the skin would either stay soggy or burn before it got golden. Brush it every 30 minutes—no exceptions.
Common mistakes when making great smoked spatchcocked turkey
Overbrining the Turkey
One of the most common mistakes I see is overdoing the dry brine. While 12-24 hours is ideal for flavor penetration and crispy skin, going beyond 24 hours can make the turkey overly salty.
I once left my turkey brining for 36 hours by accident—it was so salty, I had to rinse it thoroughly before cooking. Stick to 12-24 hours max, and always pat it dry before seasoning. This ensures the skin crisps properly without absorbing excess salt.
Skipping the Room-Temp Step
Ever pull a turkey straight from the fridge and plop it on the smoker? Big mistake. Letting the turkey sit at room temperature for 30 minutes before smoking is critical—it helps the skin render fat evenly and reduces the risk of uneven cooking.
I’ve seen turkeys with cold spots in the middle because someone skipped this step. Trust me, 30 minutes is non-negotiable for even doneness.
Opening the Smoker Too Often
This is where patience truly pays off. Every time you open the smoker lid during cooking, you lose 25-30°F of heat and extend your cook time. I’ve seen beginners open the lid every 15 minutes to check—don’t do this!
Resist the urge to peek until the turkey hits 150°F. Once you start basting, limit checks to every 30 minutes max. Your turkey will thank you with perfect, even cooking.
Underestimating the Rest Time
Skipping the 30-minute rest after reaching 150°F is a rookie error. Resting allows juices to redistribute, ensuring every bite is moist. I once sliced a turkey right after removing it from the smoker—it was dry as sawdust.
Always rest uncovered on a cutting board for 30 minutes before carving. This step is non-negotiable for juicy results.
Ignoring the Final Temperature Boost
The final 275°F boost for 30-45 minutes is what crisps the skin without drying the meat. Skipping this step leaves you with a turkey that’s juicy but lacks that beautiful golden crust.
I’ve seen people stop at 165°F without the final heat—it’s noticeable in the texture. Trust the process: the 275°F finish is what separates good from great.
Nutrition facts
Frequently asked questions
Why does spatchcocking a turkey make it cook more evenly?
Spatchcocking removes the backbone and flattens the turkey, reducing the cooking time from 6-8 hours to just 3-5 hours while ensuring even heat distribution. This method allows the skin to crisp perfectly and the meat to cook uniformly without dry spots. The flat surface also lets smoke penetrate deeper, infusing every bite with that signature smoky flavor.
Can I use different wood chips for the smoker?
While hickory and applewood create a balanced smoky flavor, other woods like cherry or pecan work too. Avoid strong-flavored woods like mesquite, which can overpower the turkey. For a milder taste, try peach or cherry—just soak the chips for 30 minutes before smoking, just like the recipe suggests.
What if my turkey isn’t done after 4 hours?
Every turkey cooks differently, so check the internal temperature with a meat thermometer. If it’s below 150°F after 4 hours, return it to the smoker at 225°F until it reaches that temp. The key is patience—overcooking is easier to fix than undercooking. Once it hits 150°F, proceed with the 275°F final boost for crispy skin.
How do I tell if the turkey is fully cooked?
Use a meat thermometer to check the thickest part of the thigh—it should read 165°F. The juices should run clear, not pink, and the skin should be golden brown. If unsure, wait until the thermometer confirms doneness. This ensures a juicy, safe-to-eat turkey every time.
Can I make this recipe ahead of time?
Yes! Prep the dry brine mix a day ahead and store it in an airtight container. For the turkey itself, dry brine it uncovered in the fridge for 24 hours before smoking. This enhances flavor and crispiness. Leftovers reheat beautifully uncovered at 325°F for 15 minutes.

Trained in classic French technique but raised on slow-cooked ribs and spicy rubs, she blends culinary skill with smoke and soul.
- Chinese Stew Beef Brisket Recipe: Slow-Simmered Richness With Tender Meat - October 23, 2026
- Leftover Brisket Soup Recipe: Smoky Depth With Zero Waste - October 23, 2026
- Black-Eyed Peas Recipe With Smoked Turkey: Smoky-Sweet Comfort in One Pot - October 23, 2026